Fall entertaining changed forever for me the first time I made these mini pumpkin pies. What started as a solution for a crowded Thanksgiving dessert table has become my most requested autumn recipe. There’s something absolutely magical about individual portions of classic pumpkin pie – guests feel special receiving their own perfect little dessert, and I love how these miniature masterpieces disappear faster than I can make them.
These aren’t just scaled-down versions of regular pumpkin pie. Each bite delivers the perfect ratio of silky, spiced filling to flaky, buttery crust that’s often missing in larger pies. Moreover, the individual serving size means everyone gets an ideal amount of that coveted crispy edge that we all fight over in traditional pies.
Creating these little gems requires patience and attention to detail, but the results are absolutely worth every minute of prep time. From holiday parties to potluck dinners, these mini pies bring sophistication and charm to any dessert spread while delivering all the nostalgic flavors we crave during pumpkin season.
Why These Mini Pies Will Become Your Signature Dessert
Perfect Portion Control
Each mini pie provides exactly the right amount of dessert – not too much, not too little. Additionally, guests can easily enjoy one without feeling overly full, which makes them ideal for multi-course meals or buffet-style gatherings where multiple dessert options are available.
Superior Crust-to-Filling Ratio
Unlike traditional large pies where some pieces might be mostly filling, these minis guarantee every single bite contains the perfect balance of creamy pumpkin custard and flaky pastry. Furthermore, the smaller size means more edges, and everyone knows the edges are the best part.
Make-Ahead Convenience
These individual pies actually improve in flavor when made a day ahead, allowing the spices to meld and the filling to achieve the perfect consistency. Consequently, they’re perfect for busy holiday schedules when advance preparation is essential.
Impressive Presentation
Nothing says “I put effort into this meal” quite like individual desserts. The miniature size creates an elegant, bakery-quality appearance that will have your guests thinking you’re a professional pastry chef.
Essential Ingredients & Recipe Information
For the Complete Recipe
- 2 unbaked pie crust discs – homemade or high-quality store-bought
- 1 and 1/4 cups (285g) pumpkin puree – canned works best for consistency
- 3/4 cup (150g) packed brown sugar – light or dark, creates rich caramel notes
- 1/2 cup (120ml) heavy cream – essential for silky texture
- 1/4 cup (60ml) whole milk – balances richness and helps filling set
- 1 large egg – binds ingredients and creates custard consistency
- 1/4 teaspoon salt – enhances all flavors
- 1 teaspoon ground cinnamon – classic warming spice
- 1 teaspoon pumpkin pie spice – complex blend of autumn flavors
- Small pinch black pepper (optional) – adds subtle warmth and depth
Recipe Specifications
- Prep Time: 2 hours 30 minutes (includes dough chilling)
- Active Prep: 45 minutes
- Cook Time: 25 minutes
- Total Time: 3 hours
- Yield: 48-50 mini pies
- Equipment Needed: Two 24-count mini muffin pans, 2.5-inch cookie cutter
Step-by-Step Instructions
Preparing Your Foundation
Begin by ensuring your pie dough is properly chilled – ideally made the night before and refrigerated for at least 2 hours. This crucial step prevents shrinkage and ensures easy handling. While many recipes skimp on this detail, proper chilling is what separates amateur results from bakery-quality pastry.
Creating the Perfect Filling
In a large mixing bowl, combine the pumpkin puree, brown sugar, heavy cream, whole milk, and egg. Using either a stand mixer with whisk attachment or a handheld mixer, beat the mixture on medium-high speed for about 2 minutes until completely smooth and well-combined. Next, add the salt, cinnamon, pumpkin pie spice, and optional black pepper, mixing until evenly distributed. Cover and refrigerate this filling while you prepare the crusts.
Setting Up for Success
Preheat your oven to 375°F (191°C) and generously grease two 24-count mini muffin pans with nonstick spray. Don’t skip this step – properly greased pans are essential for easy removal of your finished pies.
Shaping the Mini Crusts
Working with one chilled pie dough disc at a time, place it on a lightly floured surface and roll into a 12-inch circle. The dough should be about 1/8-inch thick for optimal results. Using a 2.5-inch cookie cutter (or a 1/3 cup measuring cup), cut out rounds from the dough. You’ll need to re-roll scraps several times, but work quickly since the dough becomes more delicate as it warms.
Assembly Process
Press each dough round into the greased mini muffin cups, ensuring the pastry sits flat against the bottom and extends up the sides. Take care not to stretch the dough, as this can cause shrinkage during baking. Repeat this process with your second disc of dough until you have approximately 48 prepared crusts.
Filling and Baking
Remove your chilled filling from the refrigerator and stir briefly to ensure consistency. Using a small spoon or cookie scoop, fill each pastry shell to the top with the pumpkin mixture. Don’t worry about overfilling slightly – the filling will settle during baking.
Achieving Perfect Results
Bake for 21-25 minutes, watching for centers that are just set and edges that are lightly golden brown. The filling should have a slight jiggle in the very center but not appear wet or liquid. Remove from the oven and allow to cool for 5 minutes before carefully removing from the pans.
Serving Suggestions
Classic Presentation
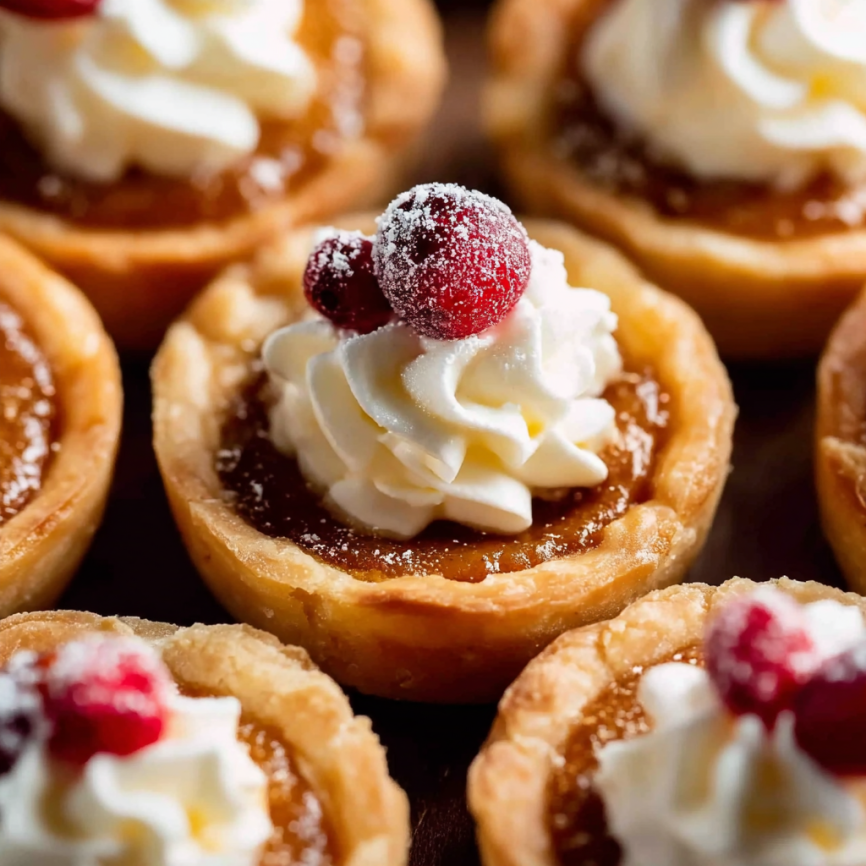
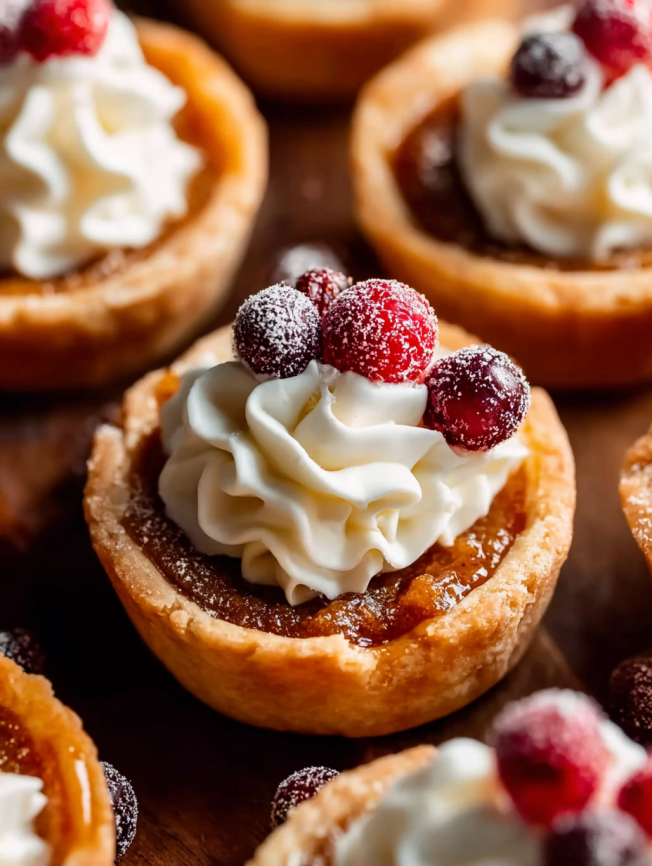
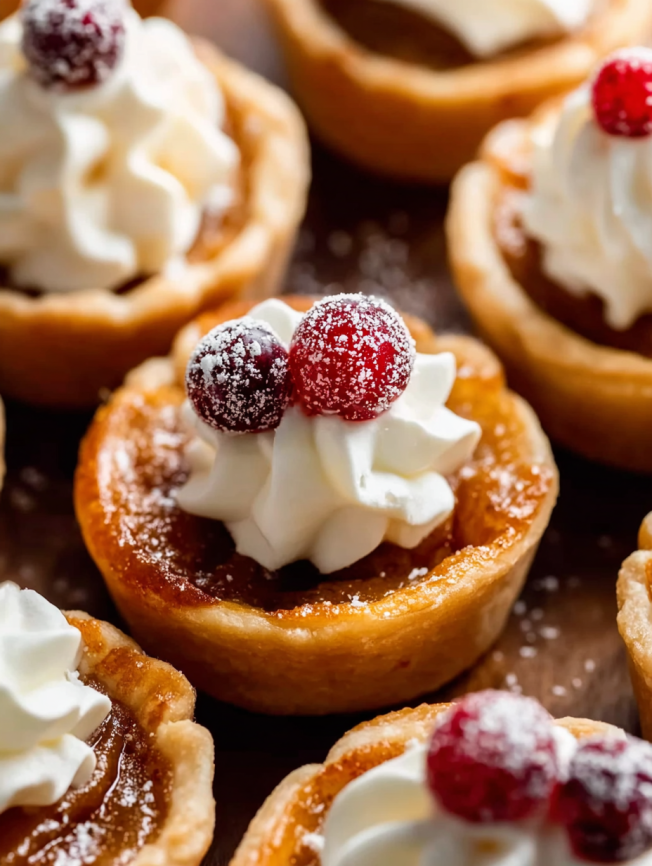
Serve these mini pies at room temperature or chilled, topped with a small dollop of freshly whipped cream. The contrast between the cool cream and spiced filling creates a delightful temperature and texture combination.
Elegant Garnishing
For special occasions, consider adding sugared cranberries, a light dusting of cinnamon, or a drizzle of caramel sauce. These simple touches elevate the presentation from homestyle to restaurant-quality.
Seasonal Styling
Arrange the mini pies on a rustic wooden board with fall leaves, mini pumpkins, or cinnamon sticks for a stunning autumn display that doubles as table decoration.
Creative Variations to Explore
Flavor Enhancements
Maple Bourbon Twist: Replace 2 tablespoons of the brown sugar with pure maple syrup and add 1 tablespoon of bourbon for sophisticated flavor depth.
Chai Spice Version: Substitute the pumpkin pie spice with chai spice blend (cardamom, ginger, cloves, and allspice) for an exotic twist.
Cream Cheese Swirl: Drop small spoonfuls of sweetened cream cheese mixture onto the filling before baking and swirl gently with a toothpick.
Crust Alternatives
Graham Cracker Option: Replace traditional pastry with mini graham cracker crusts for a different texture profile.
Gingersnap Base: Crush gingersnap cookies mixed with butter for a spiced crust that complements the pumpkin filling beautifully.
Size Modifications
Regular Muffin Version: Use standard muffin pans with 3.5-inch dough circles, extending bake time to 30 minutes for approximately 16 larger individual pies.
Make-Ahead Tips
Advanced Preparation Strategy
The beauty of this recipe lies in its make-ahead friendly nature. Prepare your pie dough up to 5 days in advance and store it wrapped in the refrigerator, or freeze it for up to 3 months. Similarly, the filling can be mixed and refrigerated for up to 2 days before use.
Storage Solutions
Once baked and cooled, these mini pies keep beautifully in the refrigerator for up to 5 days when stored in airtight containers. Layer them between sheets of parchment paper to prevent sticking and maintain their perfect shapes.
Freezing Instructions
For longer storage, completely cooled pies freeze exceptionally well for up to 3 months. Arrange them in single layers separated by parchment paper in freezer-safe containers. Thaw at room temperature for about an hour before serving – they’ll taste as fresh as the day you made them.
Important Notes
Pie Crust Considerations
This recipe requires two full pie crust recipes since you’ll need enough dough for 48-50 individual shells. While homemade crust provides superior flavor and flakiness, high-quality store-bought versions work well when time is limited. Ensure store-bought crusts are fully thawed before rolling.
Pumpkin Selection
Canned pumpkin puree provides the most consistent results due to its uniform moisture content. If using fresh pumpkin puree, lightly blot it with paper towels to remove excess moisture, which can prevent proper setting and extend baking time.
Dairy Requirements
Heavy cream and whole milk are essential for achieving the proper custard consistency. The fat content ensures proper setting during baking. In emergencies, substitute 3/4 cup of full-fat half-and-half for the cream and milk combination.
Spice Flexibility
While the recipe calls for store-bought pumpkin pie spice, you can create your own blend using 1/4 teaspoon each of nutmeg, cloves, allspice, and ginger in addition to the cinnamon. The optional black pepper adds surprising depth without being detectable as pepper flavor.
Equipment Essentials
Mini muffin pans are crucial for this recipe’s success. Standard muffin pans create different proportions and require adjusted baking times. A 2.5-inch cookie cutter ensures uniform size, though a 1/3 cup measuring cup works as an effective substitute.
Frequently Asked Questions
Why do my mini pies stick to the pan?
Insufficient greasing is the most common culprit. Use nonstick cooking spray generously, making sure to coat both the bottom and sides of each cup thoroughly. Additionally, allow the pies to cool for exactly 5 minutes – too hot and they’ll fall apart, too cool and they’ll stick.
How can I tell when the filling is properly set?
Look for centers that jiggle very slightly when gently shaken but don’t appear liquid or wet. The filling will continue cooking from residual heat after removal from the oven. Overbaked filling becomes rubbery and may crack.
Can I make these without a stand mixer?
Absolutely! A handheld mixer works perfectly, or you can whisk the filling by hand. The key is achieving a completely smooth mixture without lumps. Hand whisking takes about 3-4 minutes of vigorous mixing.
What if my pie dough becomes too soft while working?
If the dough becomes difficult to handle, refrigerate it for 15-20 minutes to firm up again. Work in batches if necessary – it’s better to take time for proper chilling than to fight with overly soft dough.
How do I prevent the crusts from shrinking during baking?
Proper chilling is essential, but also avoid stretching the dough when pressing it into the muffin cups. Let the dough relax naturally into the shape, and consider blind baking the crusts for 5 minutes before adding filling if shrinkage continues to be problematic.
Can I use different spice combinations?
Certainly! Experiment with chai spices, apple pie spice, or even a touch of cardamom for unique flavor profiles. Start with smaller amounts when trying bold spices, as the individual serving size means flavors will be more concentrated.
Why did my filling separate or curdle?
This usually occurs when ingredients are at drastically different temperatures or when the mixture is overbeaten. Ensure all ingredients are at room temperature before mixing, and beat just until combined rather than extensively.
These mini pumpkin pies represent the perfect intersection of tradition and innovation, delivering classic flavors in an irresistibly charming presentation. With their make-ahead convenience and impressive appearance, they’re destined to become your go-to dessert for every autumn celebration and beyond.