Imagine having freshly baked banana bread whenever the craving strikes, but in adorable bite-sized portions that cook in just 12 minutes. These air fryer banana bread bites deliver all the comforting flavors of traditional banana bread—those sweet, caramelized banana notes, warm cinnamon spice, and that perfectly moist crumb—without heating up your entire kitchen or waiting an hour for a loaf to bake.
I first made these on a hectic weekday morning when my family was begging for something sweet with breakfast, but I had zero time for my usual banana bread routine. With three overripe bananas sitting on my counter and my air fryer within reach, inspiration struck. Those first bites came out so perfectly golden and tender that my kids actually cheered! Now, these have become our weekend breakfast tradition, and I’ve even started making double batches because they disappear faster than I can make them. Friends who try them always ask for the recipe, completely amazed that something so delicious could be made so quickly.
Why These Bite-Sized Treats Will Win Your Heart
They’re incredibly convenient. Traditional banana bread requires preheating an oven and baking for 50-60 minutes. These adorable bites are ready in just 22 minutes from start to finish, making them perfect for busy mornings, last-minute snacks, or whenever you need a sweet treat without the wait. Pop them in the air fryer while you’re making coffee, and they’ll be ready before you finish your first cup!
Perfect portion control. Instead of slicing off “just one more piece” from a whole loaf, these pre-portioned bites make it easy to enjoy banana bread without overindulging. Each bite is perfectly sized for a quick snack, and you can grab exactly as many as you want. They’re also ideal for packing in lunchboxes or taking on the go.
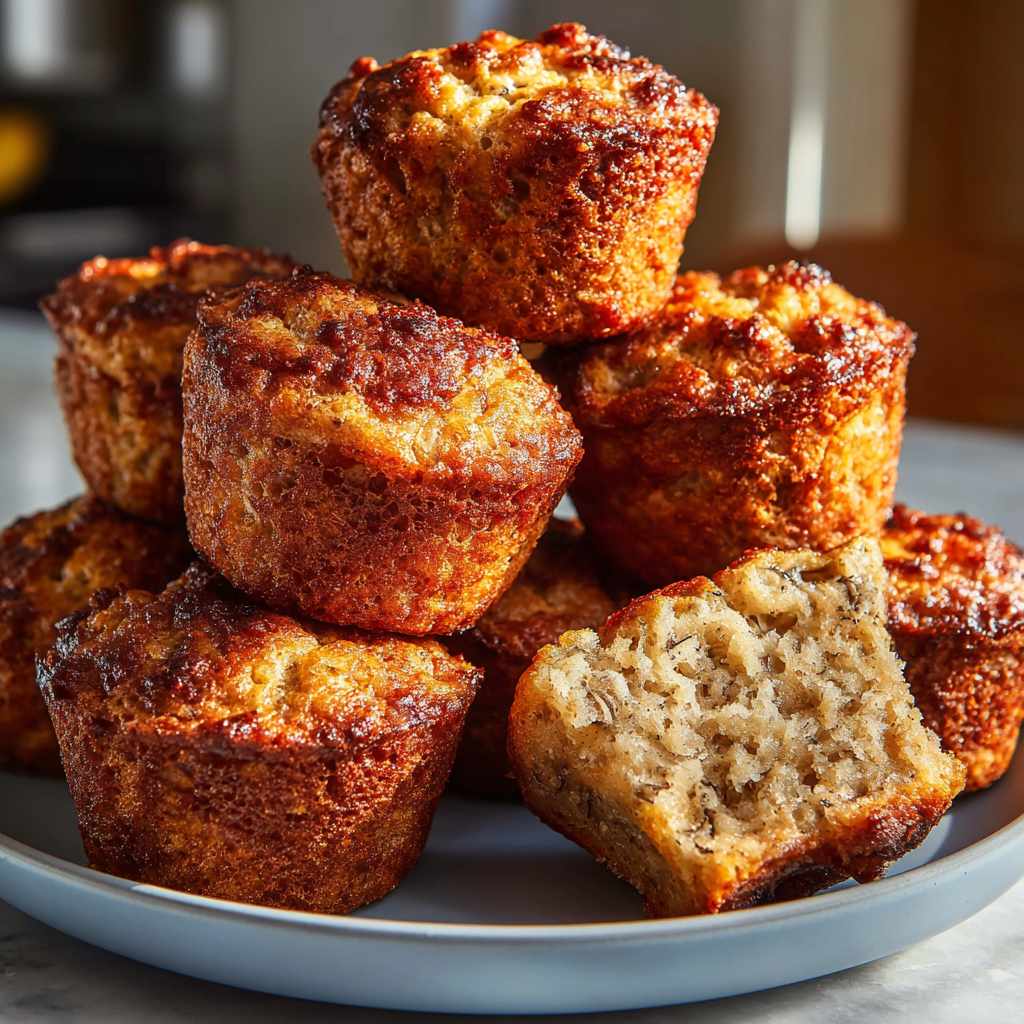
The texture is phenomenal. Air frying creates a slightly crispy exterior while keeping the inside incredibly moist and tender. This textural contrast elevates them beyond regular banana bread, giving you that satisfying bite followed by soft, fluffy goodness. Furthermore, they don’t dry out as quickly as traditional banana bread slices, staying fresh and delicious for days.
They’re customizable for everyone. While the base recipe is fantastic on its own, these bites are a blank canvas for your creativity. Add chocolate chips, nuts, dried fruit, or different spices to make them your own. Whether you prefer classic banana bread or want to experiment with new flavors, this recipe adapts beautifully.
No special equipment required. If you have silicone molds or a small baking dish that fits in your air fryer, you’re all set! You don’t need fancy bakeware or expensive gadgets. Even dollar store silicone cupcake liners work perfectly for this recipe.
Kids absolutely love them. There’s something about bite-sized food that makes it more appealing to children. These look fun, they’re easy to eat, and they taste like a treat while still containing fruit. Plus, kids can help measure and mix ingredients, making this a great family baking activity.
Gathering Your Simple Ingredients
The Wet Ingredients
2 ripe bananas, mashed – This is your star ingredient! The riper your bananas, the better. Look for bananas with plenty of brown spots or even ones that are almost entirely brown. These overripe bananas are sweeter, more flavorful, and mash more easily than yellow bananas. Don’t worry if they look too far gone—that’s exactly what you want for the best banana bread flavor!
¼ cup melted butter – Adds richness, moisture, and that classic banana bread flavor. Make sure to let it cool slightly after melting so it doesn’t scramble the egg. You can substitute with coconut oil for a dairy-free version, though the flavor will be slightly different.
½ cup brown sugar – Packed brown sugar provides sweetness along with moisture and a subtle molasses flavor that enhances the banana taste. Light or dark brown sugar both work wonderfully here.
1 large egg – Binds everything together and provides structure. Room temperature eggs incorporate more smoothly into the batter, so let yours sit out for about 15 minutes before mixing if you remember.
The Dry Ingredients
1 cup all-purpose flour – Forms the base of your bites, creating that classic banana bread texture. Measure by spooning flour into your measuring cup and leveling it off for accuracy.
1 teaspoon baking powder – Provides lift and creates those lovely air pockets throughout the bites.
½ teaspoon baking soda – Works alongside the baking powder to create the perfect rise and tender crumb. It also reacts with the acidic bananas to enhance flavor.
½ teaspoon cinnamon – The classic spice companion to banana, adding warmth and depth. Freshly ground cinnamon makes a noticeable difference if you have it!
¼ teaspoon salt – Essential for balancing sweetness and bringing out all the other flavors in the recipe.
Step-by-Step Instructions for Perfect Bites
Preparing Your Air Fryer
Begin by preheating your air fryer to 320°F (160°C). This lower temperature ensures the bites cook through evenly without burning on the outside before the centers are done. While many recipes skip preheating with air fryers, I’ve found that preheating creates more consistent results, especially with baked goods.
While the air fryer preheats, prepare your silicone molds or baking dish. If using silicone molds, place them on a small baking sheet or the air fryer tray for easy handling. Silicone doesn’t need greasing, but if you’re using a metal baking dish, spray it generously with nonstick cooking spray or brush with melted butter to prevent sticking.
Creating the Banana Base
In a medium mixing bowl, combine your mashed bananas, melted butter, and brown sugar. Use a fork or potato masher to mash the bananas until mostly smooth—a few small lumps are perfectly fine and actually add nice texture. Stir everything together vigorously until the mixture is well combined and the sugar begins to dissolve.
The mixture might look a bit separated at first, and that’s completely normal. Keep stirring until it comes together in a smooth, thick paste. This should take about a minute of steady mixing. The banana mixture should be fragrant and slightly glossy.
Adding the Egg
Crack your egg into the banana mixture and whisk or stir vigorously until completely incorporated. You want the egg fully distributed throughout with no streaks of egg white visible. This creates a uniform batter that will bake evenly.
Beat the mixture for about 30 seconds to ensure everything is well combined. The batter should become lighter in color and slightly fluffy. This aeration helps create a tender texture in your finished bites.
Combining Dry Ingredients
In a separate bowl, whisk together the flour, baking powder, baking soda, cinnamon, and salt. Whisking these dry ingredients together first ensures even distribution of the leavening agents and spices. This prevents you from getting a bite with too much baking soda or a pocket of concentrated cinnamon.
Take a moment to smell that cinnamon-flour mixture—it smells like the promise of freshly baked goods! Make sure there are no lumps in your flour mixture before proceeding to the next step.
Bringing It All Together
Add the dry ingredients to the banana mixture gradually, stirring gently after each addition. You can add it all in thirds or even all at once if you prefer—just be careful not to overmix. Stir until you see no dry flour patches, but stop as soon as everything is combined.
Overmixing develops gluten in the flour, which creates tough, dense bites instead of tender, fluffy ones. The batter should be thick and slightly lumpy from the mashed bananas. If it seems particularly thick, that’s perfect—it should be more like cookie dough than pancake batter.
Filling Your Molds
Spoon or pour the batter into your prepared silicone molds or baking dish, filling each cavity about two-thirds to three-quarters full. The bites will rise slightly during cooking, so you need to leave room for expansion. If you’re using a single baking dish, simply spread the batter evenly across the bottom.
Use the back of a spoon to smooth the tops slightly if desired, though a rustic look is perfectly charming too. Make sure the batter is distributed relatively evenly so all your bites cook at the same rate.
Air Frying to Perfection
Carefully place your filled molds into the preheated air fryer basket. If using multiple small molds, arrange them so air can circulate around each one. Air fryers work by circulating hot air, so proper spacing is crucial for even cooking.
Cook for 10-12 minutes, checking around the 10-minute mark. The exact time will depend on your specific air fryer model and the size of your molds. You’re looking for bites that are golden brown on top and spring back when lightly touched. The edges should pull away slightly from the sides of the molds.
Testing for Doneness
Insert a toothpick or cake tester into the center of one of the bites. It should come out clean or with just a few moist crumbs attached—never wet batter. If the toothpick comes out gooey, give them another 1-2 minutes and test again.
Keep in mind that they’ll continue cooking slightly after you remove them from the air fryer due to residual heat. It’s better to slightly underbake than overbake, as overbaking creates dry, crumbly bites instead of moist, tender ones.
Cooling and Serving
Let the bites cool in their molds for about 3-5 minutes before attempting to remove them. This cooling period allows them to firm up just enough to handle without falling apart. Silicone molds are flexible, so you can gently push from the bottom to release each bite.
If you’ve used a baking dish, run a knife around the edges and cut into squares before removing. Transfer the bites to a wire cooling rack to cool completely, or enjoy them while they’re still warm. Honestly, there’s something magical about eating these when they’re fresh from the air fryer—the slightly crispy exterior against that warm, soft interior is absolutely perfect!
Serving Ideas and Presentation
These banana bread bites are delicious on their own, but there are countless ways to dress them up. Serve them for breakfast with a smear of cream cheese or peanut butter on top. The creamy spread adds protein and richness that makes them more substantial and satisfying.
For a dessert presentation, dust the cooled bites with powdered sugar and serve alongside fresh berries and whipped cream. This transforms them from a simple snack into an elegant treat that’s impressive enough for guests. You could also drizzle them with chocolate or caramel sauce for extra indulgence.
Create a breakfast board by arranging the bites alongside fresh fruit, yogurt, nuts, and honey. Let everyone build their own perfect bite combination. This works wonderfully for brunch gatherings or leisurely weekend breakfasts when you have more time to linger.
Pair them with coffee, tea, or a cold glass of milk for the classic banana bread experience. The warm spices complement coffee especially well, making these perfect for morning or afternoon coffee breaks. They’re also fantastic with chai tea, where the spices echo each other beautifully.
For kids’ parties or lunchboxes, stick a small toothpick in each bite and arrange them on a platter. The individual portions make them easy to grab, and kids love anything served on a stick! You could even insert lollipop sticks before baking to create “banana bread pops.”
Creative Variations to Try
Chocolate Chip Banana Bites
Fold ½ cup of mini chocolate chips into the batter before portioning it into molds. The chocolate adds pockets of melty sweetness throughout and makes these even more irresistible. Dark chocolate chips provide a sophisticated contrast, while milk chocolate creates a sweeter, more kid-friendly version.
Nutty Banana Bread Bites
Stir in ½ cup of chopped walnuts or pecans for added crunch and nutrition. Toasting the nuts first enhances their flavor and creates an even better texture. The nuts also add healthy fats and protein, making these more filling as a snack.
Cinnamon Sugar Topped
Before air frying, sprinkle the tops of the bites with a mixture of cinnamon and sugar (about 2 tablespoons sugar mixed with ½ teaspoon cinnamon). This creates a slightly crunchy, sweet topping that’s reminiscent of cinnamon sugar muffins. Alternatively, brush the tops with melted butter and then sprinkle the cinnamon sugar for even better adhesion.
Peanut Butter Banana Bites
Reduce the butter to 2 tablespoons and add 2 tablespoons of creamy peanut butter to the wet ingredients. This creates a delicious peanut butter-banana combination that tastes like Elvis’s favorite sandwich in bite form. The peanut butter also adds protein, making these more substantial.
Tropical Banana Bites
Add ½ cup of shredded coconut and ¼ cup of diced dried pineapple to the batter. Replace the cinnamon with ½ teaspoon of vanilla extract for a tropical twist. These taste like a vacation in banana bread form and are absolutely delightful!
Cream Cheese Filled
Drop a small dollop of sweetened cream cheese into the center of each bite before baking. The cream cheese creates a tangy, creamy surprise in the middle that contrasts beautifully with the sweet banana bread. Mix 4 oz softened cream cheese with 2 tablespoons powdered sugar for the filling.
Make-Ahead and Storage Solutions
Preparing Batter in Advance
You can mix the batter up to 24 hours ahead and store it covered in the refrigerator. However, because the leavening agents start working once liquid is added, your bites will be slightly less fluffy if you prepare too far in advance. For best results, mix the dry ingredients and wet ingredients separately, then combine them just before air frying.
If you do refrigerate the batter, let it sit at room temperature for about 10 minutes before portioning into molds. Cold batter takes longer to cook and can result in uneven baking. Give it a gentle stir before using, as some separation may occur.
Storing Baked Bites
Once completely cooled, store your banana bread bites in an airtight container at room temperature for up to 3 days. They actually taste even better the next day as the flavors meld together and the texture becomes more cohesive. Layer them with parchment paper to prevent sticking if you’re stacking them.
For longer storage, refrigerate the bites for up to one week. Bring them to room temperature before eating, or warm them briefly in the microwave or air fryer. The cool temperature helps preserve freshness but can make them slightly firmer.
Freezing for Later
These freeze beautifully! Once completely cooled, place the bites in a single layer in a freezer-safe container or bag, separating layers with parchment paper. They’ll keep frozen for up to 3 months. Label the container with the date so you remember when you made them.
To enjoy frozen bites, thaw them at room temperature for about 30 minutes, or warm them directly from frozen in the air fryer at 300°F for 3-4 minutes. You can also microwave them for 20-30 seconds, though this doesn’t restore the slight crispiness of the exterior as well as the air fryer does.
Reheating Tips
To restore that fresh-from-the-air-fryer texture, reheat bites in your air fryer at 300°F for 2-3 minutes. This crisps up the outside while warming the inside perfectly. If you’re only reheating one or two bites, the microwave works fine—just heat in 15-second intervals until warm.
For a special treat, slice a reheated bite in half and toast it in the air fryer for an extra minute. The cut sides get crispy and caramelized, creating an almost different dessert altogether. Spread with butter while warm for an indulgent snack!
Essential Tips and Expert Advice
Banana Ripeness Matters
The ripeness of your bananas makes or breaks this recipe. Perfectly ripe or even overripe bananas with brown spots (or entirely brown skins) are ideal. They’re sweeter, more flavorful, and mash easily into a smooth consistency. Yellow bananas without spots won’t provide enough banana flavor and can make the bites taste bland.
If your bananas aren’t ripe enough and you need to make these today, you can speed up the ripening process. Place unpeeled bananas on a baking sheet and bake at 300°F for 15-20 minutes until the skins turn completely black. Let them cool before peeling and using. They won’t taste exactly like naturally ripened bananas, but they’ll work in a pinch.
Preventing Sticking Issues
While silicone molds usually don’t require greasing, giving them a light spray with cooking spray ensures easy release every time. If you’re using metal or ceramic molds, greasing is essential. Butter works well but can cause slight browning on the edges—use nonstick spray if you prefer lighter exteriors.
Let the bites cool for at least 3-5 minutes before removing them from molds. Trying to remove them too soon will cause them to break apart. Patience pays off with perfect, intact bites!
Adjusting for Your Air Fryer
Every air fryer cooks slightly differently due to variations in wattage, basket size, and air circulation. If this is your first time making these, start checking for doneness at the 10-minute mark. Some air fryers cook faster and might be done in 9 minutes, while others need the full 12 minutes or even slightly longer.
Take notes about what worked for your specific model so you can replicate success next time. Position matters too—placing molds in the center of the basket usually provides the most even cooking.
Achieving Perfect Moisture
Banana bread bites should be moist but not gummy or undercooked. The toothpick test is your best friend here. A few moist crumbs are fine, but wet batter means they need more time. Conversely, if your toothpick comes out completely clean with no crumbs, you might have slightly overbaked them.
The butter and bananas provide plenty of moisture, so don’t worry if your batter seems thick. Trust the recipe—that thickness creates the perfect texture after baking.
Size and Portioning Considerations
If using a single baking dish instead of individual molds, you’ll need to increase the cooking time to 15-18 minutes. The larger, thicker portion takes longer to cook through. Check the center with a toothpick to ensure it’s fully baked.
For mini muffin-sized molds, reduce the cooking time to 8-10 minutes. Smaller bites cook faster, so keep a close eye on them to prevent overbaking.
Making This Recipe Vegan
Despite the recipe being labeled vegan-friendly, the original ingredient list includes butter and egg, which aren’t vegan. To make these truly vegan, replace the butter with melted coconut oil or vegan butter, and substitute the egg with a flax egg (1 tablespoon ground flaxseed mixed with 3 tablespoons water, left to sit for 5 minutes). The texture will be slightly different but still delicious!
Frequently Asked Questions
Can I use frozen bananas for this recipe?
Yes! Frozen bananas actually work wonderfully because they’re typically quite ripe when frozen. Thaw them completely and drain off any excess liquid before mashing. You might need to squeeze out some of the water—frozen and thawed bananas tend to be wetter than fresh ones. The flavor will be just as good!
What if I don’t have silicone molds?
No problem! You can use a small metal baking pan that fits in your air fryer and simply cut the banana bread into squares after baking. Alternatively, regular muffin tins work if they fit in your air fryer. You can even use aluminum foil cupcake liners, though silicone is more eco-friendly and reusable.
Why are my bites coming out dry?
Dry bites usually result from overbaking or using bananas that weren’t ripe enough. Make sure you’re checking for doneness at the 10-minute mark rather than automatically baking for 12 minutes. Also, ensure your bananas are properly ripe with plenty of brown spots for maximum moisture and flavor.
Can I double this recipe?
Absolutely! Simply double all ingredients and work in batches with your air fryer. Keep finished bites warm in a low oven (200°F) while you cook subsequent batches. The batter holds up fine while you work through multiple batches, though giving it a gentle stir between batches helps.
How do I know when they’re perfectly done?
Look for a golden-brown color on top, edges that have pulled slightly away from the mold, and a springy texture when gently touched. The toothpick test is the most reliable method—it should come out with a few moist crumbs but no wet batter. When in doubt, it’s better to slightly underbake than overbake.
Can I reduce the sugar in this recipe?
You can reduce the brown sugar to ⅓ cup if you prefer less sweetness, especially if your bananas are very ripe and naturally sweet. However, sugar also contributes to moisture and texture, so reducing it too much can make the bites drier. I wouldn’t recommend going below ⅓ cup.
What’s the best way to mash bananas?
A fork works perfectly for mashing bananas! Simply place peeled bananas in a bowl and mash until mostly smooth with just a few small lumps. You can also use a potato masher for larger quantities. Some people use a food processor, but this can make the bananas too liquidy—you want some texture remaining.
Can I add protein powder to make these healthier?
Yes, but you’ll need to adjust the liquid slightly. Replace ¼ cup of the flour with ¼ cup of protein powder, and add an extra tablespoon of milk or mashed banana to compensate for the protein powder’s absorbency. Vanilla or banana-flavored protein powder works best here.
Why do my bites stick to the molds?
Sticking usually occurs when molds aren’t properly greased (if needed) or when you try to remove the bites too soon. Let them cool for at least 5 minutes before removing. If using non-silicone molds, make sure to grease them generously. Running a thin knife around the edges can also help release stubborn bites.
Can I make these gluten-free?
Yes! Use a 1:1 gluten-free flour blend that contains xanthan gum. Bob’s Red Mill 1:1 Baking Flour or King Arthur Measure for Measure Flour both work excellently. The texture will be very slightly different but still delicious. You may need to add an extra minute to the cooking time.
Nutrition Information (per bite):
Serving Size: 1 bite
Calories: 80 | Sugar: 5g | Sodium: 50mg | Fat: 3g | Saturated Fat: 1.5g | Unsaturated Fats: 1.5g | Trans Fats: 0g | Carbohydrates: 12g | Fiber: 1g | Protein: 1g | Cholesterol: 20mg
Prep Time: 10 minutes
Cook Time: 12 minutes
Total Time: 22 minutes
Yield: 12 bites
Category: Dessert
Method: Air Frying
Cuisine: American
Diet: Vegetarian (can be made vegan with substitutions)