Last autumn, I found myself staring at a basket of fresh apples from the farmer’s market, craving both apple crumble and cheesecake. Instead of choosing between them, I decided to combine these two beloved desserts into one show-stopping creation. The result? A dessert so impressive that my friends now request it for every fall gathering. The look on their faces when they cut into that first slice—revealing layers of spiced cheesecake, tender apples, and buttery crumble—makes every minute of preparation worthwhile.
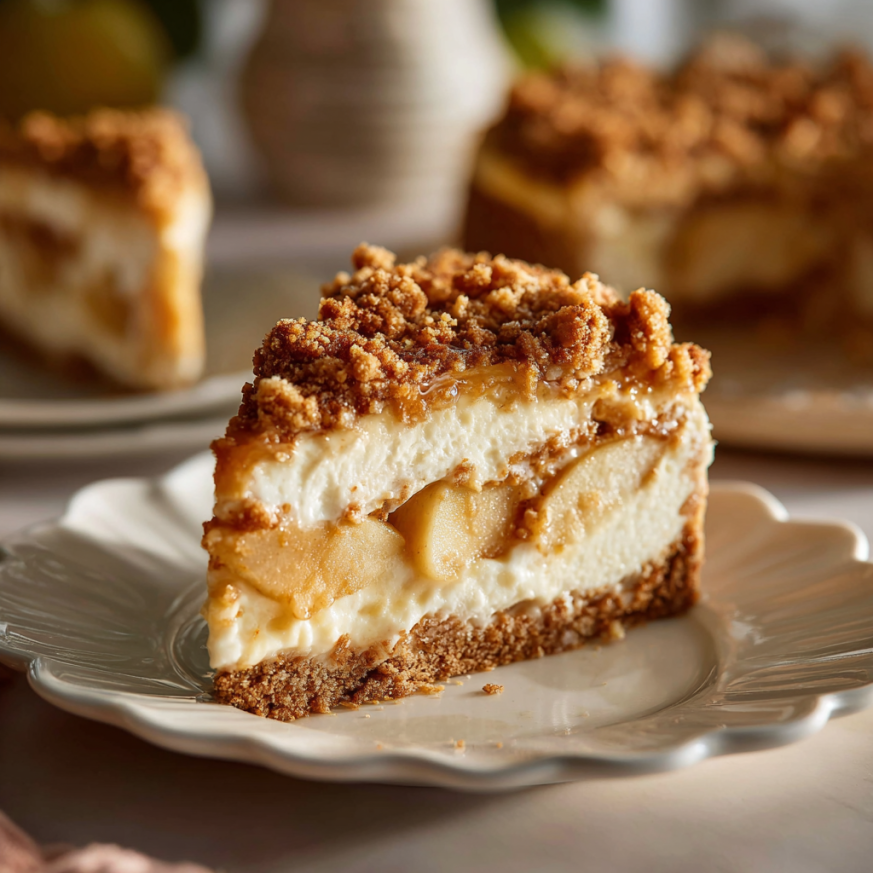
This isn’t your ordinary cheesecake. Rather than a traditional graham cracker base, it features a Biscoff cookie crust that adds a warm, caramelized flavor. The spiced cheesecake filling brings cozy autumn warmth with hints of cinnamon, ginger, and nutmeg, while the apple layer provides just the right amount of tartness to balance the richness.
Why This Dessert Deserves a Place in Your Recipe Collection
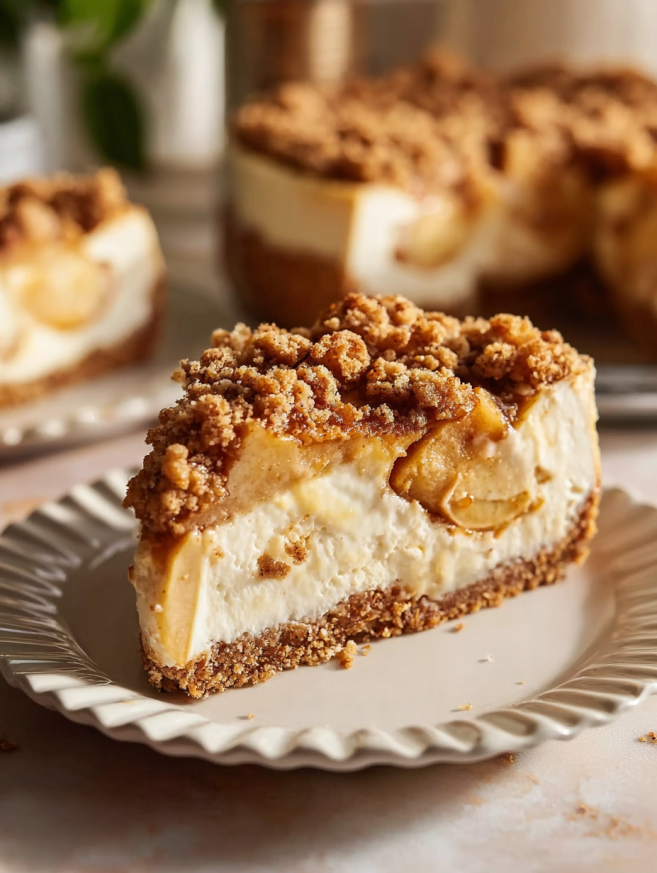
This apple crumble cheesecake represents the best of both worlds—the creamy indulgence of New York-style cheesecake meets the comforting, homey appeal of apple crumble. First, it’s an absolute showstopper for entertaining. When you present this dessert at your next dinner party, prepare yourself for compliments and recipe requests.
Beyond its visual appeal, this cheesecake offers incredible flavor complexity. Each bite delivers multiple textures and tastes: the crunchy Biscoff crust, the silky spiced cheesecake, the tender apple slices, and the buttery crumble topping. These layers work together harmoniously, creating a dessert that’s far more interesting than a simple cheesecake or apple pie alone.
Perfect for Special Occasions
While this recipe does require some time commitment, the actual hands-on work is surprisingly manageable. Most of the time involves chilling, which means you can make it a day ahead and let the refrigerator do the work. This makes it ideal for holidays, birthdays, or any occasion when you want to impress without last-minute stress.
Additionally, the warm spices make this dessert particularly perfect for fall and winter celebrations. However, don’t limit yourself to seasonal baking—this cheesecake tastes amazing year-round and works beautifully for any special occasion that calls for an unforgettable dessert.
Ingredients You’ll Need
For the Biscoff Crust
- 350g Lotus Biscoff cookies – These spiced cookies create an incredible base
- 150g unsalted butter, melted – Binds everything together perfectly
For the Crumble Topping
- 55g unsalted butter, melted – Creates that essential buttery flavor
- 50g all-purpose flour – Provides structure to the crumble
- 50g brown sugar – Adds sweetness and helps with browning
- 20g rolled oats – Gives the topping that authentic crumble texture
For the Apple Topping
- 3 tart apples – Granny Smith or Honeycrisp work beautifully
- 50g brown sugar – Enhances the natural apple sweetness
- 1 teaspoon ground cinnamon – Essential for that classic apple flavor
- 2 teaspoons cornstarch – Thickens the apple juices into a jammy consistency
For the Cheesecake Filling
- 690g cream cheese, softened to room temperature – The foundation of any great cheesecake
- 75g granulated sugar – Sweetens without overpowering
- 100g Greek yogurt – Adds tanginess and creates a lighter texture
- 2 teaspoons vanilla extract – Enhances all the other flavors
- ½ teaspoon ground cinnamon – Warms the filling
- ¼ teaspoon ground ginger – Adds subtle spice
- ¼ teaspoon ground nutmeg – Completes the spice blend
- 3 large eggs, room temperature – Creates that signature creamy texture
Essential Equipment
You’ll need a 9-inch springform pan, parchment paper, a food processor or rolling pin for crushing cookies, a small pot for cooking the apples, and a large mixing bowl. Having an offset spatula on hand makes removing the cheesecake from the pan much easier.
Step-by-Step Instructions
Making the Biscoff Crust
Begin by preparing your crust, which forms the flavorful foundation of this dessert. Place your Biscoff cookies in a food processor and pulse until they become fine crumbs. Alternatively, place them in a sturdy ziplock bag and use a rolling pin to crush them thoroughly. You want very fine crumbs with no large pieces remaining.
Transfer the cookie crumbs to a medium bowl and pour in the melted butter. Stir everything together until the mixture resembles wet sand. Every crumb should be coated with butter, which helps the crust hold together during baking.
Line the bottom of your 9-inch springform pan with parchment paper for easy removal later. Pour the crumb mixture into the pan and spread it evenly across the bottom and up the sides. Using the flat bottom of a measuring cup or glass, press the mixture firmly into place, creating an even layer about ¼ inch thick on the bottom and 1-2 inches up the sides.
Place the pan in the refrigerator to chill while you prepare the other components. This chilling step helps the crust firm up and prevents it from crumbling when you add the filling.
Creating the Crumble Topping
The crumble topping comes together quickly but adds so much character to the final dessert. In a medium bowl, combine the melted butter, flour, brown sugar, and rolled oats. Stir everything together until it forms a thick, crumbly paste. The mixture should clump together when squeezed but still break apart easily.
Set this mixture aside at room temperature. As it cools, it will firm up slightly, making it easier to crumble over the cheesecake later. The oats add wonderful texture and a rustic appearance that hints at the apple crumble inspiration.
Preparing the Apple Layer
Peel, core, and slice your apples into thin slices, approximately ⅛ inch thick. Consistent thickness ensures even cooking, so take your time with this step. Tart apples like Granny Smith provide the best flavor contrast against the sweet, rich cheesecake, though Honeycrisp apples also work beautifully.
In a small pot, combine the sliced apples with brown sugar, cinnamon, and cornstarch. Stir everything together, then place the pot over medium-high heat. Cook the mixture, stirring occasionally, until the apples become fork-tender and release their juices.
The cornstarch will thicken these juices into a jammy consistency that coats the apples beautifully. This step typically takes 8-10 minutes. Once the apples are tender and the sauce has thickened, remove the pot from heat and set it aside to cool completely before using.
Mixing the Cheesecake Filling
While your apples cool, preheat your oven to 325°F. Proper oven temperature is crucial for achieving that perfect creamy texture without cracks. Make sure your cream cheese has been sitting at room temperature for at least an hour—cold cream cheese will create lumps in your batter.
In a large mixing bowl, combine the softened cream cheese, granulated sugar, Greek yogurt, vanilla extract, cinnamon, ginger, and nutmeg. Use a sturdy spatula to mix everything together, pressing and stirring until the mixture becomes completely smooth and creamy. This process takes a few minutes of vigorous stirring, but it’s worth the effort for a lump-free filling.
Once your base mixture is smooth, add the eggs one at a time. Mix gently after each addition, incorporating each egg fully before adding the next. Overmixing at this stage can incorporate too much air, which might cause cracks during baking. Stir just until combined and no streaks of egg remain visible.
Assembling Your Masterpiece
Remove your chilled crust from the refrigerator. Pour the cheesecake batter into the pan, spreading it evenly over the crust. Give the pan a gentle tap on the counter to release any air bubbles trapped in the batter.
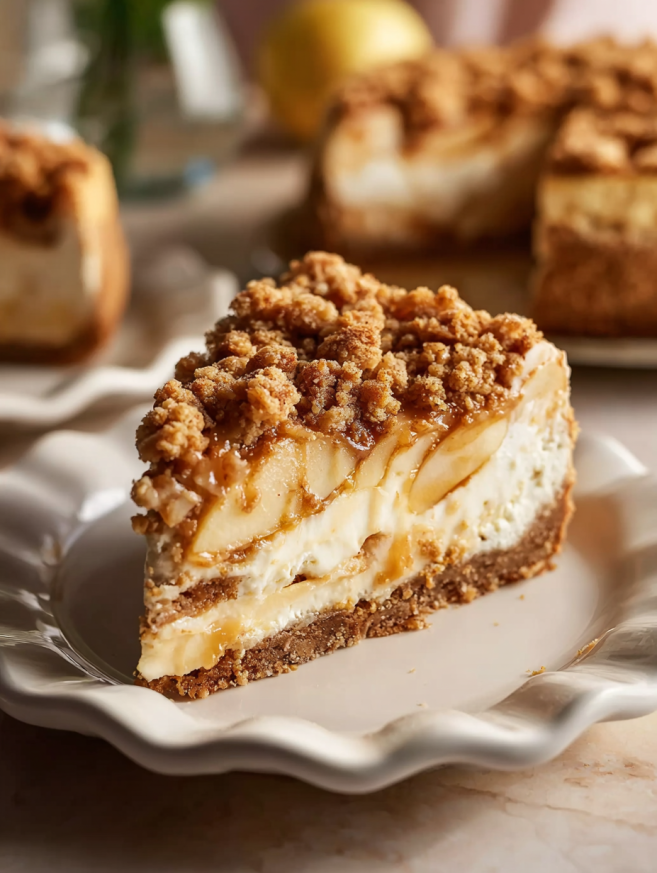
Now comes the fun part—layering on the apples. Arrange the cooled apple slices in an even layer across the top of the cheesecake batter. Gently place them down rather than dropping them, which helps prevent them from sinking into the batter. You can create a decorative pattern if you like, or simply distribute them evenly.
Take your prepared crumble topping and use your hands to break it into small chunks. Sprinkle these crumbles evenly over the apple layer, creating a rustic, textured top that will turn golden and crispy during baking.
Baking and Cooling
Place an empty sheet pan on the bottom rack of your oven before baking. This catches any butter that might leak from the springform pan during baking, saving you from a smoky kitchen and a messy oven.
Bake the cheesecake for 65-70 minutes. The edges should be set while the center remains slightly jiggly when you gently shake the pan. This slight jiggle is perfect—it means your cheesecake will be creamy rather than dry once it cools. Remember that cheesecake continues cooking as it cools, so don’t wait for the center to be completely firm.
Once baking is complete, turn off the oven and crack the door open slightly. Let the cheesecake cool gradually in the oven for about 30 minutes. This gradual temperature change helps prevent cracks from forming on the surface.
After the initial oven cooling, remove the cheesecake and let it cool completely at room temperature. This process takes 2-3 hours, so be patient. Once it reaches room temperature, cover the pan loosely with plastic wrap and transfer it to the refrigerator.
The Essential Chilling Period
Here’s where patience becomes crucial. Chill the cheesecake for at least 6 hours, though overnight is ideal. During this time, the filling sets completely, the flavors meld together, and the texture becomes perfectly creamy. Cutting into the cheesecake too early results in a messy, soft filling that doesn’t hold its shape.
When you’re ready to serve, run an offset spatula or butter knife under hot water, dry it, and carefully run it around the edges of the pan. This loosens the cheesecake from the sides, making removal easier. Release the springform clasp and gently lift the ring away. Your beautiful cheesecake is now ready to slice and serve.
Serving Suggestions
This cheesecake is stunning on its own, but a few simple additions can make it even more special. Serve slices with a dollop of freshly whipped cream or a scoop of vanilla ice cream. The cold, creamy accompaniment contrasts beautifully with the dense cheesecake.
For an extra touch of indulgence, drizzle each slice with caramel sauce. The buttery sweetness enhances both the apple and Biscoff flavors. Alternatively, a light dusting of cinnamon sugar adds a simple yet elegant finishing touch.
Presentation Tips
Slice the cheesecake with a sharp knife that’s been dipped in hot water and wiped dry between each cut. This creates clean, professional-looking slices that showcase all those beautiful layers. Serve on white plates to let the colors of the apples and crumble shine.
This dessert tastes delicious both chilled and at room temperature. Some people prefer the firmer texture straight from the fridge, while others enjoy the slightly softer consistency when it’s been sitting out for 20-30 minutes. Let your guests decide their preference.
Creative Variations to Try
Pear Crumble Cheesecake
Replace the apples with ripe but firm pears for a sophisticated twist. Pears have a more delicate flavor that pairs beautifully with the warming spices. Add a tablespoon of lemon juice to the pear mixture to prevent browning and enhance the fruit’s natural sweetness.
Caramel Apple Version
Stir 3 tablespoons of caramel sauce into your cooked apple mixture before layering it on the cheesecake. This creates an intensely sweet, caramel-apple flavor that’s perfect for those with a serious sweet tooth. Drizzle additional caramel over each slice when serving.
Pecan Crumble Addition
Add 40g of chopped pecans to your crumble topping for extra crunch and nutty flavor. The pecans toast beautifully during baking and add another dimension of texture. Walnuts work equally well if you prefer their slightly earthier taste.
Graham Cracker Crust Alternative
If you can’t find Biscoff cookies or prefer a more traditional approach, use 350g of graham crackers instead. The flavor will be milder and more classic, which some people prefer. Mix them with the melted butter just as you would the Biscoff cookies.
Chocolate Lover’s Version
Add 100g of dark chocolate chips to the crumble topping or fold them into the cheesecake batter. Chocolate and apple is an underrated combination that tastes phenomenal. The slight bitterness of dark chocolate balances the sweetness perfectly.
Make-Ahead Tips
This cheesecake actually benefits from being made in advance, making it perfect for stress-free entertaining. Prepare the entire cheesecake up to 2 days before your event. Keep it covered in the refrigerator until ready to serve. The flavors continue developing, and the texture becomes even creamier with time.
You can also prepare components separately to break up the work. Make the crust and crumble topping up to 3 days ahead, storing them separately in the refrigerator. Cook the apples a day in advance and keep them refrigerated in an airtight container. When you’re ready to assemble, simply make the cheesecake filling fresh and put everything together.
Freezing Instructions
While this cheesecake can be frozen, I recommend enjoying it fresh when possible. If you do need to freeze it, wait until it’s completely chilled and set. Wrap it tightly in plastic wrap, then aluminum foil. Freeze for up to 1 month.
Thaw the frozen cheesecake overnight in the refrigerator, still wrapped. Don’t try to speed up the thawing process at room temperature, as this can cause condensation and make the texture watery. The crumble topping may lose some of its crispness after freezing, but the overall dessert still tastes delicious.
Important Notes for Success
Room Temperature Ingredients Are Essential: This cannot be stressed enough. Cold cream cheese creates lumps that are nearly impossible to smooth out. Set your cream cheese and eggs on the counter at least one hour before you begin. If you forget, cut the cream cheese into chunks and microwave it in 10-second intervals until softened.
Don’t Overbake: The slight jiggle in the center is your signal that the cheesecake is done. Overbaking creates a dry, dense texture that’s far from the creamy perfection you’re aiming for. Trust the process and pull it from the oven even if it seems slightly underdone.
Cooling Is Just as Important as Baking: Rapid temperature changes cause cracks. Let the cheesecake cool gradually in the turned-off oven, then at room temperature, and finally in the refrigerator. Each stage is important for the final texture and appearance.
Choose the Right Apples: Tart, firm apples like Granny Smith hold their shape during cooking and provide the best flavor balance. Softer, sweeter apples like Red Delicious turn to mush and make the dessert overly sweet. Honeycrisp offers a nice middle ground if you want something less tart.
Prepare Your Pan Properly: Wrapping the bottom of your springform pan with aluminum foil before adding the crust can prevent butter leakage. Even better, place the entire pan on a sheet tray during baking to catch any drips and protect your oven.
Frequently Asked Questions
Why did my cheesecake crack?
Cracks typically occur due to rapid temperature changes or overbaking. Make sure you cool the cheesecake gradually and remove it from the oven while the center is still slightly jiggly. Also, avoid overmixing the batter once you add the eggs, as too much air can cause cracks. If your cheesecake does crack, don’t worry—the crumble topping hides most imperfections beautifully.
Can I use regular yogurt instead of Greek yogurt?
Greek yogurt is preferred because it’s thicker and has less moisture than regular yogurt. If you only have regular yogurt, drain it through a cheesecloth-lined strainer for 30 minutes to remove excess liquid. Alternatively, you can replace the yogurt entirely with an equal amount of sour cream.
My apples sank into the cheesecake batter. How do I prevent this?
Make sure your apples are completely cooled before adding them to the batter. Warm apples will sink more readily. Also, place them gently on top rather than dropping them. The slight firmness of the batter after being spread in the pan helps support the apples.
Can I make this in a different size pan?
This recipe is specifically designed for a 9-inch springform pan. Using a smaller pan will result in overflow, while a larger pan will make the cheesecake too thin. If you only have an 8-inch pan, you’ll need to remove about one-quarter of the batter before baking and bake that separately as mini cheesecakes.
How do I know when the cheesecake is fully set?
After the minimum 6-hour chill time, gently press the center of the cheesecake. It should feel firm with just a slight give, similar to the texture of set Jell-O. If it feels liquid or very soft, it needs more chilling time. Overnight chilling ensures perfect results.
The crumble topping burned before the cheesecake finished baking. What went wrong?
Your oven may run hot, or your oven rack might be positioned too close to the heating element. Try reducing the temperature by 15 degrees and placing the pan on a middle rack. You can also tent aluminum foil loosely over the top if the crumble starts browning too quickly.
Can I use low-fat cream cheese?
Full-fat cream cheese is strongly recommended for the best texture and flavor. Low-fat versions contain more moisture and less fat, resulting in a cheesecake that’s less creamy and more likely to crack. If you’re concerned about richness, the Greek yogurt already lightens the filling somewhat.
How long will this cheesecake keep in the refrigerator?
Properly stored in an airtight container or covered with plastic wrap, this cheesecake stays fresh for up to 5 days. The crumble topping may soften slightly over time, but the cheesecake itself remains delicious. Always serve it chilled for the best texture.
Recipe Details:
- Prep Time: 50 minutes
- Cook Time: 1 hour 25 minutes
- Chilling Time: 6 hours (preferably overnight)
- Total Time: 8 hours 15 minutes
- Yield: 10 servings
- Category: Dessert
- Cuisine: American
Nutrition Information (per serving):
- Calories: 690 kcal
- Fat: 46g (Saturated: 26g, Polyunsaturated: 4g, Monounsaturated: 12g, Trans: 1g)
- Carbohydrates: 62g
- Fiber: 3g
- Sugar: 35g
- Protein: 10g
- Cholesterol: 163mg
- Sodium: 426mg
- Potassium: 276mg
- Vitamin A: 1542 IU
- Vitamin C: 3mg
- Calcium: 134mg
- Iron: 2mg