
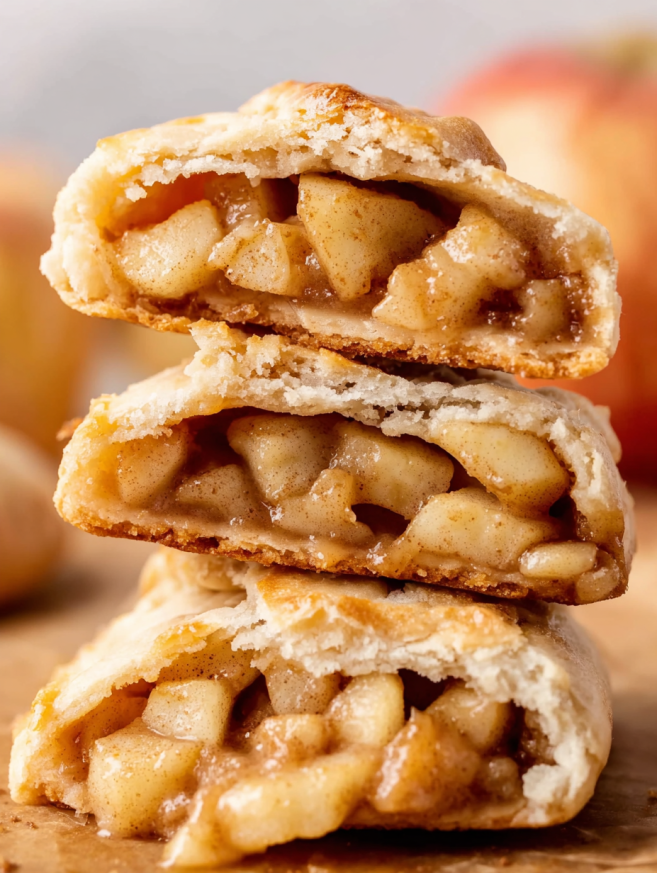
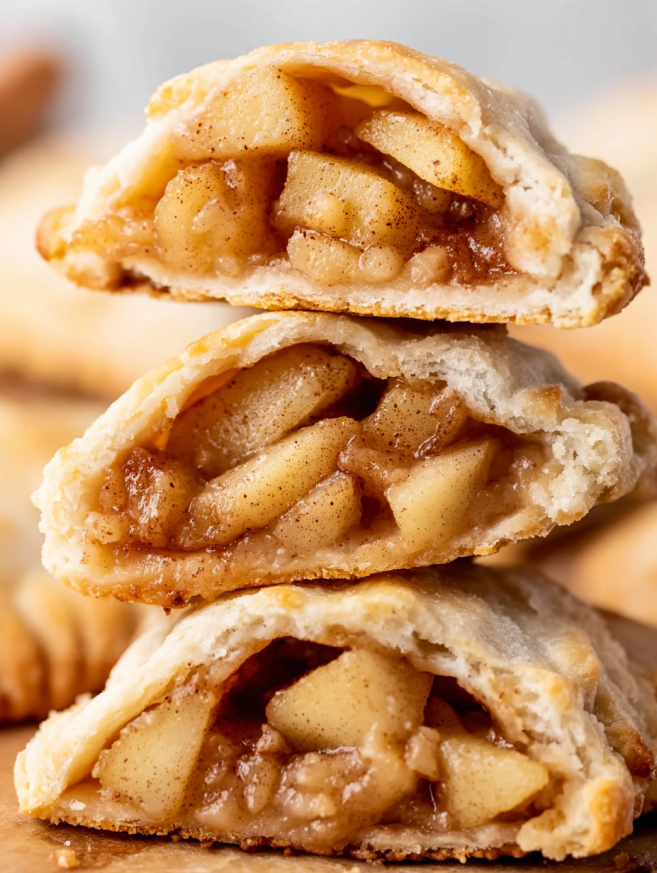
Growing up, my grandmother would make apple pies every autumn when the orchard trees hung heavy with fruit. While her full-sized pies were legendary, I always wished I could have my own personal pie without having to share. Years later, I discovered hand pies and immediately fell in love. These portable treats deliver all the joy of traditional apple pie in a convenient, no-sharing-required package. The flaky crust shatters at first bite, revealing tender cinnamon-spiced apples that taste like autumn wrapped in pastry.
What sets these hand pies apart is their uniquely tender yet flaky crust. Unlike traditional pie dough that can be tricky and temperamental, this recipe uses a combination of shortening, butter, and a secret ingredient—sweetened condensed milk—to create dough that’s both easy to work with and incredibly delicious. The result is pastry that stays flaky without being fragile.
Why These Hand Pies Deserve a Spot in Your Recipe Box
These mini apple pies offer convenience without sacrificing any of the flavor or satisfaction of a full-sized pie. First and foremost, they’re perfectly portable, making them ideal for packed lunches, picnics, or road trips. No plates, no forks, no mess—just pick one up and enjoy.
The individual portions also make serving dessert incredibly easy. Everyone gets their own pie, eliminating the need to slice and plate servings. This makes them particularly perfect for parties, potlucks, or any gathering where you want to offer a special treat without the fuss of cutting and serving a traditional pie.
An Approachable Recipe for Any Skill Level
Despite their impressive appearance, these hand pies are surprisingly beginner-friendly. The dough comes together quickly in a food processor, requiring no special skills or technique. Rolling out small individual rounds is far less intimidating than managing a large sheet of dough for a full pie.
Additionally, the filling requires minimal prep work and cooks in just minutes on the stovetop. You’ll have complete control over the texture and spice level, ensuring your filling turns out exactly how you like it. The warm spices—cinnamon, nutmeg, and allspice—create that classic apple pie flavor everyone recognizes and loves.
Essential Equipment
You’ll need a few basic kitchen tools to make these hand pies shine. A food processor makes quick work of the dough, though you can also use a pastry cutter or two forks if you don’t have one. A large skillet is essential for cooking the apple filling, while a rolling pin helps create uniform dough rounds.
Keep parchment paper on hand for lining your baking sheets—it prevents sticking and makes cleanup effortless. A pastry brush applies the egg wash beautifully, creating that gorgeous golden finish. Finally, a fork is your tool for sealing the edges, creating those classic crimped borders that look professionally made.
Ingredients You’ll Need
For the Hand Pie Dough
- 2 cups all-purpose flour – The foundation of your flaky crust
- 1 teaspoon baking powder – Adds a slight lift and tenderness
- ½ teaspoon salt – Enhances all the flavors
- 3 tablespoons frozen shortening – Creates those flaky layers
- 2 tablespoons chilled unsalted butter, cut into pieces – Adds rich flavor
- ½ cup milk – Helps bring the dough together
- ¼ cup sweetened condensed milk – The secret to tender, easy-to-work-with dough
For the Apple Filling
- 4 tablespoons unsalted butter – Creates a rich, silky filling
- 4 large green apples, peeled and chopped into small chunks – Granny Smith work beautifully
- ⅓ cup granulated white sugar – Sweetens the tart apples
- 2 tablespoons brown sugar – Adds depth and caramel notes
- ½ teaspoon salt – Balances the sweetness
- 2 teaspoons water – Helps create the sauce
- 1 teaspoon ground cinnamon – Essential apple pie spice
- ¼ teaspoon ground nutmeg – Adds warmth
- ¼ teaspoon ground allspice – Completes the spice blend
For Assembly and Finishing
- 1 large egg, whisked with 2 tablespoons water – Creates that golden shine
- Turbinado or sparkling sugar – Adds sparkle and crunch
Green apples like Granny Smith are ideal for this recipe because their tartness balances the sweetness of the sugars. Their firm texture also holds up well during cooking, preventing mushy filling.
Making the Perfect Hand Pie Dough
Step 1: Combine the Dry Ingredients
In your food processor, pulse together the flour, baking powder, and salt until everything is evenly distributed. This takes just 3-4 pulses. The baking powder is what makes this dough special—it creates a slightly different texture than traditional pie dough, making these hand pies uniquely tender.
Add the frozen shortening and chilled butter pieces to the flour mixture. Pulse 8-10 times, or until the mixture resembles coarse cornmeal with some slightly larger pea-sized pieces remaining. These small butter and shortening chunks are what create those desirable flaky layers, so don’t over-process.
Step 2: Add the Liquid Components
In a small bowl, whisk together the regular milk and sweetened condensed milk until smooth. The condensed milk is the magic ingredient here—it adds sweetness, helps tenderize the dough, and makes it much easier to handle than traditional pie dough.
With the food processor running on low speed, slowly drizzle in the milk mixture through the feed tube. Continue pulsing just until the dough begins to come together into clumps. Stop as soon as the dough starts forming larger pieces—you don’t want to over-process it.
Step 3: Form and Rest the Dough
Turn the shaggy dough out onto a large piece of plastic wrap. At this point, it might look a bit messy with some dry spots visible. Don’t worry—this is normal. Use the plastic wrap to fold the dough over itself several times, pressing and turning until all the dry flour bits are incorporated and the dough looks smooth.
This smoothness is crucial for success. If you leave dry, crumbly bits in the dough, your hand pies will crack when you roll them out later. Take your time with this step, folding and pressing until the dough is cohesive and uniform.
Wrap the smooth dough tightly in plastic wrap and refrigerate for at least 20 minutes. This rest period allows the gluten to relax and the fats to firm up, making the dough much easier to roll and shape. If you’re preparing ahead, the dough can rest in the refrigerator for up to 2 days.
Creating the Spiced Apple Filling
Step 1: Cook the Apples
Melt the butter in a large skillet over medium heat until it’s foaming and fragrant. Add your chopped apples along with both sugars and the salt. The combination of granulated and brown sugar creates a more complex sweetness with hints of caramel.
Sauté the mixture, stirring frequently, for about 2 minutes. During this time, the apples will begin to soften slightly and release some of their juices. The butter and sugar will start to melt together, creating the beginning of your luscious filling.
Step 2: Add Spices and Simmer
Pour in the water and sprinkle in all your warm spices—cinnamon, nutmeg, and allspice. Stir everything together, making sure the spices are evenly distributed throughout the apple mixture. The water helps create a light sauce that coats the apples beautifully.
Reduce the heat to medium-low and let the mixture simmer for 3-5 minutes, stirring occasionally. During this time, the apples will become tender but still hold their shape, and the liquid will thicken into a light, syrupy coating. You want the apples fork-tender but not mushy—they’ll continue to cook slightly during baking.
Step 3: Cool Completely
Transfer the cooked apple filling to a bowl and let it cool completely to room temperature before using. This step is non-negotiable—warm filling will melt the butter in your dough, making it impossible to work with and causing the hand pies to leak during baking.
While the filling cools, you can prepare your workspace and gather your assembly materials. The cooled filling can be made up to 2 days ahead and stored in an airtight container in the refrigerator, making this recipe perfect for breaking into stages.
Assembling Your Hand Pies
Step 1: Prepare Your Workspace
Preheat your oven to 350°F and line a large baking sheet with parchment paper. Having everything ready before you start rolling ensures smooth assembly. Make your egg wash by whisking together the egg and 2 tablespoons of water in a small bowl until completely smooth.
Remove your chilled dough from the refrigerator. Divide it evenly into 12 equal pieces—weighing them on a kitchen scale ensures uniform hand pies that bake evenly. Each piece should weigh approximately 2 ounces.
Step 2: Roll Out the Dough
On a lightly floured surface, roll each piece of dough into a 4-inch round. Don’t worry about achieving perfect circles—rustic, slightly irregular shapes add charm. The dough should be about ⅛ inch thick, sturdy enough to hold the filling but thin enough to become flaky and crisp during baking.
As you roll out each round, transfer it to your prepared baking sheet. This keeps them organized and prevents them from drying out. Space them about an inch apart on the sheet—you’ll be folding them in half, so they need a bit of room.
Step 3: Fill and Seal
Using your pastry brush, paint egg wash along the outer edge of each dough round. This acts as glue, helping seal the hand pies shut. Place 2 tablespoons of cooled apple filling in the center of each round. Don’t overfill—too much filling makes sealing difficult and can cause leaks during baking.
Carefully fold each round in half, creating a half-moon shape. The egg-washed edges should stick together easily. Gently press along the edges with your fingers to seal, then go over the edges with the tines of a fork, pressing firmly to create those classic crimped borders. This double-sealing ensures no filling escapes during baking.
Step 4: Apply the Finishing Touches
Brush the top of each hand pie generously with egg wash. This creates that beautiful golden-brown color and appetizing shine. Immediately sprinkle turbinado or sparkling sugar over the egg wash while it’s still wet. The sugar adds a delightful crunch and makes the hand pies look professionally made.
Using a sharp knife, cut two or three small slits in the top of each hand pie. These vents allow steam to escape during baking, preventing the hand pies from bursting open.
Baking to Golden Perfection
Slide your baking sheet into the preheated 350°F oven and bake for 20 minutes. The hand pies are done when they turn a beautiful golden brown color and the filling is bubbling slightly through the vents. The edges should be crisp and the tops should have a gorgeous shine from the egg wash.
Resist the temptation to pull them from the oven too early—they need the full baking time for the bottom crust to cook through and become flaky. If your hand pies are browning too quickly on top, loosely tent them with aluminum foil for the last 5 minutes of baking.
The Important Cooling Period
Once baked, transfer the baking sheet to a wire rack and let the hand pies cool completely before eating. I know this requires serious willpower when your kitchen smells like a bakery, but it’s important. The filling is extremely hot and can cause serious burns if you bite into a freshly baked hand pie.
As the hand pies cool, the filling sets slightly, making them easier to eat without the filling squirting out. Cooled hand pies are also easier to pack for lunches or transport to events.
Serving Suggestions
These hand pies are delicious served at room temperature or slightly warm. If you want to serve them warm, let them cool completely first, then reheat them in a 300°F oven for 5-7 minutes. Microwaving works in a pinch but can make the crust slightly soggy.
For an extra-special dessert, serve warm hand pies with a scoop of vanilla ice cream or a dollop of freshly whipped cream. The contrast between the warm, spiced apples and cold cream is absolutely divine. A drizzle of caramel sauce takes these over the top.
Perfect for Any Occasion
Pack cooled hand pies in lunch boxes for a special treat that beats any store-bought snack. They’re also perfect for breakfast on busy mornings—just grab one and go. The portable nature makes them ideal for bake sales, picnics, or potlucks where individual servings are appreciated.
These hand pies also make wonderful gifts. Package them in clear cellophane bags tied with ribbon, or arrange them in a decorative tin. They stay fresh for several days, making them perfect for sharing with neighbors, teachers, or anyone who deserves something special.
Creative Variations to Try
Caramel Apple Version
Stir 3 tablespoons of caramel sauce into your cooled apple filling before assembling the hand pies. The caramel adds richness and intensifies the sweet, buttery flavor. You can also drizzle additional caramel over the baked and cooled hand pies for extra indulgence.
Cheddar Crust Twist
Add ½ cup of shredded sharp cheddar cheese to the food processor when making the dough. The combination of sweet apples and savory cheese creates a sophisticated flavor profile that appeals to adventurous eaters. This variation is particularly popular in New England.
Crumb-Topped Option
Instead of sprinkling sugar on top, create a simple crumb topping by mixing 2 tablespoons of flour, 2 tablespoons of brown sugar, and 2 tablespoons of cold butter until crumbly. Sprinkle this mixture over the egg-washed hand pies before baking for extra texture.
Berry-Apple Combination
Mix ½ cup of fresh or frozen berries (blueberries, raspberries, or blackberries) into your apple filling. The berries add tartness and create a beautiful jewel-toned filling. You might need to add an extra teaspoon of cornstarch to the filling to account for the extra juice from the berries.
Maple-Glazed Hand Pies
After the hand pies cool completely, whisk together 1 cup of powdered sugar with 2 tablespoons of maple syrup and 1-2 tablespoons of milk until smooth. Drizzle this glaze over the hand pies for a sweet, maple-kissed finish that complements the apple filling beautifully.
Make-Ahead and Storage Tips
These hand pies are perfect for making ahead, which takes the stress out of entertaining or meal prep. The dough can be made up to 2 days in advance and kept wrapped tightly in the refrigerator. The apple filling also stores well for 2 days in an airtight container in the fridge.
For maximum convenience, you can assemble the hand pies completely, place them on the baking sheet, and refrigerate them for up to 4 hours before baking. This means you can prepare everything in the morning and bake fresh hand pies for an afternoon snack or evening dessert.
Storage Instructions
Store baked and cooled hand pies in an airtight container at room temperature for up to 3 days. Layer them between sheets of parchment paper to prevent sticking. They’ll stay fresh and delicious, though the crust may soften slightly over time.
For longer storage, freeze baked hand pies for up to 2 months. Let them cool completely, then wrap each one individually in plastic wrap before placing them all in a freezer-safe bag. Thaw overnight in the refrigerator or at room temperature for a few hours. Reheat in a 300°F oven for 10 minutes to restore crispness.
Freezing Unbaked Hand Pies
You can also freeze assembled but unbaked hand pies for ultimate convenience. After assembling and applying the egg wash and sugar, place the baking sheet in the freezer until the hand pies are frozen solid (about 2 hours). Transfer the frozen hand pies to a freezer bag.
When you’re ready to bake, place frozen hand pies on a parchment-lined baking sheet and bake at 350°F for 25-30 minutes, or until golden brown. There’s no need to thaw them first—baking from frozen actually helps maintain the flaky texture.
Important Notes for Success
Keep Everything Cold: Working with cold dough is crucial for flaky pastry. If your kitchen is warm or the dough becomes soft during assembly, pop it back in the refrigerator for 10 minutes to firm up before continuing.
Don’t Overfill: Two tablespoons of filling might seem conservative, but it’s the perfect amount. More filling makes sealing difficult and increases the risk of leaks during baking. Trust the measurement.
Seal Thoroughly: Take your time pressing the edges together with your fingers before crimping with a fork. Poor sealing is the number one cause of filling leaking out during baking. Make sure there are no gaps.
Cool the Filling Completely: This cannot be emphasized enough. Warm filling will melt your carefully prepared dough and create a sticky, unworkable mess. Plan your timing so the filling has adequate time to cool.
Use Green Apples: Tart green apples like Granny Smith hold their shape during cooking and provide the best flavor balance. Sweeter apples like Red Delicious become mushy and make the hand pies cloyingly sweet.
Don’t Skip the Vents: Those small slits on top aren’t just decorative—they allow steam to escape, preventing your hand pies from bursting open like over-inflated balloons.
Room Temperature Eggs: Cold eggs don’t emulsify as well when making egg wash. Let your egg sit at room temperature for 15 minutes before whisking it with water for the smoothest, most effective egg wash.
Frequently Asked Questions
Can I use store-bought pie dough instead?
While you certainly can use store-bought dough, this homemade version is actually easier to work with and tastes significantly better. The sweetened condensed milk creates a unique texture that’s more forgiving than traditional pie dough. Give the homemade version a try—you might be surprised how simple it is.
My dough keeps cracking when I roll it out. What am I doing wrong?
Cracking usually means the dough is too cold or wasn’t kneaded enough when forming it. Make sure you fold and press the dough until it’s completely smooth with no dry bits before refrigerating. When rolling, let the dough sit at room temperature for 5-10 minutes if it’s rock-hard from the fridge.
Can I make these hand pies dairy-free?
The dough relies heavily on butter and milk for its texture and flavor, making dairy-free substitutions challenging. You could try using dairy-free butter alternatives and coconut condensed milk, though the texture and taste will differ from the original recipe.
What other fruits work well for hand pies?
Cherry, peach, blueberry, and pear all make excellent hand pie fillings. Cook them similarly to the apples, adjusting the sugar and spices to complement each fruit. Berries may need a bit more cornstarch to thicken their juices.
How do I prevent soggy bottom crusts?
Make sure your filling is completely cool before assembling, and don’t overfill the hand pies. The egg wash helps waterproof the dough. Baking at 350°F (rather than a higher temperature) gives the bottom crust time to cook through before the top browns too much.
Can I make larger or smaller hand pies?
Absolutely! Divide the dough into 8 pieces for larger hand pies, or 16 pieces for smaller ones. Adjust the baking time accordingly—larger ones need a few extra minutes, while smaller ones bake faster.
The filling tastes bland. How can I fix it?
Make sure you’re using tart green apples, which provide better flavor contrast. You can also increase the spices slightly—try 1½ teaspoons of cinnamon instead of 1 teaspoon. A pinch of fresh lemon juice brightens the filling nicely too.
Why did my hand pies leak during baking?
Leaking happens when the edges aren’t sealed properly or when there’s too much filling. Make sure you press the edges firmly with your fingers before crimping with a fork. Also check that your filling is completely cool—warm filling can melt the dough and compromise the seal.
Can I use a different type of sugar for sprinkling?
Regular granulated sugar works fine, though it won’t create the same sparkle or crunch as turbinado or sanding sugar. Avoid powdered sugar, which will dissolve and disappear during baking.
How do I reheat these without making them soggy?
Always reheat hand pies in the oven rather than the microwave. Place them on a baking sheet in a 300°F oven for 5-7 minutes. This method restores the crispness of the crust while warming the filling evenly.
Recipe Details:
- Prep Time: 45 minutes
- Cook Time: 20 minutes
- Chill Time: 40 minutes
- Total Time: 1 hour 45 minutes
- Yield: 12 hand pies
- Serving Size: 1 hand pie
Nutrition Information (per hand pie):
- Calories: 255 kcal
- Carbohydrates: 38g
- Protein: 4g
- Fat: 11g (Saturated: 5g, Polyunsaturated: 1g, Monounsaturated: 3g, Trans: 1g)
- Cholesterol: 34mg
- Sodium: 250mg
- Potassium: 152mg
- Fiber: 2g
- Sugar: 19g
- Vitamin A: 272 IU
- Vitamin C: 4mg
- Calcium: 66mg
- Iron: 1mg