Introduction
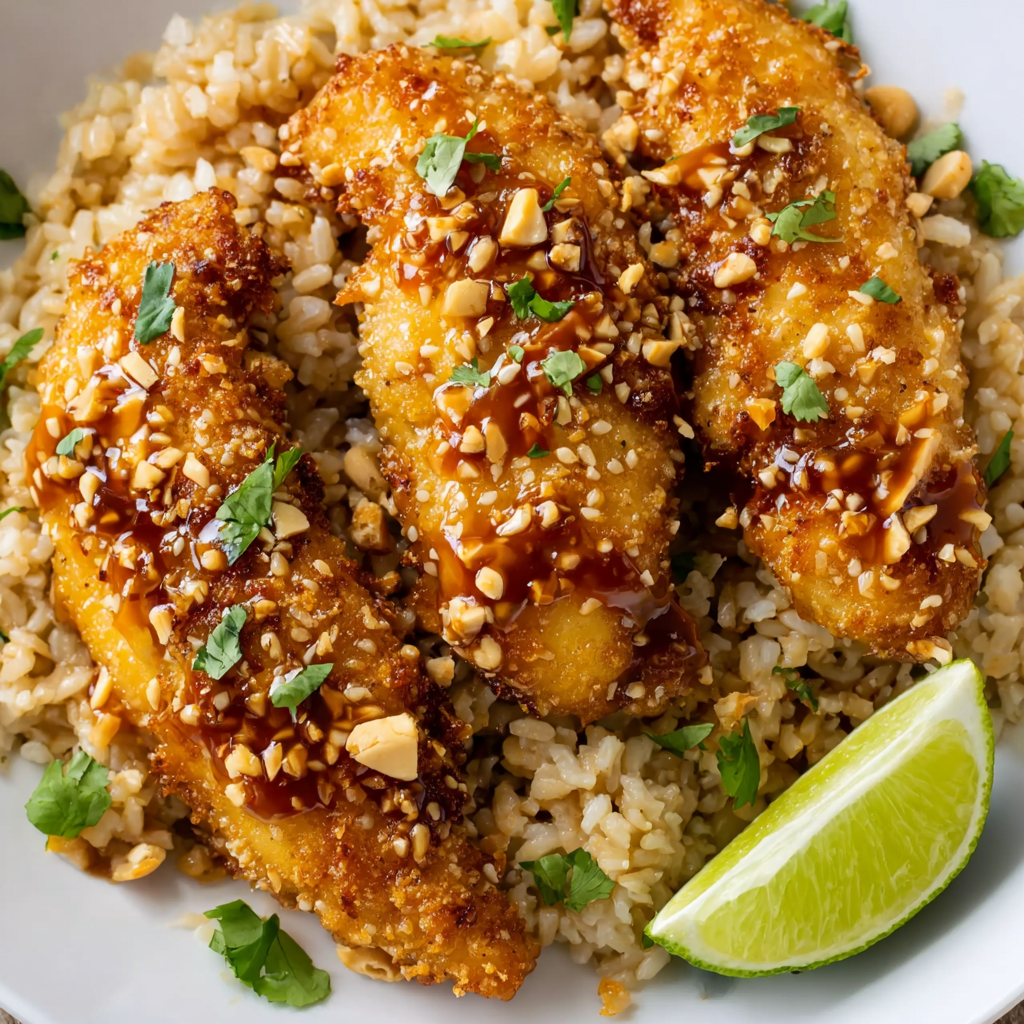
Few flavor combinations are as irresistible as the perfect marriage of crispy, golden chicken with a glossy coat of sweet-meets-spicy hot honey sauce. This Baked Crunchy Hot Honey Chicken delivers all the satisfaction of restaurant-style fried chicken while being significantly healthier and easier to prepare at home. What makes this recipe truly exceptional is how it achieves that coveted crunchy exterior through smart baking techniques rather than deep frying.
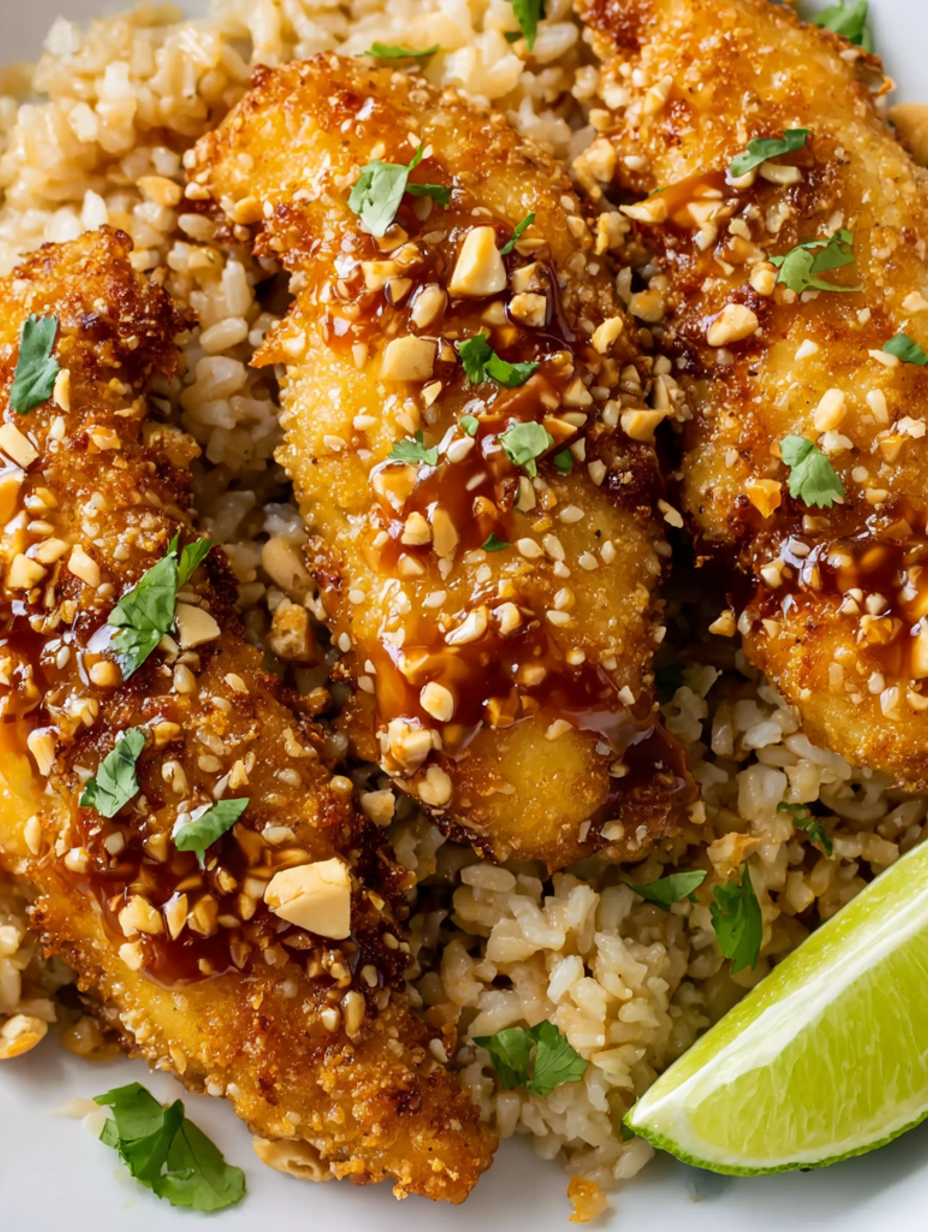
The magic happens when that ultra-crispy panko coating meets the sticky-sweet heat of homemade hot honey sauce—it’s the kind of combination that makes you close your eyes on the first bite. Over the years, I’ve discovered that the secret to exceptional baked chicken lies in proper breading technique and achieving the right balance of sweet heat that complements rather than overwhelms the crispy coating.
This recipe has become my go-to whenever I want to impress guests or treat my family to something special without spending hours in the kitchen. The best part? While it tastes incredibly indulgent, baking instead of frying makes it a guilt-free pleasure that you can enjoy any night of the week. Moreover, the active preparation time is minimal, making it perfect for busy weeknights when you still want something extraordinary on the table.
Prep Time: 20 minutes
Cook Time: 30 minutes
Total Time: 50 minutes
Servings: 4
Difficulty: Easy to Intermediate
Cuisine: American Fusion
Why You’ll Love This Recipe
Healthier Than Traditional Fried Chicken
This baking method delivers all the crispy satisfaction of fried chicken with significantly less oil and calories. Furthermore, you avoid the mess and hassle of deep frying while still achieving that coveted golden, crunchy exterior.
Perfect Balance of Sweet and Heat
The hot honey sauce provides just the right amount of sweetness to balance the spicy kick, creating a complex flavor profile that appeals to both heat lovers and those who prefer milder flavors. Additionally, you can easily adjust the spice level to suit your preferences.
Impressive Yet Accessible
While this dish looks and tastes restaurant-quality, it uses simple techniques and readily available ingredients. Consequently, even novice cooks can achieve professional-looking results that will impress family and guests alike.
Versatile and Customizable
The basic recipe serves as an excellent foundation for countless variations, allowing you to experiment with different spice levels, coating additions, or sauce modifications. Moreover, it works beautifully with both chicken breasts and thighs.
Essential Ingredients
Building the Perfect Coating
- 4 boneless, skinless chicken breasts or thighs (about 1.5 lbs)
- 1 cup all-purpose flour
- 1 teaspoon salt
- 1 teaspoon black pepper
- 1 teaspoon garlic powder
- 1 teaspoon onion powder
- ½ teaspoon smoked paprika (optional)
- 2 large eggs, beaten
- 1½ cups panko breadcrumbs (for extra crunch)
Creating the Signature Hot Honey Sauce
- ¼ cup honey (preferably local or high-quality)
- 2 tablespoons hot sauce (adjust to preferred heat level)
- 1 tablespoon unsalted butter
- ½ teaspoon red pepper flakes (optional, for extra heat)
- 1 teaspoon apple cider vinegar or lemon juice (optional, for tang)
Optional Finishing Touches
- Fresh chopped parsley for color and freshness
- Sesame seeds or crushed peanuts for added crunch and visual appeal
Essential Equipment
- Large rimmed baking sheet
- Parchment paper or silicone baking mat
- Three shallow dishes for breading station
- Small saucepan for sauce
- Meat thermometer for accuracy
- Cooking spray or olive oil for crisping
Step-by-Step Instructions
Setting Up for Success
Begin by preheating your oven to 400°F (200°C) and lining a large baking sheet with parchment paper or a silicone mat. This preparation ensures even cooking and easy cleanup, while the high temperature is crucial for achieving that golden, crispy exterior.
Position the oven rack in the center to promote even air circulation around the chicken, which helps create uniform browning and crispiness.
Preparing the Chicken Foundation
Pat each piece of chicken completely dry with paper towels—this step is absolutely crucial for proper breading adherence. Any moisture on the surface will prevent the coating from sticking properly and can lead to soggy results.
If using chicken breasts, consider pounding them to even thickness (about ¾ inch) for uniform cooking. Thighs can be left as-is since their natural fat content keeps them moist during baking.
Creating the Three-Stage Breading Station
Set up your breading station with three shallow dishes arranged in order. In the first dish, whisk together flour, salt, pepper, garlic powder, onion powder, and smoked paprika. This seasoned flour base provides the foundation that helps the egg adhere while adding flavor.
The second dish should contain the beaten eggs, which act as the binding agent between the flour and breadcrumbs. In the third dish, place the panko breadcrumbs, which create that signature crunchy texture that sets this recipe apart.
Mastering the Breading Technique
Working with one piece at a time, dredge each chicken piece thoroughly in the seasoned flour, shaking off excess. Next, dip completely in the beaten egg, allowing any excess to drip off before transferring to the panko breadcrumbs.
Press the breadcrumbs gently but firmly onto all surfaces, ensuring complete coverage. The key is creating an even, adherent coating that will crisp beautifully in the oven without falling off during cooking.
Optimizing for Maximum Crispiness
Place the breaded chicken pieces on the prepared baking sheet, ensuring they don’t touch each other. This spacing allows hot air to circulate freely around each piece, promoting even browning and preventing steaming.
Lightly spray the coated chicken with cooking spray or drizzle with a small amount of olive oil. This added fat helps the breadcrumbs brown and crisp more effectively, mimicking the results of deep frying.
Achieving Perfect Doneness
Bake for 25-30 minutes, or until the internal temperature reaches 165°F (74°C) when checked with a meat thermometer. The exterior should be golden brown and crispy to the touch, while the meat remains juicy and tender inside.
Avoid opening the oven door frequently, as this releases heat and can prevent proper crisping. Check for doneness only after the minimum cooking time has elapsed.
Crafting the Signature Hot Honey Sauce
While the chicken bakes, prepare your hot honey sauce by combining honey, hot sauce, butter, and red pepper flakes (if using) in a small saucepan. Heat over medium-low heat, stirring constantly until the butter melts and all ingredients blend into a smooth, glossy sauce.
For added complexity, stir in apple cider vinegar or lemon juice during the last minute of cooking. This touch of acidity brightens the sauce and balances the sweetness perfectly.
The Final Glazing Touch
Once the chicken reaches perfect doneness, remove it from the oven and immediately drizzle with the warm hot honey sauce. The residual heat from the chicken will help the sauce adhere while creating that signature glossy finish.
For maximum coverage, you can gently toss the chicken pieces in a bowl with the sauce, though drizzling preserves more of the crispy texture.
Serving Suggestions
Classic Comfort Pairings
Serve this hot honey chicken alongside creamy mashed potatoes and roasted seasonal vegetables for the ultimate comfort food experience. The mild sides perfectly balance the sweet-spicy chicken while soaking up any extra sauce.
Fresh and Light Options
Balance the richness with a crisp coleslaw, fresh garden salad, or steamed broccoli dressed with lemon. These lighter accompaniments provide refreshing contrast while adding nutritional value to the meal.
Southern-Inspired Combinations
Pair with cornbread, mac and cheese, or roasted sweet potatoes for a Southern comfort food feast. Additionally, pickles or pickled vegetables provide tangy contrast that cuts through the richness beautifully.
International Fusion Ideas
Serve over coconut rice with sautéed vegetables for an Asian-inspired twist, or alongside quinoa and roasted Brussels sprouts for a healthier, modern presentation.
Recipe Variations
Spice Level Adjustments
For milder versions, reduce hot sauce to 1 tablespoon and omit red pepper flakes entirely. Conversely, heat lovers can increase hot sauce, add cayenne to the flour mixture, or use a spicier hot sauce variety like habanero or ghost pepper.
Coating Alternatives
Experiment with different breadcrumb types such as seasoned breadcrumbs, crushed cornflakes, or even finely ground nuts for unique textures. Moreover, adding grated Parmesan to the panko creates extra flavor and browning.
Protein Substitutions
This recipe works beautifully with bone-in chicken pieces (adjust cooking time to 35-40 minutes), pork chops, or even cauliflower florets for a vegetarian version. Each protein requires slight timing adjustments but delivers equally delicious results.
Sauce Variations
Create different flavor profiles by substituting maple syrup for honey, using different hot sauce varieties, or adding ingredients like soy sauce, sriracha, or chipotle peppers in adobo for unique twists.
Make-Ahead Tips
Breading Preparation
Bread the chicken pieces up to 4 hours ahead and refrigerate on the prepared baking sheet. This resting time actually helps the coating adhere better while allowing you to prep other meal components.
Sauce Storage
The hot honey sauce can be prepared up to one week ahead and stored in the refrigerator. Simply reheat gently before serving, adding a splash of water if it becomes too thick.
Complete Make-Ahead Strategy
For busy weeknights, bread the chicken and prepare the sauce completely ahead of time. Store the breaded chicken covered in the refrigerator and simply bake when ready to serve.
Freezing Guidelines
Breaded (but unbaked) chicken pieces freeze beautifully for up to 3 months. Bake directly from frozen, adding 10-15 minutes to the cooking time and checking internal temperature carefully.
Important Notes
Breadcrumb Selection Matters
Panko breadcrumbs are essential for achieving maximum crunchiness—regular breadcrumbs won’t provide the same texture. Japanese-style panko creates larger, airier flakes that crisp more effectively than traditional breadcrumbs.
Temperature Accuracy is Key
Always use a meat thermometer to ensure chicken reaches 165°F internal temperature. This guarantees food safety while preventing overcooking that can dry out the meat.
Sauce Consistency Tips
The hot honey sauce should coat the back of a spoon when ready. If too thin, simmer longer to reduce; if too thick, add a tablespoon of water or additional hot sauce.
Storage Guidelines
Leftover chicken keeps in the refrigerator for up to 3 days, though the coating will soften. Reheat in a 350°F oven for 10-12 minutes to restore some crispiness.
Frequently Asked Questions
Can I use chicken thighs instead of breasts?
Absolutely! Chicken thighs work wonderfully and often stay more moist during baking. They may require an additional 5-10 minutes of cooking time to reach the proper internal temperature of 165°F.
What if I don’t have panko breadcrumbs?
While panko provides the best crunch, you can substitute regular breadcrumbs, crushed cornflakes, or even finely crushed crackers. The texture will be different but still delicious.
Can I make this gluten-free?
Yes! Replace the all-purpose flour with gluten-free flour blend and use gluten-free breadcrumbs. Ensure all other ingredients, including hot sauce, are certified gluten-free.
How do I prevent the coating from falling off?
Proper drying of the chicken, thorough coating at each stage, and allowing the breaded chicken to rest for 15-30 minutes before baking all help the coating adhere better.
Can I double this recipe?
Certainly! Use two baking sheets and rotate their positions halfway through cooking for even browning. You may need to increase cooking time slightly when baking larger quantities.
What’s the best hot sauce to use?
Frank’s RedHot, Louisiana-style, or sriracha all work well. Choose based on your heat preference and flavor profile—tangy vinegar-based sauces complement the honey beautifully.
How do I know when the chicken is properly crispy?
The coating should be deep golden brown and feel firm to the touch. Additionally, you should hear a slight crackling sound when the chicken is properly crisped.
Can I prepare this without eggs?
For egg-free versions, try buttermilk or even mayonnaise as binding agents. The texture will be slightly different, but these alternatives still create good adhesion for the breadcrumbs.