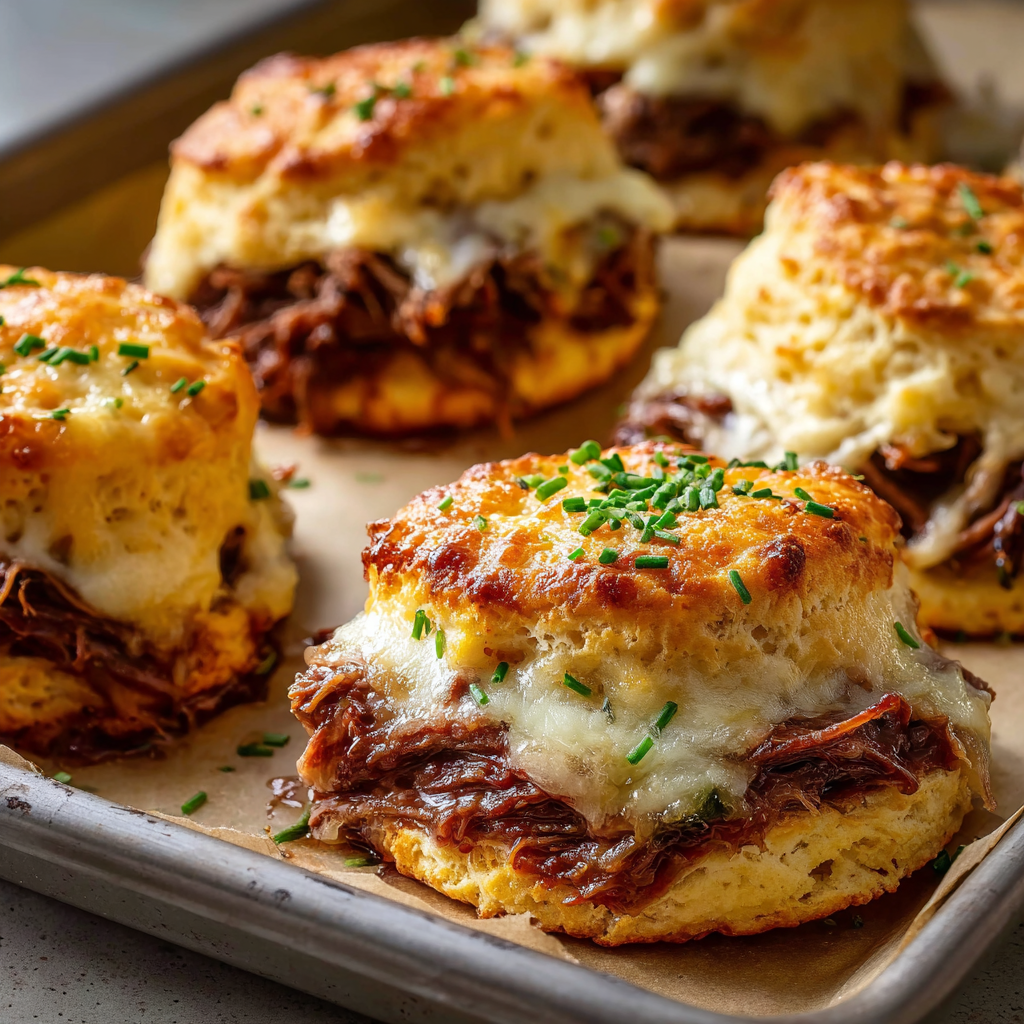
I stumbled upon the idea for these baked French dip biscuits during a hectic weeknight when I desperately needed something quick but satisfying for dinner. My kids had been asking for French dip sandwiches, but I didn’t have the time or energy for a traditional version. That’s when I spotted a can of biscuit dough in my refrigerator and had a lightbulb moment. The result? These golden-brown, herb-butter-brushed pockets of heaven filled with tender roast beef and melty provolone cheese. My family devoured them in minutes, dunking each bite into warm au jus with pure joy on their faces. Now, they’re in our regular dinner rotation, and I make them at least twice a month.
Why You’ll Love This Recipe
These baked French dip biscuits deliver all the flavors of a classic French dip sandwich in a fun, handheld format that’s perfect for busy families. First, they’re incredibly quick to prepare—from start to finish, you’ll have dinner on the table in just 40 minutes. Unlike traditional French dip sandwiches that require multiple components and assembly, these biscuits contain everything in one neat package.
What’s more, the combination of flaky biscuit dough, savory roast beef, and gooey provolone creates an irresistible texture contrast in every bite. The herb-butter mixture brushed on top adds incredible aromatic flavor that makes your entire kitchen smell like a gourmet restaurant. Meanwhile, the warm beef broth for dipping transforms these simple biscuits into an interactive eating experience that kids and adults alike find exciting.
Beyond their delicious flavor, these biscuits are remarkably versatile and budget-friendly. They work equally well as a hearty appetizer for game day, a quick weeknight dinner, or even a creative lunch option. Plus, using refrigerated biscuit dough means there’s no complicated dough-making involved—just simple assembly that even beginner cooks can master with confidence.
Ingredients You’ll Need
Main Components
- 1 can (16.3 oz) refrigerated biscuit dough – convenient base that bakes up flaky and golden
- 8 slices deli roast beef – the savory star of the filling
- 8 slices provolone cheese – melts beautifully and adds creamy richness
- ¼ cup butter, melted – creates that golden, flavorful coating
- 1 tablespoon Worcestershire sauce – adds umami depth and savory complexity
- 1 teaspoon garlic powder – aromatic punch
- 1 teaspoon onion powder – sweet, savory undertones
- ½ teaspoon dried thyme – earthy, herbal notes
- ½ teaspoon dried rosemary – pine-like aromatics that complement beef
- ½ teaspoon salt – enhances all flavors
- ½ teaspoon black pepper – subtle heat and depth
- 1 cup beef broth – for that essential dipping experience
Prep Time: 15 minutes
Cook Time: 25 minutes
Total Time: 40 minutes
Yield: 8 biscuits
Calories: 310 kcal per biscuit
Step-by-Step Instructions
Getting Started
Begin by preheating your oven to 350°F (175°C). While the oven reaches temperature, generously grease a 9×13 inch baking dish with butter or non-stick cooking spray, making sure to coat the bottom and sides thoroughly. This preparation prevents sticking and ensures your biscuits release easily after baking. Set the prepared dish aside within easy reach.
Preparing the Biscuit Dough
Open your can of refrigerated biscuit dough and separate it into 8 individual biscuits. Place them on a clean work surface or cutting board. Using your hands, gently press and flatten each biscuit into a circle approximately 4-5 inches in diameter. Don’t worry about making them perfectly round—a roughly circular shape works fine. The goal is to create enough surface area to wrap around the filling comfortably.
Assembling the Filled Biscuits
Take one slice of roast beef and fold it loosely so it fits within the center of a flattened biscuit, leaving about a ½-inch border around the edges. Place one slice of provolone cheese on top of the roast beef, folding it similarly to match the size. The cheese acts as a barrier that helps keep the beef moist while adding that signature melty factor.
Now comes the sealing step, which is crucial for keeping all the delicious filling inside. Lift the edges of the biscuit dough up and over the filling, gathering them together at the top like a little bundle. Pinch the gathered dough firmly to seal it completely, then gently roll the filled biscuit between your palms to form a smooth ball shape. Make sure there are no gaps or openings where filling could escape during baking.
Place the filled biscuit seam-side down in your prepared baking dish. Repeat this process with the remaining biscuits, arranging them in the dish with a little space between each one—they’ll expand slightly as they bake.
Creating the Herb Butter Mixture
In a small bowl, combine the melted butter with the Worcestershire sauce, garlic powder, onion powder, dried thyme, dried rosemary, salt, and black pepper. Whisk everything together thoroughly until the herbs are evenly distributed throughout the butter. The mixture should smell incredibly aromatic—a savory, herb-forward scent that promises amazing flavor.
Using a pastry brush or spoon, generously brush this herb butter mixture over the tops and sides of each biscuit. Don’t be shy here—the more butter mixture you use, the more flavorful and golden your biscuits will become. Make sure to use all of the mixture, redistributing it evenly across all eight biscuits.
Baking to Golden Perfection
Place your baking dish in the preheated oven and bake for 20-25 minutes. You’re looking for biscuits that are deeply golden brown on top and cooked through completely. The tops should feel firm when gently pressed, and you might see a little cheese bubbling out here and there—that’s perfectly normal and delicious.
To test for doneness, gently lift one biscuit slightly to check the bottom—it should be golden brown, not pale or doughy. If you have an instant-read thermometer, the internal temperature should reach at least 190°F. Once done, remove the baking dish from the oven and let the biscuits rest for about 5 minutes before serving.
Preparing the Au Jus
While your biscuits bake, prepare the dipping broth. Pour the beef broth into a small saucepan and place it over medium heat. Warm the broth until it’s hot but not boiling—you want it steaming gently. For extra flavor, you can add a splash of Worcestershire sauce or a pinch of garlic powder to the broth. Transfer the warm broth to small individual bowls for dipping, or pour it into one larger bowl for sharing.
Serving
Arrange the warm biscuits on a serving platter and place the bowls of hot au jus alongside them. Encourage everyone to tear or cut their biscuit and dunk it into the savory broth. The combination of flaky, herb-scented biscuit, tender beef, melted cheese, and rich broth creates an unforgettable eating experience.
How to Serve
These versatile biscuits work beautifully in multiple serving scenarios. For a complete weeknight dinner, pair them with a simple side salad dressed in vinaigrette or a cup of tomato soup. The light, fresh elements balance the rich, savory biscuits perfectly. Alternatively, serve them alongside roasted vegetables or french fries for a more substantial meal.
As an appetizer for parties or game day, arrange the biscuits on a large platter with several small bowls of warm au jus scattered around for easy dipping. They’re substantial enough to satisfy hungry guests but still work as finger food. Additionally, you could set out extra dipping sauces like horseradish cream, garlic aioli, or even honey mustard for variety.
For a fun family meal, serve these biscuits picnic-style with individual portions of au jus in small cups. Kids especially love the interactive dunking element, making this an excellent way to get picky eaters excited about dinner. You could even turn it into a build-your-own situation by offering extra toppings like sautéed onions or peppers on the side.

Creative Recipe Variations
Italian Beef Version
Replace the provolone with mozzarella cheese and add a spoonful of giardiniera (Italian pickled vegetables) inside each biscuit. Serve with the au jus mixed with some of the giardiniera brine for a Chicago-style Italian beef experience.
Philly Cheesesteak Style
Sauté sliced bell peppers and onions, then add them to each biscuit along with the roast beef. Replace the provolone with American cheese or Cheese Whiz for authentic Philly flavor. Serve with beef broth seasoned with extra Worcestershire sauce.
French Onion Variation
Top each biscuit with caramelized onions before adding the cheese and beef. Use Gruyère or Swiss cheese instead of provolone for a more sophisticated French onion soup flavor. Add a splash of white wine to your beef broth for dipping.
Breakfast Version
Replace the roast beef with scrambled eggs and cooked breakfast sausage. Use cheddar cheese instead of provolone, and serve with sausage gravy for dipping instead of beef broth.
Spicy Jalapeño Option
Add sliced pickled jalapeños inside each biscuit for a spicy kick. Mix a pinch of cayenne pepper into your herb butter. Use pepper jack cheese instead of provolone for extra heat throughout.
Mushroom Swiss Upgrade
Add sautéed mushrooms to each biscuit and replace the provolone with Swiss cheese. This variation pairs beautifully with the herbs already in the butter mixture and creates a more upscale flavor profile.
Make-Ahead and Storage Tips
While these biscuits are best enjoyed fresh from the oven, you can definitely prepare elements ahead of time to streamline your cooking process. Assemble the filled biscuits up to 4 hours in advance, place them in the baking dish, cover tightly with plastic wrap, and refrigerate. When ready to bake, remove them from the refrigerator, let them sit at room temperature for 10 minutes, prepare your herb butter, brush it over the cold biscuits, and bake as directed—you may need to add 3-5 extra minutes to the baking time.
Leftover baked biscuits can be stored in an airtight container in the refrigerator for up to 3 days. To reheat, wrap them in foil and warm in a 300°F oven for 10-12 minutes, or microwave individual biscuits for 30-45 seconds. For the crispiest results, reheat them in an air fryer at 350°F for 3-4 minutes.
Freezing works wonderfully for these biscuits. You can freeze them either before or after baking. For unbaked biscuits, assemble them completely, place them on a parchment-lined baking sheet, and freeze until solid (about 2 hours). Transfer the frozen biscuits to a freezer bag and store for up to 2 months. When ready to bake, place frozen biscuits in a greased dish, brush with herb butter, and bake at 350°F for 30-35 minutes.
To freeze baked biscuits, let them cool completely, then wrap individually in plastic wrap and place in a freezer bag. They’ll keep for up to 3 months. Thaw overnight in the refrigerator, then reheat as described above. The beef broth can be made ahead and stored in the refrigerator for up to 5 days or frozen for up to 3 months.
Important Notes
Use Quality Ingredients
Since this recipe has relatively few components, the quality of your roast beef and cheese makes a significant difference in the final result. Splurge on good deli roast beef from your grocery store’s deli counter rather than pre-packaged lunch meat—it tastes dramatically better and has better texture. Similarly, freshly sliced provolone from the deli counter melts more smoothly than pre-sliced cheese.
Seal the Biscuits Properly
Taking time to pinch the dough securely ensures your filling stays inside during baking. Press the edges together firmly, and if you notice any thin spots or tears, pinch a small piece of dough from the seam area to patch them. Placing the biscuits seam-side down provides extra insurance against leaking.
Don’t Skip the Herb Butter
The herb butter mixture isn’t just about making the biscuits golden—it’s essential for flavor. The combination of Worcestershire sauce and dried herbs creates a savory crust that elevates these from simple stuffed biscuits to something truly special. Use all of the mixture for maximum impact.
Work Quickly with the Dough
Refrigerated biscuit dough can become sticky and difficult to work with if it warms up too much. If your kitchen is warm or you’re working slowly, consider refrigerating the dough for 10 minutes before starting. This keeps it firm and easier to manipulate.
Adjust Cooking Time for Your Oven
All ovens vary slightly in temperature accuracy and hot spots. Start checking your biscuits at the 20-minute mark, and if they’re browning too quickly on top but still pale on the bottom, tent them loosely with foil and continue baking. The goal is even, deep golden brown color all around.
Keep the Au Jus Warm
Cold dipping broth is disappointing! Keep your beef broth warm on the lowest stove setting while serving, or transfer it to small ramekins that can be reheated in the microwave as needed throughout the meal.

Frequently Asked Questions
Can I use a different type of cheese?
Absolutely! While provolone is classic for French dip, Swiss cheese, mozzarella, cheddar, or even a combination work beautifully. Choose a cheese that melts well—avoid hard cheeses like Parmesan as the main cheese, though you could add a sprinkle for extra flavor.
What if I can’t find good deli roast beef?
You can use leftover homemade roast beef, sliced thin. Alternatively, look for pre-packaged roast beef labeled “slow-roasted” or “premium,” which tends to be better quality than standard lunch meat. In a pinch, thinly sliced steak or even cooked ground beef seasoned with Worcestershire sauce works.
Can I make these with homemade biscuit dough?
Yes! Use your favorite biscuit recipe and portion the dough into 8 equal pieces. The technique remains the same—just flatten, fill, seal, and bake. Homemade biscuits often taste even better than refrigerated dough.
Why did my biscuits leak during baking?
Leaking usually happens when the dough isn’t sealed well or when there’s too much filling. Make sure to pinch the seam very firmly and place the biscuits seam-side down. If using extra-large slices of meat or cheese, fold them smaller to fit properly within the dough.
Can I make these vegetarian?
Certainly! Replace the roast beef with sautéed mushrooms, roasted vegetables, or even a meat substitute. Use vegetable broth instead of beef broth for dipping. The same cooking method and timing apply.
What’s the best way to reheat these?
For the crispiest exterior, use an oven or air fryer rather than the microwave. Wrap in foil and heat at 300°F for 10-12 minutes in the oven, or use an air fryer at 350°F for 3-4 minutes. The microwave works in a pinch but creates softer biscuits.
Can I add vegetables inside?
Yes, but be careful with moisture. Vegetables like peppers and onions should be sautéed first to remove excess water, then patted dry before adding to the biscuits. Raw vegetables release too much liquid during baking and can make the biscuits soggy.
How do I prevent the bottoms from getting too dark?
If your biscuits consistently have dark bottoms, your oven may run hot or your rack position might be too low. Try moving the baking dish to a higher rack position or placing a second baking sheet underneath to create a buffer from the direct heat.
Can I use a different cut of beef?
While deli roast beef is most convenient, you can absolutely use thinly sliced leftover pot roast, prime rib, or even steak. Just make sure whatever you use is already cooked and sliced thin enough to fold inside the biscuit easily.
How many biscuits should I serve per person?
As an appetizer, plan on 2 biscuits per person. For a main course, most adults will eat 2-3 biscuits depending on what sides you’re serving. Kids typically eat 1-2 biscuits.
Nutrition Information (per biscuit):
Calories: 310 kcal | Carbohydrates: 27g | Protein: 11g | Fat: 18g | Saturated Fat: 9g | Unsaturated Fat: 7g | Trans Fat: 0g | Cholesterol: 40mg | Sodium: 810mg | Fiber: 1g | Sugar: 3g
Prep Time: 15 minutes
Cook Time: 25 minutes
Category: Appetizer, Main Dish
Method: Baking
Cuisine: American


