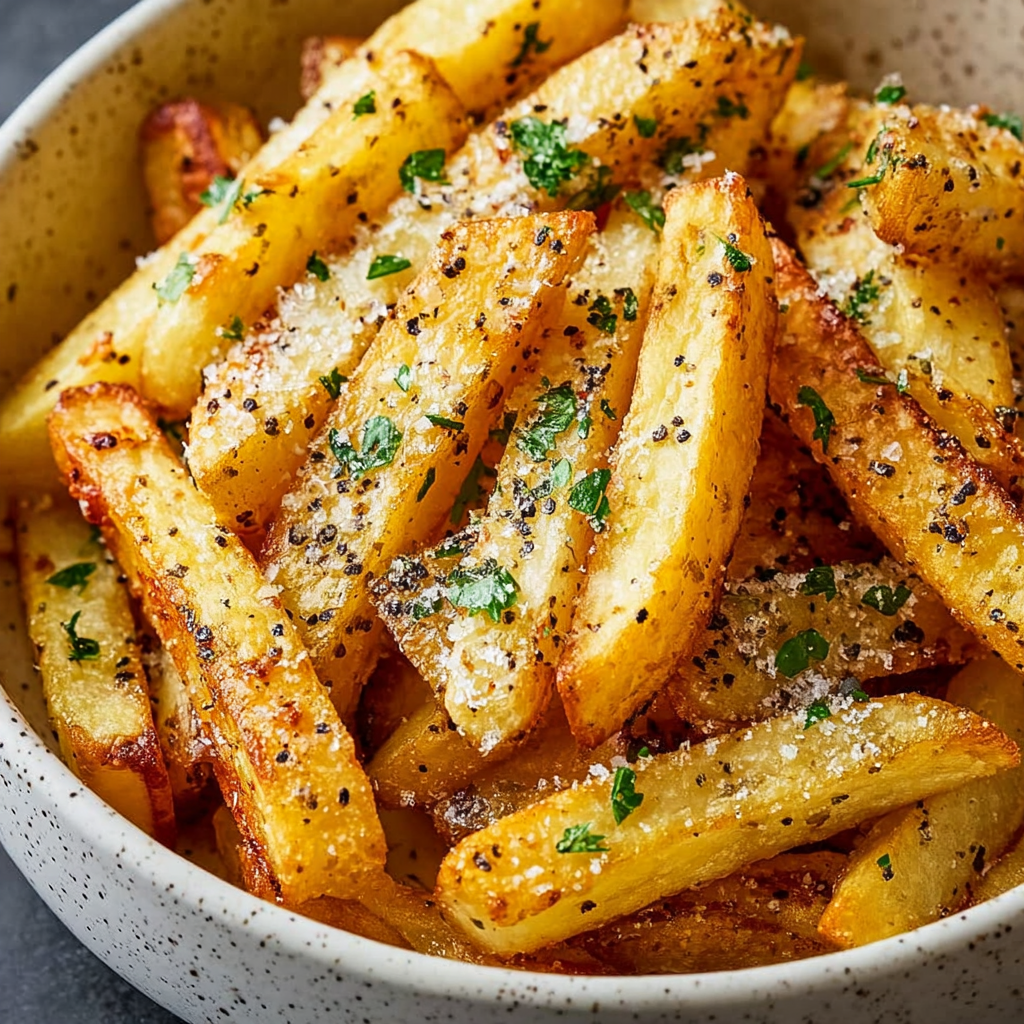
There’s something undeniably comforting about a plate of crispy fries, especially when they’re dressed up with the rich flavors of garlic and Parmesan. I’ll never forget the first time I made these at home—I was trying to recreate a dish from my favorite Italian restaurant, and honestly, my homemade version turned out even better. The combination of roasted garlic, nutty Parmesan, and perfectly crispy potatoes creates an addictive side dish that disappears within minutes. Now, these Baked Parmesan Garlic Fries have become my secret weapon for everything from casual weeknight dinners to impressive dinner parties.
Why You’ll Love This Recipe
Baked Parmesan Garlic Fries are not just a side dish; they’re a delightful experience that can elevate any meal from ordinary to extraordinary. Unlike traditional deep-fried versions, these oven-baked beauties offer all the crispiness and flavor without the guilt or mess of dealing with hot oil. They’re healthier, easier to clean up after, and honestly just as delicious—if not more so.
What makes this recipe truly special is its incredible versatility. Serve them alongside burgers, steaks, or grilled chicken for a classic pairing. Alternatively, enjoy them as a satisfying snack with your favorite dipping sauce. Whether you’re looking for a quick solution after a long day or a way to impress friends at your next gathering, these fries are your answer. Best of all, they come together in under 40 minutes with minimal hands-on time, leaving you free to focus on the rest of your meal.
Ingredients You’ll Need
Main Components
- 4 large russet potatoes – These starchy potatoes are ideal for fries, giving you that crispy exterior and fluffy interior
- 3 tablespoons olive oil – A drizzle of this healthy fat helps achieve that golden crispiness while adding rich flavor
- 4 cloves garlic, minced – Fresh garlic infuses the fries with a savory punch that’s hard to resist
- 1 teaspoon salt – Essential for enhancing all the flavors
- 1/2 teaspoon black pepper – Adds a subtle kick, balancing the richness of the cheese and oil
- 1 teaspoon paprika – Provides color and a hint of smokiness to the fries
- 3/4 cup grated Parmesan cheese – The star of the show, providing irresistible cheesy goodness
- 2 tablespoons fresh parsley, chopped – Optional but adds a fresh touch and pop of color for garnish
Optional Additions
Feel free to experiment with different seasonings to make these fries your own. A pinch of cayenne pepper adds welcome heat for spice lovers. Italian seasoning brings herbaceous notes that complement the Parmesan beautifully. For a smokier flavor, try smoked paprika instead of regular. You can also add a squeeze of fresh lemon juice before serving for a bright, acidic contrast.
Step-by-Step Instructions
Making Baked Parmesan Garlic Fries is a straightforward process that anyone can master. With just a few simple steps, you’ll have a delicious side dish that will impress your family and friends without breaking a sweat.
Preheating and Prep Work
First things first, preheat your oven to 425°F (220°C). This high temperature ensures that your fries will cook evenly and develop that perfect crispiness we’re after. While the oven heats up, line a large baking sheet with parchment paper. This prevents the fries from sticking and makes cleanup absolutely effortless—no scrubbing required later.
If you have two baking sheets, consider preparing both so you can spread the fries more generously. Overcrowding is the enemy of crispy fries, so giving them space is crucial for success.
Preparing the Potatoes
Grab those russet potatoes and give them a good scrub under cold water. You can peel them if you prefer, but leaving the skin on adds extra nutrients and a rustic texture that many people love. Cut the potatoes into thin strips, roughly 1/4 to 1/3 inch thick. The thinner the strips, the crispier your fries will be, though they’ll also cook faster.
Once cut, you can optionally soak the potato strips in cold water for 15-30 minutes. This step removes excess starch, resulting in even crispier fries. If you choose to soak them, make sure to pat them completely dry with paper towels before proceeding—any moisture will prevent proper crisping.
Seasoning the Fries
Toss the cut potato strips in a large bowl with the olive oil, making sure they are well-coated. This oil is essential for achieving that golden-brown finish and helping the seasonings stick. Now it’s time to add some serious flavor! Sprinkle in the minced garlic, salt, black pepper, and paprika.
Mix everything together until the potatoes are evenly coated with seasonings. Don’t be shy here—use your hands to really work the garlic and spices into every crevice. This step is crucial for ensuring every fry is bursting with flavor rather than having some bland pieces and some over-seasoned ones.
Arranging for Success
Spread the seasoned fries in a single layer on the prepared baking sheet, making sure they have room to breathe. Avoid crowding them together, as this is critical for optimal crispiness. When fries are too close, they’ll steam instead of bake, resulting in soggy, disappointing results that nobody wants.
If you don’t have enough space on one sheet, definitely use a second baking sheet rather than piling them up. You can bake both sheets simultaneously, just rotate their positions halfway through for even cooking.
Baking to Golden Perfection
Pop the baking sheet into the preheated oven and bake for about 25-30 minutes. Set a timer for 12-15 minutes to remind yourself to flip the fries halfway through cooking. Use a spatula to gently turn them, ensuring even browning on all sides. You’ll know they’re ready when they’re crispy and golden brown with slightly darker edges.
Watch them carefully during the final few minutes, as ovens can vary and you don’t want them to burn. The fries should be fork-tender on the inside while maintaining that satisfying crunch on the outside.
Adding the Cheese
Once your fries are looking perfectly crispy and golden, it’s time for the star ingredient—Parmesan cheese! Remove the baking sheet from the oven and immediately sprinkle the grated cheese evenly over the hot fries. Return them to the oven for an additional 5 minutes, allowing the cheese to melt and create a deliciously cheesy crust that clings to every fry.
The residual heat will also continue crisping the exterior while the cheese melts, creating textural layers that make each bite interesting.
The Final Touch
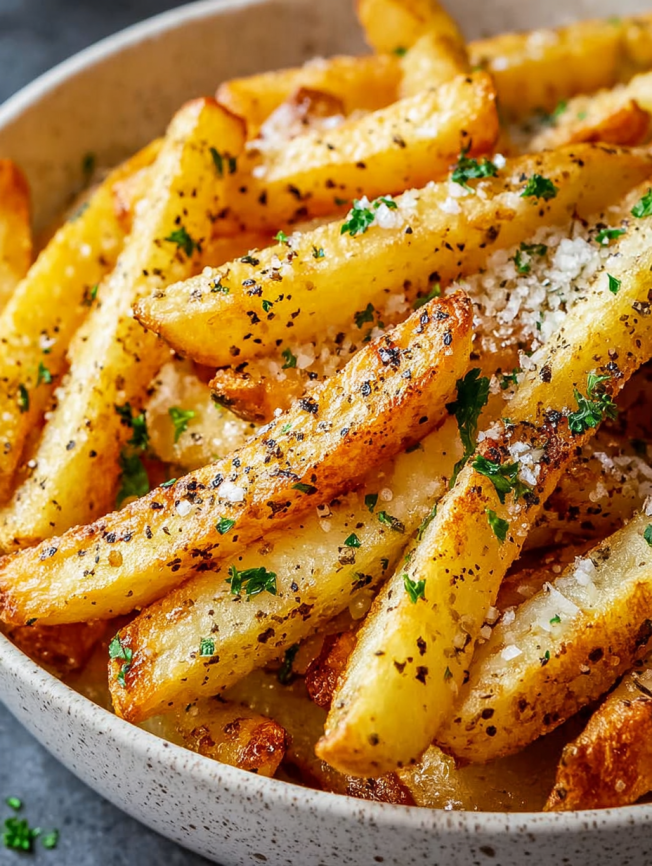
Remove the fries from the oven one last time and transfer them to a serving platter. Garnish generously with chopped fresh parsley, which adds a fresh touch and beautiful pop of color that makes the dish look restaurant-worthy.
Serve them immediately while hot for the best experience. The contrast between the crispy exterior and fluffy interior is at its peak when they’re fresh from the oven. Don’t forget your favorite dipping sauce—these fries are incredible on their own but even better with aioli, ranch, or marinara.
Serving Suggestions
These Baked Parmesan Garlic Fries are versatile enough to accompany almost any main dish. Serve them alongside juicy burgers, grilled steaks, or roasted chicken for a satisfying meal. They also make an excellent companion to fish and chips, offering a gourmet twist on the classic British favorite.
For a casual appetizer spread, arrange them on a large platter with an assortment of dipping sauces. Consider offering garlic aioli, spicy ketchup, honey mustard, or ranch dressing. Each sauce provides a different flavor experience that complements the cheesy, garlicky fries in unique ways.
Transform them into a complete meal by topping with a fried egg, crispy bacon bits, and extra Parmesan for a decadent loaded fries experience. Alternatively, serve them as part of a Mediterranean-inspired plate with tzatziki sauce, fresh vegetables, and grilled halloumi cheese.
Recipe Variations
Truffle Parmesan Fries
Drizzle the finished fries with truffle oil and add extra Parmesan for an upscale, restaurant-quality version. The earthy truffle flavor pairs beautifully with the garlic and cheese, creating an incredibly luxurious side dish perfect for special occasions.
Spicy Cajun Garlic Fries
Replace the paprika with Cajun seasoning and add a pinch of cayenne pepper to the mix. Top with shredded pepper jack cheese instead of Parmesan for a Southern-inspired twist with serious heat. Serve with cooling ranch dressing to balance the spice.
Herb-Crusted Version
Add dried herbs like rosemary, thyme, and oregano to the seasoning mixture. Use a combination of Parmesan and Pecorino Romano cheese for more complex flavor. This variation has an Italian countryside feel that’s perfect with roasted meats.
Sweet Potato Parmesan Fries
Substitute sweet potatoes for russet potatoes for a nutrient-dense alternative with natural sweetness. The combination of sweet potato, savory garlic, and salty Parmesan creates an interesting sweet-savory contrast that’s unexpectedly delicious.
Loaded Steakhouse Fries
After baking, top the fries with crumbled bacon, sour cream, chives, and extra cheese. This turns them into a hearty appetizer or even a main course that’s perfect for game day or casual entertaining.
Make-Ahead Tips
While these fries are best enjoyed fresh from the oven, you can certainly prep components ahead to save time. Cut the potatoes up to 24 hours in advance and store them submerged in cold water in the refrigerator. This prevents browning and actually helps remove excess starch for crispier results.
You can also mix your dry seasonings together ahead of time and store them in an airtight container. When ready to cook, simply toss the dried potatoes with oil and your pre-mixed seasonings, then proceed with baking.
If you have leftover cooked fries, store them in an airtight container in the refrigerator for up to 3 days. Reheat them in a 400°F oven for 8-10 minutes to restore some of their crispiness. Avoid using the microwave, as it will make them soggy and disappointing.
For longer storage, you can freeze the cut, raw potatoes. Spread them on a baking sheet and freeze until solid, then transfer to a freezer bag. When ready to use, there’s no need to thaw—just toss with oil and seasonings and bake, adding 5-10 minutes to the cooking time.
Notes
Potato Selection: Russet potatoes work best for this recipe due to their high starch content, which creates that ideal fluffy interior and crispy exterior combination. Yukon Gold potatoes can work as an alternative, though they’ll have a creamier texture and won’t get quite as crispy.
Cutting Consistency: Try to cut all your fries to a similar thickness so they cook evenly. If some are much thinner than others, they’ll burn before the thicker ones finish cooking. A french fry cutter or mandoline makes this process easier and more consistent.
Don’t Skip the Flip: Flipping the fries halfway through ensures even browning on all sides. Set a timer so you don’t forget this crucial step, as it makes the difference between perfectly golden fries and ones that are burnt on the bottom and pale on top.
Cheese Timing: Add the Parmesan near the end rather than at the beginning to prevent it from burning. Cheese can burn quickly at high temperatures, so those final 5 minutes are perfectly timed for melting without scorching.
Fresh Garlic Matters: While garlic powder is convenient, fresh minced garlic provides much more vibrant, aromatic flavor. If you’re concerned about burning, you can add the garlic halfway through cooking instead of at the beginning.
Crispiness Factor: For maximum crispiness, make sure your oven is fully preheated and avoid opening the door unnecessarily during baking, as this releases heat and moisture. Also, using parchment paper rather than aluminum foil allows better air circulation around the fries.
Frequently Asked Questions
Can I use a different type of potato?
Absolutely! While russet potatoes are recommended for their high starch content and fluffy texture, you can experiment with other varieties. Yukon Gold potatoes create creamier fries with a buttery flavor. Red potatoes hold their shape well but won’t get as crispy. Sweet potatoes offer a nutritious alternative with natural sweetness that pairs surprisingly well with Parmesan and garlic.
How do I make sure my fries get really crispy?
The key to crispy fries is removing as much moisture as possible and ensuring they have enough space. Soak cut potatoes in cold water for 30 minutes to remove excess starch, then pat them completely dry before tossing with oil. Spread them in a single layer without touching, and resist the urge to flip them too early—let them develop a crust first.
Can I make these without an oven?
Yes! An air fryer works wonderfully for this recipe and actually produces even crispier results. Cook at 400°F for 15-20 minutes, shaking the basket every 5 minutes for even cooking. You’ll need to work in batches depending on your air fryer size. A convection oven also works excellently, reducing cooking time by about 5 minutes.
What dipping sauces pair best with these fries?
The possibilities are endless! Classic options include garlic aioli, ranch dressing, or simple ketchup. For more adventurous pairings, try truffle aioli, chipotle mayo, or a balsamic reduction. Marinara sauce turns them into an Italian-inspired treat, while honey mustard provides sweet-tangy contrast to the savory garlic and cheese.
Why are my fries soggy instead of crispy?
Soggy fries usually result from overcrowding on the baking sheet or not drying the potatoes thoroughly after cutting (or soaking). Moisture is the enemy of crispiness, so make sure your potato strips are completely dry before coating with oil. Also, ensure your oven is fully preheated to 425°F—too low a temperature will steam rather than roast the potatoes.
Can I prepare these for a crowd?
Definitely! Simply multiply the recipe and use multiple baking sheets, rotating their positions in the oven halfway through for even cooking. You can also keep finished batches warm in a 200°F oven while you bake subsequent batches. Just note that the first batch will be the crispiest, so consider timing your cooking so all batches finish close to serving time.


