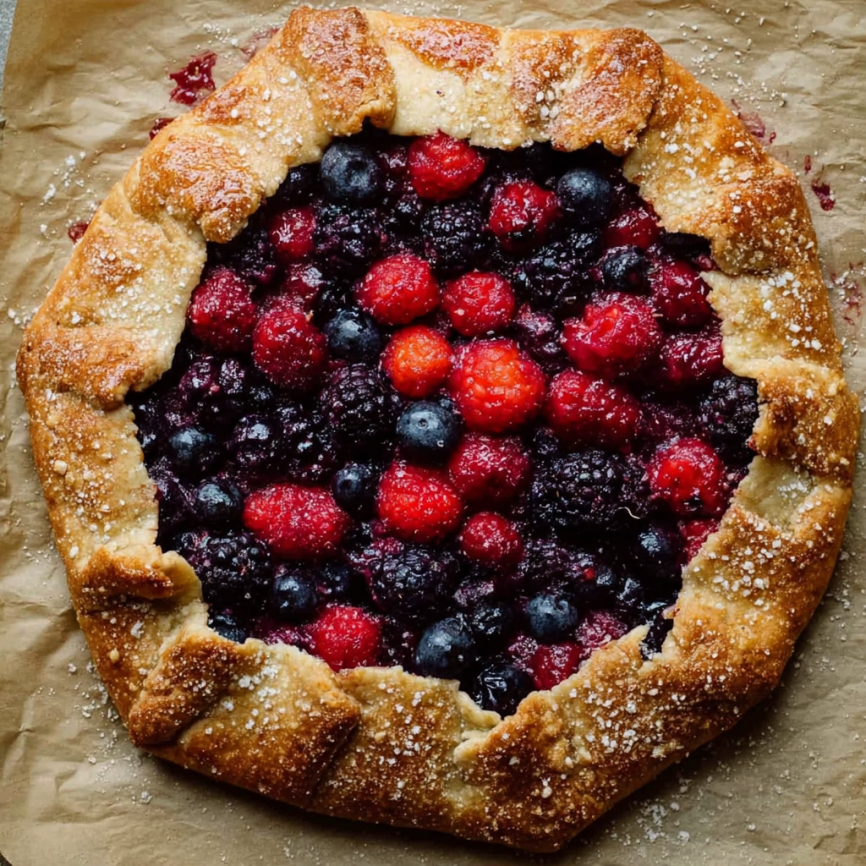
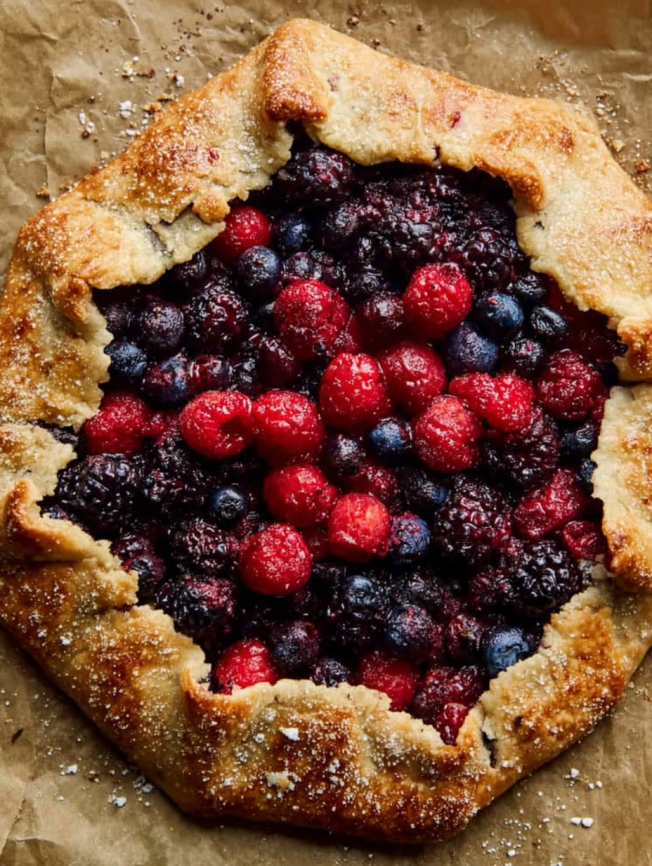
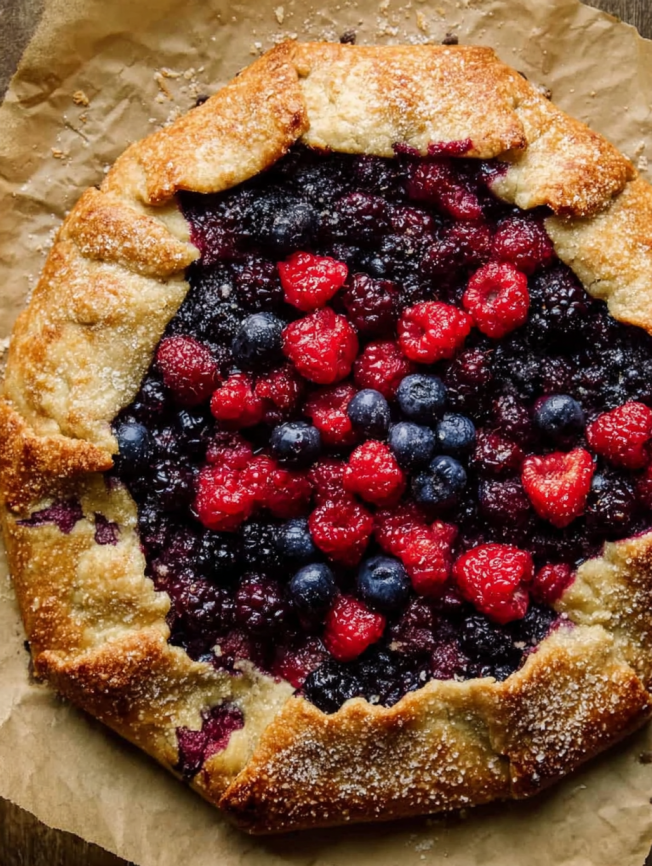
There’s something magical about the way a berry galette comes together in my kitchen during peak summer months. Unlike traditional pies that demand perfect crimping and pristine presentations, this rustic dessert embraces imperfection with open arms. The first time I made this particular version, I was experimenting with leftover buttermilk and cornmeal from a cornbread recipe. What emerged from my oven was a revelation – a golden, free-form tart with a uniquely textured crust that perfectly complemented the burst of juicy berries within.
Why You’ll Fall in Love with This Berry Galette
This recipe transforms simple pantry staples into something extraordinary. The buttermilk adds a subtle tang that balances the sweetness of summer berries, while cornmeal provides an unexpected textural element that elevates this dessert beyond ordinary. Moreover, galettes are incredibly forgiving – uneven edges and rustic appearances are not just acceptable, they’re celebrated.
Time-Saving Benefits Creating this galette requires significantly less effort than traditional pie-making. Furthermore, there’s no need for specialized pie pans or perfect lattice work. The free-form nature means you can roll the dough into any shape that fits your baking sheet.
Seasonal Flexibility Whether you’re working with fresh farmers market berries or frozen varieties from your freezer, this recipe adapts beautifully. Additionally, the cornmeal crust holds up remarkably well to juicy fruits without becoming soggy.
Essential Ingredients
Buttermilk Cornmeal Crust
- 1¼ cups (156g) all-purpose flour, spooned and leveled, plus extra for dusting
- ¼ cup (30g) fine cornmeal
- 3 tablespoons (38g) granulated sugar
- ¼ teaspoon salt
- ½ cup (113g) cold unsalted butter, cubed
- ¼ cup (60ml) cold buttermilk, plus additional if needed
Berry Filling Components
- 4 cups (600g) fresh or frozen mixed berries (do not thaw frozen berries)
- ¼ cup (50g) granulated sugar
- 1 tablespoon (7g) cornstarch
- 1 tablespoon (15ml) fresh lemon juice
Finishing Touches
- 1 large egg beaten with 1 tablespoon milk (for egg wash)
- Coarse sugar for sprinkling
Serving Suggestions: Vanilla ice cream, freshly whipped cream, or crème fraîche pair beautifully with warm galette slices.
Step-by-Step Instructions
Preparing the Crust
Begin by whisking flour, cornmeal, sugar, and salt together in a medium bowl. Using a pastry cutter or two forks, cut the cold butter into the mixture until it resembles coarse, pea-sized crumbs. This texture is crucial for achieving the perfect flaky consistency.
Next, add the buttermilk gradually while stirring until the flour becomes moistened and the dough begins to clump together. If the mixture appears too dry, incorporate one additional tablespoon of buttermilk. Transfer the crumbly dough onto a lightly floured work surface.
Shaping and Chilling Gently bring the dough together with your hands, then shape it into a ball before flattening into a 1-inch-thick disc. Wrap tightly in plastic wrap and refrigerate for at least 1 hour. This chilling period allows the gluten to relax while ensuring the butter stays cold for optimal flakiness.
Creating the Berry Filling
Just before the dough finishes chilling, combine berries, sugar, cornstarch, and lemon juice in a large bowl. Mix gently to avoid crushing delicate berries. Timing is essential here – avoid letting the filling sit too long, as berries will release excess juice that could make the crust soggy.
Assembly and Baking
Preheat your oven to 425°F (190°C) while lining a large baking sheet with parchment paper. On a lightly floured surface, roll the chilled dough into a 12-14 inch circle. Don’t worry about perfect roundness – rustic shapes add character.
Transfer the rolled dough to your prepared baking sheet. Spoon the berry mixture into the center, leaving a 2-3 inch border around the edges. Carefully fold the dough edges over the fruit, overlapping where necessary and pressing gently to seal.
Final Touches Brush the folded edges with egg wash, then sprinkle generously with coarse sugar for added texture and sparkle. Bake for 28-32 minutes until the filling bubbles actively and the crust achieves a beautiful golden brown color.
Serving Suggestions
Allow the galette to cool on the baking sheet for 10 minutes before slicing. This brief resting period helps the filling set while keeping the crust from becoming too crisp to cut cleanly.
Perfect Pairings Serve warm slices with vanilla ice cream for a classic combination. Alternatively, try dollops of freshly whipped cream or tangy crème fraîche. For breakfast enthusiasts, leftover galette pairs wonderfully with morning coffee or tea.
Creative Recipe Variations
Seasonal Fruit Combinations
Replace mixed berries with stone fruits like peaches and plums during late summer. During autumn months, try apple and pear combinations with a pinch of cinnamon. Winter citrus fruits like blood oranges create an unexpected but delightful variation.
Flavor Enhancements
Add 1 teaspoon of vanilla extract to the filling for deeper flavor complexity. Alternatively, incorporate fresh herbs like basil or thyme for sophisticated taste profiles. A tablespoon of balsamic vinegar can intensify berry flavors remarkably.
Dietary Modifications
Substitute vegan butter and plant-based milk for dairy-free versions. Gluten-free flour blends work well, though you may need to adjust liquid quantities slightly.
Make-Ahead Tips
Dough Preparation
The crust dough can be prepared up to 3 days in advance and stored in the refrigerator. For longer storage, wrap tightly and freeze for up to 3 months. Thaw overnight in the refrigerator before rolling and filling.
Assembly Strategy
While the dough can be made ahead, avoid assembling the galette more than a few hours before baking. Pre-assembled galettes may develop soggy bottoms as berries release their juices.
Important Notes
Temperature Control Maintaining cold ingredients is crucial for achieving the flakiest crust possible. Keep butter and buttermilk refrigerated until the moment you use them. Additionally, chilling the assembled galette for 15 minutes before baking can help prevent spreading.
Buttermilk Substitution If buttermilk isn’t available, create a substitute by adding ½ teaspoon fresh lemon juice or white vinegar to a measuring cup. Fill with cold whole milk to reach ¼ cup, then let sit for 5 minutes before using.
Berry Selection Tips Combine different berry types for optimal flavor complexity – try 2 cups blueberries with 1 cup each of raspberries and blackberries. Frozen berries work excellently and should never be thawed before use, as this prevents excess moisture release.
Frequently Asked Questions
Can I use a different type of milk instead of buttermilk? While buttermilk provides the best flavor and texture, you can substitute with the homemade version mentioned above. Regular milk will work but won’t provide the same tangy depth of flavor that makes this crust special.
Why is my galette crust tough instead of flaky? Tough crusts usually result from overworking the dough or using warm ingredients. Make sure your butter is cold and handle the dough minimally. Additionally, proper chilling time is essential for gluten relaxation.
How do I prevent a soggy bottom crust? Several factors contribute to crisp bottom crusts: using cold ingredients, not letting the berry filling sit too long before baking, and baking at the correct temperature. Furthermore, avoid overfilling the galette, which can cause juices to leak and create sogginess.
Can I make individual mini galettes instead? Absolutely! Divide the dough into 6-8 portions and create individual galettes. Reduce baking time to 18-22 minutes and adjust filling quantities accordingly. Mini galettes make excellent individual desserts for dinner parties.
How should I store leftover galette? Cover loosely with foil and store at room temperature for up to 2 days. For longer storage, refrigerate for up to 5 days. Reheat individual slices in a 350°F oven for 5-8 minutes to restore crispness before serving.


