Bringing Drive-Thru Magic to Your Kitchen
Remember the excitement of ordering your first Crunchwrap Supreme? That perfect combination of textures – the crispy tostada shell giving way to warm, seasoned beef, all wrapped in a perfectly grilled flour tortilla. For years, I thought this culinary masterpiece could only be achieved by the experts at Taco Bell. Then one busy Tuesday evening, with no time for a drive-thru run, I decided to recreate this beloved favorite at home.
What I discovered was revolutionary: not only could I make these at home, but they were actually better than the original! With complete control over ingredients and freshness, plus the satisfaction of creating something amazing from scratch, these homemade Crunchwrap Supremes quickly became our family’s new Tuesday tradition. Best of all, they come together in just 15 minutes with ingredients you likely already have on hand.
Why This Homemade Version Will Blow Your Mind
Superior Quality and Freshness
Unlike their fast-food counterparts, these homemade versions use fresh ingredients throughout. Additionally, you control the quality of your ground beef, ensuring it’s perfectly seasoned and cooked to your preference.
Unbeatable Convenience
Ready in just 15 minutes from start to finish, these Crunchwraps actually come together faster than a drive-thru trip. Moreover, you can make six at once, feeding the whole family simultaneously rather than waiting for individual orders.
Complete Customization Control
Tailor each Crunchwrap to individual preferences – make some vegetarian, adjust spice levels, or add extra cheese for the cheese lovers. Furthermore, you can accommodate dietary restrictions easily with simple ingredient swaps.
Family-Friendly Fun Activity
This recipe transforms dinner prep into an engaging family activity. Children love the assembly-line approach, and since everything gets wrapped up inside, there’s no pressure for perfect presentation.
Budget-Conscious Excellence
Create six restaurant-quality meals for a fraction of the cost of takeout. Additionally, you’ll likely have leftover ingredients for future meals or other Mexican-inspired dishes.
Essential Ingredients
For the Hearty Filling
- 1 lb. ground beef – Choose 80/20 for the perfect balance of flavor and lean protein
- 1 packet taco seasoning – Store-bought saves time, but homemade works beautifully too
- 1 cup nacho cheese sauce – The creamy component that ties everything together
Building the Perfect Layers
- 6 burrito-size flour tortillas – These form the outer wrapper
- 6 fajita-size flour tortillas – Smart sizing trick that eliminates waste
- 6 tostada shells – The crucial crunch factor
- 2 cups chopped lettuce – Fresh iceberg provides the best texture
- 1 cup diced tomatoes – Fresh is always best, but well-drained canned works in a pinch
- 1 cup sour cream – Full-fat version gives the richest results
- 1½ cups shredded Mexican cheese blend – The final melty layer
Step-by-Step Assembly Guide
Preparing Your Foundation
Begin by heating a large sauté pan over medium heat, then add the ground beef. Using a spatula, crumble the meat as it cooks, ensuring even browning throughout. Once the beef is completely cooked through, drain any excess fat.
Seasoning for Maximum Flavor
Add the taco seasoning packet along with the recommended amount of water according to package directions. Stir thoroughly until the seasoning is evenly distributed and the mixture is well combined. Allow the flavors to meld while you prepare your assembly station.
Setting Up for Success
Organize all remaining ingredients within easy reach – this assembly process moves quickly once you start. Additionally, trim your fajita-size tortillas to approximately match the diameter of your tostada shells, creating perfect-fitting top layers.
The Art of Assembly
Place a large burrito tortilla flat on your work surface. Start with a generous portion of seasoned taco meat, followed by a drizzle of warm nacho cheese sauce. Next, spread sour cream across one side of a tostada shell and place it sour cream-side up on the cheese.
Layering for Perfection
Top the tostada with fresh lettuce, diced tomatoes, and a generous sprinkle of shredded cheese. Crown everything with a fajita-size tortilla, creating your top seal.
The Folding Technique
Here’s where the magic happens: starting at one edge, fold the large tortilla over the smaller one, pleating as you work your way around the circumference. Continue folding and pleating until you’ve created a sealed, compact package with the seam side on the bottom.
Achieving the Perfect Golden Crust
Pan Preparation
Clean your sauté pan and return it to medium heat. Alternatively, use a cast iron griddle for cooking multiple Crunchwraps simultaneously – perfect when feeding a crowd.
The Critical First Side
Place each Crunchwrap seam-side down in the heated pan. This positioning ensures the seam stays sealed during cooking. Cook for 2-3 minutes without moving, allowing a beautiful golden-brown crust to form.
The Perfect Flip
Carefully flip each Crunchwrap using a wide spatula, then cook the second side for another 2-3 minutes until equally golden and crispy. The finished product should be beautifully browned on both sides with a satisfying crunch.
Creative Serving Suggestions
Classic Drive-Thru Style
Serve immediately with small bowls of your favorite salsa, additional sour cream, and warm cheese dip for those who want extra indulgence. Don’t forget the napkins – these are deliciously messy!
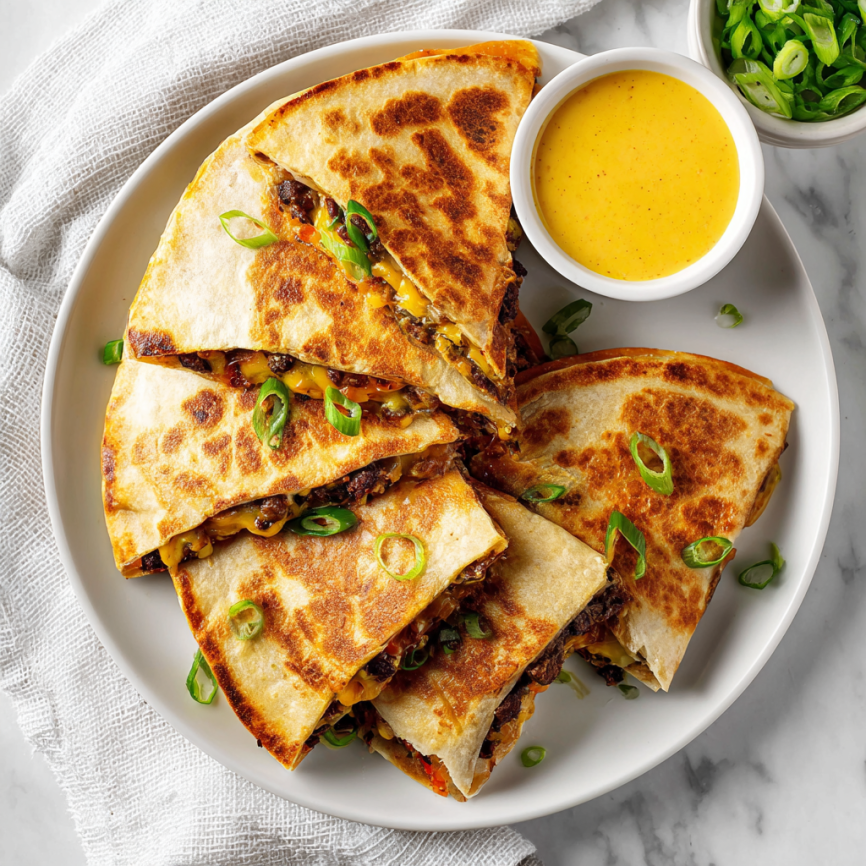
Elevated Dinner Presentation
Cut each Crunchwrap in half diagonally to showcase the beautiful layers, then arrange on plates with colorful Mexican rice and refried beans for a complete meal.
Party Platter Perfection
Create a Crunchwrap bar with various fillings and toppings, allowing guests to customize their own before you grill them to perfection. This interactive approach is perfect for casual entertaining.
Delicious Recipe Variations
Vegetarian Powerhouse
Replace the ground beef with seasoned black beans or refried beans for a protein-rich vegetarian version. Alternatively, use seasoned lentils or crumbled extra-firm tofu for different texture profiles.
Chicken Lovers’ Dream
Substitute rotisserie chicken for the ground beef – simply shred and season with taco spices. This variation works particularly well with leftover chicken from previous meals.
Spice It Up Options
Add diced jalapeños, hot sauce, or pepper jack cheese for heat lovers. Conversely, use mild cheese and omit spicy elements for sensitive palates.
Breakfast Crunchwrap Twist
Transform this into a breakfast favorite using scrambled eggs, breakfast sausage, hash browns, and cheese. Perfect for weekend brunch or meal prep options.
Make-Ahead Strategies
Meal Prep Excellence
Cook and season the ground beef up to 3 days in advance, storing it covered in the refrigerator. Similarly, prep all fresh vegetables and store them separately in airtight containers.
Freezer-Friendly Options
Assemble complete Crunchwraps and freeze individually wrapped in plastic wrap. Cook directly from frozen, adding 2-3 additional minutes per side to ensure thorough heating.
Assembly Line Efficiency
Set up all ingredients buffet-style and involve the whole family in assembly. This approach makes the process faster and more enjoyable while teaching valuable cooking skills.
Professional Tips and Techniques
Tortilla Size Strategy
Using fajita-size tortillas as toppers eliminates waste and provides better proportions than cutting down larger tortillas. Save leftover tortillas for quesadillas or fajitas later in the week.
Temperature Control Mastery
Medium heat is crucial – too hot and the outside burns before the inside heats through. Conversely, too low heat won’t achieve that signature crispy exterior.
Seam Placement Importance
Always place the seam side down first when cooking. This technique uses the heat and weight to help seal the Crunchwrap, preventing unwrapping during the cooking process.
Equipment Recommendations
Essential Tools
A large sauté pan works perfectly for individual cooking, while a cast iron griddle allows you to cook multiple Crunchwraps simultaneously. Additionally, a wide spatula makes flipping much easier and safer.
Nice-to-Have Additions
A pancake griddle expands your capacity for large families or entertaining. Furthermore, small prep bowls help organize ingredients for efficient assembly.
Frequently Asked Questions
Can I make these ahead of time and reheat them? While best served immediately, you can reheat leftover Crunchwraps in a 350°F oven for 5-7 minutes or in a skillet over medium-low heat. However, the tostada shell may lose some crispness upon reheating.
What’s the best way to prevent the Crunchwrap from falling apart? Ensure your seam is on the bottom when cooking and avoid overfilling. Additionally, make sure your pan is properly heated before adding the Crunchwrap to create an immediate seal.
Can I use corn tortillas instead of flour tortillas? Flour tortillas work best because they’re more pliable for folding and sealing. Corn tortillas tend to crack when folded and don’t create the same sealed effect.
How do I know when the ground beef is properly seasoned? After adding the taco seasoning and water, simmer until most liquid has evaporated and the mixture coats the meat evenly. Taste and adjust seasoning as needed – don’t be afraid to add extra salt.
What if I don’t have nacho cheese sauce? You can make a quick version by melting shredded cheese with a splash of milk, or substitute with regular shredded cheese for a different but still delicious result.
Can I make these gluten-free? Use gluten-free flour tortillas and ensure your taco seasoning doesn’t contain wheat-based fillers. Always check labels to verify gluten-free status of all ingredients.
How do I get kids involved safely? Children can help with layering ingredients, spreading sour cream, and sprinkling cheese. Save the folding technique and cooking for adults, as these steps require more skill and involve hot surfaces.
What’s the secret to getting restaurant-quality results at home? Don’t skimp on the browning time – that golden crust is what makes these special. Additionally, have all ingredients at room temperature for easier assembly and more even cooking.
Recipe yields 6 servings | Prep time: 10 minutes | Cook time: 5 minutes | Total time: 15 minutes
Nutrition per serving: 624 calories, 37.2g protein, 53.6g carbohydrates, 29g fat, 1.6g fiber


