Three years ago, I entered a Christmas cookie exchange with over twenty competitors, feeling both excited and terrified. I’d stayed up late perfecting these Biscoff Cookie Butter White Chocolate Chip Cookies, second-guessing whether they were special enough. When the votes were tallied, mine won first place by a landslide. My husband couldn’t stop grinning, and I couldn’t stop handing out copies of the recipe. Since that night, these cookies have become my secret weapon for impressing friends, neighbors, and anyone lucky enough to receive a batch.
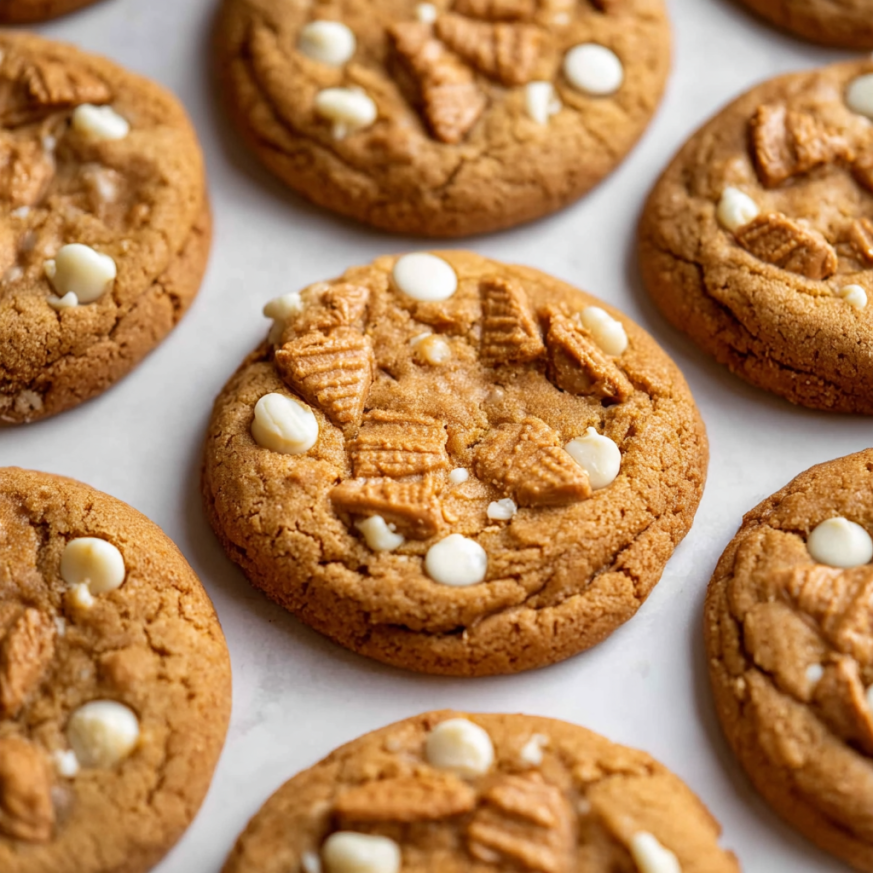
What makes these cookies truly remarkable is the triple dose of Biscoff goodness—creamy cookie butter in the dough, finely crushed cookie crumbs mixed throughout, and chunky cookie pieces for texture. The white chocolate chips add pockets of sweetness that balance the warm, spiced Biscoff flavor perfectly. Best of all, they stay soft and thick without requiring any dough chilling time.
Why These Cookies Will Become Your Go-To Recipe
These award-winning cookies deliver everything you want in a homemade treat. First and foremost, they’re incredibly easy to make despite tasting like they came from an upscale bakery. Unlike finicky cookie recipes that require hours of chilling or precise temperature control, these come together quickly and bake in under 10 minutes.
The texture is absolutely perfect—crispy edges give way to soft, chewy centers loaded with melty white chocolate and crunchy Biscoff pieces. Each bite offers multiple textures and flavors, making these cookies far more interesting than your standard chocolate chip variety.
A Cookie That Impresses Every Time
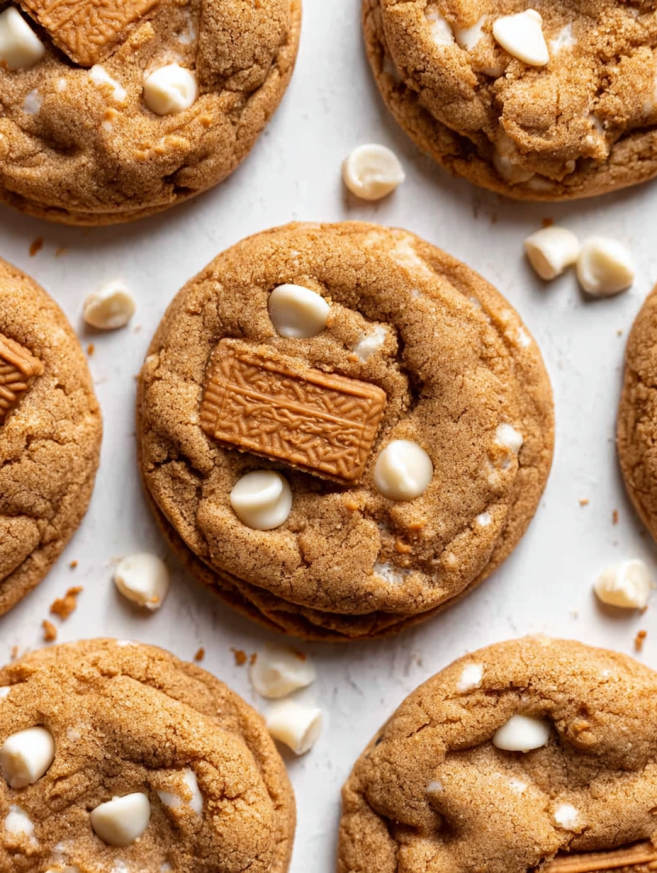
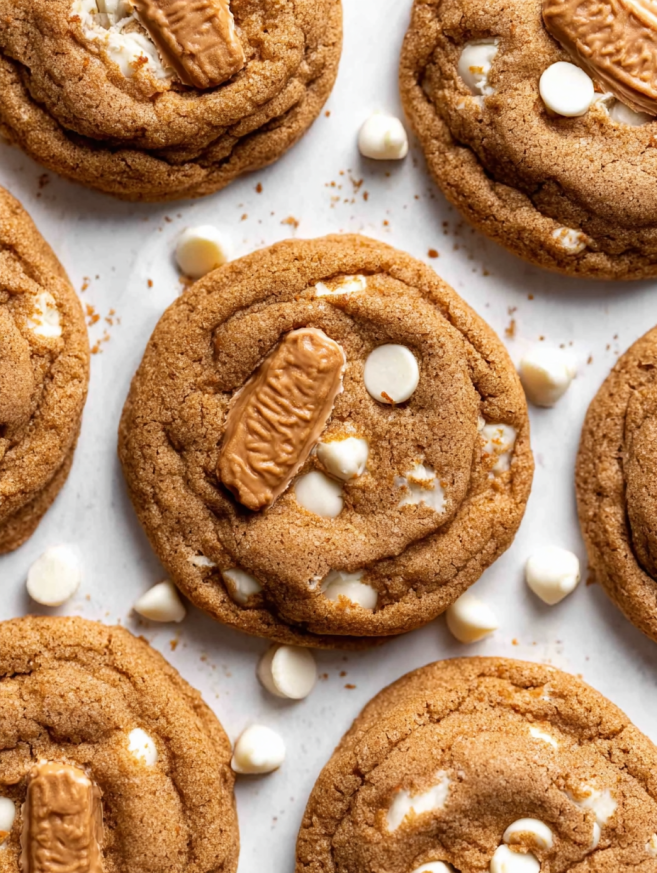
Beyond their incredible taste, these cookies look stunning. The half Biscoff cookie pressed on top creates a professional, bakery-style presentation that makes people think you spent hours decorating. Meanwhile, the golden-brown color and visible cookie chunks make them irresistible before anyone even takes a bite.
Additionally, Biscoff cookie butter has become a beloved ingredient that people recognize and adore. When you mention these cookies contain cookie butter, eyes light up with excitement. The nostalgic, caramelized flavor of Biscoff cookies resonates with anyone who’s enjoyed them on an international flight or discovered them at the grocery store.
Essential Equipment
You’ll need a few basic tools to make these cookies shine. A stand mixer makes creaming the butter and sugar effortless, though a hand mixer works perfectly fine too. Two baking sheets and parchment paper or silicone baking mats prevent sticking and ensure even browning.
A food processor or blender comes in handy for crushing the Biscoff cookies into fine crumbs. If you don’t have either, place the cookies in a ziplock bag and crush them with a rolling pin. A large ¼-cup cookie scoop creates perfectly uniform cookies that bake evenly, though two tablespoons work as a substitute.
Ingredients You’ll Need
Cookie Base
- 32 Biscoff cookies, divided – The star ingredient in three different forms
- 1 cup (227g) salted butter, cold and cubed – Creates rich, tender cookies
- 1 cup (200g) light brown sugar, packed – Adds moisture and molasses flavor
- ½ cup (100g) granulated sugar – Balances sweetness and texture
- 2 large eggs – Binds everything together
- 2 teaspoons vanilla extract – Enhances all the other flavors
- 1 cup (250g) Biscoff cookie butter – Plus extra for stuffing if desired
Dry Ingredients
- 2¾ cups (387g) all-purpose flour, scooped and leveled – The foundation of the dough
- 2 teaspoons cornstarch – Keeps cookies soft and tender
- 1 teaspoon baking soda – Helps with spreading and browning
- ½ teaspoon baking powder – Adds extra lift
- ½ teaspoon salt – Balances sweetness
Mix-Ins and Toppings
- 1½ cups white chocolate chips – Plus extra for decorating
- Extra Biscoff cookie butter for stuffing – Optional but highly recommended
The combination of ingredients creates a complex flavor profile that goes beyond typical cookie recipes. Using both brown and granulated sugar ensures the perfect balance of chewiness and crispness, while the cornstarch creates that signature soft texture.
Step-by-Step Instructions
Preparing Your Workspace
Begin by preheating your oven to 375°F. This temperature is crucial for achieving those perfectly golden edges while keeping the centers soft. Line two baking sheets with parchment paper or silicone baking mats, which prevents sticking and makes cleanup incredibly easy.
Now comes the fun part—preparing your Biscoff cookies in three different ways. Take 16 cookies and pulse them in your food processor or blender until they become fine crumbs, measuring about 1 cup. These crumbs will get mixed into the dough, adding flavor throughout.
Next, take 8 cookies and roughly break them into chunks with your hands. These larger pieces create pockets of concentrated Biscoff flavor and add wonderful texture. Set the remaining 8 cookies aside completely—you’ll use half of each cookie to decorate the tops later.
Creaming the Butter and Sugar
In your stand mixer bowl fitted with the paddle attachment, combine the cold cubed butter with both sugars. Beat on medium-high speed for 3-4 minutes until the mixture becomes light, fluffy, and pale in color. This creaming process incorporates air into the dough, creating a lighter texture in your finished cookies.
Don’t rush this step—proper creaming makes a significant difference in the final result. The mixture should look noticeably lighter in color and have increased in volume. Small sugar granules should be barely visible when you rub the mixture between your fingers.
Adding the Wet Ingredients
Add the eggs and vanilla extract to your creamed butter mixture. Beat again on medium speed, stopping halfway through to scrape down the bottom and sides of the bowl with a spatula. This ensures everything incorporates evenly and prevents lumps of butter from hiding at the bottom.
Once the eggs are fully incorporated, add the Biscoff cookie butter. Mix on medium speed until the cookie butter is completely combined and the mixture looks smooth and uniform. The dough will take on a beautiful caramel color at this stage, hinting at the amazing flavor to come.
Incorporating the Dry Ingredients
Add all your dry ingredients at once—the flour, reserved cup of finely crushed Biscoff crumbs, cornstarch, baking soda, baking powder, and salt. Mix on medium-low speed just until everything comes together and no dry streaks remain visible.
Resist the temptation to overmix at this stage. Stop the mixer as soon as the flour disappears into the dough. Overmixing develops too much gluten, resulting in tough, cakey cookies instead of tender, chewy ones. If needed, finish mixing by hand with a sturdy spatula, using a folding motion to incorporate any remaining flour pockets.
Adding the Mix-Ins
Fold in the reserved broken-up Biscoff cookie chunks and white chocolate chips using a spatula or wooden spoon. Distribute them evenly throughout the dough so every cookie gets a fair share of goodies. The dough will be thick and loaded with mix-ins—this is exactly what you want.
At this point, your dough is ready to bake immediately. Unlike many cookie recipes, these don’t require chilling, making them perfect for satisfying sudden cookie cravings.
Scooping and Shaping
Use your large ¼-cup cookie scoop to portion out evenly sized balls of dough. For the most professional-looking cookies, gently roll each scooped portion between your palms to create perfectly round balls. This extra step takes only seconds but creates uniformly shaped cookies that bake evenly.
Space the cookie dough balls a few inches apart on your prepared baking sheets—they’ll spread during baking, so give them room. You’ll likely need to bake these in batches unless you have multiple ovens. Keep the remaining dough at room temperature while the first batch bakes.
Baking to Perfection
Bake the cookies for 8-10 minutes, watching them carefully toward the end. The edges should be set and beginning to turn golden brown, while the centers remain slightly underbaked and puffy. This is the secret to soft, chewy cookies—pulling them from the oven when they still look slightly underdone.
The cookies will continue baking on the hot sheet pan after you remove them from the oven, so resist the urge to leave them in “just one more minute.” Trust the timing, even if they seem softer than you expect.
The Finishing Touch
Immediately after removing the cookies from the oven, press half of one reserved Biscoff cookie into the top of each cookie while they’re still hot. The warmth helps the cookie piece adhere perfectly. Add a few extra white chocolate chips around the Biscoff cookie for an extra-indulgent look.
Let the cookies cool on the baking sheets for 10 minutes. During this time, they’ll continue to set up while staying soft in the middle. After 10 minutes, transfer them to a wire rack to finish cooling completely, though I won’t judge if you sneak one warm cookie before they’re fully cool.
Creating the Stuffed Version
The stuffed version of these cookies took first place at my cookie exchange, and I completely understand why. They’re absolutely phenomenal. After scooping each portion of dough, break it in half. Use your thumb or the back of a tablespoon to create a small cavity in each half.
Dollop about 2 teaspoons of Biscoff cookie butter into the cavity of one half, then top with the other half. Carefully roll the dough into a ball, sealing the edges completely so the cookie butter doesn’t leak out during baking. The outside should look smooth with no visible seams.
These stuffed cookies may spread slightly more than the regular version. If this happens, use the backs of two spoons to gently nudge the edges into a rounder shape immediately after removing them from the oven. Work quickly while they’re still hot and malleable.
Serving Suggestions
These cookies taste amazing at any temperature. Serve them warm for maximum gooeyness, with the white chocolate chips still slightly melty. Room temperature cookies have a firmer texture that’s perfect for packing in lunch boxes or gifting.
Pair them with a cold glass of milk, hot coffee, or chai tea. The spiced Biscoff flavor complements warm beverages beautifully. For dessert, serve them alongside vanilla ice cream or use them to make ice cream sandwiches that’ll blow people’s minds.
Presentation Ideas
Stack these cookies on a simple white plate to showcase their beautiful golden color and decorative tops. For gift-giving, arrange them in a clear cellophane bag tied with ribbon so the Biscoff cookie decoration shows through. They also look stunning arranged in a cookie tin lined with parchment paper.
If you’re serving these at a party or cookie exchange, consider printing small labels that say “Award-Winning Biscoff Cookies” to generate excitement. People love knowing they’re trying a prize-winning recipe.
Creative Variations
Drizzled Cookie Butter Version
Instead of pressing a half Biscoff cookie on top, warm extra cookie butter in the microwave for 30 seconds until it’s pourable. Transfer it to a ziplock bag, snip off a corner, and drizzle it over the cooled cookies in a zigzag pattern. This creates a beautiful presentation and adds even more Biscoff flavor.
Crunchy Cookie Butter Twist
Swap the creamy Biscoff cookie butter for the crunchy version to add even more texture. The cookie pieces in the crunchy spread provide extra crunch that some people prefer. The flavor remains the same, but the texture becomes more complex.
Dark Chocolate Chip Option
Replace the white chocolate chips with dark or semi-sweet chocolate chips for a less sweet variation. Dark chocolate provides a sophisticated contrast to the sweet Biscoff flavor. You could also use a combination of white and dark chocolate for the best of both worlds.
Mini Cookie Version
Use a smaller cookie scoop (about 2 tablespoons) to make mini versions perfect for parties or cookie platters. Reduce the baking time to 6-8 minutes and use quarter pieces of Biscoff cookies for decorating instead of halves.
Biscoff Sandwich Cookies
Bake the cookies without the decorative topping, let them cool completely, then sandwich two cookies together with a generous layer of Biscoff cookie butter. Roll the edges in crushed Biscoff cookies for an extra-special treat.
Make-Ahead and Storage Tips
These cookies store beautifully, making them perfect for baking ahead. Keep them in an airtight container at room temperature for 3-4 days. They’ll maintain their soft texture throughout this time, though they taste best within the first two days.
For longer storage, freeze the baked cookies for up to 2 months. Place them in a single layer in an airtight container with parchment paper between layers to prevent sticking. Thaw at room temperature for about 30 minutes before serving. If you prefer warm cookies, pop them in the microwave for 10-15 seconds after thawing.
Freezing Cookie Dough
The unbaked cookie dough freezes exceptionally well, giving you fresh-baked cookies whenever the craving strikes. After scooping the dough into individual balls, place them on a parchment-lined baking sheet and freeze for 1-2 hours until completely solid.
Once frozen hard, transfer the cookie dough balls to a large freezer-safe ziplock bag, removing as much air as possible. Label the bag with the date and baking instructions. The dough will keep for up to 2 months in the freezer.
Bake frozen cookie dough balls directly from the freezer without thawing. Simply add 1-2 extra minutes to your baking time and watch them carefully toward the end. This method means you can enjoy fresh, warm cookies anytime with almost no preparation.
Important Notes for Success
Use Cold Butter: Starting with cold, cubed butter creates the best texture. Room temperature butter works fine too, but cold butter produces slightly thicker cookies with better structure.
Don’t Overbake: These cookies continue baking on the hot pan after leaving the oven. Pull them when they look slightly underdone in the center—this is the secret to keeping them soft and chewy.
Measure Flour Correctly: Scoop your flour into the measuring cup and level it off with a knife. Don’t pack it down or tap the cup. Too much flour creates dry, cakey cookies instead of soft, chewy ones.
Space Cookies Properly: Give these cookies plenty of room to spread—at least 2-3 inches between each ball of dough. Crowding causes them to bake into each other and prevents proper spreading.
Work Quickly with Decorations: Press the Biscoff cookie halves and extra chocolate chips onto the cookies immediately after removing them from the oven. As the cookies cool, their surface hardens and won’t hold the decorations as well.
Customize the Sweetness: If you find these cookies too sweet, reduce the granulated sugar by 2 tablespoons. The brown sugar provides enough sweetness and moisture, so the cookies will still taste amazing.
Frequently Asked Questions
Can I make these without a stand mixer?
Absolutely! A hand mixer works perfectly for this recipe. You can even make these cookies by hand using a sturdy wooden spoon, though the creaming process will require more arm strength and take a bit longer.
What if I can’t find Biscoff cookie butter?
Biscoff cookie butter (also called Speculoos spread) is widely available in most grocery stores near the peanut butter. If you truly can’t find it, you could substitute another cookie butter or even peanut butter, though the flavor will be quite different. The Biscoff flavor is what makes these special, so I recommend seeking it out.
My cookies spread too much. What happened?
Excessive spreading usually results from butter that’s too warm, not enough flour, or an oven temperature that’s too low. Make sure you measure your flour by spooning and leveling, and verify your oven temperature with an oven thermometer. You can also try chilling the dough for 30 minutes before baking if spreading remains an issue.
Can I use regular chocolate chips instead of white chocolate?
Yes, though the flavor profile will change significantly. White chocolate’s sweetness complements the Biscoff flavor beautifully, while dark or milk chocolate creates a richer, less sweet cookie. Try a combination of both for an interesting variation.
The cookie butter isn’t mixing in smoothly. Why?
Cookie butter sometimes separates in the jar, with oil rising to the top. Stir it thoroughly before measuring to reincorporate the oils. If it’s very thick and cold, warm it in the microwave for 10-15 seconds to make it easier to mix into the dough.
How do I prevent the stuffed cookies from leaking?
Make sure you seal the edges completely when forming the stuffed cookies. Roll them between your palms to create a smooth exterior with no visible seams. Don’t overstuff them—2 teaspoons of cookie butter is the maximum that will stay contained during baking.
Can I make these gluten-free?
You can try substituting a 1:1 gluten-free flour blend for the all-purpose flour. Results may vary depending on the brand you use. The texture might be slightly different, but they should still taste delicious.
Why do my cookies turn out cakey instead of chewy?
Cakey cookies usually result from too much flour, overbaking, or overmixing the dough after adding the flour. Make sure you measure flour correctly and mix just until combined. Also, pull the cookies from the oven when they still look slightly underdone in the center.
Can I add other mix-ins to these cookies?
Certainly! Chopped pecans or walnuts add a nice crunch, while toffee bits complement the caramelized Biscoff flavor. Just replace part of the white chocolate chips with your chosen mix-ins to keep the proportions balanced.
How do I get perfectly round cookies?
After scooping the dough, roll each portion gently between your palms to create a smooth ball. This extra step takes only seconds but results in uniformly shaped cookies. Also, make sure your dough balls are all the same size by using a cookie scoop.
Recipe Details:
- Prep Time: 15 minutes
- Cook Time: 8 minutes
- Total Time: 23 minutes
- Yield: 16-18 cookies
- Course: Dessert
- Cuisine: American
Why These Won First Place: The combination of creamy cookie butter, crushed Biscoff crumbs, chunky cookie pieces, and white chocolate creates an unforgettable flavor and texture experience. The soft, thick texture without chilling and the professional-looking presentation sealed the deal. Most importantly, these cookies deliver on taste in every single bite—there’s no disappointing center or bland spots. They’re consistently delicious from edge to edge.