I’ll never forget the first time I brought these brownie cheesecake bars to a potluck. People literally stopped mid-conversation when they saw them—three stunning layers of chocolate and cream cheese topped with crushed Oreos. After the first bite, someone asked if I’d spent hours making them. The truth? They’re surprisingly straightforward, built on a simple box mix foundation that nobody would ever guess. That’s the beauty of this recipe—it looks like you’ve mastered advanced pastry techniques when you’ve really just layered a few simple components.
These bars deliver everything you want in a show-stopping dessert: the fudgy richness of brownies, the tangy creaminess of cheesecake, and the cookies-and-cream appeal of Oreos, all finished with glossy chocolate ganache. Each layer brings something different to the party, creating a complex flavor and texture experience that keeps people coming back for “just one more piece.”
Total Time: 1 hour 15 minutes (plus chilling)
Yield: 16 bars
Course: Dessert
Keyword: Brownie
Servings: 16 bars
Why You’ll Love This Recipe
The combination of brownie and cheesecake is nothing short of genius. Brownies bring rich chocolate intensity and fudgy texture, while cheesecake adds tangy creaminess that cuts through all that chocolate richness. Together, they create perfect balance—neither too heavy nor too light, neither too sweet nor too tart.
Using a boxed brownie mix as the base isn’t cheating—it’s smart baking. Box mixes have been perfected over decades of testing and consistently deliver reliable results. Building on that reliable foundation with homemade cheesecake and ganache gives you the best of both worlds: convenience where it matters and homemade quality where it shows.
Visual Impact
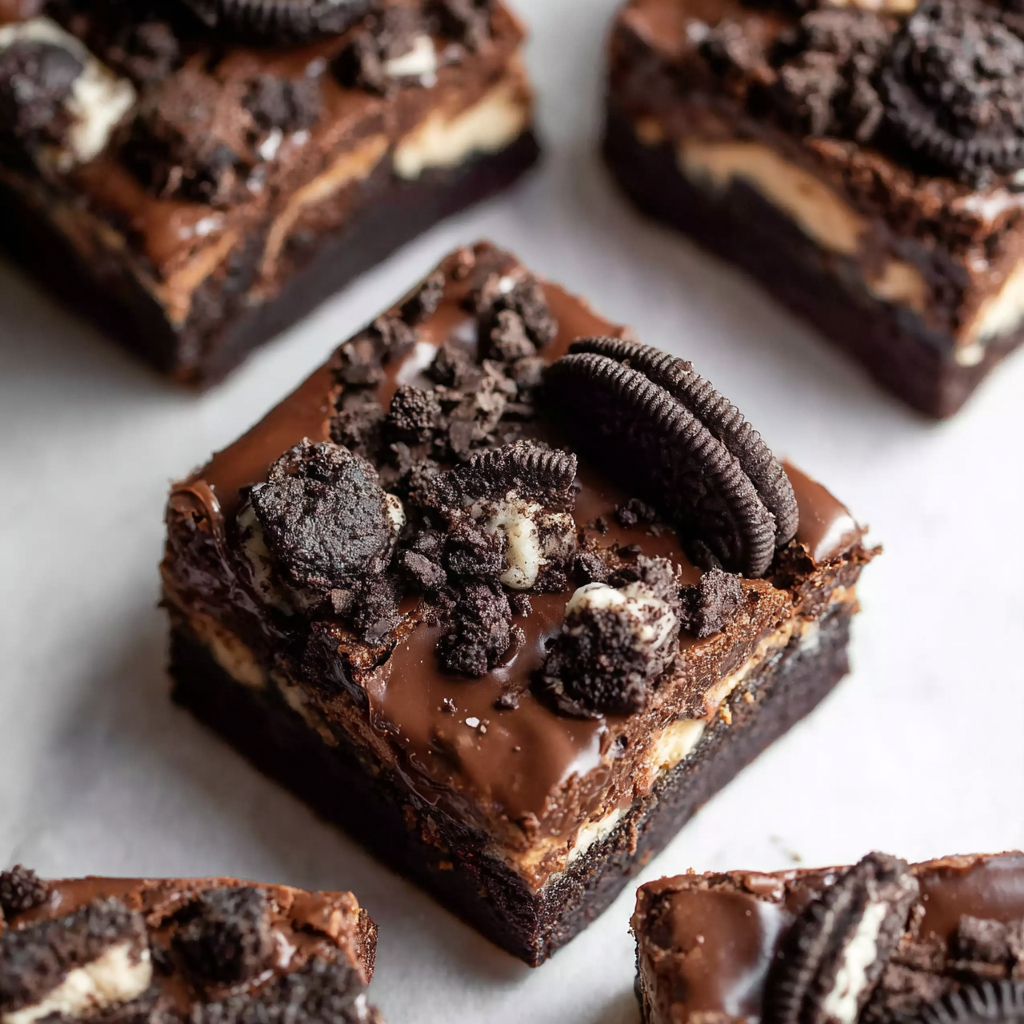
These bars are stunning when you cut into them. The distinct layers—dark brownie base, creamy white cheesecake center, glossy chocolate ganache top studded with Oreo pieces—create a professional appearance that looks like it came from an upscale bakery. They photograph beautifully, making them perfect for food blogs, social media, or any time presentation matters.
The Oreos serve double duty: they add texture and flavor to the brownie layer, then provide a decorative, crunchy topping that tells everyone exactly what flavor adventure awaits them.
Perfect for Every Occasion
Birthday parties, holiday gatherings, bake sales, teacher gifts—these bars work for everything. They travel well, cut into neat portions, and appeal to almost everyone. The combination of familiar flavors (chocolate, cheesecake, Oreos) means even picky eaters tend to love them.
They’re also impressive enough for special occasions. Serve these at a dinner party, and guests will think you spent all day baking. Only you need to know how manageable they actually are to make.
Equipment You’ll Need
- 9×13-inch baking pan
- Parchment paper or cooking spray
- 2 large mixing bowls
- Electric hand mixer or stand mixer
- Rubber spatula
- Whisk
- Small saucepan or microwave-safe bowl
- Sharp knife for cutting
Ingredients
For the Brownie Layer
- 1 box brownie mix (for 9×13 pan)
- Ingredients called for on brownie mix box (typically eggs, oil, water)
- 11 Oreos, roughly chopped (half of 22 total)
For the Cheesecake Layer
- 8 oz (225g) cream cheese, softened
- 1 large egg
- 1 teaspoon vanilla extract
- ¼ cup (50g) granulated sugar
- 2 tablespoons sour cream
For the Ganache Topping
- ¼ cup (45g) chocolate chips
- ¼ cup (60ml) heavy whipping cream
- 11 Oreos, roughly chopped (remaining half)
Step-by-Step Instructions
Preparing Your Workspace
Preheat your oven to 350°F (175°C). This temperature works for most brownie mixes, but check your specific box just to be sure. Consistent oven temperature is crucial for even baking, especially with multiple layers.
Line your 9×13-inch baking pan with parchment paper, leaving some overhang on two opposite sides. This creates handles that make lifting the finished bars out of the pan effortless. Alternatively, spray the pan generously with cooking spray, making sure to get into all the corners.
Gather all your ingredients and measure everything out before you start. This mise en place approach prevents scrambling mid-recipe and ensures you don’t forget anything crucial.
Creating the Brownie Base
Prepare your brownie mix according to the package directions. Different brands have slightly different requirements, but most call for eggs, oil, and water. Mix until just combined—don’t overbeat, as this can make brownies tough rather than fudgy.
Pour the brownie batter into your prepared pan, spreading it evenly with a spatula. The batter should reach all corners and be relatively level, though perfect smoothness isn’t necessary since you’ll be covering it with cheesecake.
Roughly chop 11 Oreos—you want pieces ranging from quarter-sized to smaller. Don’t pulverize them; visible chunks add textural interest. Press these chopped Oreos into the surface of the brownie batter, distributing them relatively evenly across the pan. They’ll sink slightly during baking, creating pockets of cookies-and-cream flavor throughout the base.
Partially Baking the Brownies
Slide the pan into your preheated oven and bake for about 15-20 minutes—significantly less than the full baking time listed on the box. You’re not fully baking these brownies yet; you’re just setting them enough to support the cheesecake layer.
Watch for these visual cues: the top should look set rather than wet and shiny, but still soft when you gently press it. The edges might just be starting to pull away from the pan. A toothpick inserted near the center will come out with wet batter—that’s exactly what you want at this stage.
Remove the pan from the oven and let it cool for about 10 minutes while you prepare the cheesecake mixture. The brownies will continue to set as they cool, and slight cooling prevents the cheesecake mixture from getting too warm when you add it.
Making the Cheesecake Layer
In a large bowl, beat the softened cream cheese with an electric mixer on medium speed for 1-2 minutes until it’s completely smooth with no lumps. Cream cheese must be truly soft—not just cool to the touch, but genuinely pliable. Cold cream cheese will create lumpy filling no matter how long you beat it.
Add the granulated sugar to the cream cheese and beat for another minute until well incorporated. The mixture should look lighter and fluffier than when you started. Add the egg and vanilla extract, beating until just combined—about 30 seconds. Don’t overmix once you add the egg, as this can create too much air that might crack during baking.
Finally, mix in the sour cream. Beat for just 15-20 seconds until the mixture is smooth and uniform. The sour cream adds tanginess and creates an ultra-creamy texture. If you see any lumps of cream cheese, beat a bit longer until perfectly smooth.
Assembling and Baking the Cheesecake Layer
Pour the cheesecake mixture over the partially baked brownie base. Use a spatula to spread it into an even layer, making sure it reaches all the edges and corners. The layer will be relatively thin—about ½ inch—but that’s perfect. Too much cheesecake would overwhelm the brownie base.
Return the pan to the 350°F oven and bake for 25-30 minutes. The cheesecake layer is done when the edges look set and firm while the center has just a slight jiggle when you gently shake the pan. Think of Jell-O that’s just set—that’s the amount of jiggle you want. Overbaking creates dry, cracked cheesecake.
The top might puff up slightly during baking, which is normal. It will settle as it cools. Don’t worry if you see a few small cracks—the ganache will cover everything.
Cooling Process
Remove the pan from the oven and place it on a wire cooling rack. Let the bars cool at room temperature for about 30 minutes. This gradual temperature change helps prevent cracking. Moving straight from hot oven to cold refrigerator can shock the cheesecake and cause cracks.
After the initial cooling, transfer the pan to the refrigerator and chill for at least 1 hour before adding the ganache. This ensures the cheesecake layer is firm enough to support the ganache without mixing together. If you’re not in a hurry, 2 hours is even better.
Making the Chocolate Ganache
In a small saucepan over low heat or in a microwave-safe bowl, combine the chocolate chips and heavy cream. If using the microwave, heat in 20-second intervals, stirring between each, until the chocolate is completely melted—usually 40-60 seconds total.
If using the stovetop, stir constantly over low heat until the chocolate melts and the mixture is smooth and glossy. Don’t rush this with high heat, as chocolate can seize or burn. Low and slow creates silky ganache.
Let the ganache cool for about 5 minutes after melting. If it’s too hot, it might melt the cheesecake layer. You want it warm and pourable but not piping hot. Stir it occasionally as it cools to maintain that smooth consistency.
Adding the Final Touches
Pour the ganache over the chilled cheesecake layer. Use a spatula to spread it evenly across the entire surface, working from the center outward. The ganache should flow relatively easily, creating a smooth, glossy top layer.
While the ganache is still soft, sprinkle the remaining chopped Oreos over the top. Distribute them evenly so every piece gets some cookie topping. Press them very gently into the ganache so they adhere—just enough to make them stick without pushing them down into the cheesecake layer.
Return the pan to the refrigerator and chill for at least 2 hours until the ganache is completely set. For the cleanest cuts and best texture, overnight chilling is ideal. The extended chill time allows all the layers to firm up completely and the flavors to meld together.
Cutting Clean Bars
When ready to serve, use the parchment paper handles to lift the entire block of bars out of the pan and onto a cutting board. This makes cutting much easier and cleaner than trying to cut directly in the pan.
For the cleanest cuts, dip a sharp knife in hot water, wipe it dry, and make one cut. Clean the knife, dip in hot water again, wipe dry, and make the next cut. This hot-knife method prevents dragging and creates bakery-perfect edges.
Cut the bars into 16 pieces by making 3 cuts lengthwise and 3 cuts crosswise, creating a 4×4 grid. You can make them larger or smaller depending on your preference and occasion.
Serving Suggestions
These rich, decadent bars are substantial on their own, but certain accompaniments and serving methods can enhance the experience.
Classic Presentation
Serve these bars chilled or at room temperature—both work beautifully. Chilled bars are firmer and easier to handle, making them perfect for outdoor events or buffet-style serving. Room temperature bars have a slightly softer, more luxurious texture that melts on your tongue.
Place each bar on a small dessert plate with a dollop of whipped cream on the side. The light, airy cream provides a refreshing contrast to the dense, rich bars. Fresh raspberries or strawberries add color and a tart note that cuts through the sweetness.
Dust the plate with cocoa powder or drizzle with additional chocolate or caramel sauce for an elegant, restaurant-style presentation. These small touches make individual servings feel special.
Coffee and Beverage Pairings
Strong coffee or espresso is the perfect companion to these rich bars. The slight bitterness of coffee balances the sweetness and enhances the chocolate flavors. For afternoon gatherings, hot chocolate creates a chocolate-lover’s dream pairing.
Cold milk is always a winner, especially for kids. The combination of milk and Oreos is classic for good reason. For adults, try them with dessert wine like port or a sweet Riesling, which complement the creamy cheesecake beautifully.
Party and Event Serving
For parties, arrange the bars on a tiered serving stand or decorative platter. Their beautiful layers make them naturally photogenic. Provide small dessert plates and forks so guests can eat comfortably.
These bars hold up well on buffet tables for several hours without melting or falling apart, making them ideal for events where desserts sit out. Just keep them in a cool environment and avoid direct sunlight.
Recipe Variations
Different Cookie Options
While Oreos are classic and delicious, you can substitute other cookies for different flavor profiles. Chocolate chip cookies create a homestyle twist, while peanut butter cookies make these into chocolate-peanut butter bars. Mint Oreos turn them into mint-chocolate treats perfect for the holidays.
Nutter Butter cookies transform these into peanut butter-chocolate bars, while Golden Oreos create a vanilla-chocolate version with a slightly sweeter profile. The possibilities are endless—just use cookies that complement chocolate.
Brownie Mix Alternatives
Any brownie mix designed for a 9×13 pan works here. Try dark chocolate brownie mix for more intense chocolate flavor, or milk chocolate for a sweeter, milder version. Some brands offer specialty flavors like peppermint or caramel that can add interesting dimensions.
For a truly homemade version, use your favorite from-scratch brownie recipe instead of a mix. Just ensure it yields enough batter for a 9×13 pan, and use the same partial-baking technique.
Cheesecake Flavor Variations
Add different extracts to the cheesecake layer for flavor variations. Almond extract creates a sophisticated flavor that pairs beautifully with chocolate. Peppermint extract makes these perfect for winter holidays. Coffee extract or 1 tablespoon of instant espresso powder enhances the chocolate notes.
Fold mini chocolate chips into the cheesecake mixture before spreading it over the brownies for extra chocolate throughout. Swirl in 2-3 tablespoons of caramel sauce or peanut butter for ribbons of additional flavor.
Ganache Alternatives
Use white chocolate for the ganache instead of dark chocolate to create visual contrast and a sweeter topping. Dark chocolate (60-70% cacao) creates a more sophisticated, less sweet version that adult chocolate lovers appreciate.
Add a tablespoon of liqueur to the ganache—Bailey’s, Kahlua, or Frangelico all work beautifully—for an adult twist. Just reduce the cream slightly to maintain the proper consistency.
Gluten-Free Option
Use a gluten-free brownie mix to make these bars gluten-free. Make sure all other ingredients (especially the Oreos) are also gluten-free—there are several good gluten-free sandwich cookie options on the market now that work perfectly in this recipe.
Make-Ahead Tips
These bars are actually better when made ahead, as the extended chilling time allows all the layers to set perfectly and the flavors to develop fully.
Advance Preparation
Make these bars up to two days before you need them. Complete all the steps including the ganache and Oreo topping, cover tightly with plastic wrap, and refrigerate. They actually improve after sitting for a day as the flavors meld together.
The brownie layer stays moist, the cheesecake firms up beautifully, and the ganache sets to perfect sliceable consistency. There’s no loss of quality—if anything, day-two bars taste even better than fresh ones.
Freezing Instructions
These bars freeze remarkably well for up to 2 months. Complete the recipe entirely, let the bars chill until firm, then cut them into individual pieces. Wrap each bar individually in plastic wrap, then place them all in a freezer-safe container or bag with parchment paper between layers.
Thaw individual bars in the refrigerator for about 4 hours or at room temperature for 1-2 hours. They maintain their texture beautifully—you’d never know they’d been frozen.
Component Preparation
If you want to break up the work, you can bake the brownie layer completely (with the Oreos pressed in), let it cool, wrap it tightly, and refrigerate for up to 2 days before adding the cheesecake layer. When ready, continue with the cheesecake layer and proceed as directed.
The cheesecake mixture can be prepared and refrigerated for up to 24 hours before using. Give it a quick stir before pouring over the brownie base. The ganache is best made fresh, as it only takes a few minutes anyway.
Storage Tips
Proper storage keeps these bars fresh and delicious while maintaining their beautiful layers and textures.
Refrigerator Storage
Store cut bars in an airtight container in the refrigerator for up to 5 days. Place parchment or wax paper between layers if stacking to prevent sticking. Cover tightly to prevent the bars from absorbing refrigerator odors or drying out.
If storing the uncut block, cover the pan tightly with plastic wrap or aluminum foil. The bars actually keep slightly better uncut, as there are fewer exposed surfaces to dry out.
Room Temperature Considerations
While these bars can sit at room temperature for serving (2-3 hours), they shouldn’t be stored at room temperature due to the cream cheese component. The cheesecake layer needs refrigeration for food safety. Take out only as many bars as you plan to serve within a couple of hours.
In cooler weather or air-conditioned spaces, the bars can stay out longer. In hot weather, keep them refrigerated until just before serving and return any uneaten portions to the refrigerator promptly.
Maintaining Quality
The ganache topping may develop slight condensation when bars are refrigerated then brought to room temperature. Simply blot gently with a paper towel if this happens. The Oreo pieces will soften slightly after a day or two in the fridge but remain perfectly delicious.
For the best texture, let refrigerated bars sit at room temperature for 10-15 minutes before serving. This takes the chill off just enough to bring out the full flavors and achieve that perfect creamy texture.
Notes
Cream cheese must be truly softened for smooth cheesecake filling. Leave it at room temperature for at least an hour before using, or cut it into small cubes to speed up the softening process. Never microwave cream cheese to soften it, as it melts unevenly and creates a grainy texture.
Choose a quality brownie mix for best results. The brownie layer is the foundation of these bars, so its quality matters. Look for mixes that produce fudgy rather than cake-like brownies—they create better texture and flavor contrast with the cheesecake.
Don’t skip the partial baking of the brownie layer. If you add the cheesecake mixture to completely raw brownie batter, the layers will mix together during baking rather than staying distinct. The partial bake sets the brownie just enough to support the cheesecake.
The bars must be completely chilled before cutting. Warm or barely-set bars will be messy to cut and won’t have clean layers. Plan your timing accordingly—these need several hours of chill time, ideally overnight.
When spreading the cheesecake mixture over the brownies, work gently to avoid mixing the two layers. Use a light hand and work from the center outward in smooth strokes.
FAQ
Can I use low-fat cream cheese?
While you can use reduced-fat cream cheese, I don’t recommend fat-free cream cheese. Low-fat cream cheese works reasonably well with slightly different texture—a bit less rich and creamy. Fat-free cream cheese has too much moisture and creates soupy, unstable filling that won’t set properly.
Why did my cheesecake layer crack?
Cracks usually result from overbaking or temperature shock. The cheesecake should still jiggle slightly in the center when you remove it from the oven. Cooling gradually at room temperature before refrigerating also helps prevent cracking. Good news: the ganache covers any cracks beautifully!
Can I make these without Oreos?
Absolutely! The Oreos add flavor and visual appeal but aren’t structurally necessary. For a plain version, omit them entirely. You can substitute other cookies, chopped nuts, toffee bits, or mini chocolate chips pressed into the brownie layer and sprinkled on top of the ganache.
My ganache is too thick. How do I fix it?
If your ganache is too thick to spread, warm it gently in the microwave for 10-15 seconds, stirring after heating. Add a teaspoon of cream if needed to thin it to spreading consistency. Ganache should be warm and flowing but not hot enough to melt the cheesecake layer.
Can I make these in a different size pan?
The recipe is designed for a 9×13 pan and won’t work well in significantly different sizes. An 8×8 or 9×9 pan will create very thick layers that need longer baking times and may not cook evenly. Larger pans will create layers that are too thin. Stick with 9×13 for best results.
Do I have to use sour cream in the cheesecake?
The sour cream adds tang and extra creaminess, but you can substitute Greek yogurt in the same amount. Plain yogurt works too, though it’s thinner so the filling will be slightly less thick. Don’t omit it entirely—it’s important for both flavor and texture.
How do I know when the cheesecake layer is done?
The edges should look set and firm, while the center should have just a slight jiggle—like Jell-O that’s just set. If it’s completely solid and doesn’t jiggle at all, it’s likely overbaked. Remember, it will continue setting as it cools and chills.
Can I double this recipe?
These bars are quite rich, so one batch serves a good-sized group. To double, simply make two separate pans rather than trying to fit everything in one larger pan. The layers won’t bake properly in a different configuration. You can bake both pans simultaneously on different oven racks, rotating halfway through.
Prep Time: 15 minutes
Cook Time: 1 hour (includes partial baking and final baking)
Chilling Time: 3+ hours (or overnight)
Total Time: 4+ hours
Yield: 16 bars
Course: Dessert
Keyword: Brownie, Cheesecake, Layered Dessert
Method: Baking
Cuisine: American
Nutrition (per bar – estimated):
- Serving Size: 1 bar (1/16 of recipe)
- Calories: 320kcal
- Carbohydrates: 38g
- Protein: 4g
- Fat: 17g
- Saturated Fat: 9g
- Cholesterol: 55mg
- Sodium: 240mg
- Fiber: 2g
- Sugar: 28g
Note: Nutrition information varies based on the specific brownie mix used. These are estimates based on typical box mixes and the added ingredients.