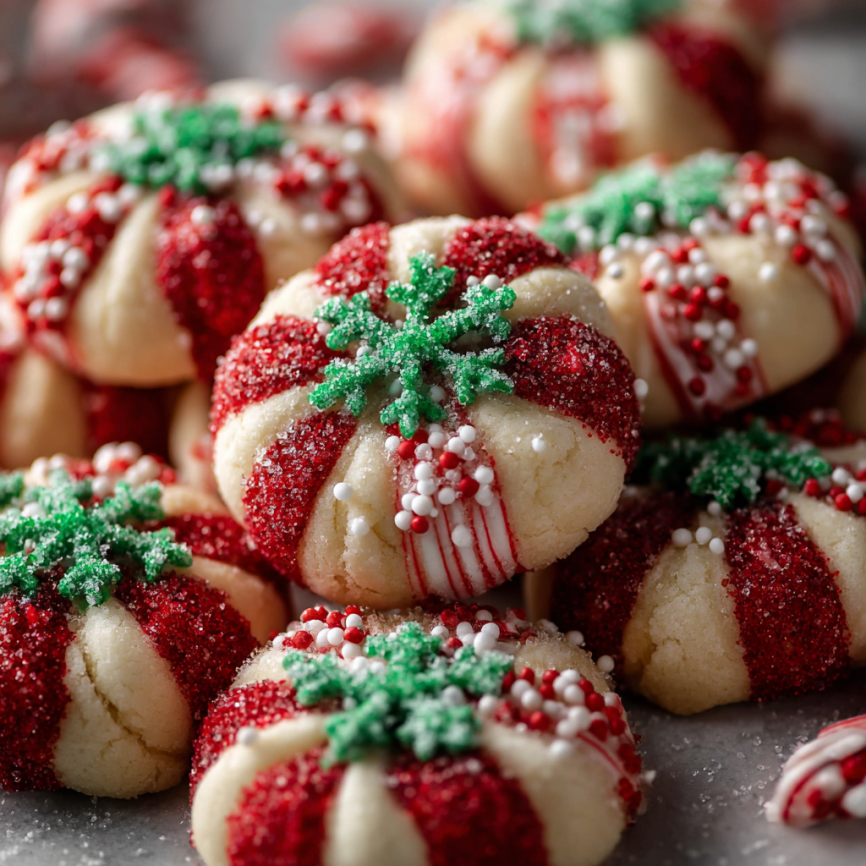
There’s something absolutely magical about the combination of soft sugar cookies and minty chocolate kisses that instantly transports me back to childhood Christmas mornings. These Candy Cane Kiss Cookies have become my signature holiday treat, and every year, friends and family eagerly await their appearance on my cookie platters. The first time I made these was during a particularly hectic December, searching for a recipe that looked impressive but wouldn’t keep me in the kitchen all day.
What started as a last-minute baking decision has now become one of my most requested recipes. Moreover, these cookies perfectly capture the essence of the holiday season with their festive appearance and delightful peppermint flavor.
Why You’ll Fall in Love with This Recipe
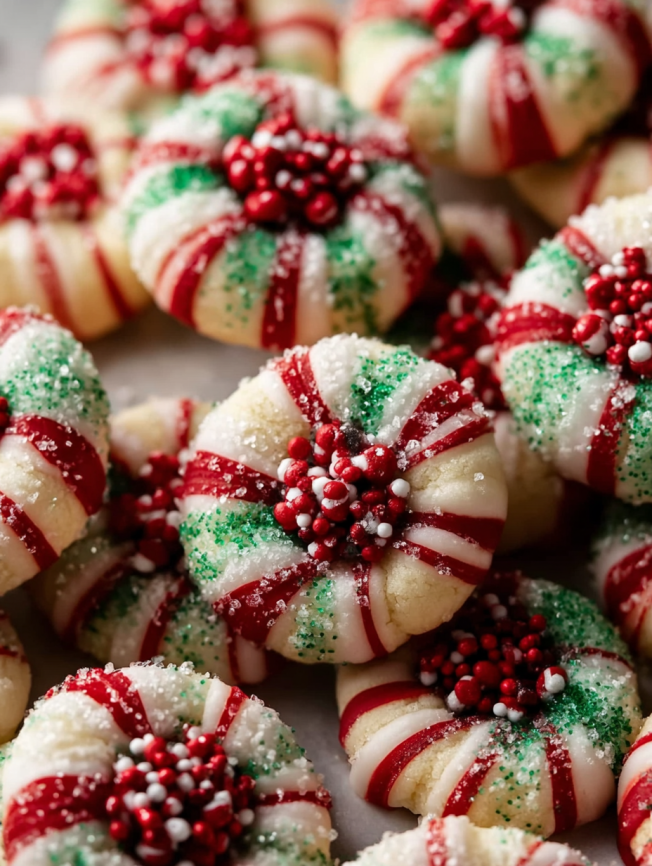
These cookies strike the perfect balance between simplicity and wow factor. First, they require no special decorating skills – the colorful sprinkles and chocolate kisses do all the visual work for you. Additionally, the texture is absolutely divine: soft and chewy with a delightful minty surprise in every bite.
Furthermore, this recipe is incredibly forgiving for bakers of all skill levels. The dough comes together quickly, and even if your cookie balls aren’t perfectly round, they’ll still taste amazing. Best of all, you can make the dough ahead of time, which is a lifesaver during busy holiday seasons.
Finally, these cookies are guaranteed crowd-pleasers. Children love the colorful sprinkles and sweet chocolate centers, while adults appreciate the sophisticated peppermint flavor that isn’t overwhelming.
Essential Ingredients & Components
For the Cookie Base:
- 2 cups + 1 tablespoon (260g) all-purpose flour (spooned and leveled for accuracy)
- 1½ teaspoons baking powder (ensures perfect rise and texture)
- ¼ teaspoon salt (enhances all flavors)
- 10 tablespoons (142g) unsalted butter (softened to room temperature)
- 1 cup (200g) granulated sugar (creates the perfect sweetness)
- 1 large egg (at room temperature for better mixing)
- 1 teaspoon vanilla extract (adds depth of flavor)
- ¼ teaspoon peppermint extract (the star flavor – use high-quality extract)
For Assembly & Decoration:
- ½ cup (90g) nonpareil sprinkles (the tiny round ones work best)
- 32-36 candy cane flavored Hershey’s Kisses (unwrapped and ready)
Recipe Yield & Timing:
- Prep Time: 45 minutes (including essential chilling time)
- Cook Time: 12 minutes per batch
- Total Time: 1 hour 10 minutes
- Yield: 32-36 beautifully festive cookies
Step-by-Step Instructions
Preparing the Foundation
Step 1: Create the Dry Mix Begin by whisking together the flour, baking powder, and salt in a medium bowl until thoroughly combined. Set this mixture aside while you prepare the wet ingredients.
Step 2: Mix the Wet Ingredients Using a large bowl with either a hand-held or stand mixer fitted with a paddle attachment, beat the softened butter and granulated sugar together on high speed. Continue mixing for about 2 minutes until the mixture becomes creamy and well combined.
Step 3: Add Flavor Elements Next, add the egg, vanilla extract, and peppermint extract to the butter mixture. Beat for approximately 1 minute until everything is well incorporated. Remember to scrape down the sides and bottom of the bowl, then beat again as needed to ensure complete combination.
Forming the Dough
Step 4: Combine Wet and Dry Ingredients Gradually add the flour mixture to the wet ingredients, mixing on low speed until fully combined. The resulting dough will be quite thick, which is exactly what you want for these cookies.
Step 5: Shape and Coat Roll the dough into balls using 1 scant tablespoon of dough each (approximately 20g per ball). Although the dough may seem dry initially, the warmth of your hands will help it come together beautifully. Roll each dough ball generously in the colorful sprinkles.
Pro Tip: If sprinkles aren’t sticking properly, try pouring them onto a plate and pressing the dough balls directly into them. Alternatively, continue rolling as the warmth from your hands often helps sprinkles adhere better.
The Crucial Chilling Phase
Step 6: Chill for Success Place the sprinkle-coated dough balls on a baking sheet or plate that fits in your refrigerator. Chill them for at least 20 minutes, though you can leave them for up to 1 day. If chilling for longer than 1 hour, be sure to cover them.
Step 7: Prepare for Baking While the cookie dough balls are chilling, preheat your oven to 350°F (177°C). This timing ensures your oven is perfectly heated when the cookies are ready.
Baking to Perfection
Step 8: Bake with Precision Place the chilled dough balls about 2 inches apart on lined baking sheets. Bake for exactly 12 minutes or until the edges appear set. The cookies may look slightly under-baked in the centers – this is perfectly normal and essential for achieving the ideal chewy texture.
Step 9: The Kiss Application Remove cookies from the oven and allow them to cool on the baking sheets for 5 minutes. Then, press a Hershey’s Kiss into the center of each cookie. Using a thin spatula, immediately transfer the cookies to plates (handle gently as they’ll still be soft).
Step 10: The Freezer Secret Place the plates of cookies in the freezer for exactly 10 minutes. This crucial step quickly sets the candy in the cookie, preventing melting and ensuring picture-perfect results.

Creative Serving Suggestions
These cookies are stunning on their own, but here are some delightful presentation ideas:
Holiday Cookie Platters: Arrange alongside other festive treats like gingerbread cookies and snickerdoodles for a beautiful variety.
Gift Giving: Package in clear cellophane bags tied with ribbon for perfect hostess gifts or teacher appreciation treats.
Dessert Tables: Display on tiered stands for elegant holiday parties, where their colorful appearance makes them instant conversation starters.
Milk & Cookie Stations: Set up alongside glasses of cold milk for a nostalgic treat that both kids and adults will love.
Delicious Recipe Variations
Flavor Adaptations
Classic Sugar Version: Omit the peppermint extract entirely, or substitute with almond extract for a traditional sugar cookie flavor that’s equally delicious.
Chocolate Lover’s Version: Replace the sugar cookie base with chocolate dough using my chocolate peppermint thumbprint recipe, following the same assembly method.
Different Kiss Flavors: Experiment with various Hershey’s Kiss flavors like cookies and cream, caramel, or dark chocolate when candy cane kisses aren’t available.
Coating Variations
Sparkling Sugar: Replace nonpareils with sparkling sanding sugar for an elegant, glittery appearance.
Mixed Sprinkles: Use a combination of jimmies-style sprinkles and nonpareils for added texture and visual interest.
Seasonal Colors: Adapt the sprinkle colors for different holidays – pastels for Easter, orange and black for Halloween, or red, white, and blue for patriotic celebrations.
Make-Ahead Tips for Busy Bakers
Dough Preparation: You can make the cookie dough, roll it into balls, and coat with sprinkles up to 1 day ahead. Store covered in the refrigerator until ready to bake.
Freezing Unbaked Cookies: Sprinkle-coated cookie dough balls freeze beautifully for up to 3 months. Bake directly from frozen, adding just one extra minute to the baking time.
Storing Baked Cookies: Finished cookies stay fresh when stored covered at room temperature for up to 1 week. For longer storage, freeze baked cookies for up to 3 months.
Assembly Strategy: During busy holiday seasons, I often bake the cookies in the morning and add the kisses in the evening, making the process more manageable.
Important Baking Notes
Temperature Matters: Ensure your butter is properly softened to room temperature for the best mixing results. Similarly, room temperature eggs incorporate more easily into the batter.
Don’t Overbake: These cookies should look slightly under-baked in the centers when you remove them from the oven. They’ll continue cooking from residual heat.
Sprinkle Timing: Coat the cookie dough balls in sprinkles immediately after rolling them. Waiting too long can cause adhesion problems.
Kiss Placement: Work quickly when adding the Hershey’s Kisses while cookies are still warm, as this ensures they’ll set properly in the centers.
Frequently Asked Questions
Q: Can I use regular chocolate Hershey’s Kisses if I can’t find candy cane flavor? A: Absolutely! Regular chocolate kisses work wonderfully, though you’ll miss the extra peppermint flavor. You could also try other seasonal Kiss flavors like cookies and cream or dark chocolate.
Q: Why do my sprinkles keep falling off the dough balls? A: This usually happens when the dough is too cold or dry. Try warming it slightly with your hands, or add 1 teaspoon of water to the dough to make it slightly stickier. Pressing the dough balls into sprinkles on a plate also helps.
Q: Can I make these cookies without peppermint extract? A: Definitely! Simply omit the peppermint extract for classic sugar cookies, or substitute with ½ teaspoon almond extract for a different but equally delicious flavor profile.
Q: How do I prevent the chocolate kisses from melting during baking? A: The key is adding the kisses after baking, not before. Press them into the warm cookies immediately after removing from the oven, then use the freezer method to set them quickly.
Q: Can I use different types of sprinkles? A: Yes! Nonpareils work best because they’re small and stick well, but you can also use sparkling sugar, jimmies, or any decorative sprinkles you prefer. Just avoid anything too large or heavy.
Q: My cookies spread too much during baking. What went wrong? A: This usually indicates the dough wasn’t chilled long enough or your butter was too warm. Make sure to chill the formed dough balls for at least 20 minutes, and ensure your butter is softened but not melted when making the dough.
Q: How far ahead can I make these for a party? A: These cookies actually improve in flavor after a day or two! You can make them up to a week ahead and store them covered at room temperature, or freeze them for up to 3 months for longer storage.
These Candy Cane Kiss Cookies truly embody the spirit of holiday baking – they’re beautiful, delicious, and create wonderful memories with every batch. Whether you’re baking for family gatherings, cookie exchanges, or simply to fill your home with festive aromas, this recipe delivers consistent, impressive results that will have everyone asking for seconds!


