
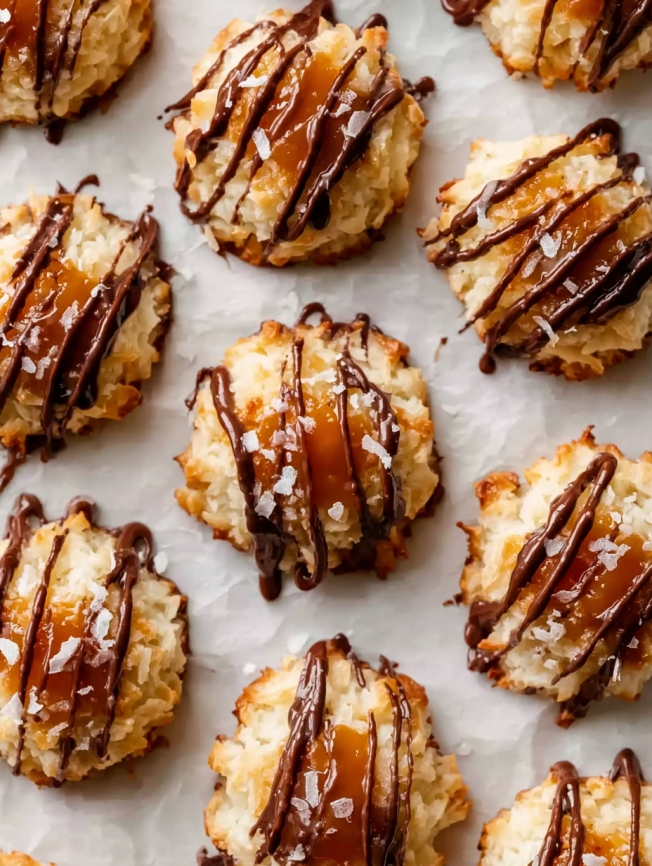
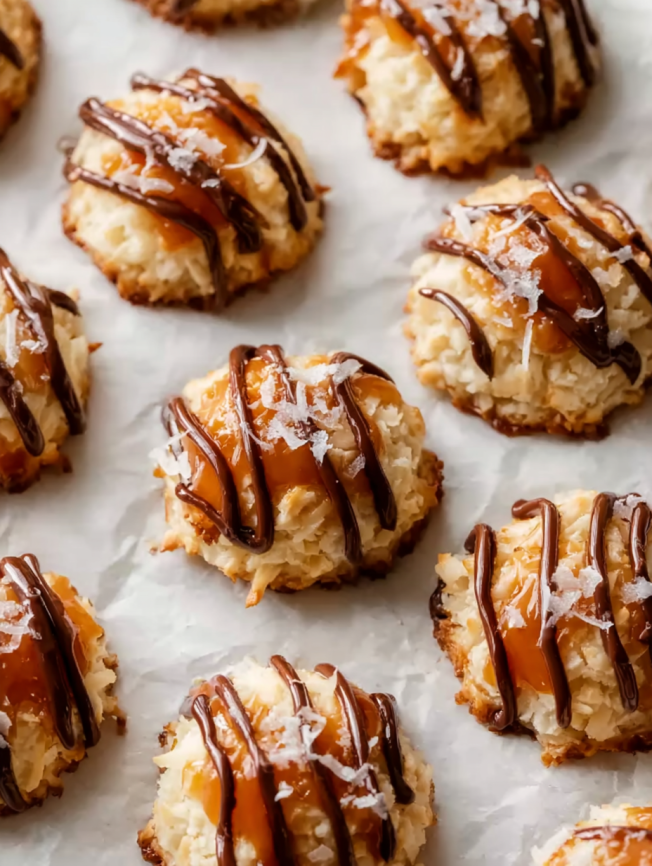
The first time I bit into one of these caramel coconut macaroon thumbprints, I was transported to a tropical paradise where every bite delivered the perfect balance of chewy coconut, silky caramel, and rich chocolate. What started as an experiment in my kitchen quickly became a family obsession – and now these naturally gluten-free treats are requested at every gathering. There’s something irresistible about the way the toasted coconut exterior gives way to a tender center, crowned with that luxurious pool of homemade salted caramel.
Why These Cookies Will Become Your New Obsession
Naturally Gluten-Free Excellence: Unlike many gluten-free alternatives that compromise on texture, these macaroons achieve bakery-quality results using only coconut as the base, making them accessible to everyone without sacrificing flavor.
Textural Symphony: Each bite offers a delightful contrast – the crispy, golden exterior yields to a moist, chewy interior, while the smooth caramel and melted chocolate add layers of indulgence.
Make-Ahead Friendly: Perfect for busy schedules, these cookies actually improve with time as the flavors meld together, and they freeze beautifully for up to three months.
Sophisticated Flavor Profile: The combination of toasted coconut, salted caramel, and dark chocolate creates a dessert that’s both comforting and elegant enough for special occasions.
Customizable Indulgence: While stunning as written, these thumbprints serve as a canvas for creativity – swap caramel for jam, try different chocolate varieties, or experiment with various finishing salts.
Essential Ingredients
For the Macaroons
- 17 ounces (482g) sweetened shredded coconut (one 14-ounce bag plus 1 cup)
- ½ cup (100g) granulated sugar
- ¼ teaspoon salt
- 1 teaspoon pure vanilla extract
- 1 large egg
- 2 large egg whites
For Assembly and Finishing
- ½ cup (145g) homemade salted caramel sauce, cooled
- One 4-ounce bar (113g) semi-sweet chocolate, finely chopped
- Optional: flaky sea salt for sprinkling
Prep Time: 30 minutes | Cook Time: 24 minutes | Total Time: 1 hour | Yield: 22-24 cookies
Step-by-Step Instructions
Essential Preparation
Step 1: Prepare Your Caramel Begin by making your salted caramel sauce well in advance, allowing it ample time to cool and thicken to the perfect consistency. The caramel must be completely cool when you spoon it into the baked thumbprints to prevent melting and maintain the cookies’ structure.
Step 2: Set Up Your Workspace Preheat your oven to 325°F (163°C). Line large baking sheets with parchment paper or silicone baking mats – this step is crucial for easy removal and even baking. Position your oven racks in the center for optimal heat circulation.
Creating the Macaroon Base
Step 3: Process the Coconut Place the sweetened shredded coconut in a food processor and pulse approximately 15 times until finely chopped but not powdered. If you don’t have a food processor, spread the coconut on a cutting board and chop it roughly with a sharp knife until the pieces are smaller and more uniform.
Step 4: Build the Foundation In a large mixing bowl, use either a hand mixer or stand mixer fitted with a whisk attachment to beat the egg, egg whites, sugar, salt, and vanilla extract together. Mix on medium-high speed for 1-2 minutes until the sugar dissolves completely and the mixture becomes frothy and light in color.
Step 5: Incorporate the Coconut Using a silicone spatula, gently fold the processed coconut into the egg mixture until every strand is evenly coated and the mixture holds together when pressed. The consistency should be moist but not wet, holding its shape when scooped.
Shaping and Baking
Step 6: Form the Thumbprints Using a medium cookie scoop or spoon, portion 1.5 tablespoons (about 30g) of the mixture and arrange them 2 inches apart on your prepared baking sheets. With your thumb, finger, or the back of a small measuring spoon, press firmly into the center of each macaroon to create a deep, well-defined indent that will hold the caramel.
Step 7: Achieve Perfect Golden Color Bake for 20-24 minutes, monitoring closely after the 18-minute mark. Look for macaroons that are lightly golden and set around the edges while remaining mostly white in the center. Remove them when they’ve developed a toasty color but haven’t darkened too much – overbaking will result in dry, tough cookies.
Step 8: Cool Properly Allow the macaroons to cool on the baking sheet for at least 10 minutes before handling. This cooling time helps them set properly and prevents breaking when you add the caramel.
Final Assembly
Step 9: Add the Caramel Spoon the cooled salted caramel into the center indentations, using approximately ½ to 1 teaspoon per cookie. Fill the wells generously but avoid overflowing, as this can make the cookies messy to eat.
Step 10: Chocolate Drizzle Perfection Melt the chopped chocolate using either a double boiler or microwave method. For microwave melting, place chocolate in a heat-proof bowl and microwave in 20-second increments, stirring between each interval until completely smooth. Drizzle the melted chocolate artistically over the cookies, then sprinkle with flaky sea salt if desired.
Step 11: Set and Serve Allow both the chocolate and caramel to set completely, either at room temperature for about 30 minutes or in the refrigerator for faster results (approximately 15 minutes).
Serving Suggestions
These elegant thumbprints shine at various occasions throughout the year. For holiday entertaining, arrange them on tiered serving platters alongside other bite-sized desserts. During summer gatherings, their tropical coconut flavor pairs beautifully with fresh fruit and light desserts.
Consider serving them with coffee or espresso, as the bitter notes complement the sweet caramel perfectly. For special occasions, present them in individual paper cups or mini cupcake liners for an upscale presentation that prevents sticky fingers.
Create a dessert station by offering different drizzle options – white chocolate, dark chocolate, or even a dusting of toasted coconut flakes for guests who want extra coconut flavor.
Creative Recipe Variations
Tropical Paradise Version
Replace the caramel with passion fruit curd or mango jam for a bright, fruity twist that emphasizes the coconut’s tropical origins.
Chocolate Lover’s Dream
Use chocolate caramel sauce and drizzle with both dark and white chocolate for an ultra-decadent experience that chocolate enthusiasts will adore.
Seasonal Adaptations
During fall, try pumpkin caramel or spiced apple butter in the centers. For spring celebrations, lemon curd creates a bright, refreshing alternative.
Nutty Enhancement
Add finely chopped toasted almonds or macadamia nuts to the coconut mixture before shaping for additional texture and flavor complexity.
Flavor Infusions
Incorporate different extracts like almond, rum, or coconut extract alongside the vanilla for more complex flavor profiles.
Make-Ahead Strategies
Timeline Planning
Prepare the salted caramel sauce up to one month in advance, storing it covered in the refrigerator. The coconut macaroon dough can be made up to three days ahead – simply cover tightly and refrigerate until ready to shape and bake.
Freezing Excellence
These cookies freeze exceptionally well for up to three months, whether plain or fully assembled. Wrap individual cookies in plastic wrap, then store in airtight containers. Thaw overnight in the refrigerator before bringing to room temperature for serving.
Storage Solutions
Store finished cookies at room temperature for up to three days or refrigerate for up to one week. Keep them in airtight containers with parchment paper between layers to prevent sticking.
Professional Baking Notes
Coconut Considerations
The recipe requires exactly 17 ounces (482g) of sweetened shredded coconut, which equals 5⅔ cups before processing. This amount is more than one standard 14-ounce bag, so plan accordingly when shopping.
Unsweetened Coconut Alternative: While possible, unsweetened coconut will produce drier results and requires adjustments to the egg whites and sugar content. Sweetened coconut is strongly recommended for optimal texture and flavor.
Caramel Success Tips
The salted caramel must be completely cool before assembly to prevent melting the macaroons and creating a mess. If your refrigerated caramel becomes too thick, warm it gently in 10-second microwave increments until it reaches the perfect spooning consistency.
Texture Optimization
Avoid overmixing the coconut into the egg mixture, as this can make the cookies tough. Gentle folding ensures the coconut remains fluffy and the final texture stays tender.
Baking Environment
Humidity can affect these cookies significantly. On particularly humid days, you may need to bake them an extra 1-2 minutes to achieve the proper set.
Frequently Asked Questions
Q: Can I make these without a food processor? A: Absolutely! Simply spread the coconut on a cutting board and chop it roughly with a sharp knife. The key is reducing the coconut pieces to smaller, more uniform sizes for better binding.
Q: Why do my macaroons spread too much during baking? A: This usually indicates too much moisture in the mixture. Ensure your egg whites are properly measured and that you haven’t added extra liquid. Also, make sure your oven is fully preheated before baking.
Q: Can I use store-bought caramel sauce? A: While homemade is preferred for flavor and consistency control, high-quality store-bought caramel can work. Choose a thick, premium brand and ensure it’s completely cool before using.
Q: How do I prevent the chocolate from seizing when melting? A: Ensure all utensils are completely dry, melt in short intervals, and stir gently between each heating period. If the chocolate does seize, add a teaspoon of neutral oil and stir until smooth.
Q: What’s the best way to create uniform indentations? A: Use the back of a ½-teaspoon measuring spoon for consistent size and depth. Press firmly but don’t go all the way through the cookie base.
Q: Can I make mini versions of these cookies? A: Yes! Use about 1 tablespoon of mixture per cookie, reduce baking time to 15-18 minutes, and adjust caramel portions accordingly. Mini versions are perfect for parties and gift giving.
Q: How do I know when they’re perfectly baked? A: Look for light golden edges while the centers remain mostly white. The cookies should feel set but not hard when gently touched. They’ll continue to firm up as they cool.


