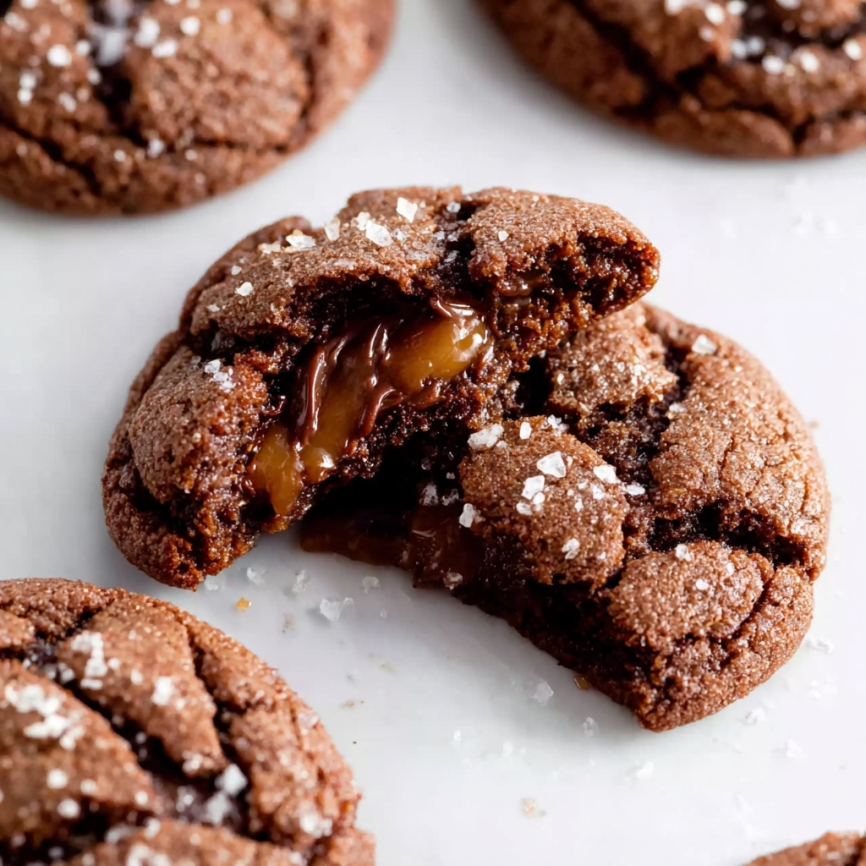
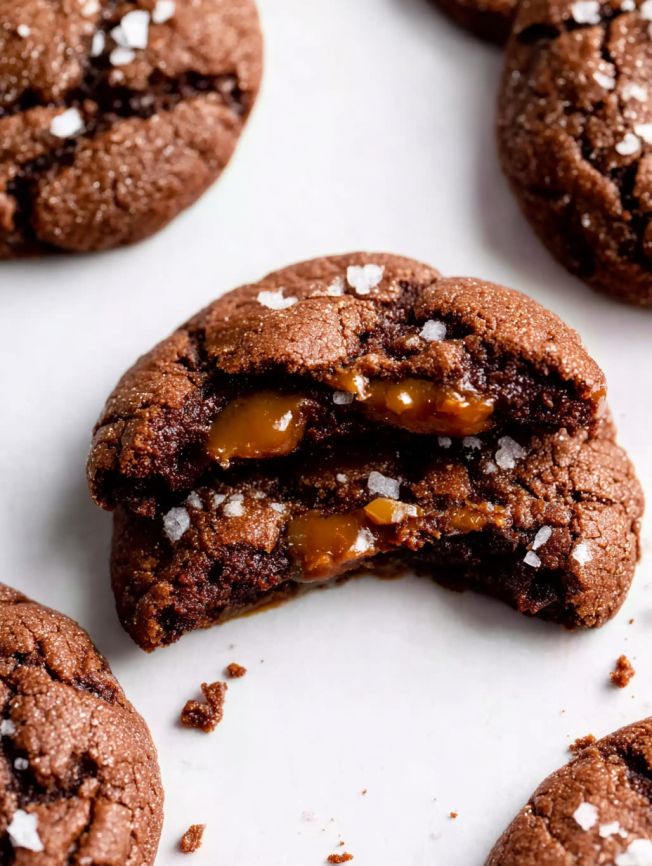
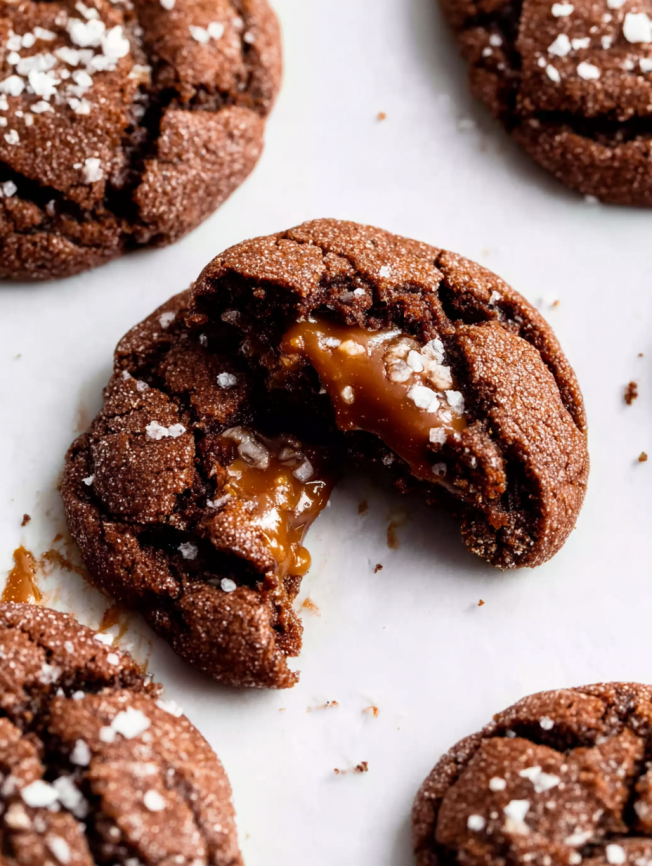
Picture this: you bite into what appears to be a perfectly normal chocolate hazelnut cookie, only to discover a river of warm, gooey caramel flowing from its center. That magical moment of surprise and delight is exactly what inspired me to perfect these Caramel Stuffed Nutella Cookies. After countless kitchen experiments and a few delicious failures, I’ve created what I consider the ultimate indulgent cookie experience.
These aren’t your ordinary cookies—they’re soft, chewy masterpieces that combine the beloved flavors of Nutella and hazelnuts with a hidden caramel center that creates pure joy with every bite. Recently, I served these at a dinner party, and the reaction was absolutely priceless. Guests couldn’t stop talking about the surprise inside, and several asked for the recipe before the evening ended.
Why These Cookies Will Become Your New Obsession
A Textural Symphony
Each cookie delivers multiple layers of satisfaction in a single bite. The exterior offers a perfectly soft and chewy texture, while the Nutella adds rich chocolate-hazelnut depth. Meanwhile, the caramel center provides a delightful contrast with its smooth, flowing sweetness. Furthermore, the chopped hazelnuts contribute a satisfying crunch that ties all the flavors together beautifully.
Perfect for Special Occasions
These cookies make an impressive statement at parties, bake sales, or holiday gatherings. Moreover, they’re conversation starters that create memorable moments. The hidden caramel surprise never fails to delight both children and adults, making them ideal for any celebration.
Surprisingly Manageable Technique
While the stuffing process might seem intimidating, the technique is actually quite straightforward once you understand the method. Additionally, the dough chilling step makes handling much easier, ensuring even novice bakers can achieve professional-looking results.
Make-Ahead Convenience
Busy schedules don’t have to derail your baking plans. These cookies freeze exceptionally well, both as dough and after baking, providing flexibility for last-minute entertaining or gift-giving.
Essential Ingredients for Success
Cookie Dough Foundation
- 2½ cups (313g) all-purpose flour, spooned and leveled
- 2 tablespoons (10g) unsweetened natural cocoa powder
- 1 teaspoon baking soda
- ½ teaspoon salt
- ¾ cup (170g) unsalted butter, softened to room temperature
- ¾ cup (150g) packed brown sugar (light or dark)
- ½ cup (100g) granulated sugar
Flavor Enhancers
- 1 large egg, at room temperature
- 1 teaspoon pure vanilla extract
- ¾ cup (225g) Nutella
- 1 heaping cup (130g) chopped hazelnuts
The Star Ingredient
- 28 soft caramel candies (Rolos or Werther’s work best)
- Optional: coarse salt or sea salt for topping
Smart Shopping Tips
When selecting caramel candies, quality matters significantly. Rolo candies provide the ideal consistency and size, while Werther’s soft caramels offer excellent flavor but need folding in half. Avoid Kraft caramel squares, as they’ve become firmer in recent years and won’t create the desired gooey center.
Step-by-Step Baking Instructions
Preparing the Cookie Dough
Step 1: Create the Dry Base Begin by whisking together flour, cocoa powder, baking soda, and salt in a large bowl. This ensures even distribution of leavening agents throughout the dough. Set this mixture aside while you prepare the wet ingredients.
Step 2: Master the Creaming Process Using either a hand mixer or stand mixer with paddle attachment, cream the softened butter with both sugars on medium speed for about 2 minutes until smooth. The mixture should become light and fluffy. Next, add the egg and mix on high speed until fully combined, approximately 1 minute. Scrape down the bowl sides and bottom as needed to ensure even mixing.
Step 3: Incorporate the Flavor Stars Add vanilla extract and Nutella to the butter mixture, then beat on high speed until completely combined. The mixture should be smooth and uniform in color. This step is crucial for achieving consistent Nutella flavor throughout every cookie.
Building the Final Dough
Step 4: Combine Wet and Dry Ingredients Pour the prepared dry ingredients into the wet mixture, then beat on low speed until just combined. Avoid overmixing, which can lead to tough cookies. Finally, beat in the chopped hazelnuts until evenly distributed. The resulting dough will be thick yet airy and slightly sticky.
Step 5: Essential Chilling Period Cover the dough completely and refrigerate for at least 3 hours. This chilling step is absolutely crucial—it firms up the dough, making it manageable for stuffing, and also helps prevent excessive spreading during baking. If chilling longer than 3 hours (up to 3 days), allow the dough to sit at room temperature for 30 minutes before proceeding.
The Stuffing Process
Step 6: Prepare for Baking Preheat your oven to 350°F (177°C) and line two large baking sheets with parchment paper or silicone baking mats. Having your workspace organized makes the stuffing process much smoother.
Step 7: Master the Stuffing Technique Working with chilled but pliable dough, measure 1 scant tablespoon and roll it into a ball. Create an indent with your thumb, then nestle a caramel candy inside. Take another scant tablespoon of dough and use it to completely cover the caramel on top. Roll everything into an even ball, ensuring the caramel is completely sealed inside. This step requires patience, but proper sealing prevents caramel from leaking excessively during baking.
Step 8: Final Touches and Spacing Sprinkle each stuffed cookie ball with coarse salt if desired—this enhances both flavor and presentation. Arrange the cookies 3 inches apart on prepared baking sheets, giving them ample room to spread. Keep any remaining dough balls refrigerated while baking other batches to maintain proper consistency.
Baking to Perfection
Step 9: Achieve the Perfect Bake Bake cookies for 13-14 minutes until edges appear set. Don’t worry if some caramel oozes out—this is completely normal and actually creates an appealing rustic appearance. The centers should look soft and slightly under-baked when you remove them from the oven.
Step 10: Critical Cooling Period Allow cookies to cool on the baking sheet for exactly 5 minutes. During this time, they continue cooking from residual heat and set properly. After 5 minutes, carefully transfer to a wire rack using a thin spatula, especially if caramel has oozed out.
Creative Serving Suggestions
Elegant Presentation Ideas
Serve these cookies on a beautiful platter with a small bowl of sea salt flakes for guests to add extra seasoning. Alternatively, dust them lightly with powdered sugar for a more refined appearance.
Temperature Variations
While delicious at room temperature, these cookies are absolutely magical when slightly warm. Consider reheating them briefly in the microwave (10-15 seconds) to soften the caramel center for an extra-special treat.
Pairing Recommendations
These rich cookies pair wonderfully with cold milk, strong coffee, or even a glass of dessert wine. For an elegant dessert course, serve them alongside vanilla ice cream or fresh berries.
Exciting Recipe Variations
Different Candy Centers
Experiment with other soft candies like caramel-filled chocolates, peanut butter cups, or even mini marshmallows. Each variation creates a unique surprise while maintaining the same delicious base cookie.
Nut Alternatives
While hazelnuts are traditional with Nutella, toasted almonds, pecans, or even pistachios create interesting flavor profiles. Toast any nuts you choose for maximum impact.
Flavor Twists
Try substituting part of the Nutella with peanut butter for a different twist, or add a teaspoon of instant espresso powder to enhance the chocolate notes.
Size Variations
Create mini versions using 1 teaspoon of dough per side and smaller caramels, perfect for parties or gift tins. Alternatively, make giant versions using 2 tablespoons per side for an extra-impressive presentation.
Make-Ahead Strategies
Advance Dough Preparation
Prepare the cookie dough up to three days in advance and store it covered in the refrigerator. This actually improves flavor development as ingredients have more time to meld together.
Freezing Unbaked Cookies
Stuff and shape the cookies completely, then freeze them on baking sheets until solid. Transfer to freezer bags for up to three months. Bake directly from frozen, adding just one extra minute to the baking time.
Storage Solutions
Baked cookies stay fresh at room temperature for up to one week when stored in an airtight container. Layer them between parchment paper to prevent sticking if any caramel has oozed during baking.
Freezing Baked Cookies
Completely cooled cookies freeze beautifully for up to three months. Thaw them at room temperature or warm briefly in the microwave for that fresh-baked experience.
Professional Tips for Perfect Results
Temperature Management
Room temperature ingredients mix more easily and create better texture. Take eggs and butter out of the refrigerator about an hour before baking to ensure they’re properly tempered.
Measuring Accuracy Matters
Spoon flour into measuring cups and level with a straight edge rather than scooping directly. This prevents dense cookies caused by too much flour.
Caramel Selection Impact
The type of caramel you choose dramatically affects the final result. Rolos provide the perfect size and consistency, while Werther’s offer superior flavor but require folding in half to fit properly.
Chilling Cannot Be Skipped
Adequate chilling time is essential for both texture and workability. Under-chilled dough spreads excessively and becomes difficult to stuff properly.
Baking Sheet Preparation
Using parchment paper or silicone mats prevents sticking and makes cleanup easier, especially when caramel oozes during baking.
Frequently Asked Questions
Q: Why is my cookie dough too sticky to work with? A: Insufficient chilling is usually the culprit. Ensure the dough has chilled for at least 3 hours, and work quickly with small portions while keeping the rest refrigerated.
Q: How can I prevent caramel from leaking out during baking? A: Make sure the caramel is completely sealed inside the dough ball. Additionally, using the recommended caramel types helps—avoid overly soft or hard varieties.
Q: My cookies are spreading too much. What went wrong? A: This typically indicates insufficient chilling, too-soft butter, or oven temperature issues. Verify your oven temperature with a thermometer and ensure proper dough chilling.
Q: Can I use homemade caramel instead of candy? A: While possible, homemade caramel can be tricky because it may be too soft or hard. Stick with the recommended commercial caramels for best results.
Q: What’s the best way to store these cookies? A: Store in an airtight container at room temperature for up to one week. Layer between parchment paper if caramel has oozed to prevent sticking.
Q: Why do my cookies look under-baked? A: The centers should appear soft when you remove them from the oven. They continue cooking on the hot baking sheet during the 5-minute cooling period, achieving perfect doneness.
Q: Can I make these cookies smaller or larger? A: Absolutely! Adjust dough portions accordingly and modify baking time—smaller cookies need 1-2 minutes less, while larger ones need 2-3 minutes more.
Q: How do I know when the caramel center will be perfectly gooey? A: Serve cookies slightly warm for the most molten caramel experience. At room temperature, the caramel will be softer than regular cookies but not flowing.
Prep Time: 3 hours, 15 minutes (includes chilling)
Cook Time: 14 minutes
Total Time: 3 hours, 45 minutes
Yield: 28 cookies
Cuisine: American/European


