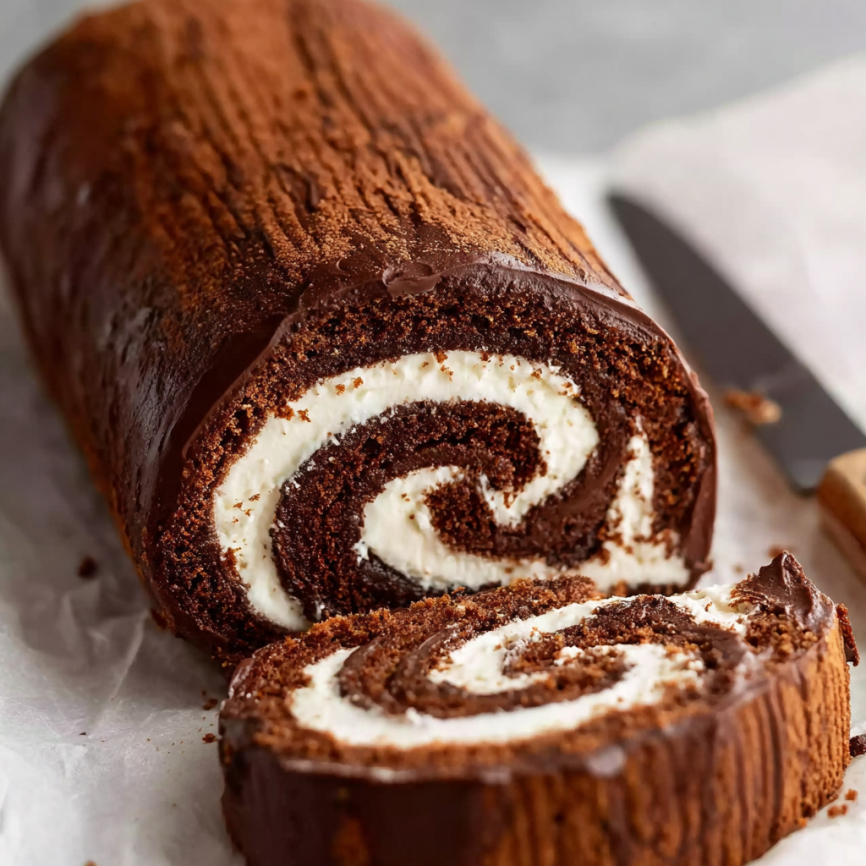
Few desserts capture attention quite like an elegant chocolate cake roll, with its perfect spiral of rich chocolate sponge and creamy filling revealed in each slice. This classic Swiss roll technique might seem intimidating at first, but it’s actually one of the most rewarding baking skills to master. Once you understand the fundamentals, you’ll have a versatile dessert that never fails to impress guests and family alike.
My journey with cake rolls began during culinary school, where our pastry instructor emphasized the importance of timing and technique over complicated ingredients. “The magic,” she would say, “happens in the rolling while the cake is still warm and pliable.” After years of perfecting this recipe, I’ve learned that success lies in understanding each critical step and why it matters.
This updated 2024 version addresses common issues that home bakers face – dry cake, cracking problems, and flavor intensity. Through extensive testing, we’ve created a chocolate sponge that’s both moist and sturdy enough to roll without breaking, paired with a luscious vanilla whipped cream filling and glossy chocolate ganache topping that transforms this into a bakery-quality dessert.
Why This Chocolate Cake Roll Will Become Your Signature Dessert
Professional Results at Home: This recipe delivers a perfectly moist, flexible sponge cake that rolls beautifully without cracking. The updated formula includes buttermilk and oil for superior texture and flavor.
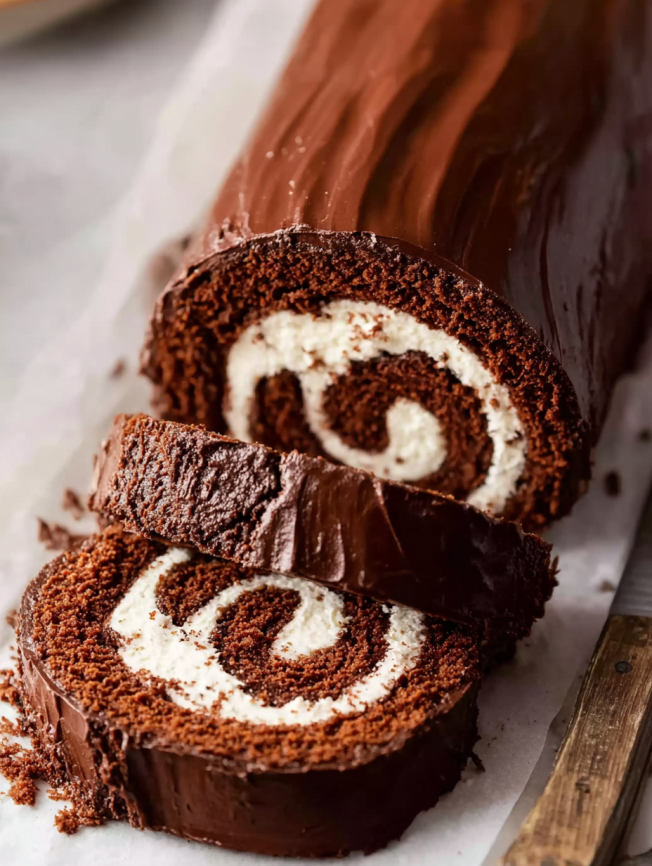
Impressive Visual Impact: Few desserts create the “wow factor” of a beautifully executed cake roll. The spiral pattern revealed in each slice makes this dessert worthy of special occasions and celebrations.
Make-Ahead Convenience: The entire cake roll can be prepared days in advance, making it perfect for entertaining. Components can be made separately and assembled when convenient.
Customizable Flavors: While this chocolate version is spectacular, the technique translates to countless flavor combinations. Master this recipe, and you’ll have endless dessert possibilities.
Surprisingly Approachable: Despite its elegant appearance, this cake roll uses basic ingredients and straightforward techniques. The key is understanding the process rather than advanced baking skills.
Essential Ingredients and Their Roles
For the Chocolate Sponge Cake
- ¾ cup (95g) cake flour or all-purpose flour (spooned and leveled)
- ¼ cup (21g) unsweetened cocoa powder, plus extra for rolling
- 1 teaspoon baking powder
- ½ teaspoon salt
- 4 large eggs, separated and at room temperature
- ¾ cup (150g) granulated sugar, divided
- ¼ cup (60ml) vegetable oil
- ¼ cup (60ml) buttermilk or whole milk
- 1½ teaspoons pure vanilla extract
- 1 teaspoon espresso powder (optional but recommended)
For the Vanilla Whipped Cream Filling
- 1 cup (240ml) cold heavy cream
- 3 tablespoons (38g) granulated or confectioners’ sugar
- 1 teaspoon pure vanilla extract
- 2 tablespoons marshmallow creme (optional for subtle marshmallow flavor)
For the Chocolate Ganache Topping
- ½ cup (120ml) heavy cream
- 4 ounces (113g) semi-sweet chocolate, finely chopped
- 1 teaspoon light corn syrup (optional for glossy finish)
Serving Enhancements: Fresh berries, mint sprigs, or a dusting of powdered sugar elevate the presentation beautifully.
Step-by-Step Technique Guide
Preparing the Foundation
Set up for success by preheating your oven to 350°F (177°C) and preparing a 12×17-inch baking pan. Grease thoroughly with butter or nonstick spray, then line with parchment paper, ensuring the paper extends up the sides. Grease the parchment as well – this double preparation prevents any sticking issues.
Create the dry mixture by sifting together cake flour, cocoa powder, baking powder, and salt through a fine-mesh sieve. This aerates the ingredients and ensures even distribution, which is crucial for a smooth, lump-free batter.
Mastering the Egg Technique
Whip the egg whites using a hand mixer or stand mixer with whisk attachment. Beat egg whites with ¼ cup of the granulated sugar on high speed for 4-5 minutes until foamy medium peaks form. These peaks should have a slight droop – avoid over-beating to stiff peaks, which can make the cake tough.
Prepare the egg yolk base in the same bowl (no need to clean) by adding egg yolks and remaining sugar. Mix on high speed for 1 minute, then incorporate oil, buttermilk, vanilla, and espresso powder. Beat for 2 minutes until the mixture appears thin and slightly bubbly.
Combine with care by adding half the whipped egg whites to the yolk mixture and mixing on low for just 10 seconds. Repeat with remaining whites, mixing minimally to preserve the airy structure.
Creating the Perfect Batter
Incorporate dry ingredients by sifting the flour mixture directly over the egg mixture, then folding gently with a silicone spatula until just combined. Avoid over-mixing, which deflates the carefully created volume.
Achieve even distribution by spreading the light, fluffy batter evenly in the prepared pan. The layer will be quite thin – this is correct. Gently shimmy the pan on the counter to smooth the surface.
The Critical Baking and Rolling Phase
Bake with precision for 12-14 minutes until the cake springs back lightly when touched. Avoid over-baking, which creates a dry cake prone to cracking.
Prepare the rolling surface while the cake bakes by laying a piece of parchment paper or thin kitchen towel flat on the counter. Dust generously with cocoa powder using a fine-mesh sieve.
Execute the immediate roll by quickly running a knife around the cake edges as soon as it comes from the oven. Immediately invert onto the prepared surface and peel away the baking parchment. Starting from the narrow end, begin rolling the hot cake with the cocoa-dusted parchment or towel, working slowly and gently.
Cool completely while rolled for about 3 hours at room temperature. This gradual cooling process trains the cake to hold its shape without cracking. Avoid refrigerating during this phase, as cold cake becomes brittle and prone to breaking.
Assembly and Finishing
Prepare the whipped cream by beating heavy cream, sugar, and vanilla to medium-stiff peaks (2-3 minutes). Fold in marshmallow creme if using for subtle flavor enhancement.
Unroll and fill by gently unwrapping the cooled cake and spreading whipped cream evenly, leaving a ½-inch border around the edges. This border prevents filling from squeezing out during re-rolling.
Create the final roll by carefully re-rolling the cake without the parchment this time. Place on a wire rack set over a baking sheet to catch ganache drips.
Make the ganache by placing chopped chocolate and corn syrup in a bowl. Heat cream until it just begins to simmer, then pour over chocolate. Let sit 2-3 minutes before stirring slowly until smooth and glossy.
Apply the finishing touch by pouring ganache over the entire roll, using a spoon to coat evenly. Refrigerate for 30-60 minutes to set before slicing.

Professional Presentation Ideas
Classic Elegance: Slice with a sharp knife wiped clean between cuts, arranging on individual plates with a drizzle of raspberry coulis and fresh mint.
Rustic Charm: Present the whole roll on a wooden cutting board with the knife alongside, allowing guests to serve themselves family-style.
Individual Portions: Cut into thick slices and serve on dessert plates with a dollop of whipped cream and fresh berries for restaurant-quality plating.
Holiday Styling: Dust with powdered sugar and garnish with seasonal elements like sugared cranberries or rosemary sprigs for festive occasions.
Creative Variations and Adaptations
Flavor Combinations
Strawberry Chocolate Roll: Replace vanilla whipped cream with strawberry-flavored filling and fresh sliced strawberries for a fruity variation.
Mocha Perfection: Add instant coffee to both the cake and filling, then top with coffee-flavored ganache for coffee lovers.
Orange Chocolate Delight: Incorporate orange zest into the cake and filling, finishing with dark chocolate ganache for a sophisticated citrus twist.
Seasonal Adaptations
Peppermint Holiday Version: Add peppermint extract to the filling and crush candy canes over the ganache for festive appeal.
Summer Berry Roll: Fill with mixed berry whipped cream and top with white chocolate ganache for a lighter summer dessert.
Autumn Spice Variation: Add warming spices like cinnamon and nutmeg to the cake, paired with spiced whipped cream.
Make-Ahead Strategies for Entertaining
Component Preparation: Bake and roll the unfilled cake up to 24 hours ahead, storing at room temperature. Prepare ganache up to 3 days in advance, gently reheating before use.
Complete Assembly: The filled cake roll can be made 1-2 days ahead and stored refrigerated. Add ganache topping the day of serving for best appearance.
Freezer-Friendly Options: Freeze the filled (but not ganache-topped) roll for up to 3 months. Thaw overnight in the refrigerator before adding ganache.
Party Planning: For large gatherings, consider making mini cake rolls by cutting the filled cake into rectangles before rolling individual portions.
Expert Tips for Guaranteed Success
Temperature Matters: Room temperature eggs whip better and create more volume. If eggs are cold, place them in warm water for 10 minutes before separating.
Rolling Technique: The initial roll must happen while the cake is still warm – this is when it’s most pliable. Cold cake will crack and break.
Filling Distribution: Spread filling evenly but avoid overfilling, which causes the roll to lose its shape and leak during slicing.
Storage Wisdom: Always store the finished roll in the refrigerator due to the dairy-based filling and ganache. Bring to room temperature for 15 minutes before serving for best flavor.
Troubleshooting Common Challenges
Cracking Prevention: Ensure the cake doesn’t overbake, roll while still warm, and avoid refrigerating during the initial cooling phase.
Filling Issues: If whipped cream becomes too stiff, gently fold in a tablespoon of milk to restore spreadability.
Ganache Problems: If ganache becomes grainy, add a tablespoon of warm cream and whisk gently to restore smoothness.
Serving Difficulties: Use a sharp, thin knife and wipe clean between cuts. Chilled cake slices more cleanly than room temperature.
Frequently Asked Questions
Q: Can I use all-purpose flour instead of cake flour? A: Absolutely! Both flours work equally well in this recipe. Use the same weight measurement (95g) for either option.
Q: Why is my cake cracking when I roll it? A: Cracking usually occurs when the cake is overbaked, too cold when rolling, or rolled too tightly. Ensure the cake is baked just until it springs back and roll while still warm.
Q: How do I know when my egg whites are beaten properly? A: Look for medium peaks that hold their shape but have a slight droop at the tips. Overbeaten whites become grainy and can make the cake tough.
Q: Can I make this without espresso powder? A: Yes, though espresso powder significantly enhances chocolate flavor without adding coffee taste. If omitting, consider adding an extra tablespoon of cocoa powder.
Q: What’s the best way to store leftover cake roll? A: Wrap tightly and refrigerate for up to 3 days. The cake actually improves after a day as flavors meld together.
Q: My ganache won’t set – what went wrong? A: This usually means the cream was too hot when poured over chocolate, or the ratio was off. Try chilling for longer, or whisk in a bit more chopped chocolate.
Q: Can I make mini versions of this recipe? A: Yes! After filling, cut the cake into rectangles and roll each individually for adorable single-serving portions perfect for parties.
Recipe Details:
- Prep Time: 1 hour
- Cook Time: 10 minutes
- Total Time: 3 hours, 40 minutes (including cooling)
- Yield: 10-12 slices


