
Prep Time: 2 hours, 30 minutes (includes chilling) | Cook Time: 12 minutes | Total Time: 3 hours | Yield: 19-20 cookies
The Cookie That Changed Everything
Some recipes have the power to transport you instantly back to childhood, and these chocolate frosted cookies do exactly that for me. Growing up, my neighbor Mrs. Henderson would make similar cookies for every school bake sale, and they’d disappear within minutes of the table opening. Years later, when I attempted to recreate that magical combination of soft, fudgy cookie topped with rich chocolate frosting, I discovered the secret wasn’t just in the ingredients—it was in the patience.
The first time I made these cookies, I nearly skipped the chilling step, thinking it was optional. Thankfully, something made me pause and follow the instructions exactly. That two-hour wait transformed what could have been ordinary drop cookies into something extraordinary: perfectly tender, cake-like treats that practically melt in your mouth.
Why These Cookies Will Become Your Signature Recipe
Foolproof Drop Cookie Method
Unlike finicky rolled cookies that require perfect dough consistency and careful handling, these beauties use a simple drop method that welcomes imperfection. The rustic, slightly irregular shapes add to their homemade charm while making the process accessible for bakers of all skill levels.
Irresistible Texture Combination
Each cookie delivers the perfect contrast between a soft, fudgy interior and a delicate, slightly crisp exterior. Meanwhile, the rich chocolate frosting adds creamy luxury that elevates these treats from simple cookies to special occasion desserts.
Make-Ahead Convenience
The mandatory chilling period actually works in your favor for busy schedules. Prepare the dough up to three days in advance, then bake fresh cookies whenever you need them. This flexibility makes them perfect for unexpected guests or planned celebrations.
Customization Paradise
While the chocolate-on-chocolate combination is divine, this versatile base accommodates countless variations. Different frosting flavors, seasonal sprinkles, or mix-in additions transform these cookies to match any occasion or preference.
Essential Ingredients
Cookie Foundation
- ½ cup (113g) unsalted butter – softened to room temperature for proper creaming
- 1 tablespoon vegetable oil – adds moisture and creates the perfect tender texture
- ½ cup (100g) granulated sugar – provides structure and sweetness
- ½ cup (100g) packed brown sugar – contributes moisture and subtle caramel notes
- 1 large egg – at room temperature for smooth incorporation
- 1 teaspoon pure vanilla extract – enhances overall flavor depth
Dry Ingredient Blend
- 1¼ cups (156g) all-purpose flour – spooned and leveled for accuracy
- ½ cup (45g) unsweetened natural cocoa powder – creates rich chocolate flavor
- 1 teaspoon baking soda – provides proper lift and texture
- ⅛ teaspoon salt – balances sweetness and enhances chocolate notes
Luxurious Chocolate Frosting
- ¾ cup (170g) unsalted butter – softened for smooth, creamy consistency
- 2 cups (240g) confectioners’ sugar – creates the perfect sweetness level
- 6 tablespoons (30g) unsweetened cocoa powder – natural or Dutch-process both work
- 3 tablespoons (45ml) heavy cream or milk – slightly warmed for optimal texture
- 1 teaspoon pure vanilla extract – complements the chocolate beautifully
- Pinch of salt – balances flavors and enhances richness
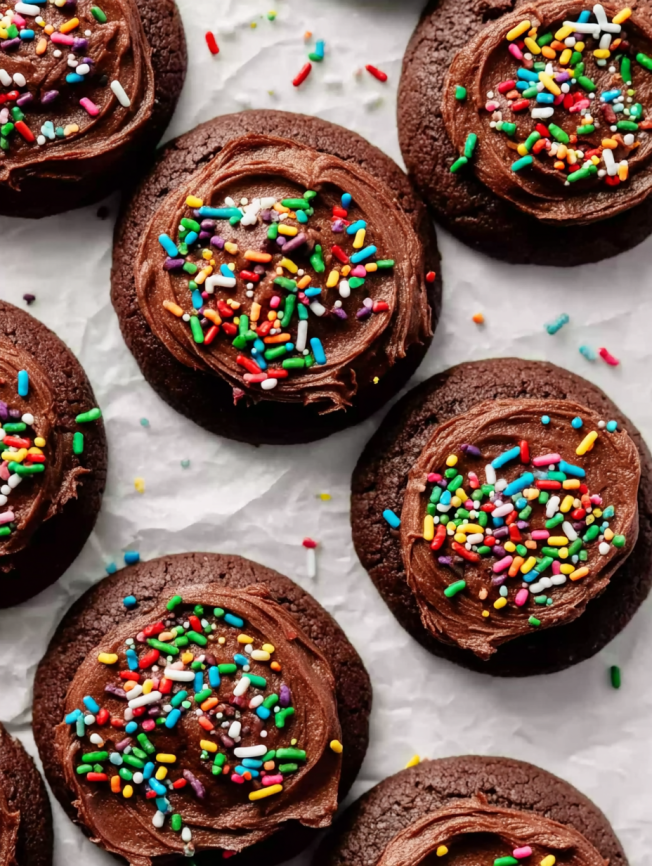
- ¼ cup (43g) colorful sprinkles – adds festive visual appeal
Step-by-Step Instructions
Creating the Perfect Cookie Dough
Creaming for Success
Using a large bowl with either handheld or stand mixer fitted with paddle attachment, beat butter, oil, granulated sugar, and brown sugar together on medium-high speed. Continue for 2-3 minutes until the mixture becomes fluffy and noticeably lighter in color. This creaming process incorporates essential air for proper texture.
Add the egg and vanilla extract, then beat on high speed until fully combined. Scrape down bowl sides and bottom as needed to ensure even mixing throughout the entire mixture.
Incorporating Dry Ingredients
In a separate bowl, whisk together flour, cocoa powder, baking soda, and salt until completely uniform. With your mixer running on low speed, slowly pour this dry mixture into the wet ingredients. Beat on low speed just until combined—overmixing can create tough cookies.
The finished dough will appear thick and notably sticky, which is exactly the desired consistency for these particular cookies.
Critical Chilling Process
Cover the dough tightly with plastic wrap and refrigerate for at least 2 hours, though up to 3 days works perfectly. This chilling step is absolutely mandatory—it’s not optional or suggested, but essential for proper cookie structure and texture.
If the dough chills longer than 3 hours, allow it to sit at room temperature for approximately 20 minutes before scooping. This brief tempering makes the dough more manageable while maintaining its improved structure.
Baking to Perfection
Preparation Steps
Preheat your oven to 350°F (177°C) and line large baking sheets with parchment paper or silicone baking mats. Proper preparation prevents sticking and ensures even baking results.
Shaping and Baking
Remove chilled dough from refrigerator and scoop heaping tablespoons (about 28-30g each), rolling them into balls. Arrange these portions 2-3 inches apart on prepared baking sheets, allowing adequate space for spreading during baking.
Bake for 12-13 minutes, watching for edges that appear set rather than wet or glossy. Here’s a professional tip: if cookies aren’t spreading properly by minute 10, remove the baking sheet and lightly bang it on the counter 2-3 times. This technique helps initiate proper spreading, then return to the oven to finish baking.
Cooling Protocol
Allow cookies to cool on the baking sheet for exactly 10 minutes—this prevents breaking while still warm. Then transfer to a wire cooling rack for complete cooling before frosting application.
Crafting the Chocolate Frosting
Using either handheld or stand mixer with paddle or whisk attachment, beat softened butter on medium speed for about 2 minutes until smooth and creamy. Add confectioners’ sugar, cocoa powder, slightly warmed cream or milk, vanilla extract, and a pinch of salt.
Begin beating on low speed for 30 seconds to prevent sugar clouds, then increase to high speed and beat for one full minute. Taste and adjust with additional salt if desired—this small addition can significantly enhance the chocolate flavor.
Serving Suggestions
Professional Presentation
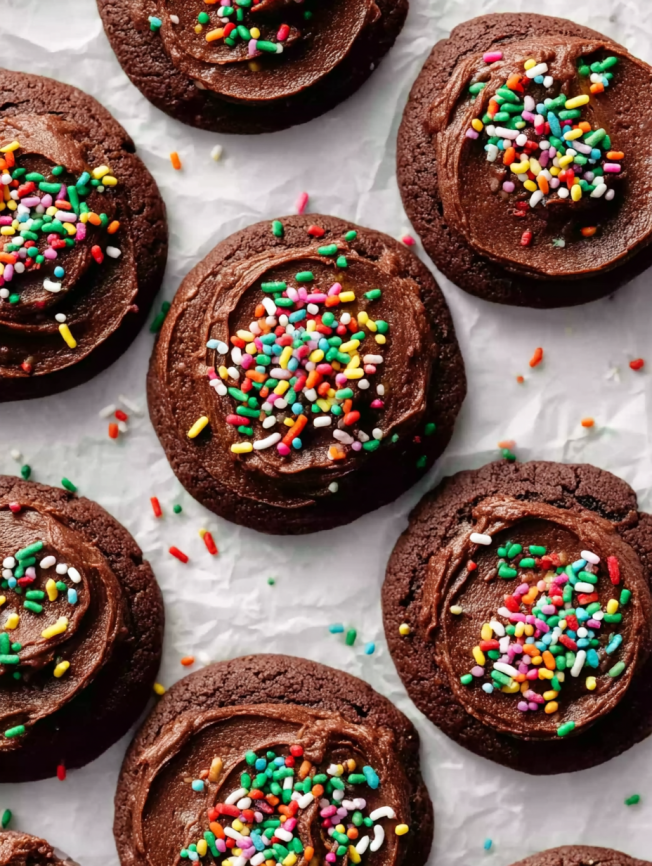
Spread frosting evenly on completely cooled cookies using either a knife or offset spatula for smooth, bakery-style results. Immediately top with colorful sprinkles while the frosting remains soft for proper adhesion.
For special occasions, consider using themed sprinkles that match your event colors, or create elegant simplicity with just a light dusting of cocoa powder instead of traditional sprinkles.
Perfect Pairing Ideas
These rich cookies pair beautifully with cold milk, hot coffee, or even vanilla ice cream for an indulgent dessert experience. They also complement fresh berries wonderfully, with the fruit’s acidity balancing the chocolate’s richness.
Creative Recipe Variations
Seasonal Adaptations
Transform these cookies throughout the year by changing sprinkle colors and types. Pastel sprinkles create perfect Easter treats, while red and green make festive Christmas cookies. Halloween calls for orange and black decorations, turning basic cookies into themed celebrations.
Frosting Alternatives
While chocolate frosting is divine, vanilla buttercream offers a classic contrast that highlights the chocolate cookie base. Peanut butter frosting creates an irresistible combination for those who love chocolate-peanut butter pairings.
Mix-In Possibilities
Consider folding mini chocolate chips, chopped nuts, or even crushed peppermint candies into the cookie dough before chilling. These additions create textural interest and flavor surprises in every bite.
Make-Ahead Tips
Dough Storage Strategy
Cookie dough can be prepared and refrigerated for up to 3 days before baking, making these perfect for planned entertaining. The extended chilling actually improves flavor development while maintaining convenience.
Freezing Guidelines
Shape unbaked cookie dough into balls and freeze on baking sheets until solid, then transfer to freezer bags for up to 3 months. Bake directly from frozen, adding 1-2 extra minutes to the original baking time.
Baked cookies, both plain and frosted, freeze exceptionally well for up to 3 months when properly wrapped. Thaw at room temperature or in the refrigerator while maintaining their original texture and flavor.
Storage Optimization
Store frosted cookies at room temperature for up to 1 day, or refrigerate for up to 5 days. The frosting will “soft-set” after several hours, developing a slightly dry surface while remaining creamy underneath.
Essential Notes
Cocoa Powder Selection
Natural cocoa powder works best in the cookie dough due to its interaction with baking soda. However, either natural or Dutch-process cocoa works in the frosting since it contains no leavening agents that would be affected by acidity levels.
Temperature Matters
Ensure all dairy ingredients and eggs reach room temperature before mixing begins. Cold ingredients don’t incorporate smoothly, potentially creating lumps or uneven texture in both cookies and frosting.
Warming the Cream
Slightly warming the cream or milk before adding to frosting helps cocoa powder absorb liquid more effectively, creating a smoother, more satiny finish. A few seconds in the microwave or on the stovetop accomplishes this easily.
Scaling Considerations
This recipe doubles easily in a single mixing bowl without overwhelming most mixers. However, doubling the frosting creates excessive amounts, so consider using a full-scale chocolate buttercream recipe for larger batches instead.
Frequently Asked Questions
Why is chilling the dough so important?
The sticky nature of this particular dough requires chilling to firm up the fats and hydrate the flour properly. Without this step, cookies will spread excessively and lose their desired soft, fudgy texture. The chilling period isn’t optional—it’s essential for success.
Can I skip the oil in the cookie recipe?
The tablespoon of oil creates the perfect tender texture that makes these cookies special. Omitting it will result in drier, less appealing cookies. The small amount works synergistically with the butter to achieve ideal moisture levels.
What if my cookies don’t spread during baking?
If cookies aren’t spreading by the 10-minute mark, remove the baking sheet and gently bang it on the counter several times. This technique helps initiate proper spreading. Cold dough or overpacked flour can cause this issue.
How do I know when the cookies are perfectly done?
Look for edges that appear set rather than wet or shiny. The centers may still look slightly underdone, but they’ll continue cooking from residual heat while cooling on the baking sheet.
Can I make these cookies without a mixer?
While possible, a mixer creates the best texture by properly creaming the butter and sugars. If mixing by hand, ensure butter is very soft and cream thoroughly for several minutes to achieve similar results.
Why does my frosting look grainy?
Grainy frosting usually results from insufficiently softened butter or confectioners’ sugar that wasn’t sifted. Ensure butter reaches proper room temperature, and consider sifting the sugar if your frosting appears lumpy.
How can I make the cookies larger or smaller?
Adjust the scoop size while maintaining the same baking temperature. Smaller cookies will bake faster (8-10 minutes), while larger ones need additional time (14-16 minutes). Watch for the visual cues of set edges regardless of size.
What’s the best way to store these long-term?
For extended storage, freeze baked cookies in airtight containers with parchment paper between layers. They maintain quality for up to 3 months frozen and taste fresh when thawed properly at room temperature.


