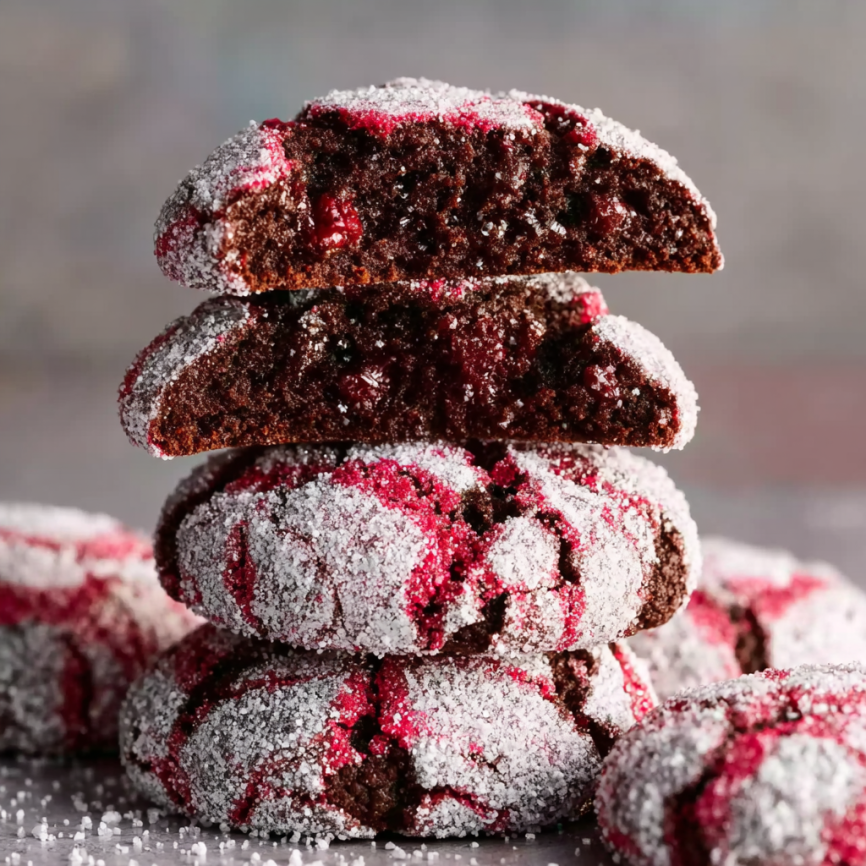
The first time I bit into one of these chocolate raspberry crinkle cookies, I experienced what I can only describe as pure magic. Picture this: a deeply fudgy chocolate cookie that’s impossibly soft and chewy, studded with real raspberry preserves, and rolled in a gorgeous pink-dusted coating that literally melts on your tongue. It was love at first bite, and I knew I had to master this extraordinary combination.
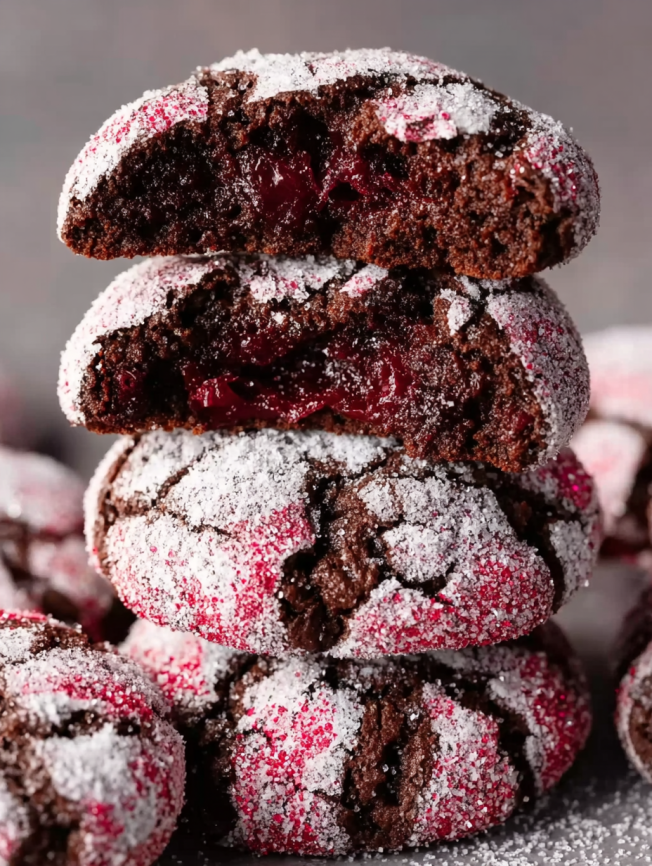
What makes these cookies truly special isn’t just their stunning appearance – though that crackled surface dusted with raspberry powder is absolutely breathtaking. Instead, it’s the way each element works in perfect harmony: the rich cocoa base provides depth, the raspberry preserves add bursts of fruity brightness, and that unique freeze-dried raspberry coating delivers both visual impact and intense flavor that dissolves beautifully in your mouth.
Prep Time: 3 hours, 30 minutes
Cook Time: 13 minutes
Total Time: 3 hours, 45 minutes
Yield: 24-26 cookies
Why These Cookies Will Steal Your Heart
Sophisticated Flavor Pairing
The combination of deep, rich chocolate with bright, tart raspberries creates a flavor profile that’s both familiar and exciting. Moreover, using real raspberry preserves instead of artificial flavoring ensures authentic fruit taste throughout each bite. This isn’t just a novelty – it’s a thoughtfully crafted flavor experience that appeals to both casual cookie lovers and sophisticated palates.
Show-Stopping Visual Appeal
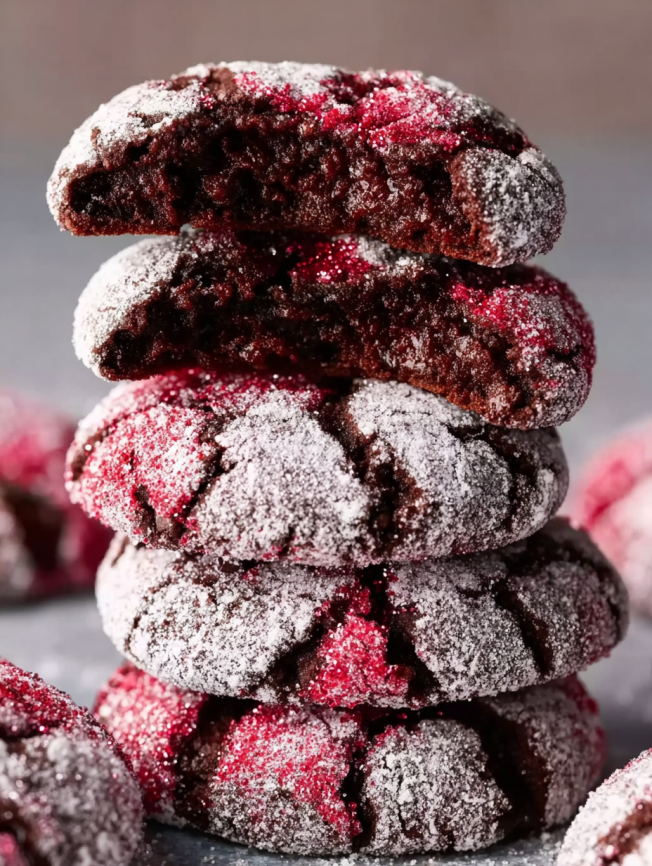
These cookies are absolutely gorgeous, with their dramatic crackled surfaces and beautiful pink-dusted coating. Furthermore, the contrast between the dark chocolate base and the vibrant raspberry powder creates an Instagram-worthy presentation that’s perfect for special occasions. Each cookie looks like it came straight from an upscale bakery.
Perfect Texture Balance
The texture is where these cookies truly shine – they’re soft-baked and chewy with that signature fudgy quality that makes crinkle cookies so beloved. Additionally, the freeze-dried raspberry coating adds a delightful textural element that dissolves on your tongue, creating layers of sensation with every bite.
Essential Ingredients
For the Chocolate Cookie Base
- 1/2 cup (8 tbsp; 113g) unsalted butter, softened – Provides rich, buttery foundation
- 1 tablespoon vegetable oil, avocado oil, or olive oil – Ensures extra moisture and chewiness
- 1/2 cup (100g) granulated sugar – Creates sweetness and helps with texture
- 1/2 cup (100g) packed brown sugar – Adds moisture, chewiness, and caramel notes
- 1 large egg, at room temperature – Binds ingredients and adds richness
- 1 teaspoon pure vanilla extract or raspberry liqueur – Enhances flavor complexity
- 1 and 1/2 cups (188g) all-purpose flour (spooned & leveled) – Forms the cookie structure
- 2/3 cup (56g) unsweetened natural cocoa powder – Delivers deep chocolate flavor
- 1 teaspoon baking soda – Provides lift and contributes to cracking
- 1/8 teaspoon salt – Balances sweetness and enhances chocolate
- 1/3 cup (100g) raspberry preserves – Infuses real fruit flavor throughout
For the Stunning Raspberry Coating
- 3/4 cup (90g) confectioners’ sugar – Creates the classic crinkle coating base
- 1/2 cup (13g) freeze-dried raspberries – Transforms into intense raspberry powder
Step-by-Step Instructions
Building the Cookie Dough Foundation
Begin by combining the softened butter, oil, and both sugars in a large bowl. Using either a handheld or stand mixer fitted with a paddle attachment, beat the mixture on medium-high speed for 2-3 minutes until it becomes fluffy and noticeably lighter in color. This thorough creaming process is essential for achieving the proper cookie texture.
Next, add the room temperature egg and vanilla extract (or raspberry liqueur if using), beating on high speed until everything is completely combined. Remember to scrape down the sides and bottom of the bowl as needed to ensure even mixing.
Incorporating the Dry Ingredients
In a separate bowl, whisk together the flour, cocoa powder, baking soda, and salt until well combined. This pre-mixing ensures even distribution of the leavening agents and prevents pockets of cocoa powder in the finished cookies.
Pour the dry ingredient mixture into the wet ingredients, then add the raspberry preserves. Beat everything on low speed until just combined – the dough will be thick and very sticky, which is exactly what you want for these fudgy cookies.
Essential Chilling Process
Cover the dough tightly with plastic wrap or transfer to an airtight container, then chill in the refrigerator for at least 3 hours, though it can stay chilled for up to 3 days. This chilling step is absolutely mandatory – the sticky dough becomes manageable and the flavors have time to meld together beautifully.
Before shaping, remove the dough from the refrigerator and let it sit at room temperature for 10 minutes if it chilled for exactly 3 hours, or about 20 minutes if it chilled longer. This brief tempering makes the dough much easier to scoop and roll.
Creating the Signature Raspberry Coating
While the dough comes to temperature, prepare your unique coating. Place the freeze-dried raspberries in a dry food processor or high-powered blender and grind them into a fine powder. Then, sift the raspberry powder through a fine-mesh sieve to remove any seeds – discard the seeds and place the smooth powder in a small bowl.
Add the confectioners’ sugar to the raspberry powder and mix thoroughly. This creates a beautiful pink-tinted coating that will give your cookies their distinctive appearance and incredible flavor.
Shaping and Coating the Cookies
Preheat your oven to 350°F (177°C) and line large baking sheets with parchment paper or silicone baking mats.
Using a medium cookie scoop or spoon, portion the dough into balls of about 1.5 tablespoons or 35g each. Here’s the crucial step: roll each dough ball very generously in the raspberry-sugar coating, ensuring complete coverage. Don’t be shy with the coating – this is what creates both the beautiful appearance and the melting texture.
Place the coated dough balls 3 inches apart on the prepared baking sheets, giving them plenty of room to spread and develop those characteristic cracks.
Baking to Perfection
Bake the cookies for 12-14 minutes, watching for edges that appear set while centers still look soft. The cookies may appear puffy when you remove them from the oven, but don’t worry – they’ll deflate slightly as they cool, developing that perfect chewy texture.
Resist the urge to overbake these cookies. They should still look slightly underdone in the centers when you remove them from the oven – the residual heat will finish the cooking process.
Finishing Touches
Allow the cookies to cool on the baking sheet for 10 minutes before transferring to a cooling rack. During this time, the cookies will set properly while maintaining their soft, chewy texture.
If you have extra raspberry powder mixture, consider sprinkling or sifting a pinch on top of the warm cookies for an extra burst of color and flavor.
Serving Suggestions
Elegant Dessert Presentations
These stunning cookies deserve to be showcased on your finest serving platters. Arrange them on white porcelain or clear glass plates to highlight their beautiful pink-dusted appearance. The visual contrast makes them perfect centerpieces for dinner parties, brunch gatherings, or afternoon tea service.
Special Occasion Showstoppers
Whether it’s Valentine’s Day, Mother’s Day, or a romantic anniversary celebration, these cookies deliver both visual impact and incredible taste. Consider packaging them in clear boxes tied with pink ribbons for memorable gifts that recipients will treasure.
Casual Indulgence Options
While they look fancy enough for special occasions, these cookies are equally delightful for everyday treats. Pack them in lunch boxes, enjoy them with morning coffee, or serve them as after-dinner treats when you want something special but not overwhelming.
Creative Recipe Variations
Fruit Alternatives
The beauty of this recipe lies in its adaptability. Strawberry preserves paired with freeze-dried strawberries creates a equally stunning variation with a sweeter, more mellow flavor profile. Blackberry or cherry versions offer deeper, more complex fruit notes that pair beautifully with the chocolate base.
Seasonal Adaptations
Transform these cookies for different seasons by adjusting the fruit components. Summer versions might feature mixed berry preserves with a blend of freeze-dried berries. Winter adaptations could incorporate orange preserves with freeze-dried orange powder for a chocolate-orange combination.
Liqueur Enhancements
For adult gatherings, consider replacing the vanilla extract with complementary liqueurs. Chambord (raspberry liqueur) intensifies the berry flavor, while Grand Marnier adds sophisticated orange notes. Amaretto creates an interesting almond-berry-chocolate combination that’s absolutely divine.
Make-Ahead Strategies
Dough Preparation Timeline
This recipe is incredibly make-ahead friendly. The cookie dough actually improves with extended chilling – up to 3 days in the refrigerator. The longer chilling time allows the flavors to develop more fully and makes the dough easier to handle.
Freezing Options
For longer-term storage, shape the dough into balls (but don’t coat them with the raspberry sugar yet) and freeze on baking sheets until solid. Transfer to freezer bags for up to 3 months. When ready to bake, thaw for 30 minutes, coat with the raspberry mixture, and bake as directed.
Finished Cookie Storage
Baked and completely cooled cookies freeze beautifully for up to 3 months. Layer them between parchment paper in airtight containers to prevent the coating from being damaged. Thaw at room temperature or in the refrigerator before serving.
Important Notes
The Freeze-Dried Raspberry Secret
Freeze-dried raspberries are crucial for this recipe’s success – they’re different from regular dried fruit because all moisture has been removed through a special process. This allows them to grind into a fine powder that won’t add unwanted moisture to your coating. Regular dried raspberries won’t work as they’re chewy and won’t powder properly.
Coating Technique Matters
Generous coating is essential for both appearance and flavor. The raspberry-sugar mixture should completely cover each dough ball, creating that signature crackled appearance as it bakes. If the coating seems to melt too much during baking, sift additional mixture over the warm cookies.
Temperature Precision
Room temperature ingredients blend more easily and create better texture. Cold eggs won’t incorporate smoothly, while overly warm butter can make the dough too soft to handle. Plan ahead to bring ingredients to the proper temperature.
Frequently Asked Questions
Can I substitute regular dried raspberries for freeze-dried?
Unfortunately, regular dried raspberries won’t work for this recipe. They’re too moist and chewy to grind into the fine powder needed for the coating. Freeze-dried raspberries are essential because they powder beautifully and provide intense flavor without adding moisture.
Where can I find freeze-dried raspberries?
Most grocery stores carry them in the dried fruit aisle, and stores like Trader Joe’s and Target regularly stock them. They’re typically much cheaper in physical stores than online, so check your local options first. The investment is worth it for the incredible flavor and appearance they provide.
My coating is melting into the cookies. What went wrong?
This usually happens when the coating isn’t applied generously enough or the cookies are overbaked. Make sure to roll each dough ball very thoroughly in the raspberry-sugar mixture. If it still melts too much, sift additional coating over the warm cookies after baking.
Can I make these without the raspberry preserves?
The raspberry preserves are integral to the cookie’s flavor and texture. They provide moisture, fruit flavor throughout the cookie, and contribute to the soft, chewy texture. Without them, you’d essentially have regular chocolate crinkle cookies, which are delicious but not the same experience.
How do I know when the cookies are properly baked?
Look for edges that appear set while centers still look slightly soft and underdone. These cookies should not be baked until firm – they continue cooking on the hot pan after removal from the oven. Overbaking will result in hard, dry cookies instead of the desired soft, chewy texture.
Can I use different preserves and freeze-dried fruits?
Absolutely! Strawberry preserves with freeze-dried strawberries work beautifully, as do other berry combinations. Just ensure you’re using high-quality preserves with real fruit pieces and actual freeze-dried fruit for the coating powder.
These chocolate raspberry crinkle cookies represent the perfect fusion of classic baking techniques with modern flavor innovation. The combination of deep chocolate richness, bright raspberry tartness, and that magical melting coating creates an unforgettable cookie experience. Whether you’re baking for a special someone or treating yourself to something extraordinary, these cookies deliver both visual drama and incredible taste that will have everyone asking for the recipe.


