My mother-in-law introduced me to pea salad during my first Easter dinner with my husband’s family fifteen years ago. Initially skeptical about a salad made with frozen peas, I was completely won over after the first bite. The combination of crispy bacon, creamy dressing, and sharp cheddar created something magical that I’ve been making ever since.
This isn’t just another pasta salad or green salad—it’s a hearty, satisfying dish that bridges the gap between side dish and main course. What makes it special is how simple ingredients transform into something greater than the sum of their parts, creating a comfort food classic that works for any occasion.
Why This Pea Salad Will Win You Over
Incredible simplicity makes this recipe accessible to anyone, regardless of cooking experience. With just a handful of ingredients and straightforward techniques, you can create a dish that tastes like it came from a high-end deli.
Perfect balance of flavors combines salty bacon, creamy cheese, sweet peas, and tangy dressing in every bite. Each element complements the others without overwhelming, creating a harmonious taste experience that keeps people coming back.
Versatile serving options allow this salad to work as a side dish for barbecues, a potluck contribution, or even a light lunch when served with crusty bread. The substantial ingredients make it filling enough to satisfy hungry appetites.
Make-ahead friendly nature means the flavors actually improve after sitting for a few hours. This characteristic makes it ideal for busy schedules and entertaining, as you can prepare it well in advance.
Essential Ingredients
Main Salad Components
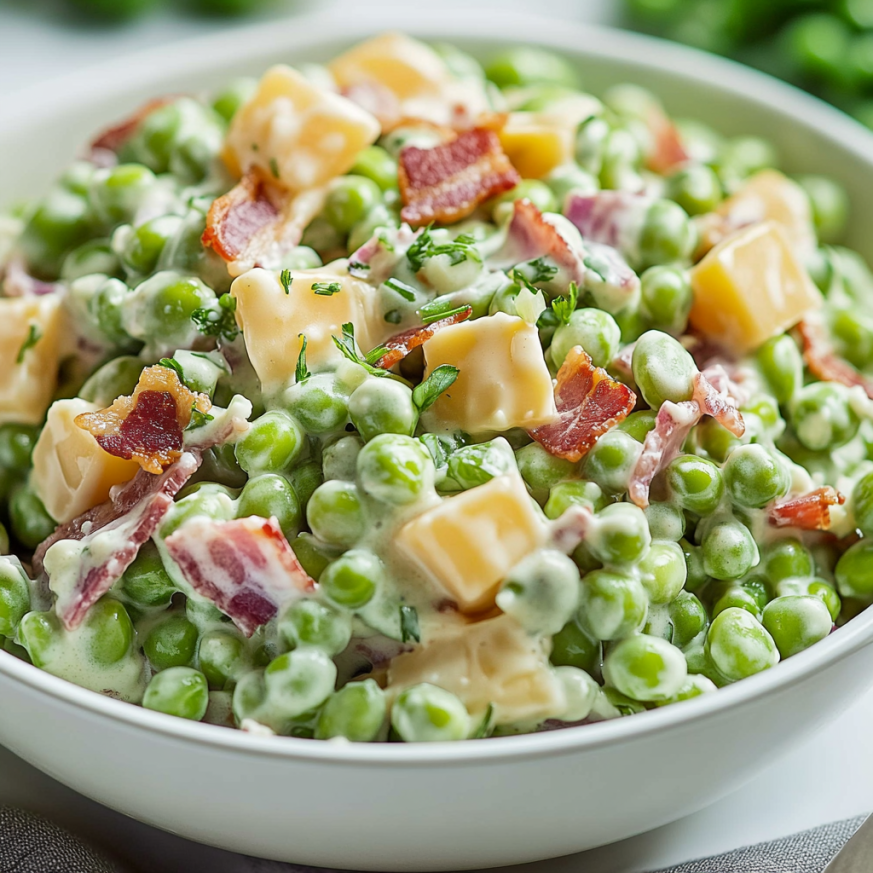
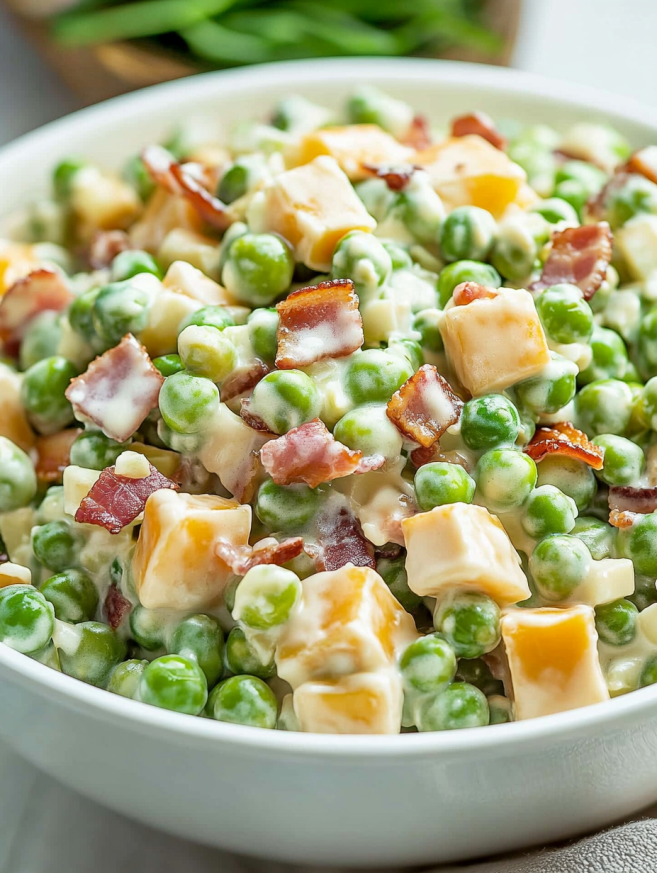
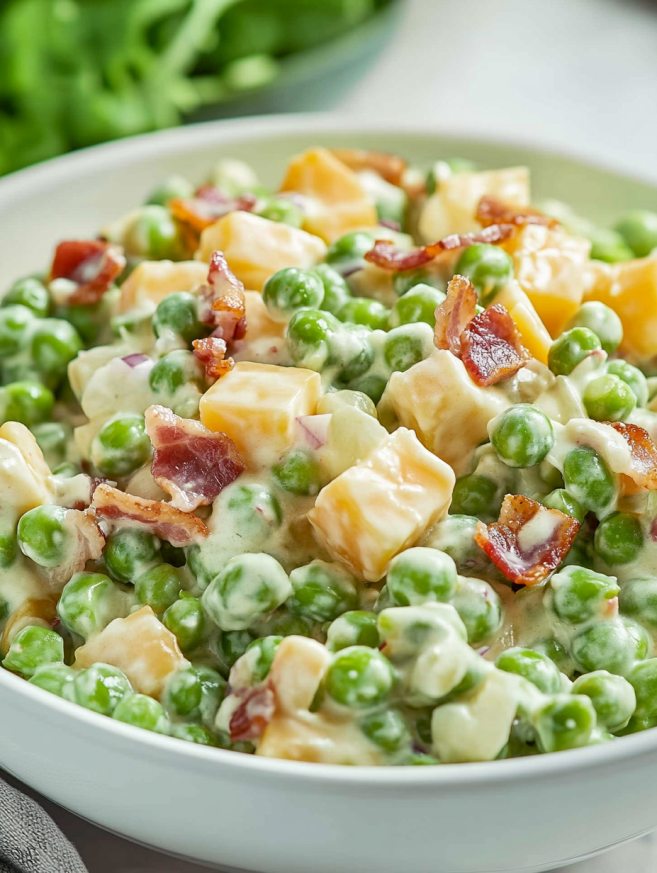
- 12 ounces bacon – Thick-cut bacon provides the best texture and smoky flavor
- 3 large eggs – Hard-boiled and chopped for protein and richness
- 16 ounces frozen peas – Thawed but not cooked for perfect texture
- 4 ounces sharp cheddar cheese – Cubed for distinct flavor bursts
- ½ cup red onion – Diced fine for subtle bite and color
Creamy Tangy Dressing
- ¼ cup mayonnaise – Creates the rich base
- ½ cup sour cream – Adds tanginess and lighter texture
- 1 tablespoon apple cider vinegar – Provides bright acidity
- 1½ tablespoons sugar – Balances the tartness perfectly
Step-by-Step Instructions
Preparing the Bacon and Eggs
Preheat your oven to 425°F and arrange the diced bacon on a large rimmed baking sheet. Cooking bacon in the oven rather than on the stovetop ensures even crisping and reduces splatter mess significantly.
Bake for 18-20 minutes, checking at the 15-minute mark to ensure even browning. The bacon should be golden brown and crispy but not burnt. Transfer to paper towels to drain excess fat, then chop into bite-sized pieces once cooled.
While the bacon cooks, prepare your hard-boiled eggs using your preferred method. For perfectly cooked eggs, place them in boiling water for exactly 10 minutes, then transfer immediately to an ice bath. Once completely cooled, peel and chop into chunky pieces.
Creating the Perfect Dressing
In a small mixing bowl, whisk together the mayonnaise and sour cream until completely smooth and lump-free. This combination provides better flavor and lighter texture than using mayonnaise alone.
Add the apple cider vinegar gradually while whisking continuously to prevent any separation. The vinegar adds brightness that cuts through the richness of the other ingredients beautifully.
Incorporate the sugar last, whisking until completely dissolved. Taste and adjust seasoning as needed—the dressing should be creamy, slightly sweet, and pleasantly tangy.
Final Assembly
In a large serving bowl, combine the thawed peas, crispy bacon pieces, cubed cheddar cheese, and diced red onion. Gently toss to distribute ingredients evenly throughout the mixture.
Pour the dressing over the salad ingredients and fold together carefully to avoid mashing the peas. Every component should be lightly coated with dressing without becoming soggy or overly wet.
Taste and adjust seasoning with salt and pepper as needed. Remember that the bacon and cheese already provide significant saltiness, so season conservatively at first.
Serving Suggestions
This classic pea salad pairs beautifully with grilled meats, particularly chicken, pork chops, or hamburgers. The creamy, cool texture provides a perfect contrast to hot, smoky barbecue flavors.
Serve it alongside other picnic favorites like potato salad, baked beans, and cornbread for a complete comfort food spread. The variety of textures and flavors creates an appealing buffet presentation.
For a lighter meal, serve generous portions over mixed greens or alongside fresh tomato slices. The substantial ingredients make it satisfying enough to serve as a main course for lunch.
Consider it as part of a brunch spread with quiche, fresh fruit, and pastries. The combination of eggs, bacon, and vegetables makes it naturally suited for morning entertaining.
Creative Recipe Variations
Protein Additions
Transform this into a heartier main dish by adding diced ham, cooked chicken, or turkey. These proteins complement the existing flavors while making the salad more substantial.
Vegetable Enhancements
Incorporate diced bell peppers, chopped celery, or cherry tomatoes for additional crunch and color. These additions provide textural variety without overwhelming the classic flavor profile.
Cheese Alternatives
Experiment with different cheese varieties like Swiss, Gouda, or pepper jack for unique flavor profiles. Each cheese brings its own character while maintaining the creamy richness.
Herb and Spice Variations
Add fresh dill, chives, or parsley for bright herbal notes. A pinch of garlic powder or onion powder can also enhance the overall flavor complexity.
Lighter Version
Use Greek yogurt in place of some sour cream and turkey bacon instead of regular bacon to reduce calories while maintaining satisfying flavors.
Make-Ahead Tips
This pea salad actually benefits from being made several hours ahead of serving. The flavors meld beautifully while the peas absorb some of the dressing, creating even better taste throughout.
Prepare the complete salad up to 24 hours in advance and store covered in the refrigerator. Give it a gentle stir before serving, as some separation may occur naturally during storage.
For optimal texture, add the bacon just before serving if making more than 4 hours ahead. This preserves the crispy texture that makes such an important contribution to the overall appeal.
The dressing can be prepared up to 3 days in advance and stored separately. This approach allows for even quicker assembly when you’re ready to serve.
Pro Tips and Notes
Pea preparation is crucial for the right texture. Use frozen peas that have been thawed but not cooked—they should retain some firmness while being tender enough to bite through easily.
Bacon cooking technique makes a significant difference in the final result. Oven-baking produces more evenly crispy pieces than stovetop cooking and reduces the chance of burned or undercooked spots.
Cheese cubing should result in pieces that are substantial enough to provide distinct bites but not so large they overwhelm other ingredients. Aim for roughly ¼-inch cubes for ideal proportion.
Dressing consistency should coat ingredients without pooling at the bottom of the bowl. If the mixture seems dry, add dressing gradually rather than all at once.
Frequently Asked Questions
Can I use fresh peas instead of frozen? Fresh peas work wonderfully, but they should be blanched briefly in boiling water until just tender-crisp, then shocked in ice water to stop cooking. This ensures proper texture without the raw taste.
How long will this salad keep in the refrigerator? Properly stored, this salad stays fresh for up to 3 days. However, it’s best within the first 24 hours when all ingredients maintain their optimal textures.
Can I make this without bacon for a lighter version? Absolutely! Try substituting with toasted sunflower seeds, chopped walnuts, or crispy chickpeas for crunch, or simply omit for a vegetarian version.
What’s the best way to hard-boil eggs for this recipe? Place eggs in boiling water for exactly 10 minutes, then immediately transfer to an ice bath. This method produces perfectly cooked eggs with creamy yolks and no green ring.
Can I substitute the sour cream? Greek yogurt makes an excellent substitute for a tangier, lighter version. You can also use all mayonnaise, though the flavor will be richer and less bright.
Why do my peas get mushy? Overmixing or using peas that are too soft initially causes this problem. Thaw frozen peas gently and fold ingredients together carefully rather than stirring vigorously.
Can I add other vegetables? Certainly! Diced celery, bell peppers, or water chestnuts all work well. Just ensure any additions complement rather than compete with the classic flavor combination.
Recipe Summary:
- Prep Time: 25 minutes
- Total Time: 25 minutes
- Serves: 6
- Calories per serving: 529
Nutritional Information per serving:
- Carbohydrates: 17g
- Fat: 42g
- Protein: 20g


