Prep Time: 45 minutes | Cook Time: 45 minutes | Total Time: 1 hour 30 minutes | Yield: 40 cookies
Every December, the sweet aroma of toasted pecans and butter fills my kitchen as I prepare these beloved snowball cookies. This tradition started with my grandmother’s handwritten recipe card, stained with years of holiday baking sessions. What makes these cookies truly special isn’t just their melt-in-your-mouth texture or festive appearance – it’s the way they bring families together, creating memories one powdered sugar-dusted bite at a time.
Why These Snowball Cookies Are Irresistible
Perfectly Balanced Texture
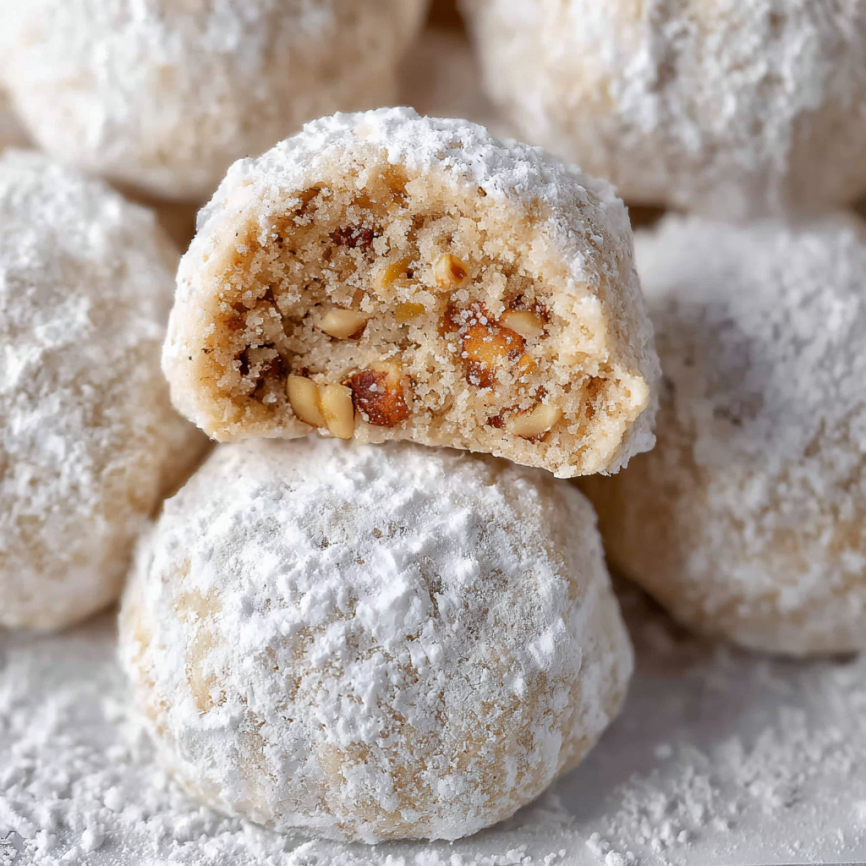
These cookies achieve the ideal combination of tender crumb and subtle crunch from toasted pecans. The careful balance of finely ground and roughly chopped nuts creates layers of texture that make each bite interesting and satisfying.
Classic Holiday Appeal
Few cookies capture the essence of the holiday season quite like snowballs. Their snowy white appearance evokes winter wonder, while the rich, buttery flavor with toasted nuts delivers the comfort we crave during cold months.
Foolproof Technique
Unlike finicky sugar cookies that require rolling and cutting, snowball cookies use a simple drop-and-roll method. This forgiving technique makes them perfect for bakers of all skill levels, including children who want to help with holiday preparations.
Make-Ahead Convenience
These cookies actually improve with time, making them ideal for holiday meal planning. Their sturdy texture travels well, and they maintain their fresh taste for days when stored properly.
Essential Ingredients
Nut Components
- 1½ cups pecans, divided – The star ingredient providing rich, buttery flavor and textural contrast
- Fresh pecans work best, but if using stored nuts, toast them a bit longer to refresh their flavor
Base Structure
- 2 cups all-purpose flour – Creates the tender crumb structure
- ¼ teaspoon kosher salt – Enhances flavors and balances sweetness
- 1 cup unsalted butter, softened to 60-65°F – Temperature is crucial for proper creaming
Sweetening Elements
- ⅓ cup granulated sugar – Provides structure and subtle sweetness
- 1 teaspoon pure vanilla extract – Adds depth and warmth to the flavor profile
- 1½ cups powdered sugar – For the signature snowy coating
Serving and Storage Ideas
These cookies pair beautifully with hot chocolate, coffee, or dessert wine. For gift-giving, arrange them in decorative tins with parchment paper between layers to prevent sticking.
Step-by-Step Instructions
Oven Preparation and Setup
Begin by positioning your oven rack in the middle position, then preheat to 325°F (160°C). This moderate temperature ensures even baking without over-browning the delicate cookies. Meanwhile, line two baking sheets with parchment paper to prevent sticking and make cleanup easier.
Toasting and Preparing Pecans
Spread all the pecans on a small baking sheet and toast for 6 minutes, stirring once halfway through. This step is crucial – toasting intensifies the nuts’ natural oils and creates deeper flavor. Transfer the warm pecans to a plate and let them cool completely, about 10 minutes.
Creating Varied Textures
Once cooled, divide your pecans strategically. Add 1 cup to a food processor and pulse approximately 15 times until finely ground – you want a powder-like consistency that will integrate seamlessly into the dough. Next, process the remaining ½ cup with just 3-5 pulses to create roughly chopped pieces that will provide delightful texture surprises.
Combine both pecan textures in a medium bowl, then stir in the flour and salt until evenly distributed.
Building the Cookie Base
Creaming Method
In a mixing bowl or stand mixer, cream the softened butter and granulated sugar on medium speed for exactly 3 minutes. Scrape down the bowl sides halfway through to ensure even mixing. Proper creaming creates tiny air pockets that contribute to the cookies’ tender texture.
Final Assembly
Add vanilla extract and mix on low speed for 30 seconds until just incorporated. Finally, add your pecan-flour mixture and combine on the lowest speed until the dough just comes together, about 30 seconds. Overmixing at this stage can result in tough cookies.
Shaping and Baking
Using a measuring spoon, portion the dough into level tablespoons. Roll each portion between your palms to form balls approximately 1 inch in diameter. Arrange them on prepared baking sheets with 1-inch spacing between cookies – they don’t spread much but need room for even air circulation.
Bake one sheet at a time for about 18 minutes, rotating the pan halfway through for even browning. The cookies are done when they’re lightly golden and the bottoms show gentle browning.
Coating and Finishing Techniques
First Sugar Coating
Allow cookies to cool on the baking sheet for exactly 5 minutes – this brief cooling prevents them from breaking while still being warm enough for the powdered sugar to adhere properly. Place powdered sugar in a shallow bowl and roll each warm cookie until completely coated, then transfer to a wire rack.
Final Presentation Coating
Once completely cooled, give the cookies a second roll in powdered sugar for that picture-perfect snowy appearance. Alternatively, you can wait until just before serving to apply this final coating for the most pristine look.
Recipe Variations
Nut Alternatives
Walnut Snowballs: Substitute pecans with toasted walnuts for a slightly different flavor profile.
Mixed Nut Version: Use ½ cup each of pecans and toasted almonds for complexity.
Hazelnut Snowballs: Replace pecans with toasted hazelnuts for a European twist.
Flavor Enhancements
Chocolate Chip Snowballs: Fold in ⅓ cup mini chocolate chips after adding the nut mixture.
Spiced Holiday Version: Add ½ teaspoon cinnamon and ¼ teaspoon nutmeg with the flour.
Lemon Snowballs: Replace vanilla with lemon extract and add 1 teaspoon lemon zest.
Make-Ahead and Storage Strategies
Advance Preparation
The cookie dough can be shaped into balls and frozen on baking sheets up to one month ahead. Once frozen solid, transfer to freezer bags. Bake directly from frozen, adding 2-3 extra minutes to the baking time.
Storage Solutions
Store completely cooled cookies in airtight containers at room temperature for up to one week. Place parchment paper between layers to prevent the powdered sugar coating from rubbing off.
Freshening Tips
If cookies lose their crisp texture, place them on a baking sheet in a 300°F oven for 3-5 minutes to restore their original consistency.
Professional Baking Tips
Temperature Precision
Butter temperature is critical for success. Too soft, and the cookies will spread; too cold, and they won’t cream properly. The ideal temperature of 60-65°F should feel slightly cool to the touch but yield easily to pressure.
Measuring Accuracy
Use the scoop-and-level method for flour to avoid dense cookies. Too much flour creates heavy, dry results that lack the signature melt-in-your-mouth quality.
Timing Considerations
Don’t rush the cooling process before the first sugar coating. Cookies that are too hot will melt the powdered sugar, creating a paste rather than the desired snowy coating.
Troubleshooting Common Issues
Preventing Crumbly Texture
If your cookies fall apart easily, the butter may have been too cold during creaming, or the dough was overmixed. Ensure proper butter temperature and mix just until ingredients combine.
Achieving Even Browning
Rotate pans halfway through baking and avoid overcrowding. If your oven has hot spots, consider using an oven thermometer to verify temperature accuracy.
Maintaining Sugar Coating
Apply the final powdered sugar coating as close to serving time as possible. Store cookies without the final coating and dust them fresh for best appearance.
Frequently Asked Questions
Can I make these cookies without a food processor? Yes! Chop the pecans finely with a sharp knife, or place them in a zip-top bag and crush with a rolling pin. The texture won’t be quite as uniform, but the cookies will still be delicious.
Why do my cookies spread too much during baking? This usually indicates the butter was too warm when mixed, or the dough wasn’t chilled enough before baking. Try refrigerating the shaped cookies for 15 minutes before baking.
Can I use salted butter instead of unsalted? While possible, reduce the added salt to just a pinch. Unsalted butter gives you better control over the final flavor balance.
What’s the best way to store these for gifting? Layer cookies between parchment paper in airtight tins. They’ll stay fresh for up to two weeks and travel well without breaking.
Can I freeze the baked cookies? Absolutely! Freeze cookies without the final powdered sugar coating for up to three months. Thaw at room temperature and dust with fresh powdered sugar before serving.
Why don’t my cookies have the classic melt-in-your-mouth texture? This texture comes from proper butter creaming and not overbaking. Ensure your butter is the right temperature and stop baking as soon as the bottoms begin to brown lightly.
How can I make these cookies more festive? Try rolling some cookies in colored sugar instead of powdered sugar, or add a few drops of food coloring to create pastel snowballs for variety.
Nutrition Information (Per Cookie):
- Calories: 113kcal
- Carbohydrates: 11g
- Protein: 1g
- Fat: 7g
- Fiber: 1g
- Sugar: 6g
These timeless snowball cookies represent the perfect balance of simplicity and elegance, proving that sometimes the most beloved recipes are those that focus on quality ingredients and time-tested techniques rather than complicated procedures.