Prep Time: 20 minutes | Cook Time: 30 minutes | Total Time: 1 hour, 10 minutes | Yield: serves 9-12
Description: Every baker should have a classic, old-fashioned and buttery coffee cake recipe in their back pocket and this one is my gold standard, baseline recipe. You’re welcome to borrow it! An 8-inch square pan is required, but see the recipe notes for other sizes.
The Coffee Cake That Defines Perfection
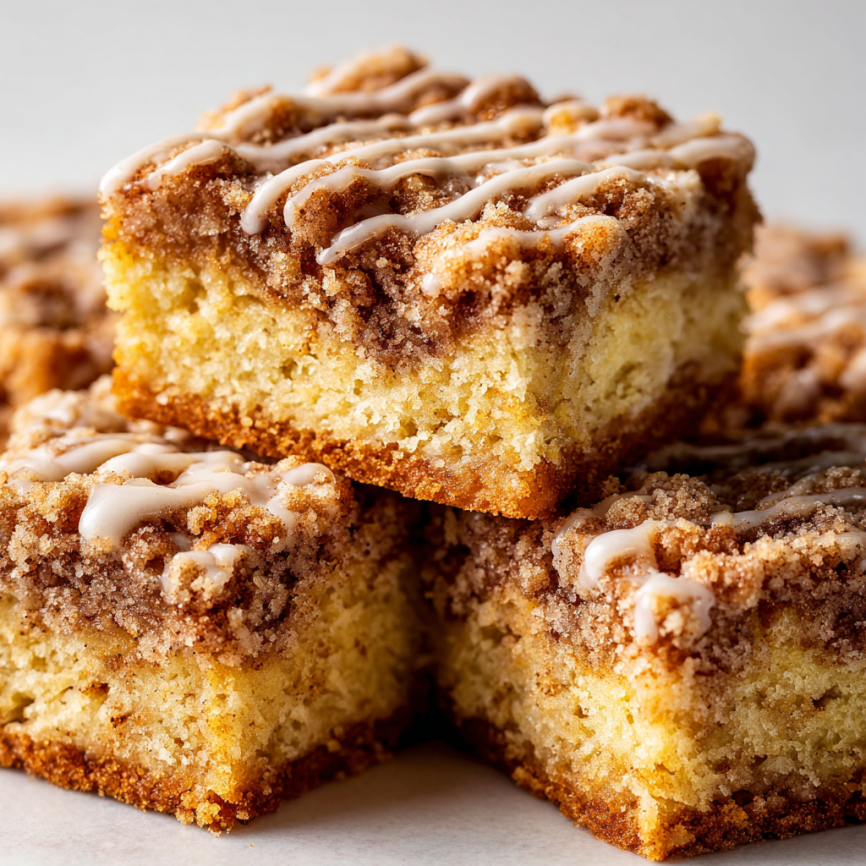
There’s something profoundly comforting about the aroma of coffee cake baking in the oven—that perfect blend of cinnamon, butter, and vanilla that promises cozy mornings and unhurried conversations. This particular recipe holds a special place in my heart because it represents everything I believe a coffee cake should be: tender, buttery, generously topped with cinnamon crumbs, and simple enough to make on a whim yet impressive enough for special occasions.
After years of testing countless coffee cake recipes, this version emerged as my absolute gold standard. It strikes that elusive balance between rich indulgence and morning-appropriate sweetness, creating a cake that’s equally at home on a weekend brunch table or alongside an afternoon cup of coffee. The secret lies in the sour cream, which creates an incredibly tender, bakery-style crumb that stays moist for days.
What makes this recipe truly special is its reliability and versatility. Whether you’re a novice baker seeking confidence or an experienced cook looking for a dependable go-to recipe, this coffee cake delivers consistent, exceptional results every single time. It’s become the recipe I reach for when I want to show someone I care, when I need to bring something to a gathering, or when I simply want to fill my home with the most wonderful aromas.
Why This Recipe Will Become Your Kitchen Essential
This coffee cake represents the perfect marriage of texture and flavor that defines truly exceptional baking. The cake itself achieves that coveted tender crumb that’s neither too dense nor too light, with a subtle tang from the sour cream that prevents it from being cloying. Each bite delivers layers of complexity—the buttery richness of the cake, the warm spice of cinnamon, and the delightful contrast of the crumbly topping.
Unlike many coffee cakes that can be dry or overly sweet, this recipe maintains perfect moisture balance through the strategic use of sour cream and just a touch of milk. The result is a cake that actually improves over time, staying incredibly moist for several days while the flavors deepen and meld together beautifully.
The generous crumb topping sets this cake apart from simpler versions. Rather than a thin sprinkling of crumbs, this recipe creates substantial layers of cinnamon-sugar goodness that provide textural interest and visual appeal. The crumbs bake into golden, slightly crispy clusters that contrast beautifully with the tender cake beneath.
Perhaps most importantly, this recipe is remarkably forgiving and adaptable. It scales beautifully for different pan sizes, accommodates various dietary substitutions, and delivers consistent results regardless of your baking experience level.
Essential Ingredients Breakdown
For the Cinnamon Crumb Mixture
- 2/3 cup (135g) packed dark or light brown sugar
- 3/4 cup (95g) all-purpose flour (spooned & leveled)
- 2½ teaspoons ground cinnamon
- 6 tablespoons (85g) unsalted butter, cold and cubed
For the Cake Base
- 1⅓ cups (166g) all-purpose flour (spooned & leveled)
- 1 teaspoon baking powder
- 1/4 teaspoon baking soda
- 1/4 teaspoon salt
- 1/2 cup (8 Tbsp; 113g) unsalted butter, softened to room temperature
- 3/4 cup (150g) granulated sugar
- 2 large eggs, at room temperature
- 2 teaspoons pure vanilla extract
- 1/2 cup (120g) full-fat sour cream, at room temperature
- 2 tablespoons (30ml) milk (any kind)
For the Optional Vanilla Icing
- 1 cup (120g) confectioners’ sugar, sifted
- 1/2 teaspoon pure vanilla extract
- 2 tablespoons (30ml) heavy cream or milk
Each ingredient serves a specific purpose in creating the perfect coffee cake. The sour cream provides tenderness and moisture, while the combination of baking powder and baking soda creates the ideal rise and texture. Cold butter in the crumb topping ensures proper texture, while room temperature butter in the cake base creates smooth, even mixing.
Detailed Step-by-Step Instructions
Preparation and Setup
Begin by preheating your oven to 350°F (177°C) and preparing an 8-inch square baking pan. Line it with lightly greased parchment paper, ensuring you leave overhang on the sides for easy removal, or simply grease the pan directly if you prefer to cut and serve directly from the pan.
The specific pan size is important here—an 8-inch square pan creates the perfect thickness for this amount of batter. A 9-inch square pan would result in a cake that’s too thin, while anything smaller would cause overflow issues during baking.
Creating the Perfect Crumb Topping
In a medium bowl, whisk together the brown sugar, flour, and cinnamon until evenly combined. The key to exceptional crumb topping lies in properly incorporating the cold butter. Cut the chilled butter into small cubes, then use a pastry cutter, two forks, or even your hands to work it into the flour mixture until you achieve pea-sized crumbs with some larger pieces.
Don’t worry if the mixture isn’t perfectly uniform—some variation in crumb size actually creates better texture in the finished cake. You should end up with slightly more than 2 cups of crumb mixture. Transfer this to the refrigerator to keep the butter cold while you prepare the cake batter.
Building the Cake Foundation
In a large bowl, whisk together the flour, baking powder, baking soda, and salt until well combined. This dry mixture forms the structural foundation of your cake, so thorough mixing at this stage ensures even distribution of leavening agents throughout.
Using either a handheld or stand mixer fitted with a paddle attachment, cream the softened butter and granulated sugar together on high speed for about 2 minutes. Properly creamed butter and sugar should appear light, fluffy, and noticeably paler in color—this process incorporates air that contributes to the cake’s tender texture.
Incorporating the Remaining Elements
Add the eggs one at a time, beating well after each addition, then incorporate the vanilla extract. Beat in the sour cream, which will initially make the mixture appear slightly lumpy—this is completely normal and expected.
Scrape down the sides and bottom of the bowl regularly during mixing to ensure all ingredients are properly incorporated. Add the flour mixture to the wet ingredients and mix on low speed until just combined, being careful not to overmix, which can result in tough cake texture.
Finally, beat in the milk, which helps smooth the batter and creates the perfect consistency for layering. The finished batter should be thick but spreadable, yielding approximately 2½ cups total.
Assembly Techniques for Professional Results
Creating Perfect Layers
The layering process requires a gentle touch but isn’t as difficult as it might seem. Spread approximately half of the cake batter into your prepared pan, using an offset spatula to create an even layer. Don’t worry about achieving complete coverage—the batter will spread during baking.
Sprinkle about 1 cup (roughly half) of the chilled crumb mixture evenly over the first layer of batter. This creates the signature coffee cake experience with crumbs throughout, not just on top.
Mastering the Top Layer
Carefully spread the remaining batter over the crumb layer, using a spoon or small offset spatula to distribute it as evenly as possible. This step can feel tricky since you’re spreading thick batter over loose crumbs, but don’t stress about perfection—the baking process will settle everything beautifully.
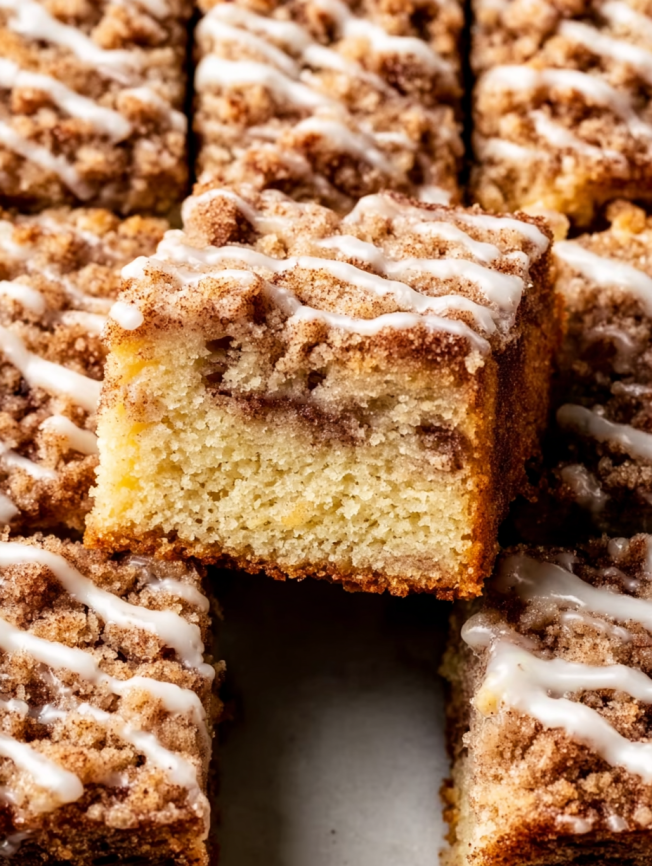
Top with the remaining crumb mixture, distributing it evenly across the surface. The generous amount of crumb topping is one of this recipe’s defining characteristics, creating that bakery-style appearance and texture that makes it so special.

Baking Techniques for Optimal Results
Temperature and Timing
Bake the assembled cake for 35-40 minutes, checking for doneness with a toothpick inserted into the center. The cake is ready when the toothpick comes out clean or with just a few moist crumbs clinging to it.
Watch for visual cues as well—the crumb topping should be golden brown, and the cake should pull slightly away from the sides of the pan. If the top browns too quickly, tent it loosely with aluminum foil for the remainder of the baking time.
Cooling Considerations
Allow the cake to cool in the pan for at least 15 minutes before adding any icing or attempting to remove it from the pan. This cooling period allows the structure to set properly while keeping the cake warm enough for the optional vanilla icing to flow beautifully.
Creating the Perfect Finishing Touch
Optional Vanilla Icing
While absolutely delicious on its own, the vanilla icing provides an elegant finishing touch that elevates this coffee cake to special occasion status. Whisk together the sifted confectioners’ sugar, vanilla extract, and cream or milk until smooth and drizzle-able.
For the best appearance, drizzle the icing while the cake is still slightly warm—this allows it to flow naturally into the crevices of the crumb topping while setting perfectly as the cake continues to cool.
Serving and Storage Strategies
Optimal Serving Methods
This coffee cake is delicious served warm, at room temperature, or even chilled. For the most authentic experience, serve it alongside freshly brewed coffee or tea, allowing the slightly sweet cake to complement your beverage of choice.
Cut into squares directly in the pan, or use the parchment paper overhang to lift the entire cake out for cleaner cutting and more elegant presentation. Either method works beautifully depending on your serving style.
Storage Guidelines
Cover leftover cake tightly and store at room temperature for up to three days, or refrigerate for up to one week. The cake actually improves slightly over time as the flavors meld and the texture becomes even more tender.
For longer storage, wrap individual pieces or the entire cake tightly and freeze for up to three months. Thaw overnight in the refrigerator and bring to room temperature before serving for the best texture and flavor.
Versatile Adaptations and Variations
Pan Size Modifications
This recipe adapts beautifully to different pan sizes with minor adjustments. For a 9×5-inch loaf pan, use the same ingredient amounts but extend the baking time to approximately 40 minutes. The loaf format creates an elegant presentation perfect for gift-giving.
A 9-inch round cake pan works perfectly with the original recipe and timing, creating a more traditional cake shape that’s lovely for special occasions. For larger gatherings, scale up to a 9×13-inch pan using the provided measurements in the notes section.
Flavor Variations
While the classic cinnamon version is perfection, consider seasonal variations like adding orange zest to the cake batter and crumb topping for a citrusy twist. Alternatively, incorporate chopped nuts like pecans or walnuts into the crumb mixture for added texture and richness.
For chocolate lovers, replace 2 tablespoons of flour in the crumb mixture with unsweetened cocoa powder, creating chocolate-cinnamon crumbs that pair beautifully with the vanilla cake base.
Professional Tips for Superior Results
Ingredient Temperature Importance
Room temperature ingredients are crucial for achieving the proper texture and even mixing. Cold eggs and sour cream won’t incorporate smoothly into the batter, potentially creating lumps or uneven texture in the finished cake.
Plan ahead by removing eggs, sour cream, and butter from the refrigerator about 30 minutes before baking. However, keep the butter for the crumb topping cold—this contrast is intentional and important for texture.
Mixing Techniques
When creaming butter and sugar, don’t rush the process. Proper creaming takes the full 2 minutes and creates the foundation for your cake’s tender texture. Under-creamed butter and sugar will result in denser cake texture.
Conversely, be gentle when incorporating the flour mixture. Overmixing at this stage develops gluten, creating tough, chewy cake texture instead of the desired tender crumb.
Crumb Topping Mastery
The key to exceptional crumb topping lies in achieving the right butter temperature and distribution. Cold butter creates distinct, crispy crumbs, while warm butter would create a paste-like mixture that won’t provide proper texture contrast.
If your kitchen is very warm, consider chilling the completed crumb mixture for 15-20 minutes before assembly to ensure the butter stays properly cold throughout the process.
Make-Ahead Strategies for Convenience
Advanced Preparation
The crumb mixture can be prepared up to three days in advance and stored covered in the refrigerator. Similarly, the cake batter can be mixed and held for several hours before assembly and baking, though immediate baking produces the best texture.
For morning entertaining, bake the cake the evening before and store it covered at room temperature. Add the vanilla icing the next morning just before serving for the freshest appearance and flavor.
Component Storage
Both the cake and crumb mixture freeze beautifully separately, allowing you to prepare components well in advance. The baked cake freezes for up to three months, while unbaked crumb mixture can be frozen for up to six months in an airtight container.
Frequently Asked Questions
Why is it called coffee cake when there’s no coffee in it? Coffee cake gets its name not from its ingredients but from its intended pairing—it’s a breakfast or afternoon cake designed to be enjoyed alongside coffee or tea. The name reflects its serving tradition rather than its flavor profile.
Can I substitute Greek yogurt for sour cream? Yes, full-fat or low-fat (not nonfat) Greek yogurt works as a substitute, though the texture will be slightly different. Sour cream provides the ideal moisture and tang for the authentic coffee cake experience.
Why does my crumb topping melt into the cake? This usually happens when the butter is too warm when making the crumb mixture, or when the cake is overbaked. Ensure your butter is cold and cubed, and don’t overmix the crumb ingredients.
Can I make this dairy-free? Yes, substitute vegan butter for regular butter and use a plant-based sour cream alternative. The results will be slightly different but still delicious.
How do I know when it’s perfectly baked? Look for golden-brown crumb topping and a toothpick that comes out clean from the center. The cake should also pull slightly away from the pan sides and spring back when lightly touched.
Can I add fruit to this recipe? While this recipe is perfect as-is, you can fold in 1/2 cup of fresh berries or diced apples into the batter. Toss them in a tablespoon of flour first to prevent sinking.
Why is my cake dense instead of tender? Dense texture usually results from overmixing the batter, using cold ingredients, or measuring flour incorrectly. Ensure proper measuring, room temperature ingredients, and gentle mixing for optimal results.
How far ahead can I make the vanilla icing? The icing can be made up to two days ahead and stored covered in the refrigerator. Bring it to room temperature and whisk briefly before using if it has thickened during storage.


