Growing up, my grandmother always had a way of turning simple ingredients into pure magic. One December afternoon, while helping her prepare treats for our annual holiday cookie exchange, she looked at a sheet of chocolate chip cookie dough and said, “Why don’t we try something different this year?” That spontaneous moment led to our first batch of cookie bark – a creation that combined the best of crispy cookies with rich, melted chocolate in one irresistible treat.
Years later, whenever I make this cookie bark, I’m transported back to that cozy kitchen filled with the aroma of butter, vanilla, and melting chocolate. Moreover, this recipe has become my go-to whenever I need something impressive yet surprisingly simple, perfect for gift-giving or satisfying my own sweet tooth cravings.
Why This Cookie Bark Will Become Your New Obsession
This isn’t just another cookie recipe – it’s a game-changing treat that combines the best elements of cookies and candy into one spectacular creation. Here’s what makes this recipe absolutely irresistible:
No-Mixer Simplicity: Unlike traditional cookies that require creaming butter and sugar, this recipe uses melted butter and simple mixing techniques. Consequently, you can whip up a batch without any special equipment, making it perfect for spontaneous baking sessions or when your mixer is tucked away in storage.
Perfect Texture Contrast: The base delivers a wonderfully crispy, buttery cookie foundation that’s thin enough to break cleanly but substantial enough to support the chocolate topping. Additionally, the smooth, rich chocolate layer provides a luxurious contrast that makes every bite a textural delight.
Effortless Elegance: Despite looking like something from a high-end confectionery, this recipe requires minimal skill and produces consistently beautiful results. Furthermore, the rustic, broken pieces have an artisanal appeal that makes them perfect for gift-giving or elegant entertaining.
Customization Paradise: The basic recipe serves as a fantastic canvas for countless variations, from different chocolate combinations to creative toppings. Therefore, you can easily adapt it to match seasonal themes, dietary preferences, or simply your family’s favorite flavors.
Essential Ingredients for Perfect Cookie Bark
The Cookie Foundation
Dry Ingredients:
- 1 and 1/3 cups (167g) all-purpose flour, spooned and leveled
- 1/2 teaspoon baking soda
- 1/2 teaspoon salt
Wet Ingredients:
- 3/4 cup (12 tablespoons; 170g) unsalted butter, melted and slightly cooled
- 2/3 cup (133g) granulated sugar
- 1/4 cup (50g) packed light or dark brown sugar
- 1 large egg yolk
- 2 teaspoons pure vanilla extract
Mix-Ins:
- 1/2 cup (90g) mini chocolate chips
The Luxurious Topping
Chocolate Layer:
- 8 ounces (226g) semi-sweet chocolate, finely chopped (two 4-ounce baking bars)
- Optional: flaky sea salt or colorful sprinkles for finishing
Perfect Pairings and Serving Ideas
This cookie bark pairs beautifully with hot coffee, cold milk, or even a glass of dessert wine for adult gatherings. Additionally, consider packaging pieces in clear cellophane bags tied with ribbon for thoughtful homemade gifts that everyone will treasure.
Step-by-Step Instructions for Cookie Bark Success
Setting Up for Success
Step 1: Prepare Your Workspace Preheat your oven to 375°F (191°C) and line a 12×17-inch baking sheet (half sheet pan) with parchment paper. This preparation step ensures even baking and makes removal effortless later.
Step 2: Create the Dry Mixture In a large bowl, whisk together the flour, baking soda, and salt until evenly combined. Set this mixture aside while you prepare the wet ingredients.
Building the Cookie Base
Step 3: Combine the Wet Ingredients In a separate bowl, whisk the melted butter, granulated sugar, brown sugar, egg yolk, and vanilla extract until the mixture is smooth and well combined. The melted butter should be slightly cooled to prevent cooking the egg yolk.
Step 4: Form the Dough Pour the wet ingredients into the bowl with the dry ingredients. Using a silicone spatula, mix everything together until completely combined, then fold in the mini chocolate chips. The dough will appear very soft and slightly greasy – this is exactly what you want.
Creating the Perfect Sheet
Step 5: Press and Shape Transfer the soft dough to your prepared baking sheet. Using your hands initially, press the dough to cover the entire parchment-lined surface. Then, switch to an offset spatula to achieve an even thickness and reach all edges of the pan. This process takes patience but ensures uniform baking.
Step 6: First Bake Bake for 18-20 minutes, keeping a close eye on the cookie after 15 minutes. The surface should turn a beautiful deep golden brown, indicating that the base is perfectly crispy.
Adding the Chocolate Crown
Step 7: Chocolate Application Remove the pan from the oven and immediately sprinkle the finely chopped chocolate evenly over the hot cookie surface. Return to the oven for just 1-2 minutes to begin melting the chocolate.
Step 8: Create the Smooth Finish Place the pan on a cooling rack and use an offset spatula or the back of a spoon to spread the softened chocolate into an even layer. Work quickly while the chocolate is still soft and pliable.
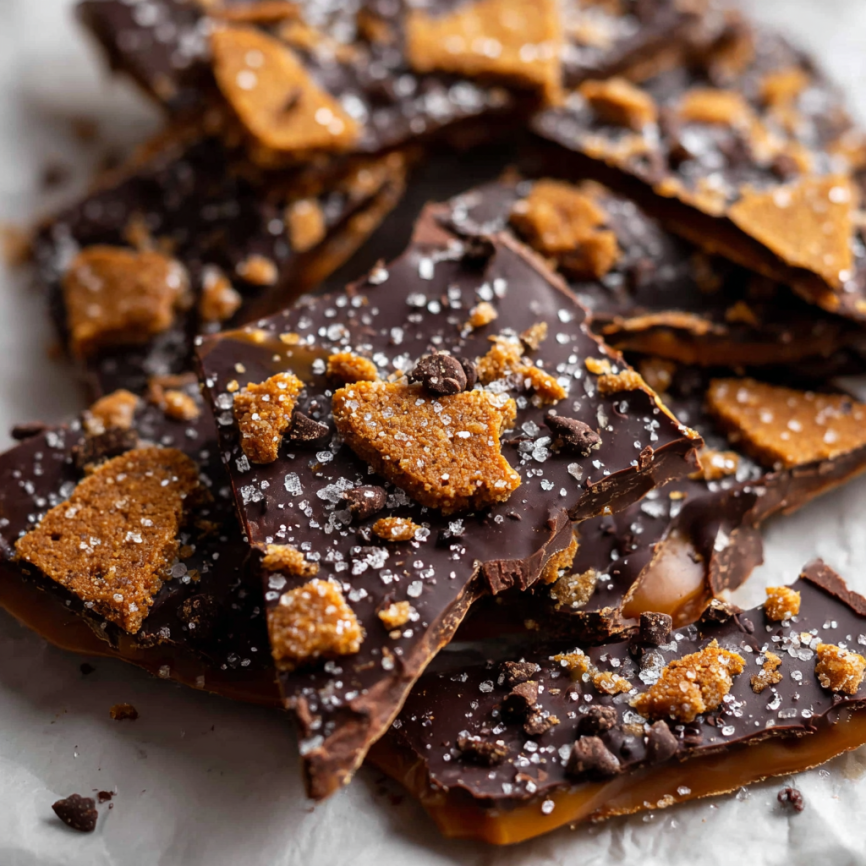
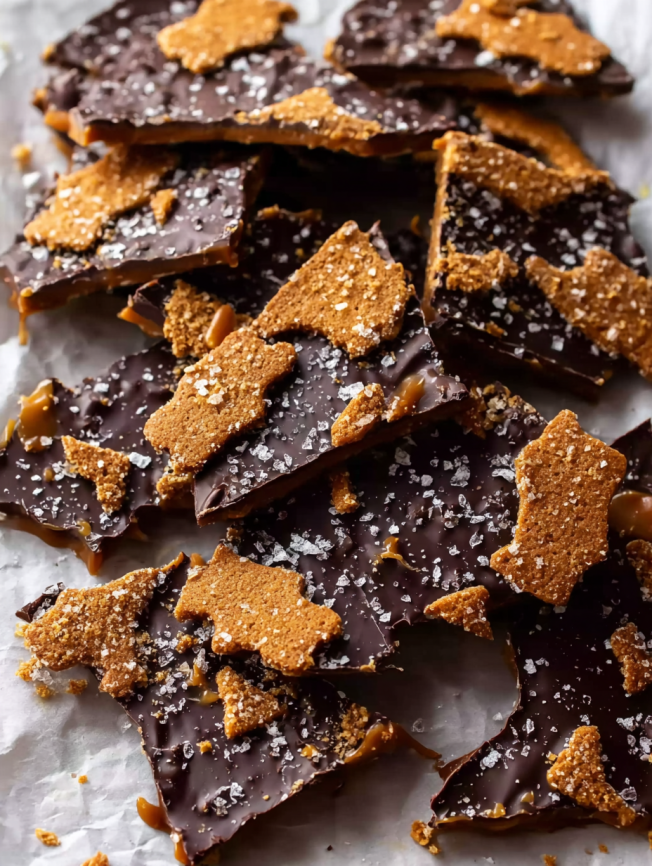
Step 9: Final Touches and Setting Sprinkle with flaky sea salt or decorative sprinkles if desired. Allow the bark to cool at room temperature for 20 minutes, then transfer to the refrigerator for at least 30 minutes until the chocolate is completely set and firm.
Creative Serving and Presentation Ideas
Gift-Worthy Packaging
Break the cooled bark into irregular, rustic pieces and arrange them in clear cellophane bags or decorative tins. The varied sizes and shapes add to the artisanal charm, making each piece look uniquely crafted.
Party Platter Perfection
Arrange pieces on a wooden cutting board alongside fresh berries, nuts, and cheese for an elegant dessert charcuterie board. The contrast between the sweet bark and other elements creates a sophisticated spread that guests will remember.
Individual Treat Bags
Package individual pieces in small glassine bags for party favors, bake sale contributions, or lunchbox treats. This portion control approach makes the rich treat more manageable while maintaining its special occasion feel.
Delicious Variations to Explore
White Chocolate Swirl Spectacular
Replace half of the semi-sweet chocolate with white chocolate for a stunning marbled effect. Melt them separately, then drop spoonfuls of each onto the cookie base and swirl with a knife for an artistic finish.
Seasonal Holiday Version
Add 1/2 teaspoon of cinnamon to the cookie dough and top the chocolate with crushed candy canes during the holiday season. This festive variation brings warm spice notes and a delightful peppermint crunch.
Nutty Indulgence
Incorporate 1/3 cup of chopped toasted pecans or almonds into the cookie dough, then sprinkle additional chopped nuts over the chocolate layer. The nuts add wonderful texture and complement the chocolate beautifully.
S’mores Inspired Creation
Replace the mini chocolate chips with crushed graham crackers and add mini marshmallows to the chocolate topping during the final minute of baking. This variation captures all the campfire flavors in an elegant bark form.
Make-Ahead Strategies for Busy Bakers
Complete Advance Preparation
This cookie bark actually improves after a day of storage, as the flavors meld and the texture settles. Prepare it up to 5 days in advance, storing it in an airtight container with parchment paper between layers.
Freezer-Friendly Options
The bark freezes beautifully for up to 3 months, though the texture will be slightly less crispy after thawing. Wrap individual pieces in plastic wrap, then store in freezer bags for easy portion control.
Component Preparation
You can prepare the cookie dough up to 2 days in advance and store it covered in the refrigerator. When ready to bake, let it come to room temperature for easier spreading, then proceed with the recipe as directed.
Gift-Giving Timeline
For holiday gift-giving, prepare the bark 2-3 days before packaging. This timing allows the flavors to develop fully while ensuring the chocolate coating remains glossy and appealing.
Essential Baking Notes for Success
Pan Size Importance: Using the correct 12×17-inch baking sheet is crucial for achieving the proper thickness. Smaller pans will result in thicker bark that may not bake evenly, while larger pans will create overly thin pieces that might burn.
Chocolate Selection Matters: Choose high-quality baking chocolate bars rather than chocolate chips for the topping. Baking chocolate melts more smoothly and creates a more professional-looking finish, while chocolate chips contain stabilizers that prevent proper melting.
Mini Chip Advantage: The thin cookie base works best with mini chocolate chips, which distribute more evenly and don’t create thick spots that might underbake. If using regular chips, chop them roughly to achieve similar results.
Temperature Control: Allow the melted butter to cool slightly before mixing with other ingredients to prevent the egg yolk from cooking. However, the butter should still be warm enough to create the characteristic soft, greasy dough texture.

Frequently Asked Questions
Q: Can I use a different size baking pan if I don’t have a half-sheet pan? A: You can use two 9×13-inch pans, dividing the dough between them and pressing it as thin as possible. The baking time will be shorter, so start checking after 12-15 minutes and adjust accordingly.
Q: Why does my chocolate topping look dull instead of shiny? A: This usually happens when the chocolate gets too hot or is overworked while spreading. Try removing the pan from the oven as soon as the chocolate begins to soften, and spread it gently with minimal manipulation.
Q: Can I make this recipe without the mini chocolate chips in the cookie base? A: Absolutely! The cookie base is delicious on its own, and you’ll still get plenty of chocolate flavor from the topping. This variation actually makes the pieces easier to break cleanly.
Q: How do I know when the cookie base is properly baked? A: Look for a deep golden brown color across the entire surface. The edges should be slightly darker but not burned, and the center should be set and no longer looking wet or pale.
Q: What’s the best way to store leftover cookie bark? A: Store pieces in an airtight container at room temperature with parchment paper between layers to prevent sticking. Properly stored bark maintains its quality for 4-5 days, though the texture is best within the first 3 days.
Q: Can I double this recipe for a larger crowd? A: Yes, but you’ll need two half-sheet pans since the dough needs to be spread thin for proper baking. Alternatively, you can use one very large commercial sheet pan if you have access to a commercial-sized oven.
Prep Time: 25 minutes | Cook Time: 20 minutes | Total Time: 1 hour 30 minutes (includes cooling)
Calories: 185 kcal per piece | Serves: 20 pieces


