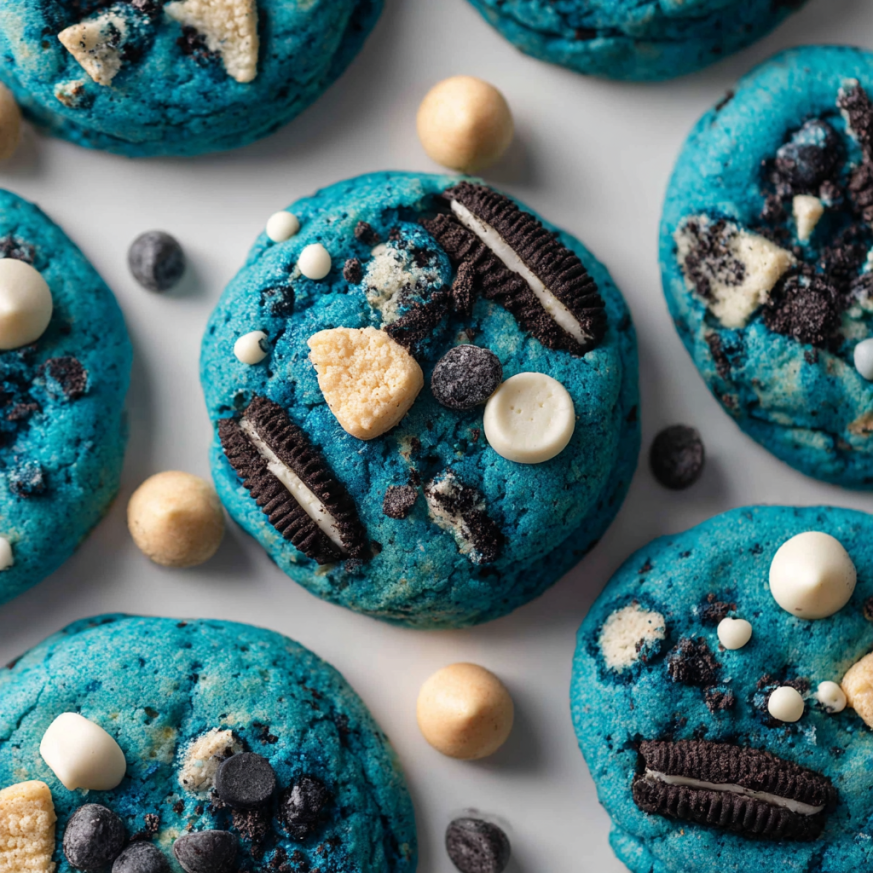
When I first saw Cookie Monster cookies online, I knew I had to recreate them in my own kitchen. These oversized, bright blue treats bring back all the nostalgic joy of watching Sesame Street as a kid, and they’ve become my signature recipe for birthday parties and special celebrations. The moment you bite into one and discover a whole Oreo cookie hidden inside, surrounded by that soft, chewy dough loaded with chocolate chips and cookie pieces, you’ll understand why they’re absolutely irresistible. Trust me when I say these aren’t just cookies—they’re an experience that delights both kids and adults alike.
Prep Time: 10 minutes
Cook Time: 15 minutes
Total Time: 25 minutes (plus chilling time)
Yield: 12 large cookies
Category: Cookies
Cuisine: American
Calories: 593 per cookie
Why You’ll Love These Cookie Monster Cookies
These cookies are a showstopper in every sense of the word. First and foremost, the vibrant blue color instantly catches everyone’s attention and makes them perfect for themed parties or simply brightening up a regular Tuesday. Beyond their eye-catching appearance, the texture is absolutely divine—soft and chewy on the inside with slightly crisp edges that provide the perfect contrast.
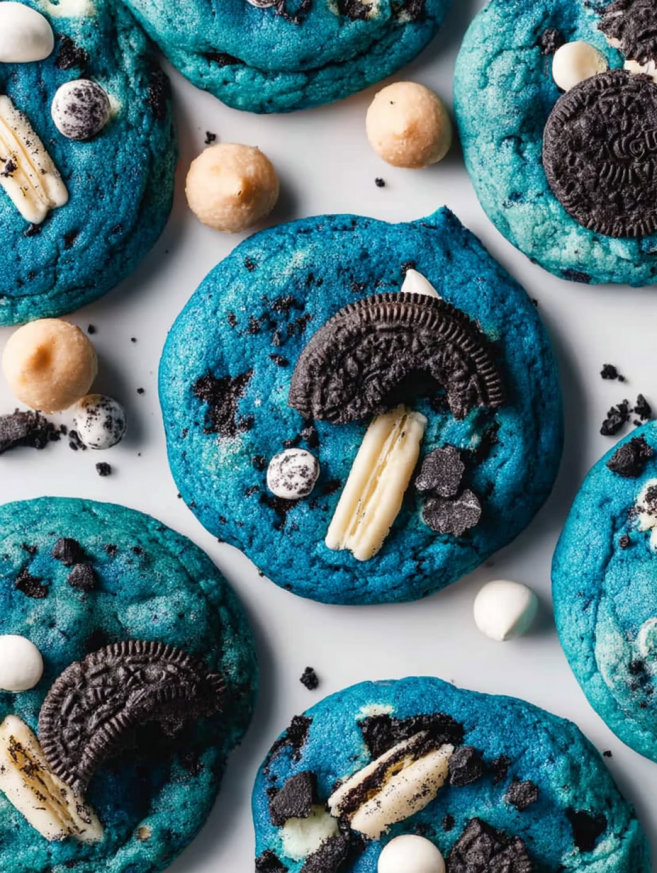
What truly sets these cookies apart is the surprise factor. Biting into a cookie and discovering an entire Oreo hidden inside never gets old, no matter how many times you’ve had them. The combination of textures is phenomenal, too—you get the chewiness of the cookie dough, the crunch of chocolate chips, the soft cream of the Oreo filling, and the snap of the Oreo wafer all in one bite.
Additionally, these cookies are incredibly fun to make, especially if you have kids who want to help in the kitchen. The process of wrapping dough around Oreos feels more like a craft project than baking, and watching little hands work to enclose those cookies is pure joy. Despite their impressive appearance, they’re surprisingly straightforward to prepare, requiring no special equipment or advanced techniques.
Ingredients You’ll Need
For the Cookie Dough
- 120g (½ cup) unsalted butter, softened
- 100g (½ cup) granulated white sugar
- 50g (¼ cup) light brown sugar
- 1 large egg, at room temperature
- 1 teaspoon vanilla extract
- Blue gel food coloring (adjust amount to achieve desired shade)
- 230g (1¾ cups) all-purpose flour
- 1 pinch of salt
- 1 teaspoon baking powder
- ½ teaspoon baking soda
For the Mix-Ins
- 40g (¼ cup) dark chocolate chips
- 40g (¼ cup) white chocolate chips
- 30g (¼ cup) crushed mini cookies
- 3 Oreo cookies, chopped into pieces
- 12 whole Oreo cookies (for stuffing)
Equipment Needed
- Large mixing bowl
- Electric mixer (hand or stand mixer)
- Spatula
- Sifter or fine-mesh strainer
- Baking sheets
- Parchment paper
- Plastic wrap
- Digital kitchen scale (recommended)
Step-by-Step Instructions
Making the Cookie Dough
Begin by ensuring your butter is properly softened to room temperature—this makes a significant difference in achieving the right texture. In a large mixing bowl, combine the softened butter with both the granulated white sugar and light brown sugar. Beat these together using an electric mixer for about 2 minutes until the mixture becomes light, fluffy, and noticeably creamy.
Once your butter and sugar are perfectly creamed, add the egg, vanilla extract, and blue gel food coloring to the bowl. Mix everything together for another minute using your electric mixer, ensuring all ingredients are fully incorporated. The dough should transform into a smooth, vibrant blue batter that already looks like something Cookie Monster himself would approve of.
Incorporating Dry Ingredients
Before adding your dry ingredients to the wet mixture, take a moment to sift them together in a separate bowl. Combine the flour, salt, baking powder, and baking soda, then gently sift or whisk them to remove any lumps and ensure even distribution of the leavening agents.
Now comes a crucial step: fold these dry ingredients into your blue batter using a spatula rather than the mixer. This gentle folding technique prevents overmixing, which can lead to tough, dense cookies. Mix just until you no longer see streaks of flour and the dough comes together into a homogeneous mixture.
Adding the Fun Stuff
With your base dough ready, it’s time to add all those delicious mix-ins. Toss in the chopped Oreo pieces, crushed mini cookies, white chocolate chips, and dark chocolate chips. Quickly but thoroughly mix everything together, ensuring the add-ins are evenly distributed throughout the dough. The dough will be quite loaded with goodies, which is exactly what makes these cookies so special.
Cover the bowl with plastic wrap and transfer it to the refrigerator. Let the dough rest for at least 30 minutes, though 1 hour is even better. This chilling period allows the flavors to meld together and makes the dough easier to handle when you’re ready to shape your cookies.
Assembling Your Cookie Monster Cookies
Here’s where the magic happens! Remove your chilled dough from the refrigerator and take a portion roughly equivalent to a large cookie scoop or about 3 tablespoons of dough. Flatten this portion into a disc in the palm of your hand, making it large enough to completely wrap around an Oreo.
Place one whole Oreo in the center of your dough disc. Carefully fold the edges of the dough up and around the Oreo, pinching the seams together to seal it completely. Roll the dough gently between your palms to create a smooth ball with the Oreo hidden inside. Don’t worry if it feels awkward at first—you’ll get the hang of it quickly.
As you form each cookie, place it seam-side down on a baking sheet lined with parchment paper. Make sure to leave plenty of space between cookies since they’ll spread during baking. Once all your cookies are shaped and arranged, pop the entire baking sheet back into the refrigerator for another 30 minutes, or into the freezer for 15 minutes. This second chill is essential for preventing excessive spreading during baking.
Baking to Perfection
While your shaped cookies are chilling, preheat your oven to 180°C (350°F). This temperature ensures your cookies bake evenly, developing those slightly crispy edges while maintaining a soft, gooey center.
When your cookies have finished their final chill and your oven has reached temperature, slide the baking sheet onto the middle rack. Bake for 12-15 minutes, watching carefully during the last few minutes. You’re looking for cookies that are lightly golden around the edges but still appear slightly underdone in the center—they’ll continue cooking as they cool.
Remove the cookies from the oven and let them rest on the baking sheet for about 5 minutes. This brief cooling period allows them to set up enough to transfer without breaking apart. After 5 minutes, carefully move them to a cooling rack or serving plate. Try to resist eating them immediately (though I completely understand if you can’t)!
Serving Suggestions
These oversized cookies are substantial enough to serve as a dessert on their own, but they pair wonderfully with cold milk—it’s practically mandatory! For parties, arrange them on a colorful platter with a glass of milk for each guest, recreating Cookie Monster’s favorite snack setup.
They’re also fantastic as ice cream sandwiches. Let the cookies cool completely, then sandwich a scoop of vanilla ice cream between two cookies for an absolutely decadent treat. Blue vanilla ice cream takes the Cookie Monster theme to the next level.
For birthday parties, consider decorating a serving platter to look like Cookie Monster’s face, with these cookies arranged as his beloved treats. You could even add googly eyes made from white chocolate and black frosting for extra fun. Kids go absolutely wild for this presentation.
Creative Variations to Try
Flavor Twists
While the classic blue Cookie Monster version is hard to beat, you can customize the colors and flavors for different occasions. Try pink or purple food coloring for princess-themed parties, or go with orange for Halloween celebrations. Red dye creates festive Christmas cookies that look equally impressive.
Instead of Oreos, experiment with other sandwich cookies like peanut butter-filled cookies, mint cream cookies, or chocolate-covered sandwich cookies. Each variation provides a different surprise center that keeps things interesting.
Mix-In Alternatives
Feel free to swap out some of the chocolate chips for other additions. M&M’s add colorful pops throughout the dough, while butterscotch chips provide a sweet, caramel-like flavor. Toffee bits or chopped nuts (if there are no allergies) introduce delightful crunch and complexity.
For a more adult version, try adding a tablespoon of espresso powder to the dough and using dark chocolate exclusively. The coffee flavor enhances the chocolate and creates a more sophisticated cookie that pairs beautifully with afternoon coffee.
Size Adjustments
If 12 giant cookies feel too indulgent, you can make smaller versions using half an Oreo or even Oreo Mini cookies as the center. This allows you to make about 24 regular-sized cookies from the same batch of dough, perfect for lunchboxes or portion control.
Conversely, if you want to go even bigger (because why not?), use mega-stuffed Oreos or double up on regular Oreos for each cookie. Just increase the baking time by a few minutes to ensure the dough cooks through completely.
Make-Ahead and Storage Tips
The cookie dough is wonderfully freezer-friendly, making these cookies perfect for planning ahead. You can prepare the dough completely through the mixing stage, then store it in an airtight container in the refrigerator for up to 3 days before shaping and baking.
For longer storage, shape the cookies around the Oreos, then freeze them on a baking sheet until solid. Transfer the frozen cookie balls to a freezer bag, where they’ll keep for up to 3 months. When you’re ready to bake, you don’t even need to thaw them—just add 2-3 minutes to the baking time.
Baked cookies stay fresh in an airtight container at room temperature for up to one week. Layer them with parchment paper if you’re stacking them to prevent sticking. The Oreo center stays surprisingly crunchy even after several days, maintaining that delightful texture contrast.
If you want to freeze baked cookies, wrap them individually in plastic wrap, then store them together in a freezer-safe container or bag. They’ll maintain their quality for up to 3 months. Thaw at room temperature for about an hour before serving, or warm them gently in the microwave for 10-15 seconds to recreate that fresh-from-the-oven experience.
Important Notes and Tips
Measuring Ingredients Accurately
For the most consistent results, I highly recommend using a digital kitchen scale to measure your ingredients in grams. Baking is a science, and even small variations in flour or sugar amounts can significantly affect your final cookies. If you must use measuring cups, spoon your flour into the cup and level it off with a knife rather than scoking it directly, which can lead to using too much flour.
Achieving the Perfect Shape
Right after removing your cookies from the oven, while they’re still warm and pliable, you can use a large round cookie cutter or even a drinking glass to gently press around each cookie. This technique creates perfectly round cookies with clean edges, making them look even more professional and bakery-worthy.
Don’t Skip the Chilling
I know it’s tempting to skip or shorten the refrigeration steps, but please resist that urge! Chilling the dough serves multiple important purposes: it allows the flavors to develop and deepen, it prevents the cookies from spreading too thin during baking, and it makes the dough much easier to handle when you’re wrapping it around the Oreos. Both chilling periods contribute to better texture and appearance in your final cookies.
Food Coloring Tips
Gel food coloring is far superior to liquid food coloring for this recipe. It provides more vibrant color without adding extra liquid that could affect your dough consistency. Start with a small amount and gradually add more until you achieve the bright blue shade you want—remember that the color will lighten slightly as the cookies bake.
Frequently Asked Questions
Can I make these cookies without food coloring?
Absolutely! While the blue color is fun and iconic, these cookies are just as delicious in their natural color. You’ll have chocolate-studded cookies with a hidden Oreo surprise, which is still pretty amazing. Some people prefer making them without dye for everyday baking or for serving to young children.
What if I don’t have baking soda?
No problem! You can substitute the baking soda by using a full packet (typically about 2 teaspoons) of baking powder instead. The cookies will rise slightly differently but will still turn out wonderfully. Baking powder contains both acid and base, so it works as a complete leavening agent on its own.
Why did my cookies spread too much?
Excessive spreading usually happens when the dough is too warm when it goes into the oven. Make sure you’re thoroughly chilling both the initial dough and the shaped cookies before baking. Also, ensure your butter was softened but not melted when you started—melted butter leads to flat cookies. Finally, check that your oven temperature is accurate, as baking at too low a temperature can cause spreading.
Can I use regular Oreos or do they need to be a specific type?
Regular Oreos work perfectly! However, you can certainly experiment with different Oreo varieties if you’d like. Golden Oreos create a nice contrast, while Mint Oreos add a refreshing flavor. Double-stuffed Oreos provide extra creaminess, though they make the cookies slightly harder to seal completely.
How do I know when the cookies are done baking?
These cookies should look slightly underdone when you remove them from the oven—they’ll continue to cook as they cool on the baking sheet. Look for edges that are just beginning to turn golden while the centers still appear soft and slightly puffy. If they look completely set and firm in the center, they’re probably overdone and will be too crispy rather than chewy.
Can I make these cookies smaller for kids?
Definitely! Use mini Oreos or even break regular Oreos in half to create smaller cookies that are more kid-friendly. You’ll get more cookies from your batch (probably 20-24), and they’ll bake faster—check them around the 10-minute mark. These smaller versions are perfect for school lunches or children’s parties.
What’s the best way to transport these cookies?
Since they’re quite large and loaded with mix-ins, handle them carefully during transport. Pack them in a single layer in a rigid container with parchment paper between each cookie. If you must stack them, use multiple layers of parchment paper and don’t stack more than two high. For extra security, you can wrap each cookie individually in plastic wrap before packing.
Can I make the dough by hand without an electric mixer?
Yes, though it requires more effort! You’ll need to cream the butter and sugars very thoroughly using a wooden spoon or sturdy spatula—this takes about 5 minutes of vigorous stirring. Make sure your butter is quite soft (but not melted) to make this easier. The rest of the mixing can be done normally with a spatula or spoon.
These Cookie Monster Cookies represent everything that’s wonderful about creative baking—they’re fun to make, stunning to look at, and absolutely delicious to eat. Whether you’re baking them for a special occasion or just because you want to bring some joy into your kitchen, they’re guaranteed to make everyone smile. The combination of that vibrant blue dough, the treasure trove of chocolate chips and cookie pieces, and especially that hidden Oreo surprise creates a cookie experience that’s truly unforgettable. So grab your ingredients, embrace your inner Cookie Monster, and get ready to bake something extraordinary!


