Prep Time: 3 hours, 30 minutes (includes dough chilling) | Cook Time: 14 minutes | Total Time: 3 hours, 45 minutes | Yield: 24 cookies
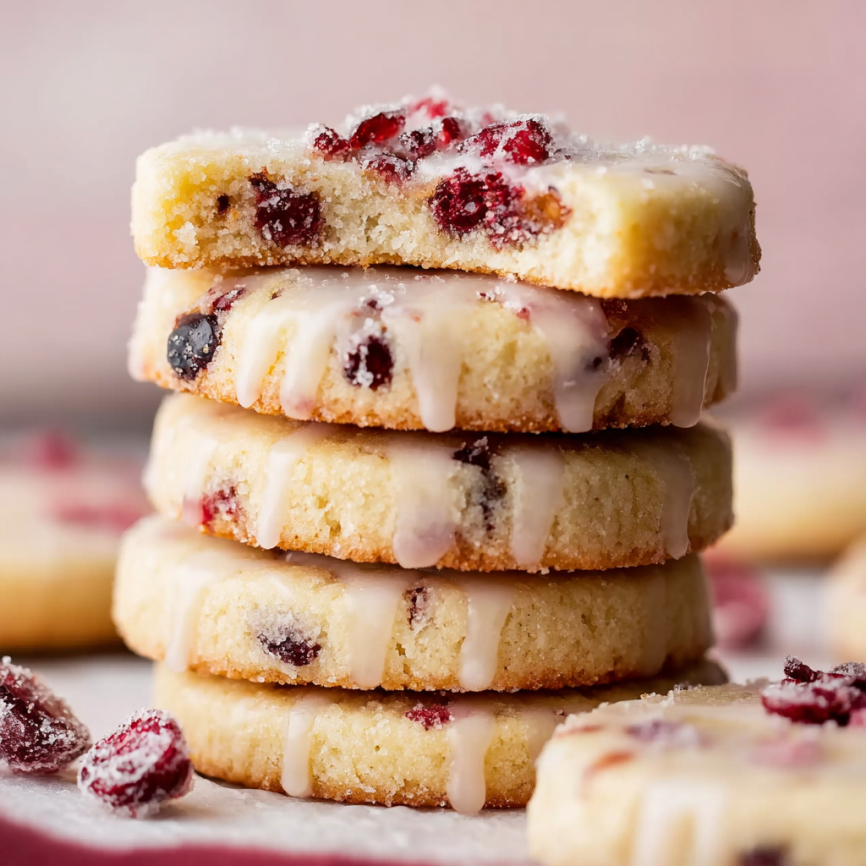
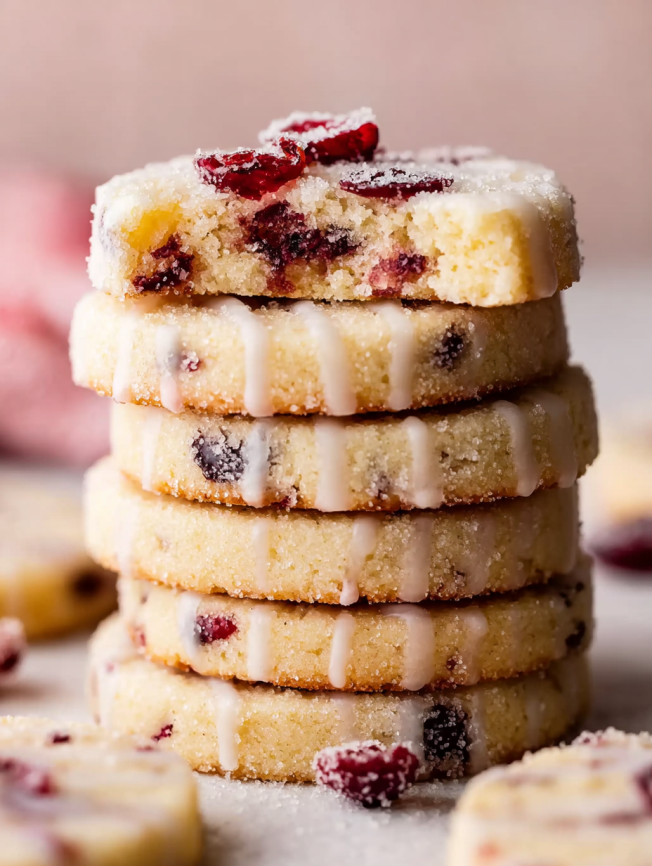
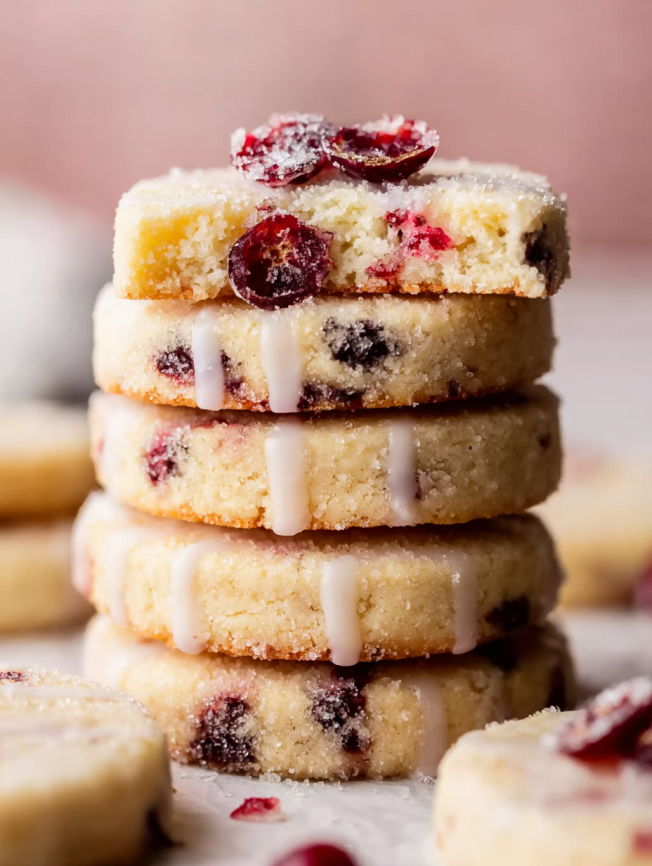
Description: Enjoy a buttery shortbread-like cookie flecked with chewy dried cranberries and fragrant orange zest. Drizzle on an easy 2-ingredient orange glaze for a flavorful finishing touch.
The Art of Patience in Cookie Making
There’s something beautifully old-fashioned about slice-and-bake cookies that reminds me of my grandmother’s kitchen, where cookie logs wrapped in wax paper always seemed to be chilling in her refrigerator, ready to transform into warm, homemade treats at a moment’s notice. These cranberry orange icebox cookies represent that same spirit of thoughtful preparation and delayed gratification that makes home baking so rewarding.
The beauty of these cookies lies not just in their vibrant flavor combination, but in the way they teach us that some of the best things truly are worth waiting for. While the extended chilling time might seem daunting at first, it’s during those hours in the refrigerator that magic happens—flavors meld and intensify, the dough firms to the perfect slicing consistency, and the orange zest releases its essential oils throughout the entire cookie.
What started as a quest for the perfect make-ahead holiday cookie has become one of my most treasured year-round recipes. These cookies capture the essence of celebration in every bite, combining the tart-sweetness of cranberries with the bright, citrusy notes of fresh orange zest, all wrapped in a tender, buttery cookie that melts beautifully on your tongue.
Why These Cookies Will Transform Your Baking Routine
These icebox cookies represent the perfect intersection of convenience and homemade quality, solving one of the biggest challenges in cookie baking—timing. Unlike drop cookies that require immediate attention, these gems allow you to prepare the dough days in advance, then slice and bake fresh cookies whenever the craving strikes or unexpected guests arrive.
The texture achieves that coveted balance between crispy edges and tender centers, with a shortbread-like richness that makes each bite incredibly satisfying. The dried cranberries provide delightful chewy pockets of concentrated flavor, while the orange zest creates aromatic bursts that complement rather than compete with the buttery base.
Perhaps most importantly, these cookies actually improve with time. The overnight chilling period allows the orange flavor to penetrate every element of the dough, creating a more complex and harmonious taste than cookies baked immediately after mixing. This patience is rewarded with cookies that taste like they’ve been infused with sunshine.
The optional orange glaze transforms these from everyday treats to special occasion stars, creating an elegant finish that’s surprisingly simple to achieve. Whether served plain or glazed, these cookies deliver consistent, professional-quality results that will make people think you spent far more time than you actually did.
Essential Ingredients and Their Roles
The Cookie Foundation
- 3/4 cup (12 Tbsp; 170g) unsalted butter, softened to room temperature
- 2/3 cup (133g) granulated sugar, plus more for rolling
- 1 large egg, at room temperature
- 1 teaspoon pure vanilla extract
- 2 cups + 2 tablespoons (265g) all-purpose flour (spooned & leveled)
- 1/4 teaspoon salt
The Flavor Stars
- 2 tablespoons (30ml) fresh orange juice
- 1 teaspoon orange zest
- 3/4 cup (100g) very finely chopped dried cranberries
- Optional: coarse sugar for rolling
The Finishing Touch
- 1 cup (120g) confectioners’ sugar, sifted
- 2 tablespoons (30ml) orange juice
- Optional: additional orange zest for garnish
Each ingredient serves a specific purpose in creating these exceptional cookies. The butter-to-flour ratio creates the perfect tender texture, while the combination of granulated sugar and egg provides structure and richness. Fresh orange juice adds moisture and flavor, while the zest contributes essential oils that intensify during chilling.
Detailed Step-by-Step Instructions
Creating the Perfect Base
Begin by ensuring your butter is properly softened to room temperature—it should yield easily to gentle pressure but not be melty or greasy. In a large bowl, use either a handheld mixer or stand mixer fitted with a paddle attachment to cream the butter and granulated sugar together on medium-high speed for about 2 minutes.
Properly creamed butter and sugar should appear lighter in color and noticeably fluffy. This process incorporates air that contributes to the cookies’ tender texture, so don’t rush this step. Beat in the egg and vanilla extract on high speed, scraping down the sides and bottom of the bowl as needed to ensure complete incorporation.
Building the Dough Structure
Add the flour and salt to the creamed mixture and beat on low speed until just combined—overmixing at this stage can result in tough cookies. The dough should come together without any streaks of flour remaining, but avoid excessive mixing once the flour is incorporated.
Finally, beat in the orange juice, orange zest, and finely chopped dried cranberries until just distributed throughout the dough. The mixture will be thick and slightly sticky, which is exactly the consistency you want for successful slice-and-bake cookies.
Shaping for Success
Turn the dough out onto a lightly floured work surface and divide it into two equal portions using a knife or bench scraper. With floured hands, shape each half into a log approximately 7-8 inches long and about 2.5 inches in diameter.
Don’t worry about achieving perfect measurements—the exact size matters less than creating uniform logs that will slice evenly. The dough may feel sticky initially, but the flour on your hands and work surface will help manage this.
The Critical Chilling Phase
Wrap each dough log tightly in plastic wrap, ensuring no air pockets remain. This tight wrapping prevents the dough from drying out and helps maintain the log shape during chilling. Refrigerate for at least 3 hours, though overnight chilling produces superior flavor development.
During this extended chilling period, the butter firms up for clean slicing, the flour fully hydrates for better texture, and most importantly, the orange zest releases its essential oils throughout the dough, creating much more intense citrus flavor.
Baking Techniques for Perfect Results
Preparation and Setup
Preheat your oven to 350°F (177°C) and line two large baking sheets with parchment paper or silicone baking mats. Position your oven racks in the upper and lower thirds of the oven for even baking if you’re baking both sheets simultaneously.
Optional Sugar Coating
For bakery-style appearance and added texture, roll the chilled logs in coarse sugar before slicing. Pour enough coarse sugar onto a large plate to cover the surface, then roll each log in the sugar, pressing gently to help it adhere to the dough surface.
This step is much easier with chilled dough—the firm texture allows the sugar to stick properly, whereas warm dough would be too sticky for even coating.
Slicing Techniques
Using a sharp knife, slice each log into 12 equally thick rounds, creating 24 cookies total. Clean your knife occasionally during slicing to prevent dough buildup, and rotate the logs periodically to prevent flattening on one side.
Arrange the sliced cookies on your prepared baking sheets, spacing them about 2 inches apart to allow for slight spreading during baking.
Achieving Perfect Baking
Bake for 13-15 minutes, or until the cookies are very lightly golden around the edges while the centers remain pale. The cookies will continue cooking slightly from residual heat after removal from the oven, so slight underbaking is preferable to overbaking.
Allow cookies to cool on the baking sheets for 5 minutes to set their structure, then transfer to wire racks to cool completely before adding any glaze.
Creating the Perfect Orange Glaze
Simple Yet Elegant Finishing
The two-ingredient orange glaze transforms these cookies from homestyle to bakery-elegant with minimal effort. Whisk together the sifted confectioners’ sugar and fresh orange juice until smooth and drizzle-able.
The consistency should flow easily from a spoon but not be so thin that it runs off the cookies completely. Adjust with additional powdered sugar or orange juice as needed to achieve the perfect consistency.
Professional Glazing Techniques
Drizzle the glaze over completely cooled cookies using a spoon or fork, creating attractive patterns across the surface. For added visual appeal, sprinkle additional orange zest over the wet glaze—it will adhere beautifully and provide color contrast.
The glaze sets within 30-60 minutes, creating a smooth finish that won’t smudge during storage or transport.
Storage and Make-Ahead Strategies
Optimal Storage Methods
Store finished cookies covered at room temperature for up to one week. The glaze creates a protective coating that helps maintain moisture, while the cookies themselves actually improve slightly over the first day or two as flavors continue to meld.
For longer storage, these cookies freeze exceptionally well for up to three months, either glazed or plain. Thaw overnight in the refrigerator and bring to room temperature before serving for optimal texture and flavor.
Advanced Preparation Options
The beauty of icebox cookies lies in their make-ahead potential. Cookie dough logs can be prepared and refrigerated for up to 5 days or frozen for up to 3 months. This allows you to always have homemade cookies just minutes away from the oven.
When freezing dough logs, wrap them first in plastic wrap, then aluminum foil for extra protection against freezer burn. Thaw overnight in the refrigerator before slicing and baking.
Creative Variations and Customizations
Flavor Adaptations
While the cranberry-orange combination is classic and beloved, this base recipe adapts beautifully to other flavor profiles. Substitute dried cherries for cranberries and add almond extract for a sophisticated twist, or use dried blueberries with lemon zest for a different citrus experience.
For chocolate lovers, replace some of the flour with cocoa powder and add mini chocolate chips instead of cranberries, creating chocolate-orange cookies that are equally irresistible.
Seasonal Modifications
During the holidays, consider adding a pinch of ground ginger or cardamom to the dough for warm spice notes that complement the cranberries beautifully. Spring versions might incorporate dried strawberries and lime zest for a fresh, vibrant flavor profile.
Alternative Finishing Options
Instead of orange glaze, these cookies are equally stunning dipped in melted white or dark chocolate. The contrast between the citrusy cookie and rich chocolate creates an elegant treat perfect for special occasions or gift-giving.
Professional Tips for Superior Results
Ingredient Quality Considerations
Use fresh orange juice and zest for the most vibrant flavor—bottled juice simply doesn’t provide the same aromatic quality. When zesting, avoid the white pith underneath the orange skin, which can add bitter notes to your cookies.
Choose high-quality dried cranberries that are still pliable rather than hard and dry. If your cranberries seem overly dry, plump them in warm orange juice for 10 minutes, then drain and pat dry before chopping.
Texture Optimization
The key to perfect slice-and-bake cookies lies in achieving the right dough consistency. The mixture should be cohesive enough to hold together when shaped but not so wet that it spreads excessively during baking.
If your dough seems too dry, add orange juice one teaspoon at a time until it comes together properly. Conversely, if it’s too wet, refrigerate for an additional 30 minutes to firm up before shaping.
Chilling Mastery
Don’t be tempted to skip or shorten the chilling time—it’s truly essential for both flavor development and successful slicing. Well-chilled dough slices cleanly without dragging or deforming, resulting in cookies with sharp, attractive edges.
For best results, chill the shaped logs overnight. This extended time allows flavors to meld completely and ensures the easiest slicing experience.
Troubleshooting Common Issues
Slicing Problems
If your dough cracks or crumbles when slicing, it may be too cold. Allow it to sit at room temperature for 10-15 minutes to soften slightly, then try again. Conversely, if the dough is too soft to slice cleanly, return it to the refrigerator for additional chilling.
Spreading Issues
Excessive spreading during baking usually indicates the dough was too warm when placed in the oven. Ensure your dough logs are properly chilled, and consider refrigerating sliced cookies for 15 minutes before baking if your kitchen is particularly warm.
Flavor Enhancement
If your finished cookies seem to lack orange flavor, increase the zest slightly in future batches or add a few drops of orange extract to intensify the citrus notes. Remember that flavors develop and intensify with proper chilling time.
Frequently Asked Questions
How finely should I chop the cranberries? Chop them quite finely—about the size of small peas. This ensures even distribution throughout the cookies and prevents large pieces from interfering with clean slicing.
Can I make these cookies without the glaze? Absolutely! They’re delicious plain or rolled in coarse sugar before baking for a sparkly finish. The glaze adds elegance but isn’t essential for great flavor.
Why is my dough too sticky to handle? This usually happens when the butter was too warm when mixing or if the kitchen temperature is high. Chill the dough for 30 minutes before shaping, and use plenty of flour on your hands and work surface.
Can I substitute frozen cranberries? Dried cranberries work best for this recipe. Frozen cranberries contain too much moisture and will affect the dough consistency and cookie texture.
How do I know if my cookies are done? Look for very light golden edges while the centers remain pale. The cookies should feel set but not hard when gently touched. They’ll continue firming as they cool.
Can I double this recipe? Yes, this recipe doubles beautifully. You’ll have four logs instead of two, giving you even more make-ahead convenience.
What’s the best way to store the dough logs? Wrap tightly in plastic wrap and store in the refrigerator for up to 5 days or freeze for up to 3 months. Label with the date and any flavor variations for easy identification.
Why do my cookies spread too much? This usually indicates the dough wasn’t chilled long enough or your oven temperature is too low. Ensure proper chilling and verify your oven temperature with an oven thermometer.


