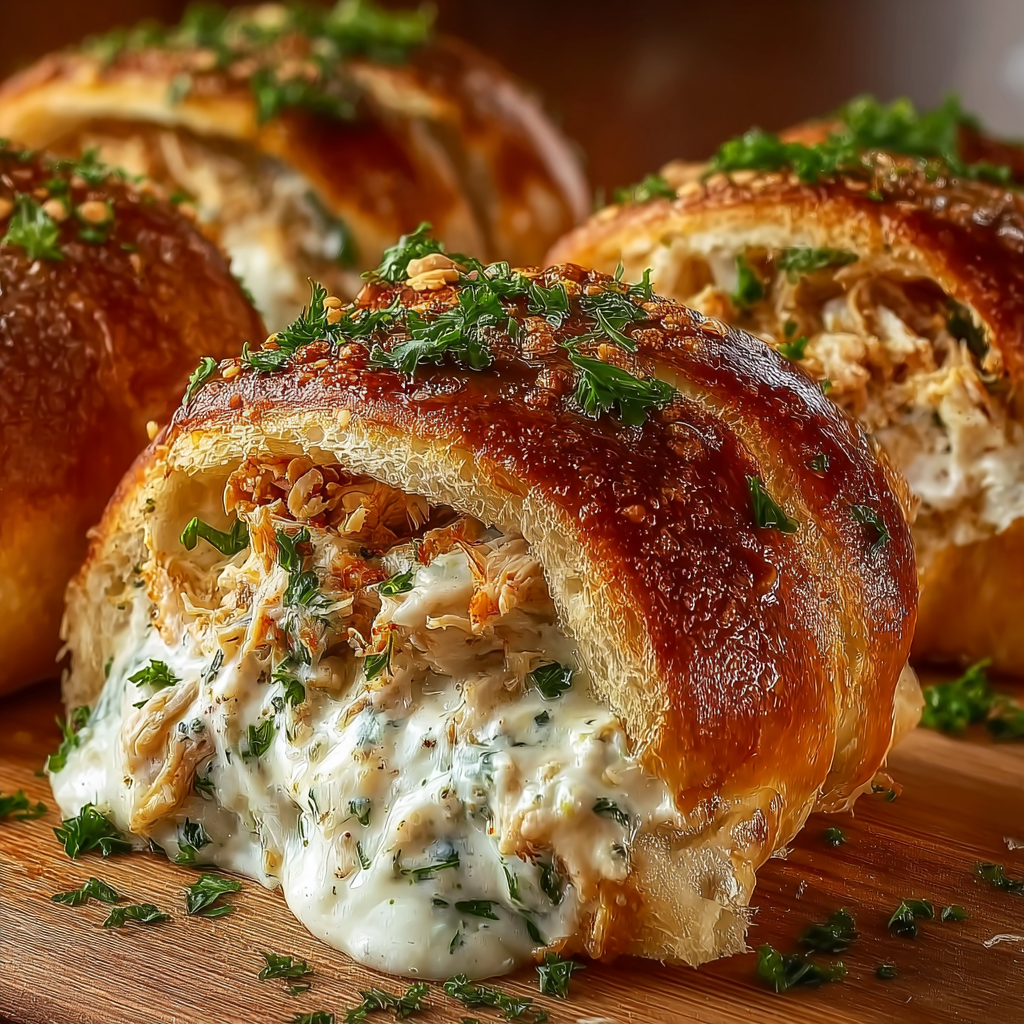
Prep Time: 15 minutes | Cook Time: 15 minutes | Total Time: 30 minutes | Servings: 8 rolls
I stumbled upon this recipe on a particularly hectic Tuesday evening when I needed something quick yet impressive for unexpected dinner guests. With only a rotisserie chicken, some crescent rolls, and cream cheese in my fridge, I threw together what has now become one of my most-requested recipes. The combination of tender chicken, rich cream cheese, and fresh herbs wrapped in flaky, buttery dough creates pure magic. My guests couldn’t believe something so delicious came together in just 30 minutes, and honestly, neither could I. Now these Creamy Garlic Herb Chicken Crescent Rolls are my go-to whenever I want to look like a culinary genius without the stress.
Why You’ll Love This Recipe
These creamy garlic herb chicken crescent rolls represent the perfect intersection of convenience and homemade goodness. Using store-bought crescent dough as a shortcut doesn’t compromise on flavor—instead, it gives you restaurant-quality results without hours in the kitchen. The flaky, golden exterior contrasts beautifully with the rich, herb-infused filling, creating a textural experience that’s utterly addictive.
What makes this recipe truly special is its remarkable versatility. Serve these rolls as an elegant appetizer at your next gathering, where they’ll disappear within minutes. Alternatively, pair them with a simple salad for a satisfying weeknight dinner that the whole family will love. They’re also fantastic for potlucks, game day parties, or even breakfast alongside scrambled eggs. Best of all, the recipe is forgiving and beginner-friendly, making it accessible to cooks of all skill levels. Even kids can help with the rolling and assembling, turning dinner prep into quality family time.
Ingredients You’ll Need
Main Components
- 2 cups cooked chicken, shredded – Rotisserie chicken saves time and adds extra flavor
- 1 cup cream cheese, softened – The creamy base that holds everything together
- 1/2 cup sour cream – Adds tanginess and keeps the filling moist
- 1/2 cup shredded mozzarella cheese – Provides stretchy, melty goodness
- 2 cloves garlic, minced – Fresh garlic delivers aromatic depth
- 1 tablespoon fresh parsley, chopped – Brings bright, herbaceous notes
- 1 tablespoon fresh chives, chopped – Adds mild onion flavor and color
- 1 teaspoon dried thyme – Contributes earthy, savory undertones
- Salt and pepper to taste – Essential for balancing all the flavors
- 2 cans (8 oz each) refrigerated crescent rolls – The convenient, flaky wrapper
- 1 egg, beaten – Creates a beautiful golden finish
Optional Additions
Consider adding a pinch of red pepper flakes for subtle heat, or incorporate spinach for extra nutrients and color. Crumbled bacon makes these even more indulgent, while sun-dried tomatoes add Mediterranean flair. A squeeze of lemon juice in the filling brightens everything beautifully.
Step-by-Step Instructions
Creating these delicious crescent rolls is straightforward and rewarding. Follow these simple steps for guaranteed success every time.
Preparing Your Workspace
Preheat your oven to 375°F (190°C) and line a large baking sheet with parchment paper. This prevents sticking and makes cleanup effortless later. Having everything ready before you start assembling ensures a smooth, stress-free cooking experience.
Clear a clean work surface for rolling out your crescent dough. A lightly floured counter or large cutting board works perfectly. Gather all your ingredients and tools so everything is within easy reach.
Making the Filling
In a large mixing bowl, combine the shredded chicken, softened cream cheese, sour cream, and mozzarella cheese. Make sure your cream cheese is truly softened—this makes mixing much easier and ensures a smooth, creamy texture. Add the minced garlic, fresh parsley, chopped chives, and dried thyme to the bowl.
Season generously with salt and pepper, keeping in mind that the crescent dough is already somewhat salty. Mix everything thoroughly until all ingredients are well combined and the filling is uniformly creamy with no lumps of cream cheese remaining. The mixture should be thick enough to stay put when rolled but still spreadable and moist.
Assembling the Rolls
Open both cans of crescent rolls carefully, following the package directions. On your prepared work surface, unroll the dough and separate it into individual triangles along the perforations. You should have 16 triangles total from both cans.
Spoon approximately 2 tablespoons of the creamy chicken mixture onto the wide end of each triangle. Don’t overfill, as this can cause the filling to leak out during baking. Starting from the wide end, carefully roll the dough towards the pointed tip, enclosing the filling as you go. Think of it like rolling a sleeping bag—gentle but secure.
Once rolled, pinch the edges and seams to seal them securely. This step is crucial for keeping the filling contained during baking. Place each completed roll on your prepared baking sheet, leaving about 2 inches between them to allow for expansion.
Creating the Golden Finish
Beat the egg in a small bowl until the yolk and white are fully combined. Using a pastry brush or the back of a spoon, gently brush the beaten egg over the top and sides of each roll. This egg wash is what gives the rolls their gorgeous golden-brown color and slight sheen when baked.
Don’t skip this step—it transforms the appearance from homemade to professional-looking. If you’re out of eggs, melted butter works as an alternative, though it won’t create quite the same shine.
Baking to Perfection
Place the baking sheet in your preheated oven and bake for 12-15 minutes. Keep an eye on them during the final few minutes, as ovens can vary significantly in temperature. The rolls are done when they’ve puffed up beautifully and turned a rich golden brown color.
The crescent dough should look flaky and crisp, not pale or doughy. If the bottoms are browning too quickly while the tops remain pale, you can move the pan to a higher oven rack for the last couple of minutes.
Serving Fresh
Once baked to perfection, remove the pan from the oven and let the rolls cool for 3-5 minutes before serving. This brief resting period allows the filling to set slightly, making them easier to eat without burning your mouth. The cooling time also prevents the cheese from being dangerously hot.
Transfer to a serving platter and enjoy while still warm. The contrast between the crispy exterior and creamy filling is at its best when the rolls are fresh from the oven. Garnish with additional fresh herbs if desired for a professional presentation.
Serving Suggestions
These versatile rolls adapt beautifully to any meal occasion. For an elegant appetizer spread, arrange them on a platter with a variety of dipping sauces like ranch dressing, garlic aioli, or honey mustard. The creamy filling pairs particularly well with tangy or slightly sweet accompaniments.
Transform them into a complete meal by serving alongside a crisp Caesar salad or roasted vegetables. Tomato soup makes an excellent companion, creating a sophisticated take on chicken and dumplings. For a heartier presentation, serve them with mashed potatoes and steamed green beans for a comforting dinner plate.
These rolls are also fantastic for brunches when served with fresh fruit and a yogurt parfait. Kids love them in lunch boxes—pack them cold and they’re still delicious at room temperature. For parties, set up a “build your own” station with different dipping sauces, allowing guests to customize their experience.
Recipe Variations
Buffalo Chicken Crescent Rolls
Add 1/4 cup of buffalo sauce to the chicken filling and use cheddar cheese instead of mozzarella. Top with crumbled blue cheese before rolling. Serve with ranch or blue cheese dressing for dipping. This spicy version is perfect for game day celebrations.
Bacon Ranch Chicken Rolls
Mix in 1/2 cup of crumbled cooked bacon and 2 tablespoons of ranch seasoning mix to the filling. The smoky bacon combined with the tangy ranch creates an irresistible flavor combination that’s always a crowd-pleaser.
Spinach Artichoke Chicken Version
Add 1/2 cup of chopped spinach (squeeze out excess moisture) and 1/4 cup of chopped artichoke hearts to the filling. This variation brings Mediterranean elegance and extra nutrients to the dish.
Italian-Style Rolls
Replace the herbs with Italian seasoning, use Parmesan instead of mozzarella, and add sun-dried tomatoes to the filling. These have an upscale Italian restaurant feel that impresses dinner guests.
Breakfast Style Rolls
Skip the chicken and use cooked, crumbled breakfast sausage instead. Add scrambled eggs to the cream cheese mixture for a hearty breakfast or brunch option that’s portable and delicious.
Make-Ahead Tips
This recipe offers excellent make-ahead options for busy schedules. Prepare the chicken filling up to 2 days in advance and store it in an airtight container in the refrigerator. When ready to bake, simply bring it to room temperature for easier spreading, then assemble and bake as directed.
You can also assemble the entire batch of rolls up to 4 hours ahead. Place them on the baking sheet, cover tightly with plastic wrap, and refrigerate until ready to bake. Add 2-3 minutes to the baking time if they’re going into the oven cold.
For longer storage, freeze the assembled, unbaked rolls on a baking sheet until solid, then transfer them to a freezer bag. They’ll keep for up to 2 months this way. When ready to enjoy, bake from frozen at 375°F for 18-20 minutes, adding a few extra minutes as needed.
Leftover baked rolls can be stored in an airtight container in the refrigerator for up to 3 days. Reheat them in a 350°F oven for 5-7 minutes to restore their crispiness—avoid the microwave, which makes them soggy.
Notes
Cream Cheese Consistency: Ensure your cream cheese is fully softened before mixing. Cold cream cheese won’t incorporate smoothly and will create lumps in your filling. Leave it at room temperature for about an hour, or soften it in the microwave for 15-20 seconds.
Chicken Options: Rotisserie chicken is ideal for this recipe because it’s already seasoned and incredibly moist. However, leftover grilled chicken, poached chicken breasts, or even canned chicken work in a pinch. Just make sure whatever chicken you use is well-seasoned.
Preventing Leaks: Don’t overfill the rolls, and make sure to pinch all seams securely. If filling does leak out during baking, it’s not a disaster—it’ll crisp up and create delicious cheesy bits that you can serve alongside the rolls.
Fresh vs. Dried Herbs: While this recipe calls for fresh parsley and chives with dried thyme, you can adjust based on what you have. If using all dried herbs, reduce the quantity to 1 teaspoon each, as dried herbs are more concentrated than fresh.
Egg Wash Alternatives: If you don’t have eggs, brush the rolls with melted butter or even milk for color. Heavy cream also works and adds richness. Each option creates a slightly different finish but all work well.
Storage and Transport: These rolls travel well for potlucks. Pack them in a container lined with paper towels to absorb any condensation, keeping them from getting soggy. They can sit at room temperature for up to 2 hours safely.
Frequently Asked Questions
Can I use a different type of dough?
Absolutely! While crescent rolls provide that signature flaky texture and buttery flavor, you can use pizza dough cut into triangles for a chewier result. Puff pastry creates an even flakier, more elegant version perfect for fancy occasions. Just adjust baking times accordingly—puff pastry typically needs 18-20 minutes at the same temperature.
What if I don’t have fresh herbs?
No problem! Substitute dried herbs, using about one-third the amount since dried herbs are more concentrated. So use 1 teaspoon dried parsley and 1 teaspoon dried chives. You can also use an Italian herb blend or herbes de Provence for similar aromatic results.
How do I know when they’re fully cooked?
The rolls are done when they’ve expanded significantly, turned a deep golden brown color, and sound hollow when tapped on the bottom. If you’re unsure, you can insert an instant-read thermometer into the center of a roll—it should read at least 165°F to ensure the filling is properly heated through.
Can I make these dairy-free?
Yes, with some substitutions! Use dairy-free cream cheese (brands like Kite Hill or Daiya work well) and dairy-free sour cream. Replace the mozzarella with a dairy-free melting cheese. The flavor will be slightly different but still delicious. Make sure to check that your crescent roll dough is dairy-free—some brands contain butter.
Why did my rolls come out soggy?
Soggy rolls usually result from too much moisture in the filling. If using fresh spinach or other vegetables, make sure to squeeze out excess water first. Also, avoid overfilling the rolls, which can cause the filling to leak and create steam. Finally, make sure your oven is fully preheated—insufficient heat causes steaming instead of crisping.
Can I use ground chicken instead of shredded?
Certainly! Brown 1 pound of ground chicken in a skillet, season it well, then drain any excess fat before mixing it with the other filling ingredients. The texture will be different—more like a chicken salad filling—but equally delicious. This method also works great if you don’t have leftover cooked chicken.