When I first attempted to recreate those irresistible restaurant-style potato wedges at home, I went through more failed batches than I care to admit. Some came out soggy, others burnt to a crisp, and many just lacked that perfect balance of crispy exterior and fluffy interior that makes potato wedges so addictive.
Then I discovered the secret wasn’t just in the temperature or timing—it was in the preparation technique and the magical combination of garlic, parmesan, and just the right amount of seasoning. These crispy garlic baked potato wedges have since become my family’s most requested side dish, and I’m convinced they’ll become yours too.
The beauty of this recipe lies in its simplicity. With just a handful of ingredients and one baking sheet, you can create golden, crispy wedges that rival any restaurant version. Moreover, they’re baked rather than fried, making them a healthier option that doesn’t sacrifice any flavor or texture.
Why These Potato Wedges Are Absolutely Perfect
Restaurant-Quality Texture at Home
These wedges achieve that coveted contrast of crispy, golden edges with soft, pillowy interiors. The key lies in the proper cutting technique and strategic seasoning placement that creates maximum surface area for crisping.
Flavor That Delivers Every Time
The garlic and parmesan combination creates layers of savory goodness that penetrate every bite. Additionally, the paprika adds a subtle warmth and beautiful color that makes these wedges as visually appealing as they are delicious.
Versatile and Crowd-Pleasing
Whether served as a side dish for dinner or as a party appetizer, these wedges adapt to any occasion. Furthermore, they pair beautifully with everything from grilled meats to simple salads, making them incredibly versatile.
Ingredients You’ll Need
Prep Time: 15 minutes
Cook Time: 35 minutes
Total Time: 50 minutes
Servings: 6 people
Main Components:
- 6 large russet potatoes, rinsed
- 1/4 cup olive oil
- 1 tablespoon minced garlic (or 3 teaspoons garlic powder)
- 1/2 teaspoon onion powder
- 2 teaspoons salt (adjust to taste)
- 1 teaspoon paprika
- 1/2 teaspoon cracked black pepper
Finishing Touches:
- 2/3 cup parmesan cheese, finely grated or shredded, divided
- 2 tablespoons fresh parsley, chopped
Step-by-Step Instructions
Preparing Your Workspace
Begin by preheating your oven to 390°F (200°C). Line 2 large baking sheets with parchment paper and set them aside. This temperature provides the perfect balance for achieving crispy exteriors without burning.
Mastering the Perfect Cut
Cut each potato in half lengthwise, then cut each half in half lengthwise again. Finally, cut each piece in half lengthwise once more until you have 8 wedges per potato. The key is ensuring all wedges are roughly the same thickness and size for even cooking.
Creating the Flavor Base
In a small bowl, combine the olive oil, minced garlic, onion powder, salt, paprika, and cracked pepper. Whisk until well combined. This aromatic mixture will be the foundation of flavor that transforms ordinary potatoes into something extraordinary.
Coating for Maximum Flavor
Pour the oil mixture over the potato wedges and toss thoroughly to ensure even coating. Every surface should glisten with the seasoned oil, as this creates the crispy exterior we’re after.
Strategic Arrangement
Arrange the potato wedges in a single layer on the prepared baking sheets, positioning them skin-side down. This placement allows the cut surfaces to crisp up beautifully while the skin provides structural support.
First Cheese Addition
Sprinkle half of the parmesan cheese over the wedges along with any additional salt if desired. The cheese will create a golden, crispy crust during baking.
The Baking Process
Bake for 35 minutes, turning the wedges halfway through the cooking time. This ensures even browning and prevents any sticking. The wedges are done when they’re golden brown and tender when pierced with a fork.
Final Finishing Touches
Remove from the oven and immediately sprinkle with the remaining parmesan cheese and fresh chopped parsley. The residual heat will slightly melt the cheese while the parsley adds a fresh, colorful contrast.
Serving Suggestions
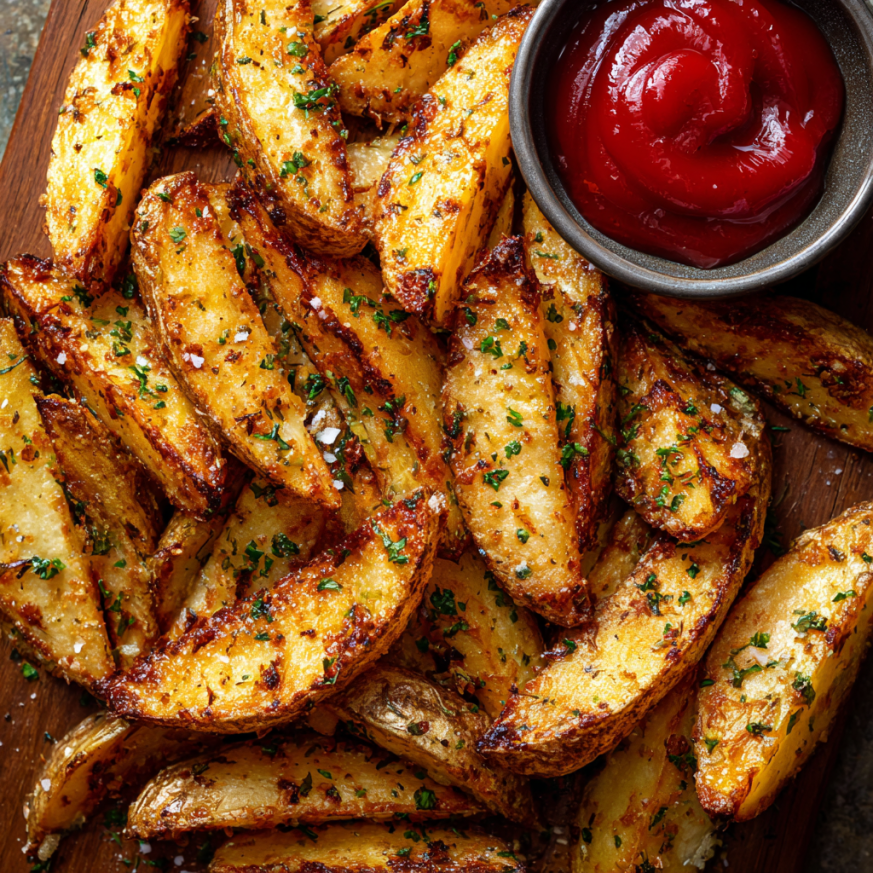
Classic Presentation
Arrange the hot wedges on a large platter with small bowls of dipping sauce scattered around. The rustic presentation highlights the homemade appeal and encourages sharing.
Dipping Sauce Pairings
As suggested in the original recipe, these wedges pair wonderfully with aioli. However, they’re equally delicious with ranch dressing, garlic mayo, or even a simple ketchup for those who prefer classic flavors.
Creative Serving Ideas
Consider serving these wedges in individual paper-lined baskets for a casual dining experience. Alternatively, arrange them on a wooden board with various dipping sauces for an appetizer spread that’s perfect for entertaining.
Recipe Variations to Try
Herb-Enhanced Version
Experiment with different herbs like rosemary, thyme, or oregano in addition to the parsley. Each herb brings its own character while complementing the garlic and parmesan base.
Spice Level Adjustments
For those who enjoy more heat, add a pinch of cayenne pepper or red pepper flakes to the oil mixture. This subtle addition provides warmth without overwhelming the other flavors.
Cheese Alternatives
While parmesan is classic, try substituting with aged cheddar, pecorino romano, or even a blend of Italian cheeses for different flavor profiles.
Make-Ahead Tips
Preparation Strategy
The potato wedges can be cut and the oil mixture prepared up to 4 hours in advance. Store the cut potatoes in cold water to prevent browning, then drain and pat dry before seasoning.
Assembly Options
You can season and arrange the wedges on the baking sheets up to 1 hour before baking. Cover with plastic wrap and refrigerate until ready to bake, though you may need to add 2-3 minutes to the cooking time.
Reheating Instructions
Leftover wedges can be reheated in a 400°F oven for 5-7 minutes to restore their crispiness. Avoid microwaving, as this will make them soggy.
Essential Tips for Success
Potato Selection
Choose large, uniform russet potatoes for the best results. These potatoes have the ideal starch content for achieving that perfect fluffy interior while maintaining structure during baking.
Cutting Consistency
Ensure all wedges are cut to similar sizes for even cooking. Inconsistent sizing will result in some wedges being overcooked while others remain undercooked.
Oil Distribution
Take time to thoroughly coat each wedge with the seasoned oil mixture. This step is crucial for achieving that golden, crispy exterior that makes these wedges irresistible.
Proper Spacing
Don’t overcrowd the baking sheets. Adequate spacing allows hot air to circulate around each wedge, promoting even browning and preventing steaming.
Troubleshooting Common Issues
Soggy Wedges
If your wedges aren’t crisping properly, ensure your oven is fully preheated and avoid overcrowding the baking sheets. Additionally, make sure the potatoes are patted dry before seasoning.
Uneven Cooking
Rotate the baking sheets halfway through cooking and flip the wedges to ensure even browning on all sides.
Burnt Edges
If the edges are browning too quickly, reduce the oven temperature by 25°F and extend the cooking time slightly.
Frequently Asked Questions
Can I use different types of potatoes?
While russet potatoes work best due to their starch content, Yukon Gold potatoes can be substituted for a slightly creamier texture. However, avoid waxy potatoes like red potatoes as they won’t achieve the same fluffy interior.
What if I don’t have fresh garlic?
Garlic powder works perfectly fine and is actually more convenient for even distribution. Use 3 teaspoons of garlic powder as specified in the recipe for the best flavor balance.
How do I know when the wedges are done?
The wedges should be golden brown on the outside and tender when pierced with a fork. The internal temperature should reach about 205°F for the fluffiest interior.
Can I make these ahead for a party?
Yes! These wedges can be partially baked earlier in the day and finished in the oven just before serving. Bake for 20 minutes initially, then finish with 15 minutes when ready to serve.
What’s the best way to store leftovers?
Store leftover wedges in the refrigerator for up to 3 days. Reheat in a 400°F oven for 5-7 minutes to restore crispiness.
Can I freeze these wedges?
Yes, you can freeze the seasoned but unbaked wedges for up to 2 months. Bake directly from frozen, adding 10-15 minutes to the cooking time.
Why do my wedges stick to the pan?
Ensure you’re using parchment paper and that the baking sheets are properly lined. Additionally, avoid moving the wedges too early in the baking process, as they need time to develop a crust.
Creative Ways to Serve These Wedges
Loaded Wedge Bar
Set up a DIY loaded wedge station with toppings like bacon bits, green onions, sour cream, and additional cheese. This interactive approach is perfect for casual gatherings.
Breakfast Hash Alternative
Serve these wedges as a unique breakfast side dish alongside eggs and bacon. The crispy texture and savory flavors make them an excellent alternative to traditional breakfast potatoes.
Appetizer Platter
Cut the wedges into smaller pieces before baking to create bite-sized appetizers. Serve with toothpicks and various dipping sauces for an elegant party spread.
Nutrition Information (per serving):
- Calories: 296kcal
- Carbohydrates: 40g
- Protein: 9g
- Fat: 12g
- Saturated Fat: 3g
- Cholesterol: 8mg
- Sodium: 965mg
- Potassium: 923mg
- Fiber: 3g
- Calcium: 166mg
- Vitamin C: 14mg


