Total Time: 30 minutes | Yield: 4 servings | Diet: Gluten Free
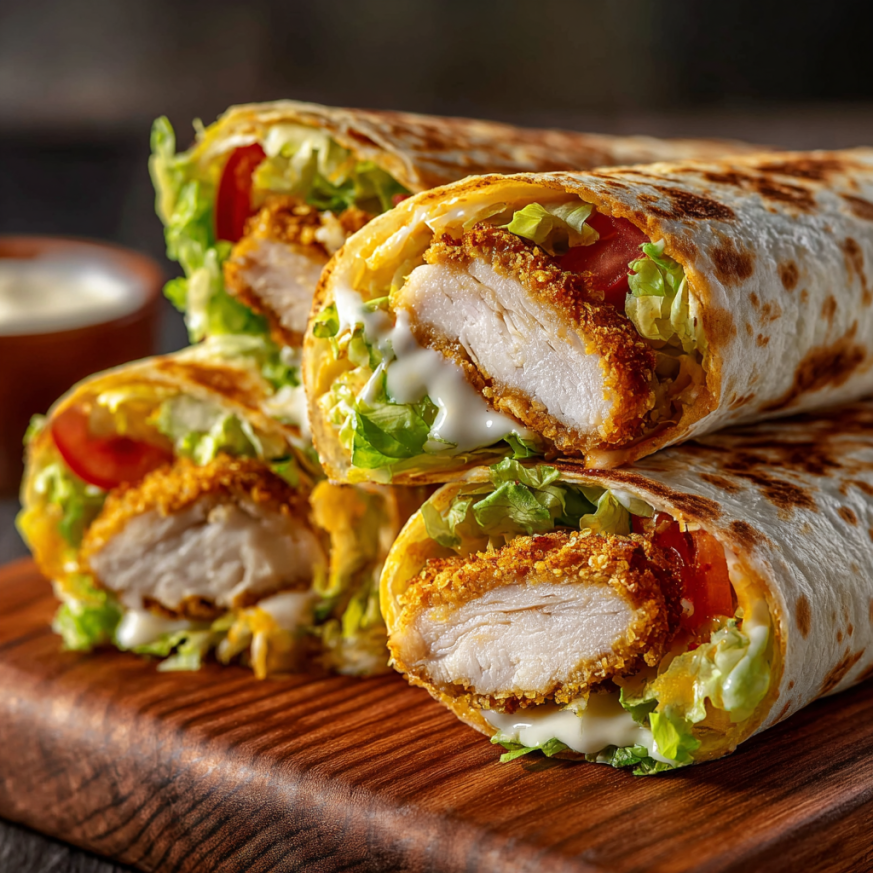
Some recipes remind me of those perfect lazy Sunday afternoons when you want something delicious but don’t have hours to spend in the kitchen. These crispy chicken wraps hit that sweet spot perfectly – they’re quick enough for a weeknight dinner yet satisfying enough to feel like a special treat. The combination of tender, seasoned chicken, melted cheese, and aromatic garlic all wrapped up in a golden, crispy tortilla creates pure comfort food magic.
Why These Wraps Will Transform Your Meal Game
The genius of this recipe lies in its incredible versatility and lightning-fast preparation time. Within 30 minutes, you can have a restaurant-quality meal that pleases everyone at the table. The crispy exterior gives way to warm, melted cheese and perfectly seasoned chicken, creating a delightful textural contrast that keeps every bite interesting.
Moreover, these wraps offer endless customization possibilities, making them perfect for picky eaters or those with specific dietary preferences. The base recipe serves as a canvas for creativity – you can add your favorite vegetables, swap sauces, or experiment with different cheese varieties. Additionally, the optional crisping step elevates these from simple wraps to something truly special, with that golden exterior that makes them irresistible.
Essential Ingredients
For the Chicken and Wraps:
- Large flour tortillas – 4 pieces (10-inch diameter works best)
- Crispy chicken strips – 400g (store-bought or homemade)
- Grated cheese – 200g (cheddar, mozzarella, or Mexican blend)
- Garlic powder – 1 teaspoon (or 2 cloves fresh garlic, minced)
- Fresh lettuce – 1 cup, chopped (iceberg or romaine)
- Ripe tomatoes – 2 medium pieces, diced
- Ranch dressing – 100ml (plus extra for serving)
- Salt and black pepper – to taste
- Vegetable oil – for frying (if crisping)
Optional Enhancements:
- Red onion slices
- Jalapeño peppers
- Avocado slices
- Crispy bacon bits
- Hot sauce
- Sour cream
Step-by-Step Cooking Instructions
Preparing the Perfect Chicken
Begin by seasoning your chicken strips generously with salt, pepper, and garlic powder. If using fresh garlic, mince it finely and rub it directly onto the chicken for maximum flavor penetration. Heat a large skillet over medium-high heat and add a tablespoon of oil once hot.
Cook the chicken strips for 3-4 minutes per side until they develop a beautiful golden crust and reach an internal temperature of 165°F (74°C). The key is not to overcrowd the pan – cook in batches if necessary to ensure even browning. Once cooked, transfer to a plate and keep warm.
Assembling Your Wraps
While the chicken rests, warm your tortillas to make them more pliable and enhance their flavor. Heat a dry skillet over medium heat and warm each tortilla for 30 seconds per side until they’re heated through and slightly toasted. This step prevents tearing during the rolling process.
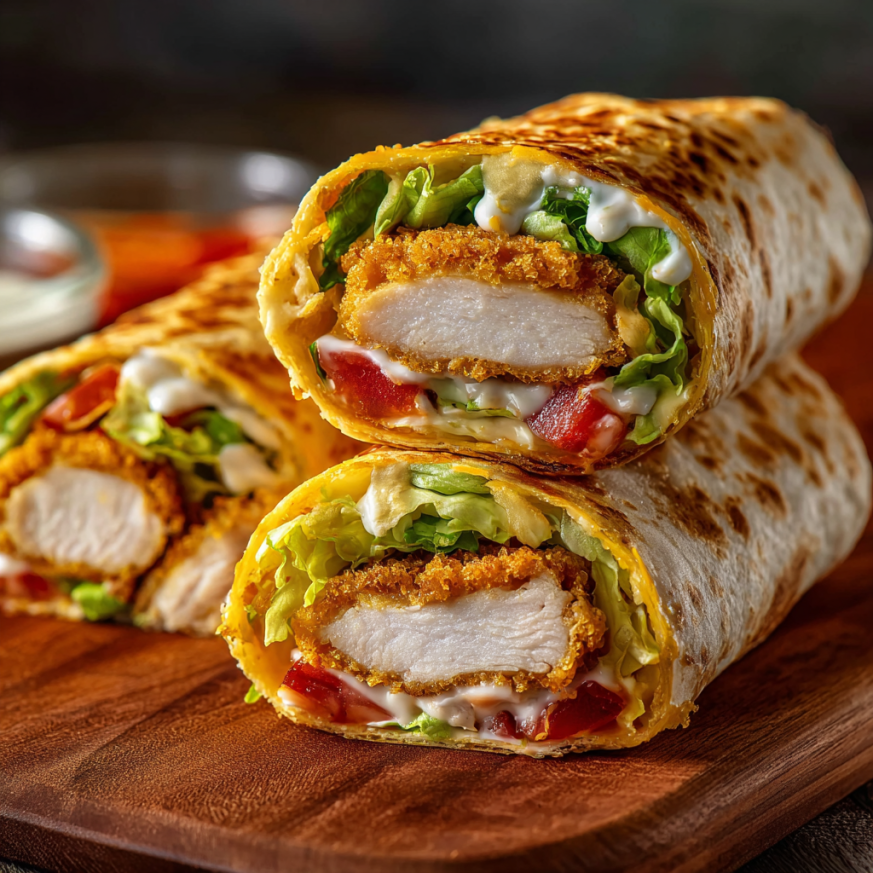
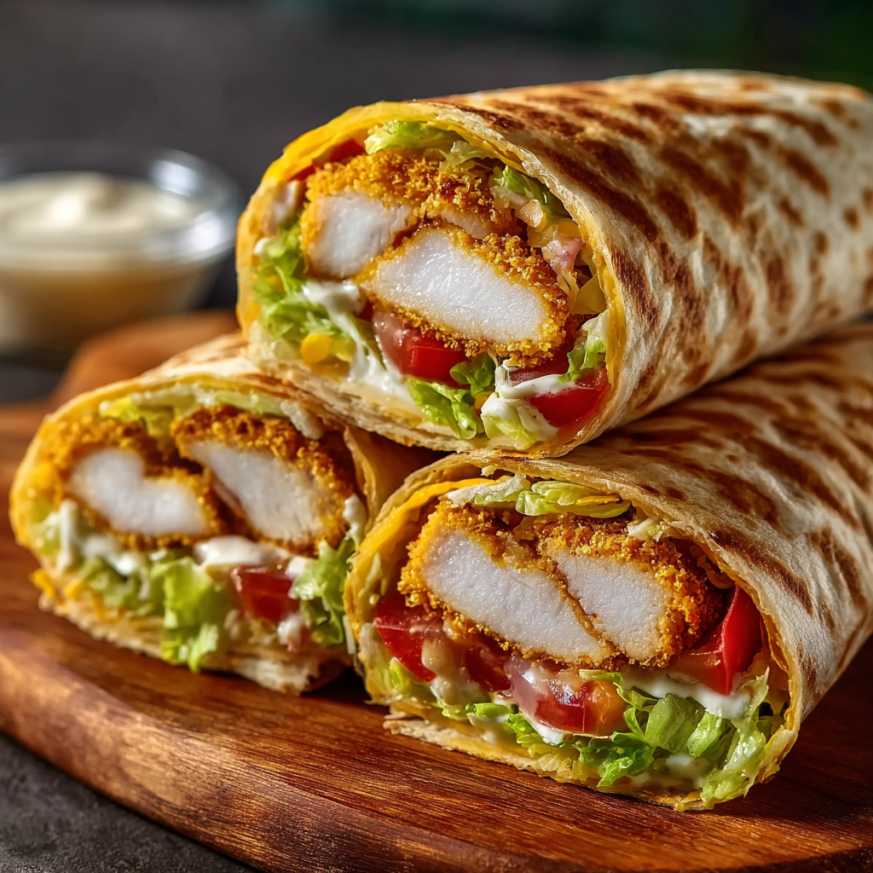
Lay each warmed tortilla flat on a clean surface. Place a generous portion of chicken strips in the center, leaving about 2 inches of space from the edges. Next, sprinkle the grated cheese over the chicken, followed by the chopped lettuce and diced tomatoes. Finally, drizzle the ranch dressing evenly over the filling.
The Rolling Technique
Proper rolling technique ensures your wraps stay intact and look professional. Start by folding the left and right sides of the tortilla toward the center, creating side flaps that will contain the filling. Then, starting from the bottom edge closest to you, roll the tortilla tightly upward, keeping the filling compressed as you go.
The key is to roll firmly but not so tightly that the tortilla tears. If the filling tries to escape, simply push it back in gently and continue rolling. Once rolled, the seam should be on the bottom to help keep the wrap closed.
Creating the Crispy Exterior
For the ultimate experience, transform your wraps into crispy golden parcels. Heat a large skillet over medium heat with a thin layer of oil. Carefully place the wraps seam-side down in the pan and cook for 2-3 minutes until the bottom is golden and crispy.
Using tongs, gently flip each wrap and cook for another 2-3 minutes until all sides are evenly golden. The cheese inside should be melted and the exterior should have a satisfying crunch. Remove from heat and let cool for 1-2 minutes before cutting.
Serving Suggestions
Present these wraps immediately while they’re still warm and crispy. Cut each wrap diagonally in half to showcase the colorful filling and make them easier to handle. Arrange on plates with the cut side facing up for the most appealing presentation.
Serve with additional ranch dressing on the side for dipping, along with some crispy tortilla chips or a simple side salad. For a complete meal, consider adding pickled jalapeños, guacamole, or salsa as accompaniments. The contrast between the hot, crispy wraps and cool, creamy sides creates a perfectly balanced dining experience.
Creative Recipe Variations
Buffalo Chicken Style
Replace the ranch dressing with buffalo sauce and add celery pieces for crunch. Use blue cheese crumbles instead of regular cheese for an authentic buffalo experience.
Mediterranean Twist
Substitute the ranch with tzatziki sauce, add cucumber slices and red onion, and use feta cheese instead of cheddar. This variation brings fresh, bright flavors to the classic wrap format.
Breakfast Wrap Version
Add scrambled eggs to the filling and replace the lettuce and tomatoes with hash browns and breakfast sausage. This creates a hearty morning meal that’s perfect for meal prep.
Spicy Jalapeño Option
Include sliced jalapeños in the filling and mix hot sauce with the ranch dressing. Use pepper jack cheese for an extra kick that spice lovers will appreciate.
Make-Ahead Tips
These wraps are excellent for meal preparation, though some adjustments ensure the best results. You can prepare the chicken up to 2 days in advance and store it in the refrigerator. Similarly, wash and chop your vegetables ahead of time, storing them in separate containers to maintain freshness.
For the best texture, assemble the wraps no more than 4 hours before serving. If making them earlier, wrap each one tightly in plastic wrap and refrigerate. When ready to serve, remove the plastic and crisp them in a dry skillet for 2-3 minutes per side to restore their texture.
Avoid adding wet ingredients like tomatoes or dressing until just before serving if you’re preparing these in advance, as they can make the tortillas soggy.
Important Notes
Choosing the right tortillas makes a significant difference in the final product. Large, fresh flour tortillas work best because they’re more pliable and less likely to tear during rolling. If your tortillas seem dry or brittle, warming them properly is crucial for successful wrapping.
Temperature control during the crisping process prevents burning while ensuring even browning. Medium heat allows the exterior to become golden and crispy while the cheese melts completely inside. Higher heat risks burning the outside before the interior is properly heated.
When storing leftovers, wrap them individually in plastic wrap to prevent them from drying out. They can be reheated in a dry skillet over medium heat for 2-3 minutes per side, though they’re best enjoyed fresh.
Frequently Asked Questions
Q: Can I make these wraps without the crispy exterior? A: Absolutely! Simply skip the final frying step and enjoy them as soft wraps. They’re equally delicious and slightly healthier this way, plus they’re easier to eat on the go.
Q: What’s the best way to reheat leftover wraps? A: For best results, reheat in a dry skillet over medium heat for 2-3 minutes per side. This restores the crispy texture better than microwaving. Alternatively, use a toaster oven at 350°F for 5-7 minutes.
Q: Can I freeze these wraps for later? A: Yes, but freeze them before the final crisping step. Wrap individually in plastic wrap and aluminum foil, then freeze for up to 3 months. Thaw overnight in the refrigerator before crisping in a skillet.
Q: How can I make these wraps healthier? A: Use whole wheat tortillas, grilled chicken instead of fried, reduced-fat cheese, and add more vegetables like bell peppers or cucumbers. You can also use Greek yogurt-based dressing instead of ranch.
Q: What if my tortillas keep tearing during rolling? A: Make sure your tortillas are properly warmed and pliable before rolling. Don’t overfill them, and roll gently but firmly. If they’re still tearing, try a different brand or warm them slightly longer.
Q: Can I use different types of cheese? A: Definitely! Mexican blend, pepper jack, Swiss, or even cream cheese work wonderfully. Just ensure whatever cheese you choose melts well and complements the other flavors.
Nutrition Information (per wrap):
- Calories: 350
- Protein: 20g
- Carbohydrates: 40g
- Fat: 15g
- Fiber: 3g
- Sugar: 2g
- Sodium: 600mg
Recipe Details:
- Prep Time: 15 minutes
- Cook Time: 15 minutes
- Category: Dinner
- Method: Pan-frying
- Cuisine: Mexican Fusion