
Prep Time: 2 hours, 30 minutes (includes chilling)
Cook Time: 13 minutes
Total Time: 3 hours
Yield: 36 cookies
Introduction: A Baker’s Love Affair with Brown Butter
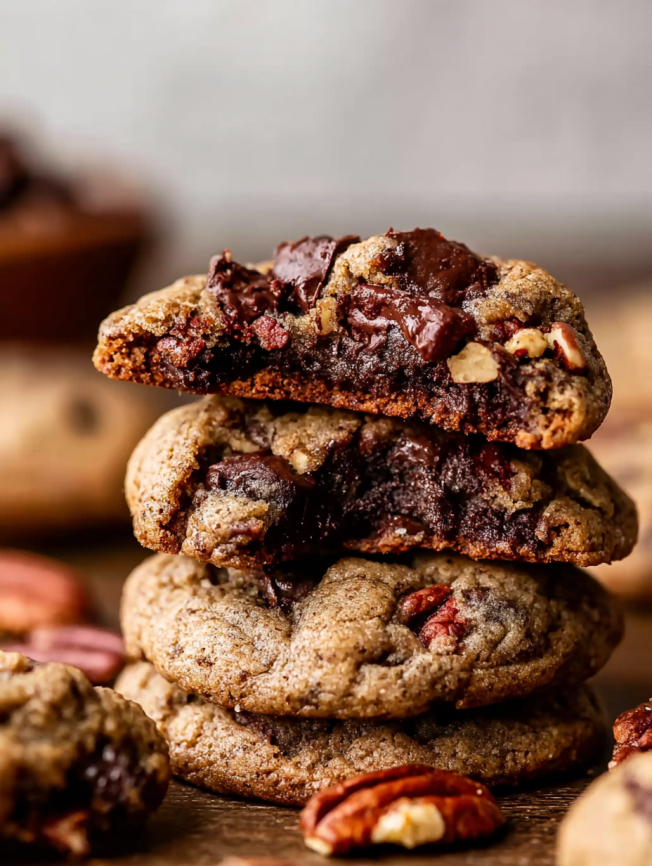
There’s something magical that happens when butter transforms from pale yellow to golden amber, releasing that intoxicating nutty aroma that fills your entire kitchen. As a passionate home baker, I’ve discovered that brown butter is the secret ingredient that elevates ordinary cookies into extraordinary treats. These dark chocolate pecan cookies represent the perfect marriage of rich, complex flavors that will make your taste buds dance with joy.
The first time I made these cookies, I was skeptical about the extra step of browning butter. However, after one bite, I became completely convinced that this technique is worth every minute of attention it requires. The depth of flavor it adds is simply incomparable to regular melted butter.
Why You’ll Fall in Love with This Recipe
Irresistible Flavor Combination
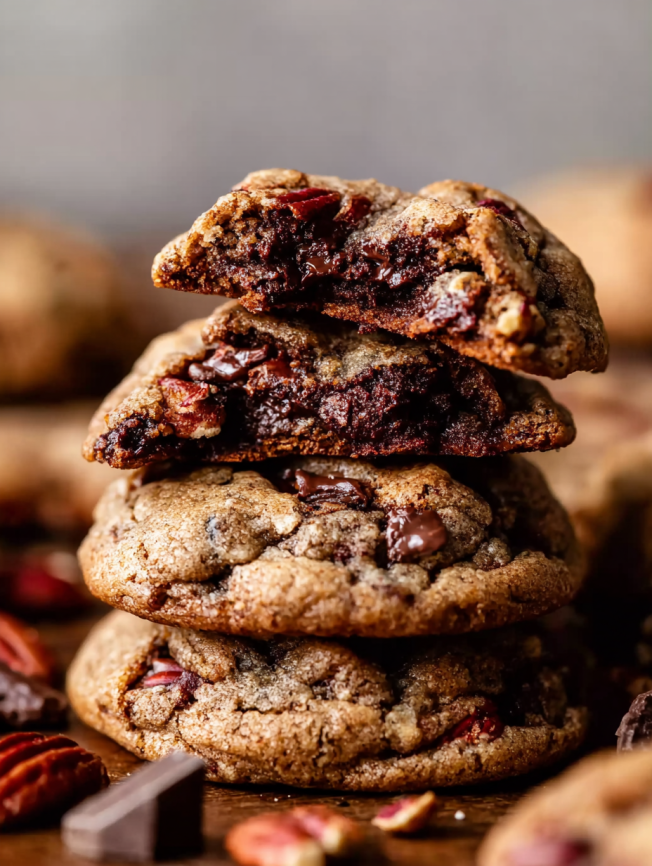
These cookies bring together some of baking’s most beloved ingredients in perfect harmony. The nutty brown butter creates a rich foundation, while dark chocolate provides intense cocoa notes that complement the earthy crunch of pecans. Meanwhile, the warm cinnamon adds a subtle spice that ties everything together beautifully.
Perfect Texture Balance
What makes these cookies truly special is their unique texture profile. They offer a delightful contrast between soft, chewy centers and slightly crisp edges. Furthermore, the combination of brown sugar and granulated sugar creates the ideal balance of moisture and structure.
Impressive Yet Achievable
Despite their gourmet appearance and complex flavors, these cookies are surprisingly approachable for home bakers. Additionally, the make-ahead friendly nature means you can prepare the dough in advance, making them perfect for entertaining or gift-giving.
Essential Ingredients and Components
Main Ingredients
- 1 cup (16 Tbsp; 226g) unsalted butter – The star ingredient that gets transformed through browning
- 1 cup (200g) packed brown sugar – Adds moisture and molasses depth
- 1/2 cup (100g) granulated sugar – Provides structure and helps with spreading
- 2 large eggs, at room temperature – Binding agent and adds richness
- 2 teaspoons pure vanilla extract – Enhances all other flavors
Dry Ingredients Foundation
- 2 and 1/2 cups (313g) all-purpose flour (spooned & leveled) – The structural backbone
- 1 teaspoon baking soda – Creates the perfect rise and texture
- 1 teaspoon ground cinnamon – Adds warmth and complexity
- 1/2 teaspoon salt – Balances sweetness and enhances flavors
Flavor Add-ins
- Two 4-ounce semi-sweet or bittersweet chocolate bars (226g total), chopped – Approximately 1 and 1/2 cups of rich chocolate pieces
- 1 cup (130g) roughly chopped pecans – Provides delightful crunch and nutty flavor
Step-by-Step Instructions
Browning the Butter Perfectly
Begin by setting out a medium heat-proof bowl, as you’ll need it immediately after browning. Next, slice your butter into tablespoon-size pieces for even melting. Place the butter pieces in a light-colored skillet or large pot, which allows you to monitor the browning process more effectively.
Melt the butter over medium heat while stirring or whisking constantly. Once melted, the butter will start to foam, so continue stirring diligently. After 5-7 minutes, watch for lightly browned specks forming at the bottom of the pan and notice the distinctive nutty aroma developing.
When the butter reaches this golden-brown stage, immediately remove it from heat. Pour the entire contents, including those flavorful brown bits, into your prepared bowl. Allow the brown butter to cool for exactly 5 minutes – not longer, as it will thicken and make mixing difficult.
Creating the Cookie Dough
Whisk both sugars into the cooled brown butter until well combined. Then, add the eggs and vanilla extract, whisking until smooth. Set this wet mixture aside temporarily.
In a large bowl, whisk together the flour, baking soda, cinnamon, and salt. Pour the wet ingredients into the dry mixture, then add the chopped chocolate and pecans. Stir everything together using a large spoon or rubber spatula until just combined. The resulting dough will appear greasy, thick, and slightly crumbly – this is exactly what you want.
The Crucial Chilling Step
Cover the cookie dough and refrigerate for a minimum of 2 hours, though you can chill it for up to 3 days. This chilling step is essential for preventing excessive spreading and developing flavors. If chilling for longer than 2 hours, let the dough sit at room temperature for 20-30 minutes before shaping, as it becomes quite firm when thoroughly chilled.
Baking to Perfection
Towards the end of your chilling time, preheat your oven to 350°F (177°C). Line large baking sheets with parchment paper or silicone baking mats.
Roll or scoop the dough into balls using approximately 1.5 tablespoons of dough each – a medium cookie scoop works perfectly for this. Place the dough balls 3 inches apart on your prepared baking sheets to allow for spreading.
Bake for 13-14 minutes, or until the edges appear set. Here’s a helpful tip: if your cookies aren’t spreading by the 10-minute mark, remove the pan from the oven and carefully bang it on the counter to encourage spreading, then return it to finish baking.
Remove from the oven and let cookies cool on the baking sheet for 5 minutes before transferring to a wire rack. This initial cooling period prevents breaking while ensuring they don’t continue cooking on the hot pan.
Serving Suggestions and Pairings
Perfect Beverage Companions
These rich, decadent cookies pair beautifully with a variety of beverages. Cold milk remains the classic choice, offering a creamy contrast to the intense chocolate and nutty flavors. For coffee lovers, a robust espresso or dark roast coffee complements the brown butter notes perfectly.
During colder months, consider serving these cookies alongside hot chocolate or spiced chai tea. The warm spices in chai particularly enhance the cinnamon in the cookies, creating a harmonious flavor experience.
Elegant Presentation Ideas
For special occasions, arrange these cookies on a beautiful platter with fresh berries and a dusting of powdered sugar. Alternatively, package them in decorative boxes or bags for thoughtful homemade gifts that friends and family will treasure.
Creative Recipe Variations
Chocolate Alternatives
While dark chocolate provides the most sophisticated flavor profile, don’t hesitate to experiment with different types. Semi-sweet chocolate offers a milder option, whereas milk chocolate appeals to those preferring sweeter treats. For an unexpected twist, try white chocolate, which creates a beautiful color contrast against the brown butter base.
Nut Substitutions
Although pecans are traditional, walnuts make an excellent substitute with their slightly more bitter flavor profile. Hazelnuts provide a European flair, while almonds offer a more delicate nutty taste. For those avoiding nuts entirely, consider substituting with dried cranberries, cherries, or toffee bits.
Spice Modifications
Beyond cinnamon, experiment with other warm spices like cardamom, nutmeg, or even a pinch of cayenne pepper for adventurous bakers. These additions can transform the cookies’ personality while maintaining their fundamental appeal.
Make-Ahead Tips and Storage
Advance Preparation Strategies
These cookies are incredibly make-ahead friendly, making them perfect for busy schedules or planned entertaining. The cookie dough can be prepared and refrigerated for up to 3 days before baking. For longer storage, shape the dough into balls and freeze them on baking sheets before transferring to freezer bags.
Frozen dough balls can be baked directly from the freezer – simply add an extra minute to the baking time without thawing. This technique allows you to have fresh, warm cookies whenever the craving strikes.
Storage Solutions
Baked cookies stay fresh when stored in an airtight container at room temperature for up to one week. For longer storage, freeze baked cookies for up to three months, separating layers with parchment paper to prevent sticking.
Important Notes and Tips
Equipment Recommendations
Using the right tools significantly impacts your baking success. A light-colored skillet is crucial for browning butter, as it allows you to monitor the color change accurately. If using a dark pan, periodically spoon some butter into a glass bowl to check the browning progress.
A medium cookie scoop ensures uniform cookie sizes, which promotes even baking. Additionally, silicone baking mats provide excellent non-stick properties and promote even browning on the bottom of cookies.
Ingredient Substitutions and Modifications
When it comes to chocolate selection, chopped baking bars generally provide better results than chocolate chips due to their irregular shapes and superior melting qualities. However, chocolate chips work perfectly fine if that’s what you have available.
For the pecans, raw unsalted varieties work best, though you can toast them beforehand for enhanced flavor. Simply spread chopped pecans on a parchment-lined baking sheet and toast at 300°F for 7-8 minutes until fragrant.
Frequently Asked Questions
Q: Can I skip the chilling step to save time? A: Unfortunately, chilling is essential for these cookies. Without proper chilling, the cookies will spread too much and lose their intended texture. The brown butter also needs time to solidify slightly, which helps create the perfect consistency.
Q: Why did my brown butter burn instead of browning? A: Brown butter requires constant attention and medium heat. The line between perfectly browned and burnt is very thin. If your heat is too high or you stop stirring, the butter can quickly go from golden to burnt. Practice makes perfect with this technique.
Q: Can I make these cookies without nuts? A: Absolutely! Simply omit the pecans without adding extra chocolate. If you’d like to substitute another add-in, try dried fruit like cranberries or cherries, or add toffee bits for extra sweetness and crunch.
Q: My cookies didn’t spread much during baking. What went wrong? A: This usually happens when the dough is too cold or the oven temperature is too low. Make sure your dough has warmed up slightly if it was chilled for more than 2 hours, and verify your oven temperature with a thermometer. The counter-banging technique mentioned in the recipe can also help encourage spreading.
Q: How can I tell when the cookies are perfectly done? A: Look for edges that appear set but centers that still look slightly soft and underbaked. The cookies will continue cooking on the hot pan after removal from the oven. Overbaked cookies become hard and lose their chewy texture.
Q: Can I double this recipe for a larger batch? A: Yes, this recipe doubles well. However, brown the butter in two separate batches to ensure even browning, as larger quantities can be more difficult to monitor and may cook unevenly.


