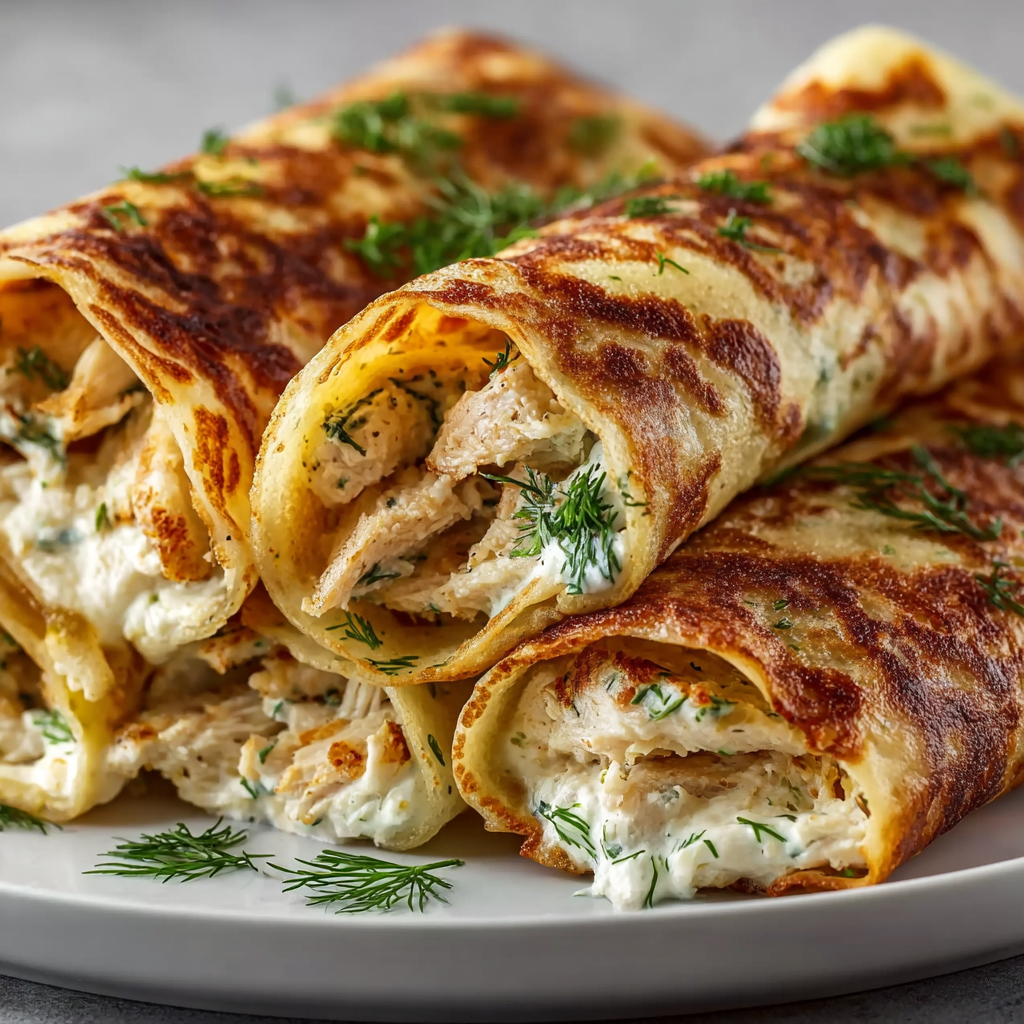
Discover the perfect snack with these Dill Pickle Ranch Chicken Taquitos—crispy, golden, and bursting with savory ranch flavors and tangy dill pickles. Oven-baked to perfection, they offer a delightful crunch that pairs beautifully with melty cheeses and tender shredded chicken.
Whether you’re serving them as a fun appetizer, a tasty lunch, or a casual dinner, these taquitos are incredibly easy to prepare and guaranteed to please any crowd. The fresh dill and garlic powders add a fragrant depth that makes each bite irresistible.
- Oven-baked for a healthier, crispier texture without frying.
- Unique combination of dill pickles and ranch creates a flavorful punch.
- Quick to prepare with shredded chicken and simple pantry ingredients.
- Perfect for parties, snacks, or easy weeknight meals.
Ingredients
- Cooked chicken breast, shredded (2 cups): Tender, cooked chicken breast finely shredded to ensure a juicy and protein-rich filling.
- Dill pickles, finely chopped (1/2 cup): Adds tangy crunch with fresh dill flavor that complements the creamy filling.
- Cream cheese, softened (4 ounces): Provides a rich and smooth base to bind all ingredients together evenly.
- Ranch dressing (1/3 cup): Brings zesty, herby flavor essential to the classic ranch chicken taste.
- Cheddar cheese, shredded (1/2 cup): Sharp and creamy, it melts perfectly for a rich cheesy texture.
- Mozzarella cheese, shredded (1/2 cup): Mild melting cheese that adds gooey indulgence to each bite.
- Fresh dill, chopped (2 tablespoons): Offers refreshing, aromatic herb notes that enhance the pickle flavor.
- Garlic powder (1/2 teaspoon): Adds subtle earthiness and depth to the seasoning blend.
- Onion powder (1/2 teaspoon): Contributes mild sweetness and savory undertones to the chicken filling.
- Salt, to taste: Balances flavors and enhances the overall taste of the filling.
- Black pepper, to taste: Adds a gentle kick and warmth for flavor complexity.
- Small flour tortillas, 6-inch diameter (12): Thin and flexible wraps that roll tightly and crisp thoroughly in the oven.
- Olive oil spray: Lightly coats taquitos to achieve a golden, crunchy exterior.
Instructions
- Preheat and Prepare the Baking Sheet
-
Set your oven to 425°F (220°C) and prepare a large baking sheet by lining it with parchment paper or greasing it lightly. This setup ensures the taquitos cook evenly without sticking.
- Mix the Chicken Filling
-
In a large bowl, combine shredded chicken, finely chopped dill pickles, softened cream cheese, ranch dressing, shredded cheddar and mozzarella cheeses, fresh chopped dill, garlic powder, onion powder, salt, and black pepper. Stir thoroughly until all ingredients are fully incorporated into a creamy, flavorful mixture.
- Assemble the Taquitos
-
Lay out the tortillas on a flat surface. Spoon about 3 tablespoons of the chicken mixture evenly along the bottom third of each tortilla. This portion ensures enough filling while allowing for tight rolling without bursting.
- Roll and Arrange Taquitos
-
Carefully roll each tortilla from the filled edge upwards to form a tight cylinder, sealing the filling inside. Place each taquito seam-side down on the prepared baking sheet, which helps maintain shape and prevents unrolling during baking.
- Apply Olive Oil Spray
-
Lightly spray the surface of each taquito with olive oil. This step promotes an evenly crisp and golden crust during baking, mimicking a fried texture without extra oil.
- Bake Until Crisp and Golden
-
Bake the taquitos in the preheated oven for 22 to 25 minutes, or until they achieve a deep golden brown color and a satisfyingly crunchy exterior. Baking ensures the cheese melts and pickles infuse the chicken mixture with tangy warmth.
- Serve and Garnish
-
Remove taquitos from the oven and let cool for a few minutes. Serve warm, optionally garnished with extra ranch dressing for dipping, fresh chopped dill for brightness, or sliced pickles for added tang.
- Use cooked chicken breast you prefer—roasted, poached, or leftover works well.
- Ensure the cream cheese is softened for easier mixing and smoother filling.
- Olive oil spray ensures even crisping without excess grease.
- Taquitos can be flipped halfway through baking if desired for more even browning.
Storage Tips
Store any leftover taquitos in an airtight container in the refrigerator for up to 3 days. Reheat in the oven at 375°F for 8-10 minutes to restore crispiness before serving.
Serving Suggestions
Serve these taquitos with a side of fresh garden salad or your favorite salsa for a balanced meal. They also pair delightfully with creamy guacamole or spicy hot sauce to amp up the flavor.
- For extra crispness, lightly brush taquitos with olive oil instead of spraying.
- Substitute flour tortillas with corn tortillas if preferred, but gently warm to avoid cracking when rolling.
- Try adding a pinch of smoked paprika or cayenne to the filling for a smoky or spicy kick.
- Use a mix of sharp and mild cheeses for a more dynamic cheesy texture.
FAQs
- Can I use rotisserie chicken for this recipe?
-
Absolutely! Rotisserie chicken works perfectly, saving prep time while adding extra flavor.
- Can I freeze these taquitos before baking?
-
Yes, freeze assembled taquitos on a baking sheet, then transfer to a container. Bake directly from frozen, adding extra minutes.
- What can I substitute for ranch dressing?
-
Greek yogurt mixed with herbs or sour cream with spices can replace ranch to maintain creaminess and flavor.
- Are corn tortillas suitable?
-
Corn tortillas can be used but must be warmed and softened to prevent breaking during rolling.
- How do I make these taquitos spicier?
-
Add cayenne pepper, chopped jalapeños, or hot sauce to the chicken mixture before assembling.
- Can these be baked in an air fryer?
-
Yes, arrange in a single layer and air fry at 400°F for about 10-12 minutes, flipping halfway for crispness.

Dill Pickle Ranch Chicken Taquitos
Equipment
- 1 baking sheet lined with parchment paper or lightly greased
- 1 mixing bowl large
Ingredients
- 2 cups cooked chicken breast shredded
- 1/2 cup dill pickles finely chopped
- 4 ounces cream cheese softened
- 1/3 cup ranch dressing
- 1/2 cup shredded cheddar cheese
- 1/2 cup shredded mozzarella cheese
- 2 tablespoons fresh dill chopped
- 1/2 teaspoon garlic powder
- 1/2 teaspoon onion powder
- Salt to taste
- Black pepper to taste
- 12 small flour tortillas 6-inch diameter
- Olive oil spray
- Extra ranch dressing for dipping (optional)
- Chopped fresh dill optional garnish
- Sliced pickles optional garnish
Instructions
- Preheat oven to 425°F (220°C) and prepare a baking sheet with parchment paper or grease.
- In a large bowl, mix shredded chicken, chopped dill pickles, softened cream cheese, ranch dressing, cheddar cheese, mozzarella cheese, fresh dill, garlic powder, onion powder, salt, and black pepper until well combined.
- Lay out the flour tortillas and evenly distribute about 3 tablespoons of the chicken mixture along the bottom third of each tortilla.
- Roll each tortilla tightly to form taquitos and place seam-side down on the prepared baking sheet.
- Lightly spray the tops of the taquitos with olive oil spray to help them crisp up.
- Bake for 22 to 25 minutes or until golden brown and crispy.
- Remove from oven, let cool slightly, and serve warm with optional ranch dressing, fresh dill, and sliced pickles.
Notes
- For extra crispiness, broil for 1-2 minutes at the end, watching closely.
- Store leftovers in an airtight container for up to 3 days.
- Use gluten-free tortillas to make this recipe gluten-free.