Prep Time: 15 minutes
Cook Time: 20 minutes
Total Time: 35 minutes
Yield: 8 rolls
Category: Breakfast
There’s something almost magical about the aroma of cinnamon rolls baking in the oven, filling your home with warmth and the promise of sweet indulgence. For years, I avoided making homemade cinnamon rolls because traditional recipes required hours of rising time, multiple steps, and what felt like a full day commitment. Then I discovered this Bisquick shortcut during a particularly hectic holiday morning when unexpected guests arrived and I desperately needed something special for breakfast.
What started as a last-minute solution has become our family’s go-to recipe for those mornings when we crave the comfort of homemade cinnamon rolls without the complexity of traditional yeast-based recipes. These rolls deliver all the gooey, sweet satisfaction of classic cinnamon rolls but come together in just 35 minutes from start to finish.
The beauty of this recipe lies in its simplicity and reliability. Whether you’re a novice baker or someone who simply wants delicious results without the fuss, these Bisquick cinnamon rolls consistently deliver bakery-quality taste with minimal effort. Moreover, they’ve saved countless weekend mornings when we wanted something special but didn’t have hours to spend in the kitchen.
Why This Recipe Will Become Your New Favorite
Speed Without Sacrifice
Traditional cinnamon roll recipes require mixing yeast, waiting for dough to rise, punching down, rolling out, and another rise period – a process that can take 3-4 hours. In contrast, these Bisquick cinnamon rolls skip all the waiting and deliver the same satisfying results in a fraction of the time.
The Bisquick baking mix contains all the leavening agents needed to create light, fluffy rolls without any rising time. This means you can decide to make cinnamon rolls on a whim and have them on the table in less than 40 minutes. Furthermore, there’s no risk of yeast not activating or dough not rising properly, making this recipe virtually foolproof.
Perfect Texture and Flavor Balance
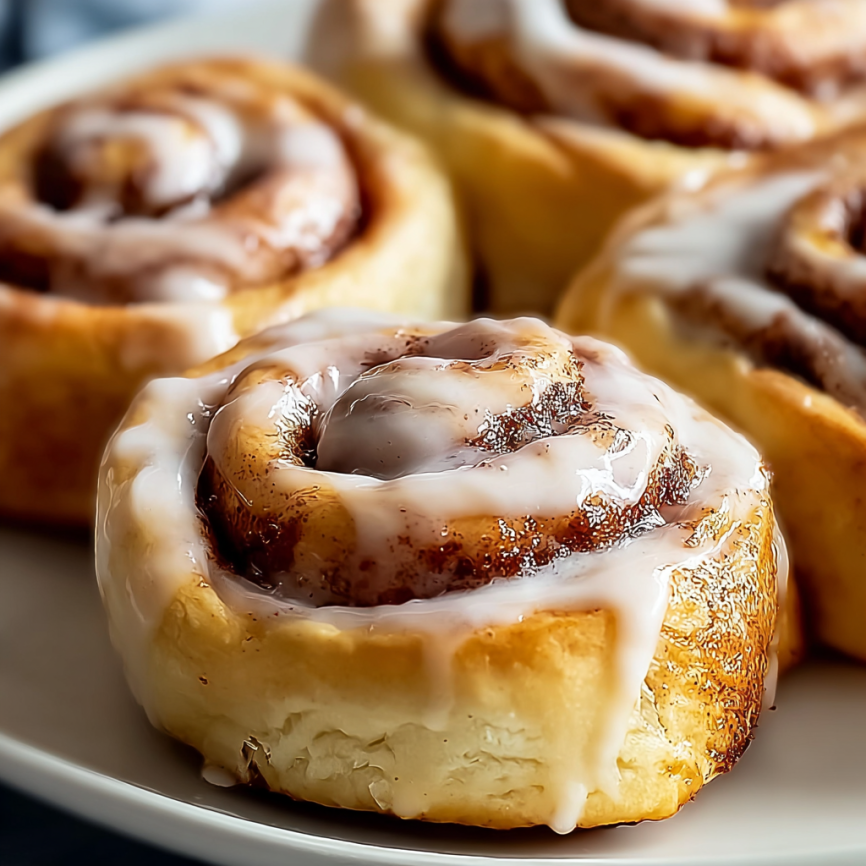
Despite their quick preparation, these rolls achieve the perfect balance of tender, soft interior and slightly crispy exterior that makes cinnamon rolls so irresistible. The brown sugar and cinnamon filling creates those signature gooey swirls, while the vanilla glaze adds the perfect finishing touch.
Each bite delivers the classic cinnamon roll experience – warm spices, sweet filling, and tender dough – proving that shortcuts don’t always mean compromising on quality. Additionally, the smaller batch size of 8 rolls is perfect for average families, preventing waste while still providing enough to satisfy everyone’s craving.
Essential Ingredients for Perfect Results
The Foundation Components
- 2 cups Bisquick baking mix – The time-saving hero that provides structure, leavening, and convenience
- ⅔ cup milk – Creates the perfect dough consistency for easy rolling
- 2 tablespoons melted butter – Adds richness and helps bind the dough together
The Signature Filling
- ½ cup brown sugar – Provides deep, caramel-like sweetness that’s essential for authentic cinnamon roll flavor
- 1 tablespoon ground cinnamon – The star spice that creates those aromatic swirls
- Additional melted butter for brushing – Helps the filling adhere and adds richness
The Perfect Glaze
- 1 cup powdered sugar – Creates a smooth, sweet coating that complements the spiced filling
- ½ teaspoon vanilla extract – Adds depth and aromatic complexity to the glaze
- 1-2 tablespoons milk – Adjusts the glaze consistency to perfect drizzling texture
Ingredient Quality Tips
While this recipe uses convenient shortcuts, ingredient quality still matters. Choose fresh ground cinnamon for the most aromatic results, as pre-ground spices lose potency over time. Similarly, real vanilla extract provides much better flavor than imitation vanilla, especially in the simple glaze where each ingredient’s taste really shines.
When selecting your Bisquick mix, check the expiration date to ensure maximum leavening power. Fresh baking mix will give you the lightest, most tender rolls.
Step-by-Step Instructions for Success
Preparation and Setup
Begin by preheating your oven to 375°F (190°C) and generously greasing a 9-inch round or 8-inch square baking dish. The choice of dish affects the final shape – round dishes create rolls that bake closer together for softer sides, while square dishes allow for slightly more individual browning.
Prepare your work surface by lightly flouring it, and have your rolling pin ready. Having everything set up before you begin mixing ensures smooth, efficient assembly without any rushed moments that could affect the final result.
Creating the Perfect Dough
In a medium mixing bowl, combine the Bisquick baking mix with ⅔ cup milk, stirring just until the ingredients come together into a soft dough. The key here is gentle mixing – overmixing will result in tough rolls rather than the tender texture we’re seeking.
The dough should be soft and slightly sticky but manageable. If it seems too dry, add milk one tablespoon at a time until it reaches the right consistency. Conversely, if it’s too wet, add a small amount of additional Bisquick mix.
Rolling and Shaping Technique
Turn the dough onto your floured surface and gently knead it 3-4 times just to bring it together. Then, roll it into a rectangle approximately 12 inches by 8 inches. The thickness should be about ¼ inch – thick enough to hold the filling but thin enough to create nice spiral layers.
Don’t worry about achieving perfect rectangle edges; the rustic appearance of handmade rolls is part of their charm. Focus instead on achieving relatively even thickness throughout so your rolls bake uniformly.
The Filling Process
Brush the entire surface of the rolled dough with melted butter, leaving a small border along one long edge to help seal the roll. This butter layer is crucial because it helps the sugar and cinnamon adhere while also adding richness to each bite.
Mix the brown sugar and cinnamon in a small bowl, then sprinkle this mixture evenly over the buttered dough. Use your hands to gently press the filling into the dough, ensuring it adheres well and won’t fall out during rolling.
Rolling and Cutting
Starting from the long side opposite the unbuttered edge, roll the dough tightly but not so tight that you squeeze out the filling. The goal is to create distinct layers without compressing the dough too much, which could make the rolls dense.
Once rolled, use a sharp knife or unflavored dental floss to cut the log into 8 equal pieces, each about 1 to 1.5 inches thick. Place the cut rolls in your prepared baking dish, leaving small spaces between them for expansion.
Serving Suggestions for Every Occasion
Classic Morning Presentation
Serve these cinnamon rolls warm from the oven, drizzled generously with the vanilla glaze while they’re still hot enough to slightly melt it. The contrast between the warm, spiced rolls and the cool, sweet glaze creates the perfect temperature and flavor balance.
Pair them with freshly brewed coffee or cold milk for a complete breakfast experience. The richness of the rolls balances beautifully with the bitterness of coffee, while milk provides a cooling contrast to the warm spices.
Special Occasion Elegance
For holiday mornings or special brunches, elevate the presentation by arranging the glazed rolls on a beautiful platter and garnishing with a light dusting of cinnamon or a few fresh berries. The visual appeal makes them feel more special while maintaining the comforting, homemade quality.
Consider serving alongside other breakfast favorites like fresh fruit salad, crispy bacon, or scrambled eggs to create a full brunch spread that satisfies various tastes and dietary preferences.
Creative Recipe Variations
Flavor Adventures
Transform these basic rolls into exciting variations by experimenting with different spices and add-ins. For instance, try adding ½ teaspoon of cardamom to the cinnamon mixture for a sophisticated, aromatic twist that’s particularly lovely during the holidays.
Orange zest mixed into the filling creates a bright, citrusy variation that’s refreshing and unexpected. Similarly, a tablespoon of cocoa powder in the cinnamon mixture creates chocolate-cinnamon rolls that feel more like dessert than breakfast.
Glaze Variations
While the classic vanilla glaze is perfect as written, creative variations can make these rolls even more special. Try adding a tablespoon of cream cheese to the glaze for tanginess, or substitute maple syrup for some of the milk to create a maple glaze that complements the cinnamon beautifully.
For chocolate lovers, create a chocolate glaze by adding 2 tablespoons of cocoa powder to the powdered sugar mixture. This creates a rich, indulgent topping that transforms the rolls into a decadent treat.
Add-In Options
Enhance the basic recipe by incorporating additional ingredients into the filling. Chopped pecans or walnuts add delightful crunch and nutty flavor, while mini chocolate chips create pockets of melted chocolate throughout the rolls.
Dried fruits like raisins or cranberries provide chewy texture and natural sweetness that complements the cinnamon spice. Just be sure to chop larger dried fruits into smaller pieces to ensure even distribution.
Make-Ahead Tips and Storage Solutions
Preparing for Busy Mornings
While these rolls are quick to make, you can prepare them even faster by assembling them the night before. Prepare the rolls through the cutting and placing stage, then cover tightly with plastic wrap and refrigerate overnight.
In the morning, remove from the refrigerator while the oven preheats, then bake as directed, adding 2-3 extra minutes to account for the cold start. This method allows you to have fresh cinnamon rolls with minimal morning effort.
Freezing Strategies
Unbaked rolls freeze beautifully for up to one month. After cutting and placing in the baking dish, cover tightly with plastic wrap and aluminum foil, then freeze. When ready to bake, thaw overnight in the refrigerator and bake as directed.
Alternatively, you can freeze baked rolls individually wrapped in plastic wrap. Reheat them in the microwave for 20-30 seconds or in a 300°F oven for 5-7 minutes until warmed through.
Storage and Reheating
Fresh rolls stay soft and delicious at room temperature for 2-3 days when stored in an airtight container. For longer storage, refrigerate for up to one week, though they’re best enjoyed within the first few days.
To refresh day-old rolls, warm them in a 300°F oven for 5-8 minutes, which restores their soft texture and reactivates the aromatic spices. Avoid microwaving for extended periods, as this can make them tough.
Professional Tips for Perfect Results
Dough Handling Mastery
The secret to tender cinnamon rolls lies in gentle dough handling. Bisquick dough is more forgiving than traditional yeast dough, but it still benefits from minimal manipulation. Mix just until combined, knead only briefly, and roll with light pressure.
If the dough springs back while rolling, let it rest for 5 minutes to relax the gluten, then continue. This patience ensures you can achieve the desired thickness without overworking the dough.
Temperature Control
Oven temperature accuracy is crucial for achieving the perfect balance of golden exterior and fully cooked interior. Use an oven thermometer to verify your oven’s temperature, as many ovens run hot or cold, affecting the final result.
The rolls are done when they’re golden brown on top and sound hollow when gently tapped. Internal temperature should reach about 190°F for fully cooked rolls that aren’t doughy in the center.
Important Notes for Success
Consistency in Sizing
Uniform roll sizes ensure even baking, so take care when cutting your dough log. Use a ruler if necessary to mark equal sections before cutting, which helps achieve consistent results.
Dental floss or a bench scraper often works better than a knife for cutting, as they slice cleanly through the dough without compressing the layers or squeezing out the filling.
Glaze Timing
The glaze should be applied while the rolls are still warm but not burning hot. This timing allows the glaze to melt slightly and soak into the surface while still maintaining its decorative appearance on top.
If the glaze seems too thick, add milk one teaspoon at a time until it reaches the perfect drizzling consistency. If it’s too thin, add more powdered sugar gradually until it coats the back of a spoon lightly.
Frequently Asked Questions
Can I use a different baking mix instead of Bisquick? Yes, other complete baking mixes like Jiffy or Pioneer work similarly, though the texture may vary slightly. Avoid mixes that require additional ingredients beyond milk, as they may not produce the same results.
What if I don’t have brown sugar? White sugar works as a substitute, though you’ll lose some of the caramel depth that brown sugar provides. You can make brown sugar by mixing white sugar with a small amount of molasses, or add a pinch of vanilla to the white sugar for extra flavor.
Can I make these without the glaze? Absolutely! The rolls are delicious on their own, or you can dust them with powdered sugar for a simpler finish. Some people prefer them with just butter while they’re warm.
Why are my rolls tough instead of tender? Tough rolls usually result from overmixing the dough or using too much flour. Mix just until combined, and use only enough flour to prevent sticking during rolling.
Can I double this recipe? Yes, but you’ll need a larger baking dish or two smaller ones. Keep the same baking temperature and time, but check for doneness a few minutes early as larger batches may cook differently.
How do I prevent the filling from leaking out? Make sure to leave a small border of unbuttered dough along one edge when applying the filling, and don’t overfill. Roll tightly but not so tight that you squeeze out the contents.
Can I add nuts or other mix-ins? Certainly! Add up to ½ cup of chopped nuts, chocolate chips, or dried fruit to the filling. Just be aware that extra ingredients may affect baking time slightly, so check for doneness a few minutes early.


