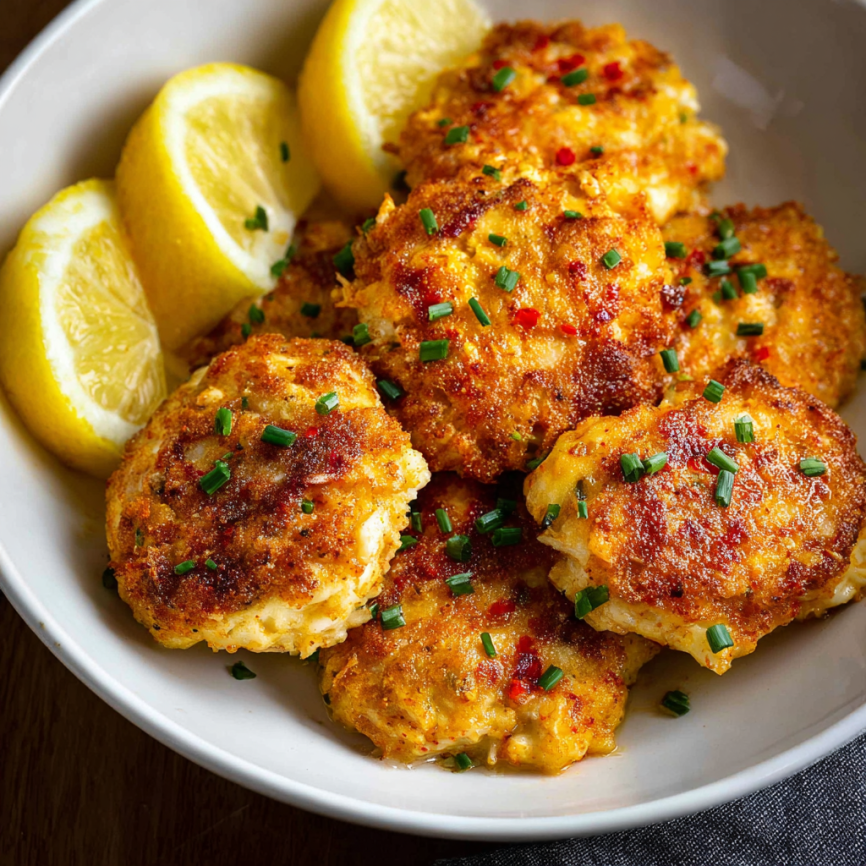
There’s something magical about watching a simple pound of shrimp transform into golden, crispy cakes that make everyone at the table smile. This recipe was born from one of those “what can I make with what I have” moments when I discovered a bag of frozen shrimp in my freezer and a handful of fresh vegetables in my crisper drawer. What started as an experiment quickly became a family favorite that my kids request at least once a week. The combination of tender shrimp, vibrant vegetables, and fresh herbs creates a dish that’s both sophisticated enough for company and simple enough for busy weeknights.
Prep Time: 10 minutes
Cook Time: 15 minutes
Total Time: 25 minutes
Servings: 6 people
Why These Shrimp Cakes Will Win Over Your Family
Kid-Friendly Yet Sophisticated
First and foremost, these shrimp cakes strike the perfect balance between familiar comfort food and elegant dining. The mild, sweet flavor of shrimp combined with colorful vegetables creates a dish that appeals to both adventurous eaters and picky family members. Even children who claim to dislike seafood often find these cakes irresistible.
Packed with Hidden Nutrition
Moreover, these cakes are a clever way to incorporate more vegetables into your family’s diet. The finely diced red bell pepper adds vitamin C and natural sweetness, while the fresh chives provide a subtle onion flavor that enhances rather than overwhelms the delicate shrimp.
Quick and Economical
Additionally, this recipe transforms affordable ingredients into something that tastes restaurant-quality. With just 25 minutes from start to finish, you can have a complete meal that rivals expensive seafood dishes, making it perfect for both budget-conscious families and time-strapped cooks.
Essential Ingredients
The Protein Foundation
The star of this recipe is high-quality shrimp that creates the perfect texture:
- 1 pound raw shrimp, peeled and deveined – Fresh or properly thawed frozen shrimp work equally well
- 2 eggs – Act as the binding agent that holds everything together
The Texture and Flavor Builders
These ingredients create the perfect consistency and taste profile:
- ¾ cup panko breadcrumbs – Provides the ideal light, crispy texture
- ¼ cup red bell pepper, finely diced – Adds sweetness, crunch, and beautiful color
- 3 tablespoons chives, sliced – Plus extra for garnish, bringing fresh onion flavor
- 1 teaspoon lemon zest – Brightens the entire dish with citrusy notes
Seasoning and Cooking Essentials
For perfect seasoning and cooking:
- ½ teaspoon salt – Enhances all the natural flavors
- ¼ teaspoon pepper – Adds subtle warmth and depth
- 4 tablespoons olive oil – For achieving that perfect golden-brown crust
Optional Garnishes
Consider these finishing touches to elevate your presentation:
- Fresh chives for garnish
- Sour cream for richness
- Lemon wedges for extra brightness
Step-by-Step Instructions
Preparing the Shrimp Base
Begin by placing the cleaned shrimp in the bowl of a food processor. Pulse the shrimp until they’re coarsely chopped, being careful not to over-process them into a paste. The goal is to achieve a chunky texture that will create interesting bite-sized pieces throughout your finished cakes. This typically takes about 6-8 short pulses, depending on your food processor’s power.
Building the Mixture
Transfer the chopped shrimp to a large mixing bowl. Add the panko breadcrumbs, finely diced red bell pepper, sliced chives, salt, pepper, eggs, and lemon zest. Using a gentle folding motion, stir all ingredients together until just combined. Avoid overmixing, which can make the cakes tough and dense.
Forming the Patties
With clean, slightly damp hands, divide the mixture into 6 equal portions. Gently shape each portion into a patty approximately 3 inches in diameter and ¾ inch thick. The mixture should hold together easily, but don’t worry if it seems slightly loose – the eggs will help bind everything during cooking.
Achieving the Perfect Sear
Heat the olive oil in a large skillet over medium-high heat. Once the oil is hot and shimmering, carefully place the shrimp patties in a single layer, ensuring they don’t touch each other. Cook for 4-5 minutes on the first side without moving them, allowing a beautiful golden crust to develop.
Finishing the Cooking Process
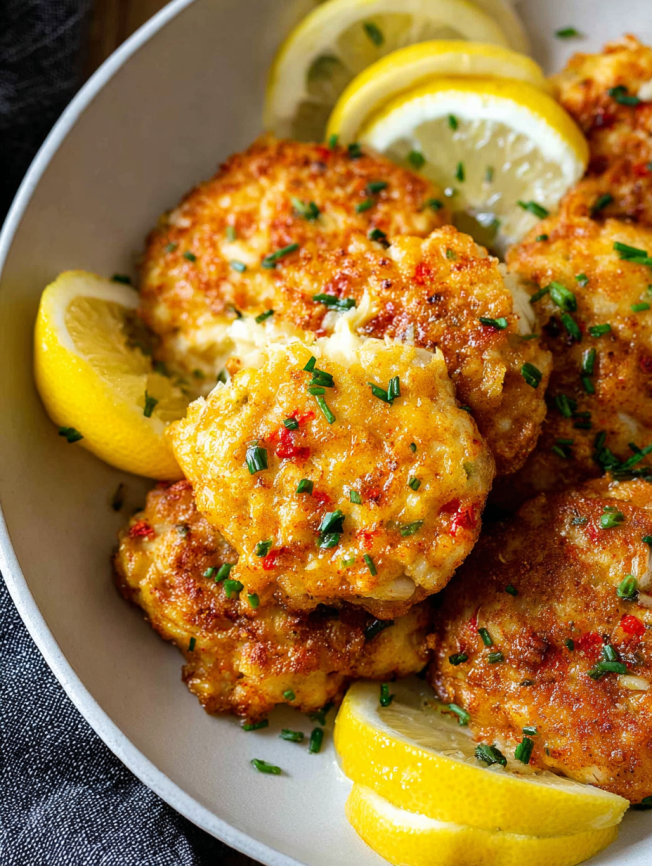
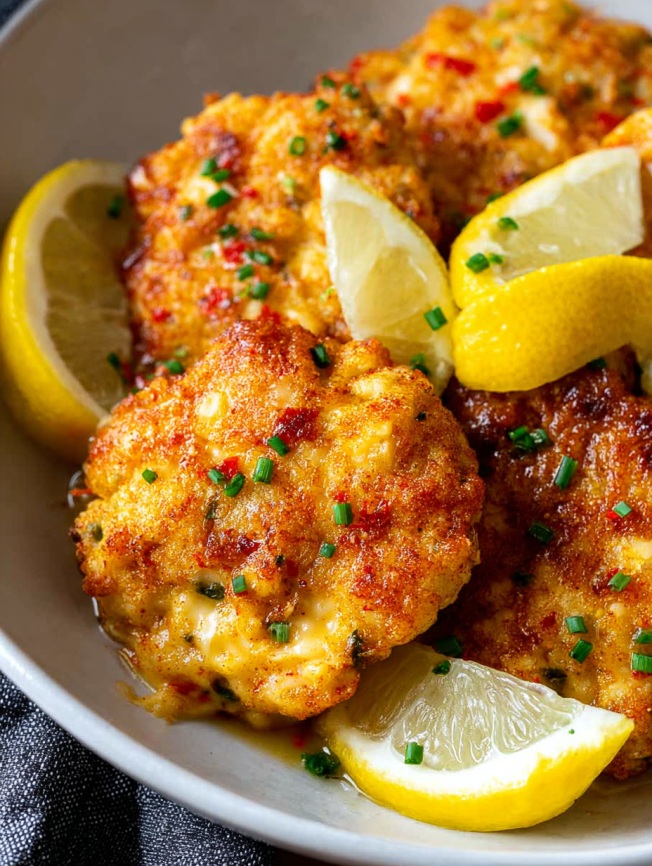
Carefully flip each patty using a spatula and cook for another 4-5 minutes on the second side. The finished cakes should be golden brown on both sides and heated through completely. The internal temperature should reach 165°F (74°C) for food safety.
Serving Suggestions
Immediate Enjoyment
These shrimp cakes are best served immediately while they’re hot and crispy. The contrast between the golden exterior and tender interior creates the perfect textural experience that diminishes as they cool.
Classic Accompaniments
Serve with a dollop of sour cream and a sprinkle of fresh chives for a classic presentation. The cool, tangy sour cream provides a lovely contrast to the warm, savory cakes.
Creative Serving Ideas
Consider serving these cakes as sliders on small buns with lettuce and tomato, or alongside a fresh salad for a lighter meal. They also make excellent appetizers when formed into smaller, bite-sized portions.
Recipe Variations
Vegetable Additions
Transform these cakes by incorporating different vegetables based on seasonal availability or family preferences. Finely diced celery adds crunch, while corn kernels provide sweetness. Minced jalapeños can add heat for spice lovers.
Herb Alternatives
While chives are fantastic, experiment with other fresh herbs like dill, parsley, or cilantro. Each brings its own unique flavor profile that complements the sweet shrimp beautifully.
Spice Enhancements
Elevate the flavor with additions like Old Bay seasoning, garlic powder, or a pinch of cayenne pepper. These spices can transform the basic recipe into something with regional flair.
Make-Ahead Tips
Advance Preparation
The shrimp cakes can be formed and refrigerated up to 4 hours before cooking. Place them on a plate covered with plastic wrap to prevent drying out. This advance preparation actually helps them hold together better during cooking.
Freezer-Friendly Options
These cakes freeze beautifully for up to 3 months. Form the patties, place them on a baking sheet lined with parchment paper, and freeze until solid. Then transfer to freezer bags for long-term storage.
Reheating Guidelines
Leftover cooked cakes can be reheated in a 350°F oven for 8-10 minutes, or quickly pan-fried in a little oil until heated through. Avoid microwaving, which can make them soggy.
Important Notes
Texture Considerations
The key to perfect shrimp cakes lies in achieving the right texture balance. The shrimp should be chopped enough to bind together but not so fine that they become mushy. Think of it as a rough chop rather than a mince.
Oil Temperature Control
Maintaining the correct oil temperature is crucial for achieving golden-brown exteriors without burning. If the oil is too hot, the outside will brown before the inside is cooked through. If it’s too cool, the cakes will absorb too much oil and become greasy.
Binding Success
If your mixture seems too wet, add a few more panko breadcrumbs. If it’s too dry, add an extra egg yolk. The mixture should hold together when gently pressed but not feel sticky or overly wet.
Frequently Asked Questions
Can I use cooked shrimp instead of raw?
While raw shrimp is preferred for the best texture, you can use cooked shrimp in a pinch. Just reduce the cooking time to 2-3 minutes per side, as you’re only heating through and browning the exterior.
What if I don’t have a food processor?
You can finely chop the shrimp by hand using a sharp knife. Take your time to achieve an even, coarse chop. Some people prefer this method as it gives them more control over the final texture.
How do I know when the cakes are done?
The cakes are done when they’re golden brown on both sides and feel firm to the touch. The internal temperature should reach 165°F (74°C) when tested with a meat thermometer.
Can I make these gluten-free?
Absolutely! Simply substitute the panko breadcrumbs with gluten-free breadcrumbs or crushed gluten-free crackers. The texture will be slightly different but still delicious.
What’s the best way to prevent the cakes from falling apart?
Ensure your mixture isn’t too wet, handle the patties gently when forming them, and don’t move them too soon when cooking. Let them develop a crust on the first side before attempting to flip.
Can I bake these instead of pan-frying?
Yes! Preheat your oven to 400°F (200°C) and bake the cakes on a greased baking sheet for 12-15 minutes, flipping once halfway through. They won’t be quite as crispy but will still be delicious.
How can I make these cakes spicier?
Add finely minced jalapeños, a pinch of cayenne pepper, or a few dashes of hot sauce to the mixture. Start with small amounts and adjust to your family’s heat tolerance.
Nutrition Information (per serving):
- Calories: 189kcal
- Carbohydrates: 7g
- Protein: 13g
- Fat: 12g
- Fiber: 1g
- Vitamin C: 9mg
- Calcium: 66mg
- Iron: 1mg
These protein-rich cakes provide excellent nutrition while being low in carbohydrates, making them perfect for various dietary preferences and a healthy addition to any meal plan.
