Saturday mornings in my childhood meant one thing: the intoxicating aroma of French toast wafting through the house, promising a day of leisure and indulgence. There’s something magical about transforming day-old bread into golden, custardy perfection that speaks to the heart of comfort food. This recipe has been my family’s secret weapon for decades – thick slices of bread soaked overnight in a rich, vanilla-scented custard, then cooked to crispy-edged, tender-centered perfection. It’s the kind of breakfast that makes ordinary weekends feel extraordinary.
Why This Recipe Creates Morning Magic
French toast represents the perfect marriage of simplicity and sophistication. Unlike quick breakfast options, this dish rewards patience with incomparable texture and flavor. The overnight soaking process transforms ordinary bread into something resembling bread pudding, creating a custardy interior that contrasts beautifully with the golden, caramelized exterior.
Moreover, this recipe is incredibly forgiving and adaptable. Whether you’re feeding a crowd or treating yourself to a solo indulgence, the technique remains consistent while allowing for creative variations. The make-ahead nature means you can prepare everything the night before, making busy mornings stress-free.
Finally, mastering French toast teaches fundamental cooking skills like creating proper custard bases, controlling heat for even browning, and understanding how different breads absorb liquid. These techniques translate to numerous other recipes throughout your culinary journey.
Premium Ingredients for Superior Results
The Foundation
- 6 slices white bread, cut 4cm thick
- 5 large eggs
- 1½ cups full cream milk
- ¼ cup white sugar
- 1 teaspoon vanilla extract
- ½ tablespoon ground cinnamon
- 50g butter
- Extra virgin olive oil
Finishing Touches
- Pure maple syrup
- Fresh strawberries, sliced
- Powdered sugar for dusting (optional)
Choosing the Right Bread
Thick-cut bread is absolutely essential for this recipe. Day-old brioche, challah, or even thick white sandwich bread works beautifully. The bread should be substantial enough to absorb the custard without falling apart, yet tender enough to create that perfect custardy interior.
Creating the Perfect Custard Base
Building Flavor Layers
In a large mixing bowl, crack your eggs and whisk them thoroughly until no streaks remain. This initial step ensures smooth integration with the other ingredients. Gradually add the full cream milk while whisking continuously, creating a silky base that will transform your bread.
Next, incorporate the sugar, whisking until completely dissolved. The sugar not only adds sweetness but also helps create that beautiful golden caramelization during cooking. Add the vanilla extract and ground cinnamon, whisking until the mixture is completely homogeneous and fragrant.
Achieving the Right Consistency
Your finished custard should be smooth, creamy, and well-integrated. Taste and adjust the sweetness or spice levels according to your preference. Some prefer a more pronounced cinnamon flavor, while others enjoy a subtle hint of warmth.
The Crucial Soaking Process
Proper Arrangement
Place your thick bread slices in a deep dish or baking tray, arranging them as snugly as possible. This tight arrangement ensures even distribution of the custard and prevents any bread from remaining unsoaked.
Pour the custard mixture evenly over all the bread slices, ensuring each piece is completely covered. Use a spoon to gently press down on any areas that seem to be floating, encouraging maximum absorption.
Timing for Perfection
Allow the bread to soak for a minimum of 2 hours, though overnight soaking produces superior results. During this time, the bread will absorb the entire custard mixture, transforming into something resembling bread pudding. The longer soaking time allows flavors to meld and creates that signature custardy texture that sets great French toast apart from the ordinary.
Turn the slices once during the soaking process if possible, ensuring both sides receive equal custard penetration.
Mastering the Cooking Technique
Preparing Your Pan
Heat a large frying pan over medium-high heat – this temperature balance is crucial for achieving golden exteriors without burning while ensuring the custard center cooks through properly. Add the butter along with a drizzle of olive oil, which prevents the butter from burning while adding rich flavor.
Wait for the butter to foam and subside slightly before adding your first piece of bread. This foaming indicates the pan has reached the perfect temperature for optimal browning.
Achieving Golden Perfection
Carefully place each soaked bread slice into the hot pan, being gentle to maintain its shape. Cook for approximately 3 minutes on the first side, resisting the urge to move or flip prematurely. You’ll know it’s ready when the edges begin to set and the bottom develops a deep golden color.
Flip carefully using a wide spatula, then cook the second side for another 3 minutes. The finished French toast should be golden brown and crispy on the outside while remaining tender and custardy within.
Batch Cooking Tips
Work in batches if necessary to avoid overcrowding the pan. Keep finished pieces warm in a low oven (around 200°F) while cooking the remaining slices. This ensures everyone enjoys their French toast at the optimal temperature.
Elegant Presentation and Serving
Classic Styling
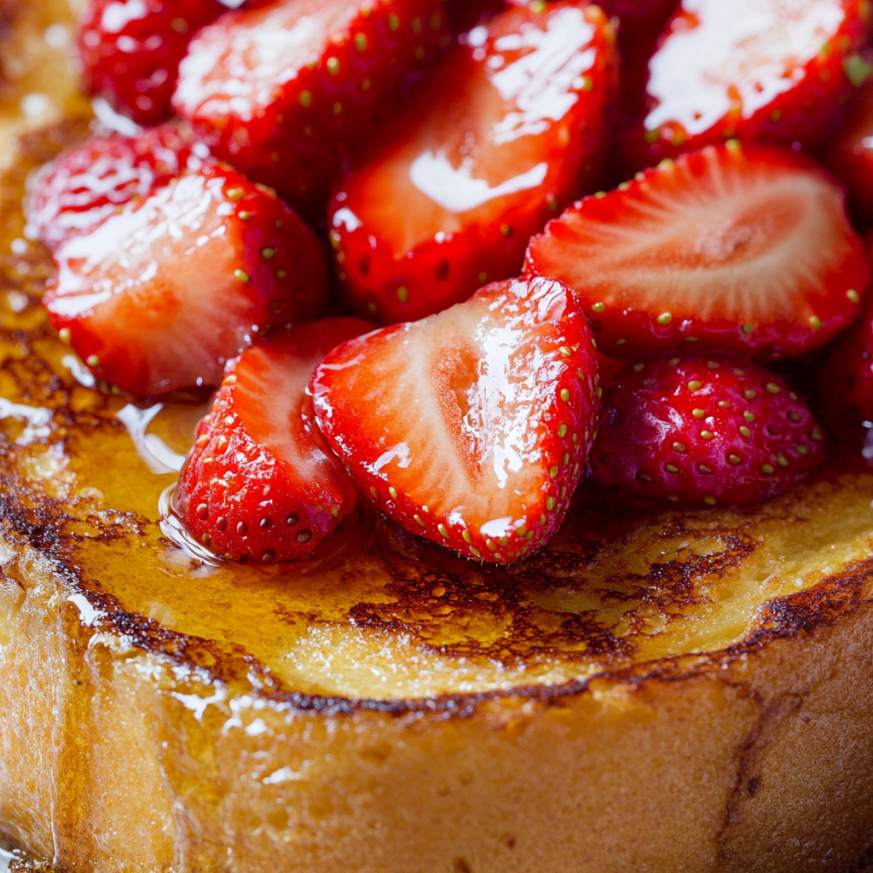
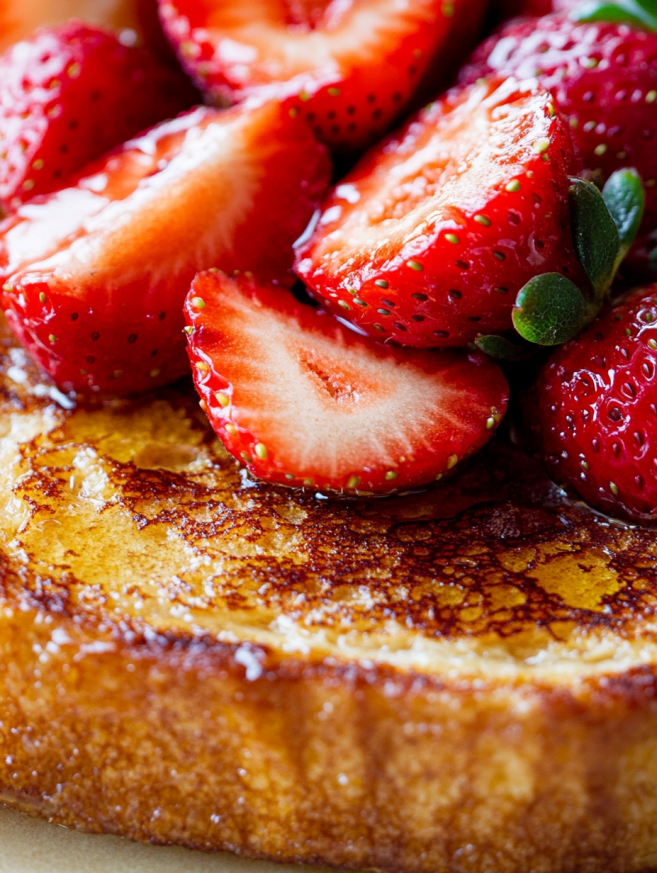
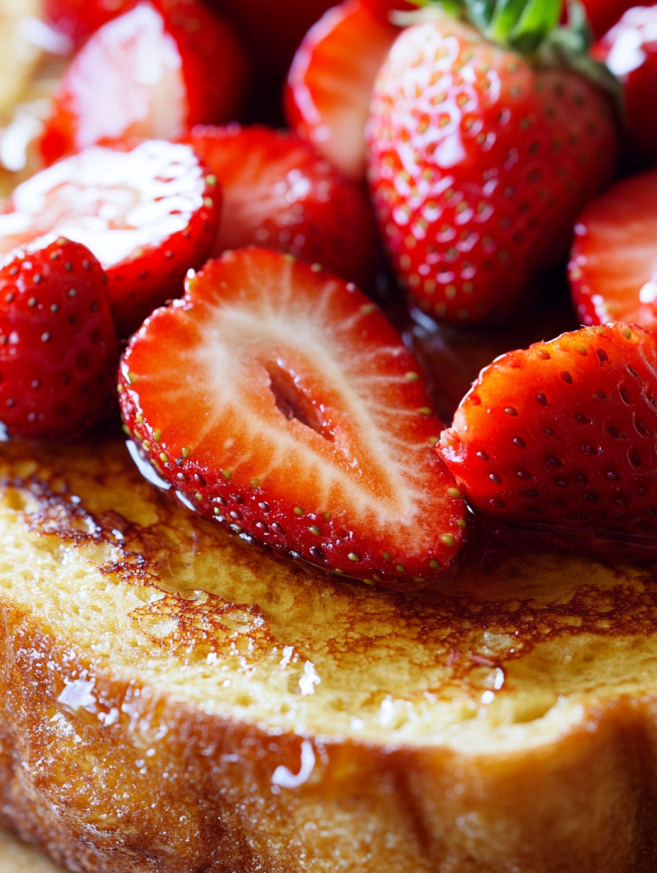
Arrange the golden French toast slices on warmed plates, overlapping slightly for visual appeal. Generously drizzle with pure maple syrup, allowing it to pool around the edges and soak into any crevices.
Top with fresh strawberry slices arranged in an attractive pattern. The bright red berries provide beautiful color contrast while adding fresh, tart notes that balance the rich, sweet toast.
Professional Finishing Touches
Consider dusting lightly with powdered sugar for an elegant restaurant-style presentation. A pat of butter melting on top adds richness and visual appeal, while a sprig of fresh mint provides an aromatic finishing touch.
Creative Variations to Try
Stuffed French Toast
Create pockets in thick bread slices and fill with cream cheese, Nutella, or fresh berries before soaking. This variation transforms the dish into an even more indulgent treat perfect for special occasions.
Savory Twist
Omit the sugar and vanilla, then add herbs like thyme or rosemary to the custard. Serve with bacon, cheese, or sautéed vegetables for a sophisticated brunch option.
International Flavors
Substitute the cinnamon with cardamom for a Scandinavian influence, or add orange zest and Grand Marnier for a French-inspired variation that’s perfect for elegant entertaining.
Smart Make-Ahead Strategies
The beauty of this recipe lies in its make-ahead nature. Assemble everything the night before, cover tightly with plastic wrap, and refrigerate. In the morning, simply cook the pre-soaked slices for an effortless yet impressive breakfast.
You can even prepare extra batches and freeze the cooked French toast. Reheat directly from frozen in a toaster or low oven for quick weekday breakfasts that taste homemade.
Consider preparing the custard base in larger quantities and storing it in the refrigerator for up to three days. This allows for spontaneous French toast creation whenever the mood strikes.
Professional Secrets for Success
Temperature control is absolutely critical for perfect French toast. Too high, and you’ll burn the exterior before the custard center cooks through. Too low, and you’ll miss that beautiful caramelization that makes French toast so appealing.
The quality of your ingredients makes a noticeable difference. Use the freshest eggs possible, real vanilla extract rather than imitation, and pure maple syrup for serving. These premium ingredients elevate the dish from good to extraordinary.
Essential Notes for Perfect Results
Bread thickness cannot be compromised – thin slices will fall apart during soaking, while overly thick pieces won’t cook through properly. The 4cm thickness provides the perfect balance of structure and absorption.
Don’t rush the soaking process. While 2 hours is the minimum, overnight soaking produces dramatically superior results. The extended time allows complete flavor penetration and creates that signature custardy texture.
Watch your heat carefully during cooking. Medium-high heat should create gentle sizzling without aggressive bubbling or smoking. Adjust as needed based on your stovetop’s characteristics.
Frequently Asked Questions
Q: Can I use non-dairy milk alternatives? A: Yes, but choose full-fat alternatives like coconut milk or oat milk for best results. The fat content is crucial for creating the rich, custardy texture that makes French toast special.
Q: How do I prevent my French toast from being soggy in the center? A: This usually indicates insufficient cooking time or temperature. Ensure your pan is properly heated and cook each side for the full 3 minutes. The center should feel firm when gently pressed.
Q: Can I make this recipe ahead and reheat it? A: Absolutely! Cooked French toast reheats beautifully in a 350°F oven for 5-7 minutes, or you can use a toaster for individual slices. Avoid microwaving, as this makes the texture soggy.
Q: What’s the best type of bread for French toast? A: Day-old brioche or challah produces the most luxurious results, but thick-cut white bread, Texas toast, or even croissants work wonderfully. The key is using bread that’s substantial enough to hold up to soaking.
Q: How can I tell when my French toast is properly cooked? A: Look for a deep golden-brown color on both sides and press gently in the center – it should feel firm rather than squishy. The custard should be completely set throughout.
Q: Can I prepare the custard mixture in advance? A: Yes, the custard base can be made up to 3 days ahead and stored in the refrigerator. Whisk briefly before using, as separation is natural and easily remedied.
Q: Why does my French toast stick to the pan? A: This usually indicates insufficient fat in the pan or improper temperature. Make sure your butter is properly foaming before adding the bread, and don’t skimp on the oil addition that prevents burning.
Prep Time: 5 minutes | Cook Time: 6 minutes | Servings: 4


