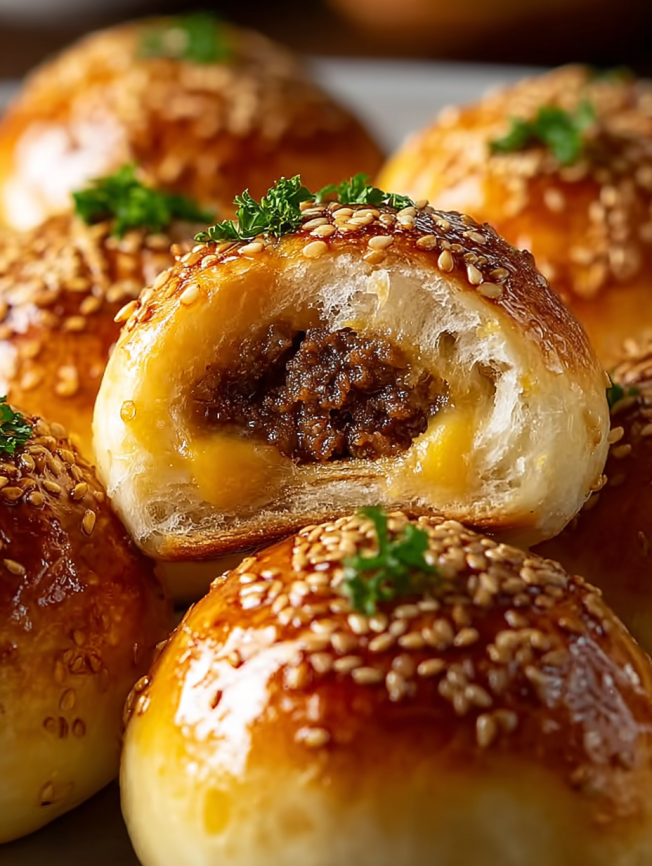
Total Time: 40 minutes | Yield: 16 cheeseburger bombs
There’s something magical about combining two comfort food favorites—cheeseburgers and warm, fluffy biscuits—into one irresistible bite. I first stumbled upon this recipe during a frantic search for party appetizers, and let me tell you, these little bombs became an instant hit. The moment you bite into that golden, buttery exterior and reach the gooey, savory center, you’ll understand why they disappear within minutes at every gathering.
Why You’ll Love This Recipe
These cheeseburger bombs aren’t just another appetizer—they’re a game-changer for busy home cooks. First, they come together in under 40 minutes, making them perfect for last-minute entertaining. Additionally, the combination of seasoned ground beef, melted cheddar, and that irresistible garlic Parmesan topping creates layers of flavor that rival any gourmet appetizer. Best of all, you can make them ahead and simply reheat when guests arrive, taking all the stress out of party prep.
What Makes These Bombs Special
Unlike traditional cheeseburgers, these compact bites deliver all the flavor without the mess. The refrigerated biscuit dough provides a surprisingly tender, pillowy wrapper that’s worlds better than store-bought frozen options. Moreover, the garlic Parmesan butter brushed on top adds a restaurant-quality finish that’ll have everyone asking for your secret recipe.
Ingredients
For the Filling:
- Ground Beef: 1 lb (80/20 fat content recommended for optimal juiciness)
- Cheddar Cheese: 1 cup, shredded (divided)
- Garlic Powder: 2 tsp
- Salt: 1 tsp
- Black Pepper: 1 tsp
For the Dough:
- Refrigerated Biscuit Dough: 2 cans (8 biscuits each, 16 total)
For the Topping:
- Butter: 2 tbsp, melted
- Parmesan Cheese: ½ cup, grated (freshly grated works best)
- Garlic Powder: 1 tsp
Step-by-Step Instructions
Step 1: Prepare Your Ingredients
Start by gathering all your ingredients on the counter—this makes the process much smoother. Next, preheat your oven to 375°F (190°C) so it’s ready when you need it. Meanwhile, let the ground beef sit at room temperature for about 15 minutes, which ensures more even cooking. Finally, open both cans of refrigerated biscuit dough, separate the rounds, and set them aside on a clean surface.
Step 2: Cook the Ground Beef
Heat a large skillet over medium heat until it’s nice and hot. Then, add the ground beef along with the salt and pepper, breaking it up with a wooden spoon as it cooks. Continue cooking for 5-7 minutes, stirring occasionally, until no pink remains and the beef is nicely browned. To ensure food safety, the internal temperature should reach 160°F (71°C).
If there’s excess grease in the pan, carefully drain it off—though with 80/20 beef, you’ll want to keep some fat for flavor. Next, stir in the garlic powder and half of the shredded cheddar cheese, mixing until the cheese melts completely and coats the beef. Remove the skillet from heat and let the mixture cool slightly while you prepare the dough.
Step 3: Assemble Your Cheeseburger Bombs
Now comes the fun part! Take each biscuit round and gently flatten it into a 4-inch circle using either your hands or a rolling pin. Don’t worry if they’re not perfectly round—rustic works just fine here.
Spoon 1 tablespoon of the beef mixture into the center of one flattened dough circle, being careful not to overfill. Then, add about 1 tablespoon of the remaining cheddar cheese on top of the beef. Place another flattened biscuit round over the filling and press the edges together firmly, creating a seal. You want to make sure there are no gaps, or the filling might leak during baking. Repeat this process with all remaining biscuits until you have 8 bombs total.
Step 4: Bake the Cheeseburger Bombs
Arrange your assembled bombs seam-side down on an ungreased baking sheet, spacing them about 2 inches apart to allow for expansion. Slide the baking sheet into your preheated oven and bake for 15-20 minutes, checking at the 15-minute mark. You’re looking for a beautiful golden-brown color on top—that’s when you know they’re perfectly done.
Step 5: Add the Parmesan Garlic Topping
While the bombs are baking, prepare your finishing touch. In a small bowl, melt the butter and whisk it together with the Parmesan cheese and garlic powder until well combined. As soon as you pull the bombs from the oven, generously brush this mixture over the tops while they’re still piping hot. The butter will soak into those little nooks and crannies, creating pockets of garlicky, cheesy goodness.

Serving Suggestions
These cheeseburger bombs are incredibly versatile when it comes to serving. For a classic approach, arrange them on a platter with small bowls of marinara sauce and ranch dressing for dipping. Alternatively, try them with spicy aioli, honey mustard, or even a tangy barbecue sauce. They’re substantial enough to serve as a main course alongside a crisp garden salad, yet portable enough to pass around at parties.
Recipe Variations to Try
Bacon Cheeseburger Bombs
Crumble 4-5 strips of cooked bacon and mix them into the beef filling before assembling. The smoky flavor takes these to the next level.
Spicy Jalapeño Bombs
Add diced jalapeños to the beef mixture and swap the cheddar for pepper jack cheese. This variation brings some serious heat that spice lovers will adore.
Pizza Bomb Twist
Replace the ground beef with Italian sausage and add a tablespoon of pizza sauce to each bomb. Top with Italian seasoning instead of the garlic Parmesan butter for an Italian-inspired treat.
Mushroom Swiss Variation
Sauté some finely chopped mushrooms with the beef and use Swiss cheese instead of cheddar. This creates a more sophisticated flavor profile that’s perfect for adult gatherings.
Make-Ahead Tips
One of the best features of this recipe is how well it adapts to advance preparation. You can assemble the bombs completely, then cover and refrigerate them for up to 24 hours before baking. Just add an extra 2-3 minutes to the baking time if you’re starting from cold.
Alternatively, bake them fully, let them cool completely, and store in an airtight container in the refrigerator for up to 3 days. When you’re ready to serve, simply reheat them in a 350°F oven for about 8-10 minutes until warmed through. For longer storage, freeze the baked bombs for up to 3 months. Thaw overnight in the refrigerator, then reheat as directed above.
Notes
Substitutions: Don’t limit yourself to cheddar! Mozzarella creates a wonderful stringy cheese pull, while pepper jack adds a spicy kick. You could even try a smoked gouda for something more sophisticated.
Pro Tip: For extra crispiness and a beautiful golden sheen, lightly brush the dough with an egg wash (one beaten egg mixed with a tablespoon of water) before baking. This professional touch makes them look bakery-quality.
Serving Suggestion: Beyond dipping sauces, consider serving these bombs with pickle spears and sliced tomatoes on the side for that full burger experience.
Storage Tip: If you have leftovers (which rarely happens), store them in an airtight container in the refrigerator. They’ll stay fresh for up to 3 days and reheat beautifully.
Prep Time: 20 minutes
Cook Time: 20 minutes
Total Time: 40 minutes
Yield: 16 cheeseburger bombs
Nutrition (Per Bomb)
- Calories: 250
- Fat: 15g
- Carbohydrates: 18g
- Protein: 12g

Frequently Asked Questions
Q: Can I use homemade biscuit dough instead of refrigerated?
A: Absolutely! Homemade biscuit dough works wonderfully and gives you more control over thickness. Just roll it out to about ¼-inch thick before cutting circles. The flavor will be even better than store-bought.
Q: Why is my filling leaking out during baking?
A: This usually happens when the edges aren’t sealed properly or the bombs are overfilled. Make sure to press the edges firmly together and avoid packing in too much filling—a tablespoon is really all you need for the perfect filling-to-dough ratio.
Q: Can I make these in an air fryer?
A: Yes! Air fry at 350°F for 10-12 minutes, flipping halfway through. They’ll come out extra crispy on the outside while staying tender inside. Just make sure not to overcrowd the basket.
Q: What’s the best way to reheat leftovers?
A: The oven is your best bet for maintaining that crispy exterior. Reheat at 350°F for 8-10 minutes. While the microwave works in a pinch, it can make the dough a bit soggy, so the oven is definitely worth the extra few minutes.
Q: Can I freeze these before baking?
A: Definitely! Assemble the bombs, place them on a baking sheet, and freeze until solid. Then transfer to a freezer bag for up to 3 months. When ready to bake, add 5-7 minutes to the baking time—no need to thaw first.


