Sometimes the best recipes are born from pure practicality. These gingerbread cookie bars came into my life during a particularly hectic holiday season when I desperately wanted homemade gingerbread cookies but couldn’t find time for the traditional rolling, cutting, and decorating process. What started as a shortcut solution has become one of my most requested recipes, proving that simple doesn’t mean sacrificing flavor or charm.
The beauty of these bars lies in their incredible simplicity – no chilling dough overnight, no rolling pins covered in flour, and no cookie cutters to wash. Instead, you simply mix, spread, and bake. The result is a tender, chewy treat that captures all the warm spice magic of traditional gingerbread cookies with a fraction of the effort.
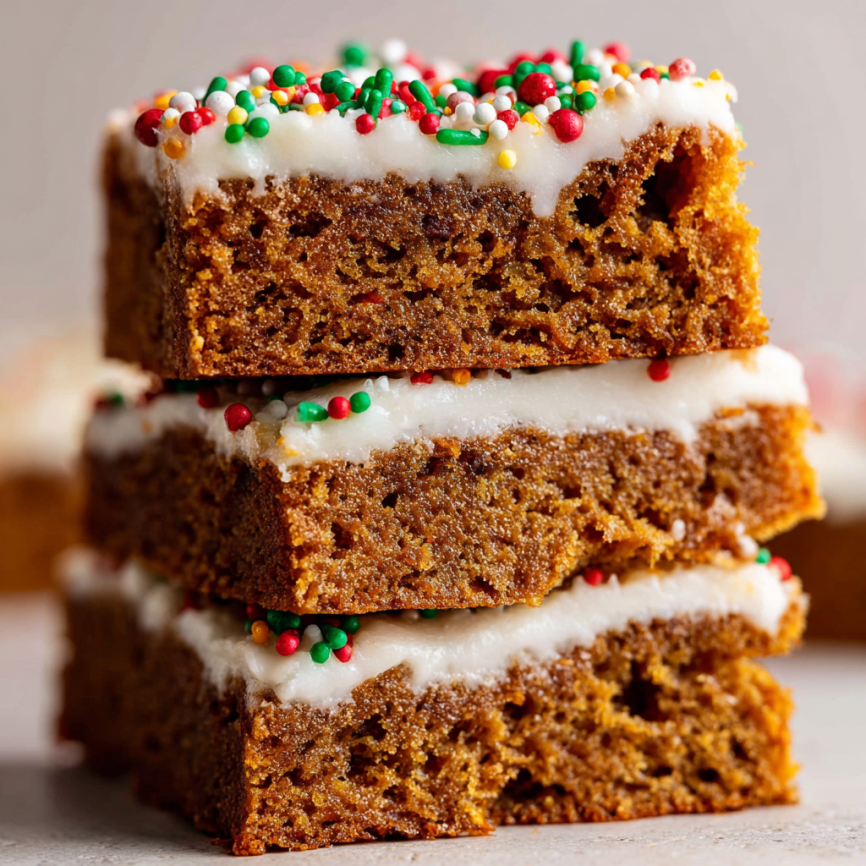
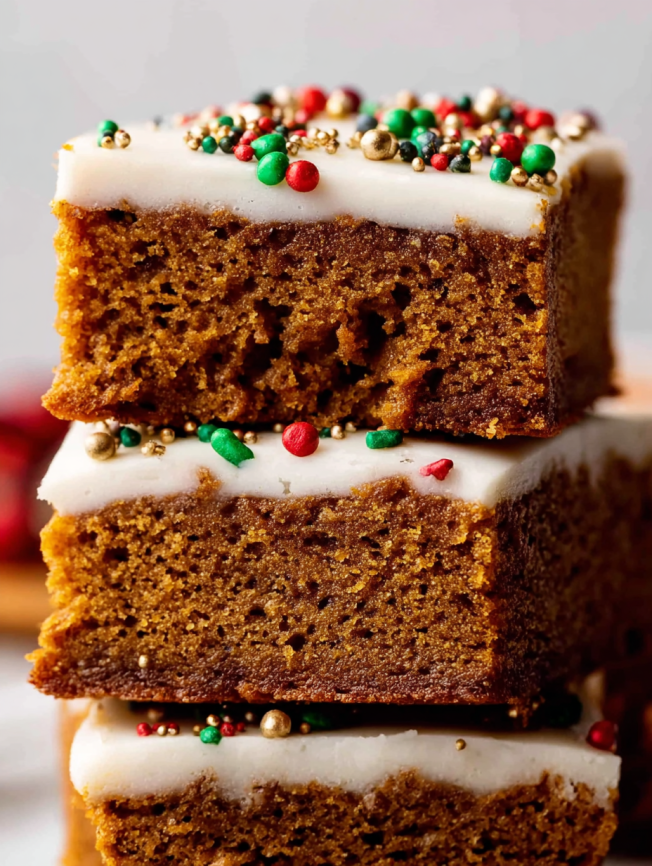
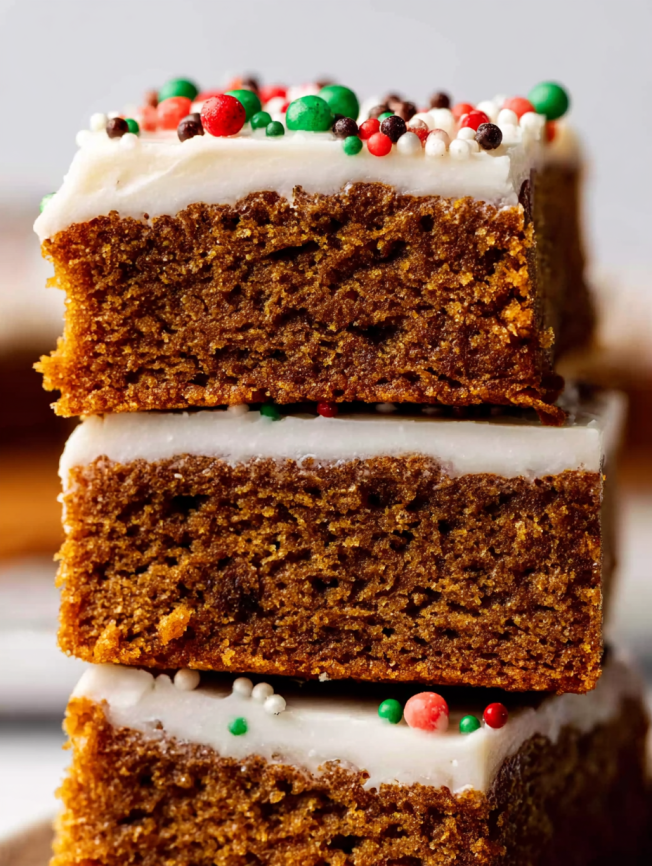
What truly sets these bars apart is their perfect texture. Unlike some gingerbread that can be hard or dry, these bars emerge from the oven wonderfully soft and chewy, with that characteristic gingerbread flavor that comes from a perfect blend of warming spices and rich molasses.
Why These Cookie Bars Will Revolutionize Your Baking
Ultimate Convenience Without Compromise
These bars eliminate every tedious step of traditional gingerbread cookie making while delivering superior results. No dough chilling means you can go from craving to eating in under an hour. Furthermore, the simple mixing method makes this recipe accessible to bakers of all skill levels, including children who want to help in the kitchen.
Consistently Perfect Results
Bar cookies are nearly foolproof compared to individual cookies that can overbake, underbake, or spread unevenly. The even thickness ensures uniform baking, while the larger surface area makes it easy to tell when they’re perfectly done. Additionally, the bars maintain their soft texture much longer than traditional cookies.
Customizable for Any Occasion
The optional spiced cream cheese frosting transforms these from casual treats to elegant dessert bars suitable for parties. Without frosting, they’re perfect lunchbox treats or afternoon snacks. Moreover, the festive sprinkle options make them adaptable to any holiday or celebration throughout the year.
Make-Ahead Friendly Design
These bars actually improve in flavor after the first day, making them ideal for advance preparation. The extended storage life means you can bake them well before events, reducing last-minute stress while ensuring you have delicious homemade treats ready to serve.
Essential Ingredients for Spiced Cookie Success
Cookie Bar Foundation
- 2¼ cups (281g) all-purpose flour
- 1½ teaspoons baking soda
- 2 teaspoons ground ginger
- 1 teaspoon ground cinnamon
- ¼ teaspoon ground allspice
- ¼ teaspoon ground cloves
- ¼ teaspoon ground nutmeg
- Small pinch ground black pepper
- ¼ teaspoon salt
- ¾ cup (170g) unsalted butter, melted
- ½ cup (100g) packed brown sugar (dark recommended)
- ½ cup (100g) granulated sugar
- ⅓ cup (80ml) molasses (unsulfured or dark)
- 1 large egg, room temperature
- 1 teaspoon pure vanilla extract
Optional Spiced Cream Cheese Frosting
- 6 oz (170g) full-fat brick cream cheese, softened
- 2 tablespoons (28g) unsalted butter, softened
- 1½ cups (180g) confectioners’ sugar
- Small pinch each: ground ginger, cinnamon, allspice
- 1 teaspoon pure vanilla extract
- ¼ cup sprinkles for garnish (optional)
Ingredient Quality Tips
The spice blend is crucial for authentic gingerbread flavor – fresh spices make a noticeable difference, so replace any that have been sitting in your pantry for over a year. Dark brown sugar adds deeper molasses notes than light brown sugar, enhancing the overall complexity.
Step-by-Step Instructions for Perfect Bars
Initial Setup and Preparation
Step 1: Preheat your oven to 350°F (177°C) and adjust the rack to the center position. Line a 9×13-inch baking pan with parchment paper, leaving overhang on the sides for easy removal. This parchment sling will make cutting and serving much simpler later.
Step 2: In a large bowl, whisk together all dry ingredients: flour, baking soda, and all the spices (ginger, cinnamon, allspice, cloves, nutmeg, black pepper, and salt). This thorough mixing ensures even spice distribution throughout the bars.
Creating the Perfect Dough
Step 3: In a medium bowl, whisk the freshly melted butter with both sugars and molasses until completely smooth with no lumps remaining. The mixture should be glossy and well-combined. Next, whisk in the egg and vanilla extract until fully incorporated.
Step 4: Pour the wet mixture into the bowl with the dry ingredients and mix with a large spoon or silicone spatula until no flour streaks remain. The resulting dough will be thick, shiny, and somewhat sticky – this is exactly what you want for tender, chewy bars.
Assembly and Baking Process
Step 5: Transfer the dough to your prepared baking pan and use your hands or a spatula to press it into an even layer covering the entire bottom. The layer will seem thin, but don’t worry – this is correct and will result in perfectly proportioned bars.
Step 6: Bake for 23-26 minutes, watching carefully for doneness indicators. The top should appear set but still look quite soft, and a toothpick inserted in the center should emerge mostly clean with just a few moist crumbs. Resist the urge to overbake, as the bars will continue setting as they cool.
Step 7: Allow the bars to cool completely in the pan on a wire rack for at least 1 hour before frosting or cutting. This cooling time is essential for proper texture development.
Optional Frosting Preparation
Step 8: For the cream cheese frosting, beat the softened cream cheese and butter together on medium speed until smooth and creamy, approximately 2 minutes. Add the confectioners’ sugar, spices, and vanilla, beating on low speed briefly before switching to high speed for 2 minutes until fluffy.
Step 9: Spread the frosting evenly over the cooled bars and add sprinkles if desired. Refrigerate for 30 minutes to set the frosting before cutting, which makes for cleaner slices and easier serving.
Creative Serving and Presentation Ideas
Holiday Party Elegance
Cut these bars into small squares and arrange them on decorative platters for holiday parties. The optional cream cheese frosting and festive sprinkles make them look professionally made, while their convenient finger-food size makes them perfect for buffet tables or cookie exchanges.
Casual Family Treats
Serve unfrosted bars with glasses of cold milk for after-school snacks or weekend family time. Their soft, chewy texture and warming spices create comfort food appeal that appeals to all ages, while the simple preparation makes them perfect for busy weeknight baking.
Gift-Worthy Packaging
Layer these bars between parchment paper in decorative tins or clear containers for thoughtful homemade gifts. Their excellent keeping quality means they’ll stay fresh during holiday gift-giving season, while their impressive flavor makes them memorable presents for teachers, neighbors, or colleagues.
Exciting Flavor and Style Variations
Chocolate-Enhanced Versions
Add ½ cup mini chocolate chips to the dough for a decadent twist that combines classic gingerbread spices with rich chocolate. Alternatively, drizzle melted chocolate over the cooled frosted bars for an elegant finish that’s perfect for special occasions.
Glaze Instead of Frosting
For a lighter option, replace the cream cheese frosting with a simple powdered sugar glaze made from confectioners’ sugar and milk. This creates a subtle sweetness that doesn’t compete with the spice flavors while still providing visual appeal.
Seasonal Spice Adjustments
Customize the spice blend for different seasons – add extra cinnamon and nutmeg for fall variations, or include cardamom and orange zest for a more exotic flavor profile. These subtle changes can make the same basic recipe feel fresh and new throughout the year.
Strategic Make-Ahead Planning
Extended Preparation Options
The cookie dough can be prepared and refrigerated for up to three days before baking, making it perfect for advance holiday preparation. Simply cover the mixed dough tightly and bring to room temperature before spreading in the pan and baking.
Freezer-Friendly Solutions
Both unbaked dough and finished bars freeze excellently for up to three months. Freeze unbaked dough in the baking pan, then transfer to freezer bags once solid. Finished bars should be frozen in single layers to protect the frosting, then packaged carefully for longer storage.
Storage Optimization
Frosted bars maintain quality in the refrigerator for up to five days, while unfrosted versions stay fresh at room temperature for three days or refrigerated for up to one week. Their excellent keeping quality makes them ideal for busy schedules and advance party planning.
Professional Tips for Perfect Results
Temperature Control Importance
Use melted butter that’s still warm but not hot when mixing with the sugars and molasses. If the butter cools too much, the dough becomes crumbly rather than smooth, affecting the final texture. Work quickly once the butter is melted for best results.
Molasses Selection Guidelines
Choose unsulfured or dark molasses rather than blackstrap molasses, which can be overwhelmingly bitter in baked goods. Grandma’s brand original molasses provides the perfect balance of sweetness and depth without overpowering the spice blend.
Doneness Recognition
These bars will look underdone when they’re actually perfect – they should still appear soft and slightly shiny on top when you remove them from the oven. Trust the toothpick test and timing rather than visual cues alone, as overbaking creates tough, dry bars.
Important Notes for Success
Pan Preparation Significance
The parchment paper overhang is crucial for easy removal and clean cutting. Without it, removing bars from the pan becomes messy and difficult, often resulting in broken pieces rather than neat squares.
Cream Cheese Type Matters
Use block-style cream cheese rather than spreadable versions from tubs, which contain stabilizers that prevent proper frosting consistency. Room temperature cream cheese blends more smoothly and creates better texture in the finished frosting.
Cutting Technique Tips
For the cleanest cuts, use a sharp knife wiped clean between cuts, especially when working with frosted bars. Chilling the frosted bars briefly before cutting helps prevent the frosting from sticking to the knife and creating messy edges.
Frequently Asked Questions
Q: Can I make these bars without molasses? A: Molasses is essential for authentic gingerbread flavor and contributes to the bars’ soft, chewy texture. Without it, you won’t achieve the characteristic gingerbread taste or proper consistency. If you don’t have molasses, consider making a different type of spiced bar cookie instead.
Q: Why do my bars turn out cakey instead of chewy? A: Cakey texture usually results from overbaking or using butter that was too cool when mixed with the sugars. Ensure your melted butter is still warm when combining with other wet ingredients, and avoid baking beyond the recommended time even if the bars look underdone.
Q: Can I reduce the amount of spices if I prefer milder flavor? A: While you can adjust spice levels to taste, the current blend creates the classic gingerbread profile most people expect. If reducing spices, start by cutting amounts in half rather than eliminating any completely, as each contributes to the complex flavor balance.
Q: How do I know when the bars are properly cooled before frosting? A: The bars should be completely cool to room temperature, which typically takes at least an hour. Test by touching the surface – it should feel room temperature, not warm. Applying frosting to warm bars will cause it to melt and become messy.
Q: Can I use a different size pan for this recipe? A: The recipe is specifically designed for a 9×13-inch pan to achieve the correct thickness and baking time. Using a smaller pan will create thicker bars that require longer baking, while a larger pan will produce thin, potentially overbaked results.
Q: What’s the best way to store leftover bars? A: Frosted bars should be covered and refrigerated for up to five days, while unfrosted bars can be stored at room temperature for three days or refrigerated for up to one week. Always use airtight containers to maintain moisture and prevent the bars from drying out.


