When I first started experimenting with healthier baking, I was skeptical that gluten-free treats could ever match the texture and flavor of traditional muffins. Then I created these high-protein pumpkin muffins, and everything changed. My husband—who usually turns his nose up at “health food”—devoured three in one sitting and asked when I’d be making them again. These muffins have become our go-to breakfast throughout fall and winter, proving that nutritious baking doesn’t mean sacrificing taste or that pillowy-soft texture we all crave.
Why You’ll Love This Recipe
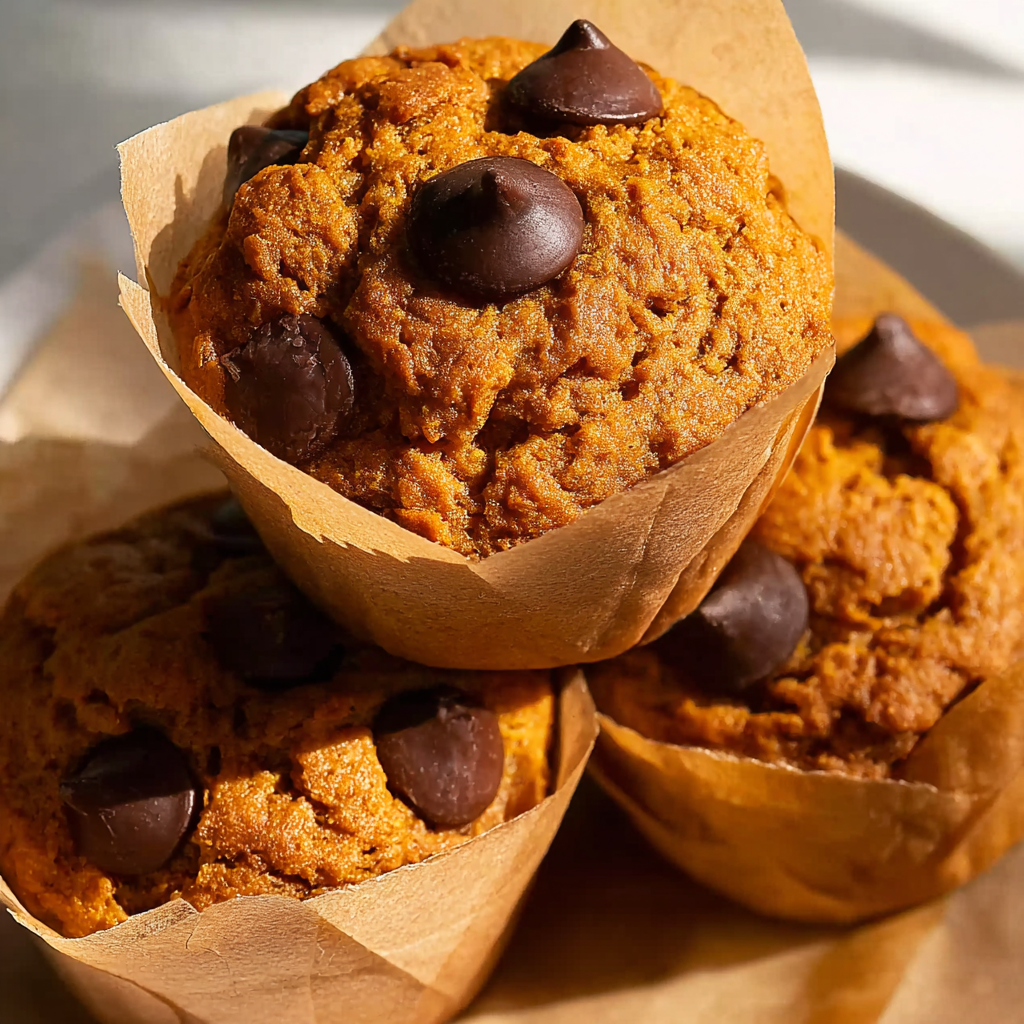
These muffins check every box for a perfect healthy treat. First and foremost, each muffin delivers an impressive 7 grams of protein, making them a genuinely satisfying breakfast or snack that keeps you full for hours. Unlike many protein-packed baked goods that taste chalky or dense, these stay incredibly moist and tender thanks to an entire can of pumpkin puree.
What’s more, they’re naturally gluten-free and dairy-free, making them accessible to friends and family with various dietary needs. The recipe uses coconut sugar for gentle sweetness rather than refined white sugar, and the addition of collagen peptides boosts the protein without affecting the flavor. Meanwhile, the chocolate chips scattered throughout make these feel like a special indulgence rather than “diet food.”
Best of all, these muffins come together in one bowl with minimal effort. There’s no need for a mixer, fancy equipment, or complicated techniques. From start to finish, you’ll have warm, fragrant muffins ready in under an hour—perfect for meal prep or last-minute breakfast solutions.
Ingredients You’ll Need
Equipment
- 2 large bowls – one for dry, one for wet ingredients
- Whisk – for combining ingredients smoothly
- Spatula – for gentle folding
- Muffin tin with liners – prevents sticking and makes cleanup easy
For the Dry Ingredients
- 1 ¼ cups gluten-free 1-to-1 flour (156g) – provides structure without gluten*
- ½ cup unflavored collagen peptides (49g) – boosts protein content significantly**
- 1 tbsp pumpkin pie spice – convenient blend of cinnamon, ginger, nutmeg, and cloves
- 1 tsp baking powder – helps muffins rise beautifully
- ¼ tsp baking soda – works with acidic ingredients for extra lift
- ½ tsp kosher salt – enhances all flavors and balances sweetness
For the Wet Ingredients
- 1 can (15 oz) pumpkin puree – creates incredible moisture and subtle flavor
- 2 large eggs – binds ingredients and adds protein
- ½ cup coconut sugar (81g) – natural sweetness with caramel notes
- ¼ cup avocado oil or melted refined coconut oil – keeps muffins tender and moist
- 1 tsp vanilla extract – enhances warmth and sweetness
For the Mix-Ins
- 1 cup paleo chocolate chips (182g) – melty pockets of chocolate throughout
Servings: 12 muffins
Prep Time: 10 minutes
Cook Time: 25 minutes
Resting Time: 15 minutes
Total Time: 50 minutes
Calories: 216 kcal per muffin
Step-by-Step Instructions
Preparing Your Workspace
Begin by preheating your oven to 375°F, giving it plenty of time to reach the proper temperature. While the oven heats, line a standard 12-cup muffin tin with paper liners. Using liners is essential here—they prevent sticking and make the muffins easy to grab for on-the-go breakfasts. Set your prepared tin aside.
Mixing the Dry Ingredients
Grab your first large bowl and add the gluten-free flour, collagen peptides, pumpkin pie spice, baking powder, baking soda, and kosher salt. Using a whisk, stir everything together thoroughly until all the ingredients are evenly distributed throughout. Pay special attention to breaking up any clumps in the collagen peptides or flour. The mixture should have a uniform, speckled appearance from the spice. Set this bowl aside while you prepare the wet ingredients.
Combining the Wet Ingredients
In your second large bowl, scoop in the entire can of pumpkin puree. Crack in both eggs, then add the coconut sugar, avocado oil, and vanilla extract. Whisk vigorously until the mixture becomes completely smooth and homogeneous—you shouldn’t see any streaks of egg or clumps of sugar. This thorough mixing ensures even sweetness and texture throughout your muffins. The batter should look glossy and well-emulsified.
Bringing the Batter Together
Pour your dry ingredient mixture into the bowl with the wet ingredients. Using a rubber spatula, begin folding the dry ingredients into the wet. This is where technique matters: fold gently and stop when you can still see small streaks of flour visible in the batter. Don’t worry—you’re not done yet!
Now add the chocolate chips and continue folding gently. Mix just until no more flour is visible, but be careful not to overstir. The batter should look cohesive but might still have a few small lumps—that’s perfectly fine. Overmixing develops gluten-like structures even in gluten-free flour, resulting in tough, rubbery muffins.
The Crucial Resting Period
Here’s a step many recipes skip, but it’s crucial for gluten-free baking success. Allow your batter to rest for 15 minutes at room temperature. During this time, the gluten-free flour absorbs moisture from the pumpkin and eggs, while the collagen peptides hydrate fully. This resting period dramatically improves the final texture, creating muffins that are moist and tender rather than gummy or dense.
Filling and Baking
After the resting period, give the batter a gentle stir with your spatula—it will have thickened slightly. Using a large cookie scoop or spoon, divide the batter evenly among the 12 muffin cups. Fill each one about ¾ full. If you like extra chocolate (who doesn’t?), press a few additional chocolate chips into the top of each muffin.
Transfer the muffin tin to your preheated oven and bake for 22-25 minutes. The muffins are done when the tops spring back lightly when touched and a toothpick inserted into the center comes out clean or with just a few moist crumbs. Because these muffins are quite moist from all that pumpkin, they need proper cooling time to set up.
Cooling Properly
Resist the temptation to dig in immediately! Allow the muffins to cool in the tin for 15 minutes. This cooling period is essential—it lets the structure firm up, preventing crumbly, falling-apart muffins. After 15 minutes, transfer the muffins to a wire rack to finish cooling completely. They’ll continue to set as they cool.
How to Serve
These versatile muffins work beautifully for any time of day. For breakfast, pair a warm muffin with your morning coffee or tea and a side of Greek yogurt for extra protein. The combination creates a balanced meal that provides sustained energy throughout your morning. Alternatively, spread a thin layer of almond butter or cream cheese on a split muffin for added richness and protein.
As an afternoon snack, these muffins satisfy sweet cravings without the sugar crash that comes from traditional treats. Pack one in your lunch box or gym bag for a convenient post-workout snack—the protein helps with muscle recovery while the carbs replenish energy stores.
For a special dessert or brunch offering, warm the muffins slightly and serve with a dollop of coconut whipped cream and a sprinkle of cinnamon. The contrast between the warm, spiced muffin and cool cream feels indulgent while remaining relatively healthy.
Creative Recipe Variations
Nut-Free Version
Replace the paleo chocolate chips with sunflower seed butter chips or simply omit the chocolate altogether. You can add ½ cup of raisins or dried cranberries instead for natural sweetness and texture.
Extra Spiced Version
If you love bold spice flavor, increase the pumpkin pie spice to 1 ½ tablespoons. You can also add ½ teaspoon of fresh grated ginger for a spicy kick that cuts through the sweetness beautifully.
Streusel-Topped Muffins
Create a simple topping by mixing 2 tablespoons of coconut sugar, 1 tablespoon of gluten-free flour, and 1 tablespoon of melted coconut oil with ¼ cup of chopped pecans. Sprinkle this mixture over the muffins before baking for a crunchy, sweet crown.
Maple Walnut Variation
Replace the coconut sugar with ⅓ cup of pure maple syrup and reduce the pumpkin puree to 1 cup plus 2 tablespoons. Swap the chocolate chips for ¾ cup of chopped toasted walnuts. These have a more sophisticated, less sweet profile.
Vegetarian-Friendly Option
Omit the collagen peptides entirely and increase the gluten-free flour to 1 ¾ cups (218g). The muffins will have slightly less protein (about 4g per muffin) but remain delicious and completely vegetarian.
Mini Muffin Version
Divide the batter among 24 mini muffin cups instead, filling each about ⅔ full. Reduce baking time to 12-15 minutes. These bite-sized treats are perfect for portion control or kids’ lunchboxes.
Make-Ahead and Storage Tips
These muffins are meal-prep champions that actually improve in flavor after a day. Once completely cooled, store them in an airtight container at room temperature for up to 3 days. For longer storage, refrigerate them for up to one week. The extra moisture from the pumpkin means they stay incredibly fresh without drying out like many gluten-free baked goods.
When storing in the refrigerator, I recommend placing a paper towel at the bottom of your container to absorb any excess moisture. This prevents the muffin bottoms from becoming soggy. Before eating refrigerated muffins, let them sit at room temperature for 10 minutes or warm them in the microwave for 15-20 seconds to restore their just-baked texture.
For freezing, individually wrap each cooled muffin tightly in plastic wrap, then place them all in a freezer-safe bag or container. Properly frozen muffins maintain their quality for up to 3 months. To thaw, simply remove a muffin from the freezer the night before and let it defrost at room temperature or in the refrigerator. For quick thawing, unwrap and microwave on 50% power for 45-60 seconds.
You can also freeze the batter! Line your muffin tin with liners and fill each cup with batter. Freeze until solid (about 2 hours), then pop the frozen batter cups into a freezer bag. When ready to bake, place frozen batter cups back in a muffin tin and bake at 375°F for 28-32 minutes—no thawing required!
Important Notes
Measure Ingredients Accurately
For the most consistent results, use a digital kitchen scale to measure your ingredients, especially the flour and collagen peptides. If you don’t own a scale, use the spoon-and-level method for flour: fluff the flour, spoon it into your measuring cup, and level it off with a knife. Never scoop directly from the bag, as this compacts the flour and adds too much.
Choose the Right Gluten-Free Flour
Not all gluten-free flours work the same way. This recipe is specifically designed for gluten-free 1-to-1 baking blends like Bob’s Red Mill or King Arthur Flour, both of which contain xanthan gum. Xanthan gum is crucial for replicating the structure that gluten provides. If your flour blend doesn’t contain xanthan gum, add ½ teaspoon to the recipe. Single-ingredient flours like rice flour or almond flour will not work as substitutes.
Understanding Collagen Peptides
Collagen peptides are virtually flavorless and dissolve completely into batters, making them perfect for protein boosting. If you don’t have collagen on hand or prefer a vegetarian recipe, increase the gluten-free flour to 1 ¾ cups (218g) instead. Keep in mind that the protein content will drop to about 4g per muffin without the collagen.
Don’t Skip the Resting Time
That 15-minute rest before baking might seem optional, but it makes a tremendous difference in gluten-free baking. The rest allows the flour to fully hydrate, resulting in muffins that are tender rather than gummy. Plan this time into your schedule—it’s worth every minute.
The Importance of Proper Cooling
Because these muffins are so moist, they need adequate cooling time to firm up properly. Cutting into them too soon results in a gummy, underbaked texture even though they’re fully cooked. Patience is key!
Nutrition Information Update
Please note that the original nutrition information listed 13g of protein per muffin, but this has been corrected to 7g per muffin. The calculation error came from inaccurate collagen data. Each muffin still provides a substantial protein boost, making them more satisfying than traditional muffins.
Frequently Asked Questions
Can I use regular all-purpose flour instead of gluten-free flour?
Absolutely! If you’re not gluten-free, substitute an equal amount (1 ¼ cups or 156g) of regular all-purpose flour. The muffins will be slightly lighter in texture. You can also skip the resting period if using regular flour, though it doesn’t hurt to let it rest anyway.
What if I can’t find pumpkin pie spice?
Make your own blend! Mix together 2 teaspoons cinnamon, ½ teaspoon ginger, ¼ teaspoon nutmeg, and ⅛ teaspoon ground cloves. This equals roughly 1 tablespoon of pumpkin pie spice.
Can I use fresh pumpkin instead of canned?
Yes, but fresh pumpkin must be cooked, pureed until completely smooth, and drained of excess moisture. Fresh pumpkin tends to be waterier than canned. After pureeing, strain it through cheesecloth for 30 minutes to achieve a thick consistency similar to canned pumpkin.
Why are my muffins dense or gummy?
Dense, gummy muffins typically result from one of three issues: overmixing the batter, skipping the resting period, or not allowing adequate cooling time. Gluten-free baked goods need gentle handling and patience to achieve the right texture.
Can I reduce the sugar?
You can reduce the coconut sugar to ⅓ cup if you prefer less sweetness, especially if using sweet chocolate chips. However, sugar contributes to both moisture and structure, so reducing it too much may result in drier muffins.
What type of oil works best?
Avocado oil and refined coconut oil both work beautifully. Refined coconut oil (the kind without coconut flavor) gives the most neutral taste. You can also use melted grass-fed butter if dairy isn’t a concern, which adds wonderful richness.
Are these muffins suitable for meal prep?
Yes! These are ideal for meal prep. Bake a batch on Sunday, and you’ll have healthy breakfasts or snacks for the entire week. The high moisture content means they stay fresh much longer than typical muffins.
Can I make these without eggs?
For an egg-free version, try replacing each egg with a “flax egg” (1 tablespoon ground flaxseed mixed with 3 tablespoons water, let sit 5 minutes). The muffins will be slightly denser but still delicious. Alternatively, use ½ cup of unsweetened applesauce to replace both eggs.
Why do I need to use unflavored collagen?
Flavored collagen often contains sweeteners or artificial flavors that would alter the taste of your muffins. Unflavored collagen dissolves completely and contributes no flavor—only protein and structure.
How do I know when they’re done baking?
The tops should spring back when lightly pressed, and a toothpick inserted into the center should come out clean or with a few moist crumbs. If you see wet batter, bake for another 2-3 minutes and test again. Remember, these muffins are naturally very moist, so they’ll feel softer than regular muffins even when fully baked.
Nutrition Information (per muffin):
Calories: 216 kcal | Carbohydrates: 27g | Protein: 7g | Fat: 11g | Saturated Fat: 4g | Polyunsaturated Fat: 1g | Monounsaturated Fat: 4g | Trans Fat: 0.003g | Cholesterol: 27mg | Sodium: 199mg | Potassium: 87mg | Fiber: 3g | Sugar: 13g | Vitamin A: 5553 IU | Vitamin C: 2mg | Calcium: 64mg | Iron: 2mg
Course: Dessert, Snack
Cuisine: American
Diet: Gluten-Free, Dairy-Free