
Prep Time: 20 minutes | Cook Time: 35 minutes | Total Time: 4 hours, 55 minutes | Yield: 12 bars
A Personal Love Affair with Lemon
There’s something magical about the first bite of a perfectly balanced lemon bar. Growing up, my grandmother would make traditional lemon squares that were intensely sweet, often masking the beautiful tartness of fresh lemons. However, after discovering Greek yogurt’s incredible versatility in baking, I’ve transformed this classic dessert into something extraordinary. These Greek yogurt lemon bars capture everything I adore about citrus desserts while maintaining a lighter, more sophisticated flavor profile.
The moment you sink your teeth into these bars, you’ll experience the perfect harmony of creamy Greek yogurt and bright, bold lemon. Unlike their traditional counterparts, these treats allow the natural tartness to shine through without overwhelming sweetness.
Why You’ll Fall in Love with This Recipe
Perfectly Balanced Flavor
Traditional lemon bars often tip the scales toward excessive sweetness. In contrast, these Greek yogurt versions strike an ideal balance, allowing the natural lemon flavor to take center stage. The tangy Greek yogurt complements the citrus beautifully, creating a sophisticated dessert that’s refreshing rather than cloying.
Simple Ingredients, Spectacular Results
With only eight ingredients, this recipe proves that complexity isn’t necessary for exceptional flavor. Moreover, most ingredients are pantry staples, making these bars accessible for spontaneous baking sessions.
Lighter Without Sacrificing Richness
Greek yogurt provides incredible creaminess while reducing overall calories and adding protein. Furthermore, the texture remains luxuriously smooth and decadent, ensuring you won’t miss the heavier traditional versions.
Essential Ingredients
For the Graham Cracker Crust
- 1 cup (120g) graham cracker crumbs (approximately 8 full-sheet crackers)
- 1 tablespoon (12g) granulated sugar
- 3 tablespoons (43g) unsalted butter, melted (coconut oil works as substitute)
For the Creamy Lemon Filling
- 6 ounces (170g) brick cream cheese, softened to room temperature
- 3/4 cup (181g) plain Greek yogurt (nonfat or low-fat), at room temperature
- 2 large eggs, at room temperature
- 1 large egg yolk, at room temperature
- 1/3 cup (67g) granulated sugar
- 1/3 cup (80ml) fresh lemon juice (from 2-3 lemons)
- 1 tablespoon fresh lemon zest
- 1 teaspoon pure vanilla extract
Optional Garnishes
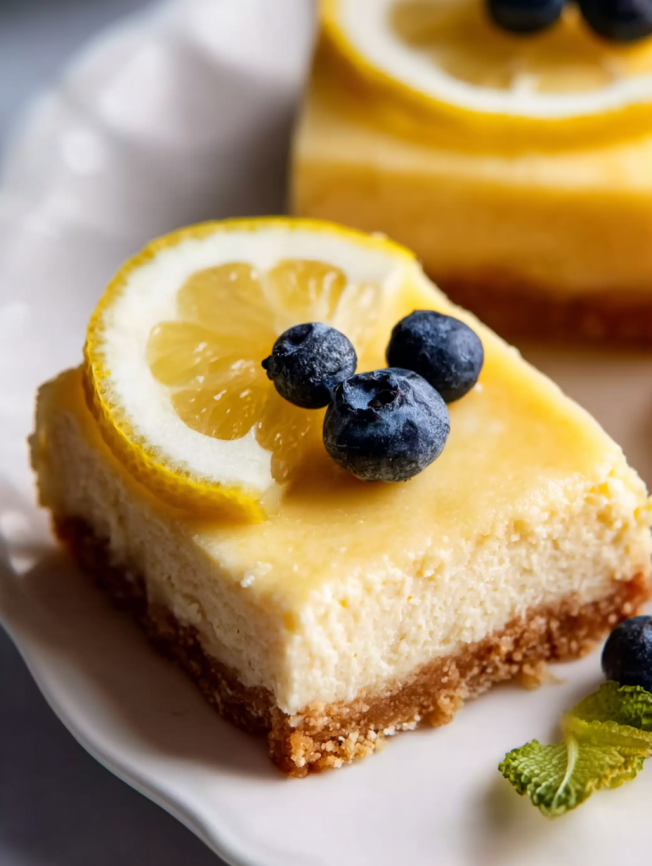
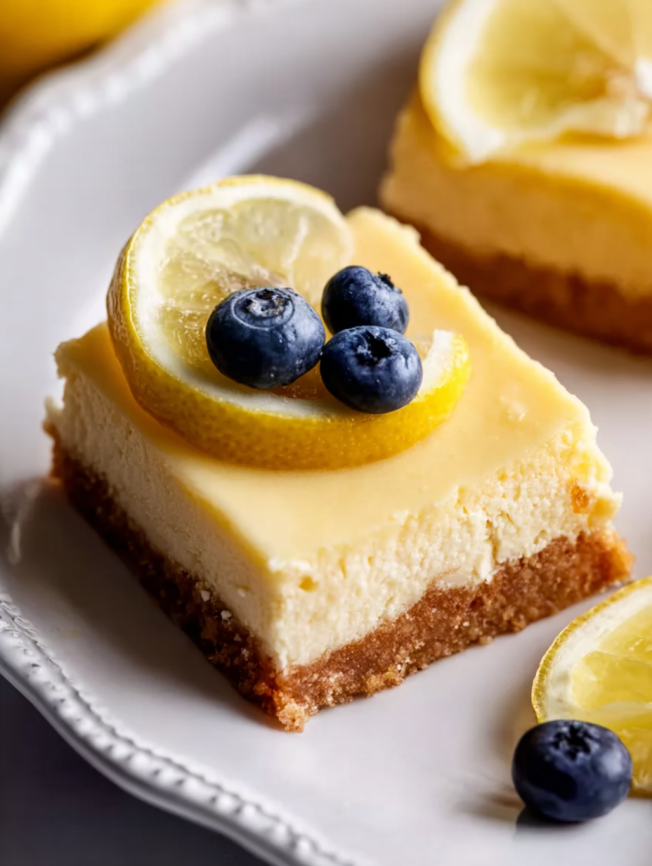
Fresh lemon slices and blueberries create a beautiful presentation while adding extra bursts of flavor and color.
Step-by-Step Instructions
Preparing Your Kitchen
Begin by preheating your oven to 300°F (149°C). Next, line an 8-inch square baking pan with parchment paper, ensuring you leave overhang on two sides for easy removal later. This preparation step is crucial for achieving clean, professional-looking bars.
Creating the Perfect Crust
In a medium bowl, whisk together the graham cracker crumbs and sugar until evenly distributed. Then, add the melted butter and stir until the mixture resembles wet sand and holds together when pressed. Press this mixture firmly and evenly into your prepared pan, creating a solid foundation.
Bake the crust for exactly 8 minutes, then remove from the oven. Allow it to cool slightly while you prepare the filling—the residual warmth won’t affect the final result.
Crafting the Lemon Filling
Using a large bowl and either a handheld or stand mixer with whisk attachment, beat the cream cheese on high speed for about one minute until completely smooth. This step eliminates any lumps that could affect the final texture.
Add the Greek yogurt and beat on medium-high speed until fully combined. Scrape down the bowl sides and bottom with a silicone spatula, then beat again if needed. The mixture should be perfectly smooth and uniform.
Beat in the eggs and egg yolk one at a time, ensuring each is fully incorporated before adding the next. Finally, add sugar, fresh lemon juice, lemon zest, and vanilla extract, beating until everything combines into a smooth, thin filling.
Assembly and Baking
Pour the filling over the slightly warm crust—the temperature difference won’t cause any issues. The filling will appear quite thin, which is exactly what you want for the proper final texture.
Bake for 34-38 minutes, watching for the center to stop wobbling significantly. A slight jiggle is acceptable since the bars will continue setting during the chilling process. Avoid overbaking, as this can cause surface cracking.
Cooling and Chilling Process
Remove the pan from the oven and place it on a cooling rack for one hour at room temperature. Then, transfer to the refrigerator for 3-4 hours or overnight. This extended chilling period is essential for achieving the perfect sliceable consistency.
Serving Suggestions
Elegant Presentation Ideas
Once properly chilled, lift the bars from the pan using the parchment overhang. For restaurant-quality presentation, use a very sharp knife, wiping it clean with a paper towel between each cut. This technique ensures clean edges and professional appearance.
Dust with powdered sugar just before serving for an elegant touch. Alternatively, garnish with fresh berries, mint leaves, or thin lemon wheels for color contrast and additional flavor dimensions.
Perfect Pairing Options
These bars complement afternoon tea beautifully and pair wonderfully with fresh fruit salads. They also make excellent endings to Mediterranean-inspired meals or summer barbecues.
Creative Recipe Variations
Lime Transformation
Substitute fresh lime juice and zest for the lemon components to create vibrant lime bars. This variation offers a slightly different flavor profile while maintaining the same creamy texture and balanced sweetness.
Mixed Berry Addition
Fold fresh blueberries or raspberries into the filling before baking for bursts of additional flavor and beautiful color contrast throughout each bar.
Coconut Twist
Replace the butter in the crust with melted coconut oil and add a tablespoon of shredded coconut to the filling for tropical flair that complements the citrus beautifully.
Make-Ahead Tips
Advanced Preparation
These bars actually improve with time, making them perfect for advance preparation. You can complete the entire recipe 1-3 days before serving, storing them covered tightly in the refrigerator until needed.
Freezing Instructions
For longer storage, wrap individual bars in plastic wrap and freeze for up to three months. Thaw overnight in the refrigerator before serving—they’ll taste just as fresh as when first made.
Storage Guidelines
Cover leftover bars tightly and refrigerate for up to five days. The texture and flavor remain consistent throughout this period, though they’re typically gone much sooner!
Essential Notes
Room Temperature Success
Always use room-temperature ingredients, especially cream cheese, eggs, and Greek yogurt. Cold ingredients don’t blend smoothly, potentially creating lumps in your final product. Plan ahead by removing dairy items from the refrigerator 30-60 minutes before baking.
Crust Consistency Updates
The recipe has been refined over time to ensure optimal crust stability. The current measurements create a substantial base that holds together beautifully while providing the perfect ratio of crust to filling.
Equipment Recommendations
An 8-inch square pan is essential for proper thickness. Using a different size will affect baking time and final texture. Quality parchment paper makes removal effortless and prevents sticking.
Frequently Asked Questions
Can I use regular yogurt instead of Greek yogurt?
Greek yogurt is essential for proper texture and consistency. Regular yogurt contains too much moisture and will prevent the bars from setting correctly. However, you can strain regular yogurt through cheesecloth for 2-4 hours to achieve similar thickness.
Why do my bars have a cracked surface?
Surface cracking typically results from overbaking or temperature fluctuations. Keep the oven temperature steady at 300°F and remove the bars when they still have a slight jiggle in the center. Additionally, avoid opening the oven door frequently during baking.
How do I know when the bars are properly set?
The bars are ready when the center no longer wobbles significantly when gently shaken. A slight jiggle is acceptable since they’ll continue firming during the chilling process. Trust the timing rather than waiting for complete solidification.
Can I make these bars dairy-free?
While challenging, you can substitute the cream cheese with dairy-free alternatives and use coconut oil instead of butter. However, the texture and flavor will differ from the original recipe. Coconut cream might work as a Greek yogurt substitute, though results may vary.
What’s the best way to achieve clean cuts?
Use a very sharp, thin knife and wipe it completely clean with a paper towel between each cut. Chilling the bars thoroughly before cutting is crucial—warm bars will stick to the knife and create messy edges.
How long do these bars need to chill?
Minimum chilling time is 3-4 hours, though overnight is preferable. The extended chilling period allows the filling to set completely and makes cutting much easier. Rushed chilling results in bars that may fall apart when cut.
Nutritional Information (per bar):
- Calories: 158
- Protein: 4.7g
- Carbohydrates: 16.8g
- Fat: 8.1g
- Sugar: 10.7g
- Sodium: 136.1mg
- Cholesterol: 64mg


