The first time I encountered green chile cheese squares was at a potluck dinner hosted by my neighbor from New Mexico. She casually mentioned they were a “simple family recipe,” but when I took that first bite, I knew I’d discovered something extraordinary. The combination of melted cheese, fluffy egg custard, and that distinctive green chile warmth created pure comfort food magic.
What struck me most was how these unassuming golden squares managed to be both elegant enough for entertaining and comforting enough for a cozy family dinner. After countless requests for the recipe, my neighbor finally shared her secrets, and now these squares have become my go-to dish for gatherings where I want to impress without stress.
Why These Cheese Squares Will Win Over Every Crowd
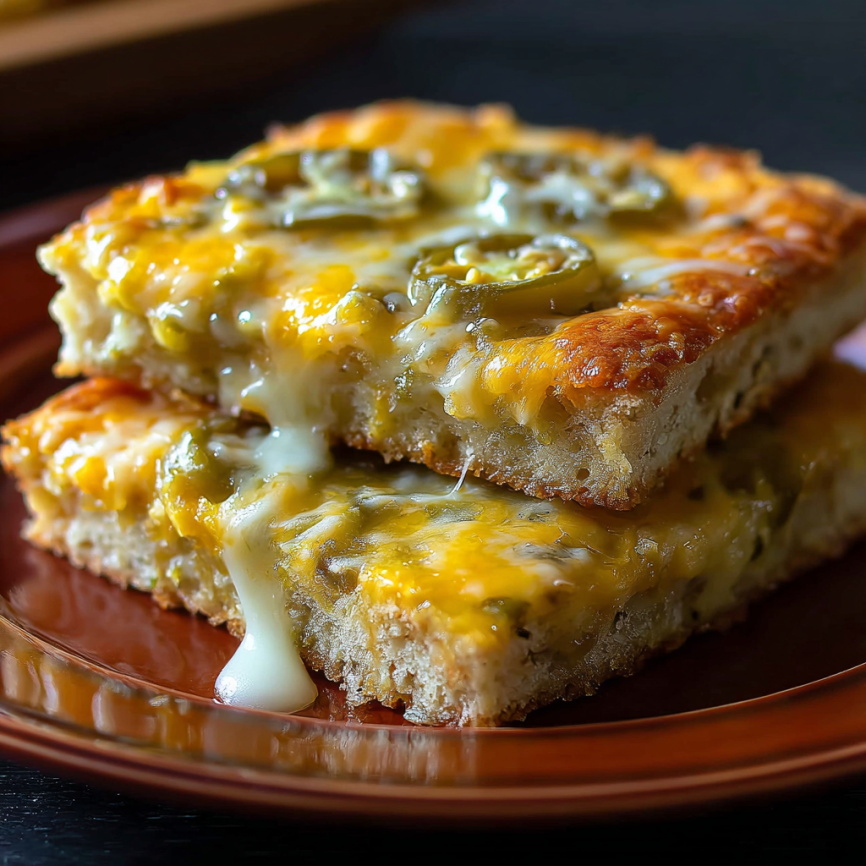
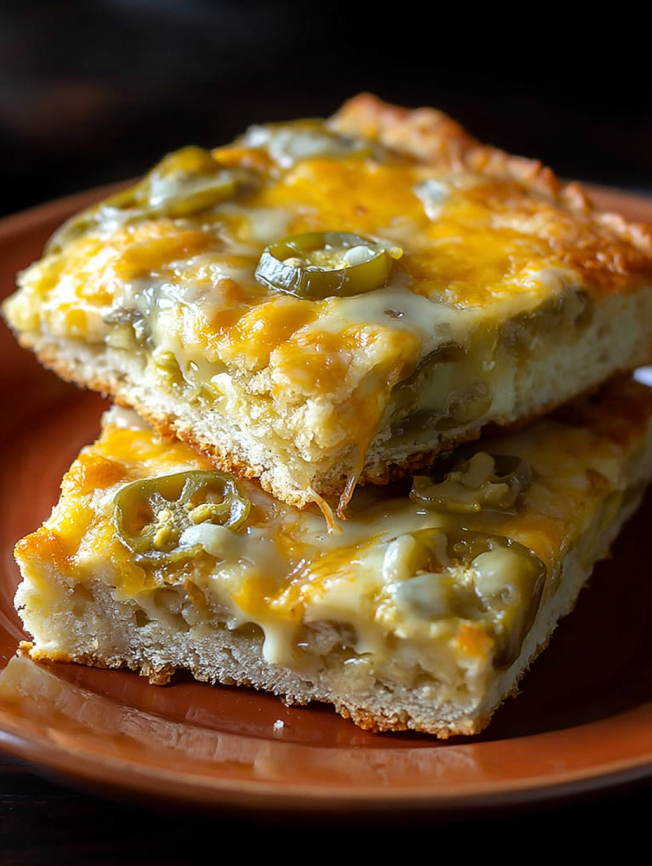
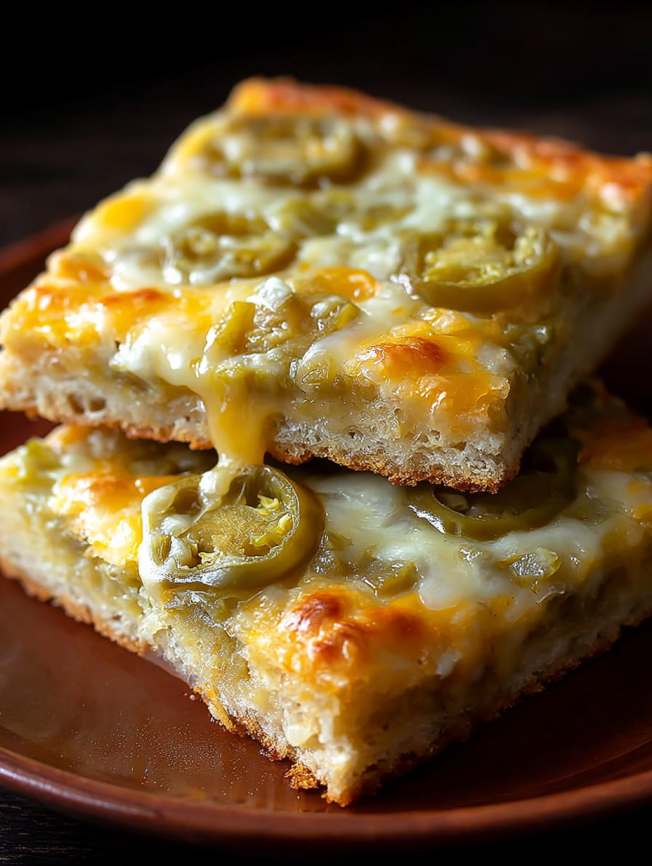
These green chile cheese squares offer the perfect balance of familiar comfort and exciting southwestern flair. The combination of Monterey Jack and cheddar creates a rich, creamy base that melts beautifully, while the green chiles add just enough heat to keep things interesting without overwhelming sensitive palates.
Beyond their incredible flavor, these squares are remarkably practical for entertaining. The recipe serves a generous crowd, cuts beautifully into neat portions, and actually tastes better when served warm rather than piping hot. Furthermore, they’re substantial enough to serve as a light lunch yet refined enough for cocktail parties.
The texture is what truly sets them apart – imagine the fluffiness of a soufflé combined with the satisfying richness of a quiche, but without the fuss of pastry crusts or complicated techniques. Additionally, they’re naturally gluten-friendly with just a small amount of flour for structure.
Essential Ingredients and Equipment
Main Components
- 4 large eggs – The foundation that creates the custard-like texture
- 2 cups shredded Monterey Jack cheese – Provides creamy mildness and excellent melting
- 2 cups shredded cheddar cheese – Adds sharp flavor and beautiful golden color
- 1 cup all-purpose flour – Creates structure without heaviness
- 1 teaspoon baking powder – Ensures proper rise and fluffy texture
- ½ teaspoon salt – Enhances all flavors and balances richness
Flavor Enhancers
- ½ cup melted butter – Contributes richness and helps bind ingredients
- 1 cup milk – Creates smooth, custard-like consistency
- 2 4-ounce cans diced green chiles, drained – The star ingredient providing mild heat and authentic southwestern flavor
Serving Suggestions
These versatile squares work beautifully as appetizers cut into small portions, served alongside tortilla chips and salsa. They also make excellent brunch additions paired with fresh fruit or served with crispy bacon. For dinner, consider them as a side dish with grilled meats or southwestern-inspired salads.
Step-by-Step Preparation Guide
Initial Setup
Step 1: Begin by preheating your oven to 350°F (175°C), which provides the ideal temperature for gentle, even cooking that won’t toughen the eggs or burn the cheese.
Step 2: Thoroughly grease a 9×13-inch casserole dish with butter or cooking spray, ensuring complete coverage to prevent sticking during the longer baking process.
Building the Base
Step 3: In a large mixing bowl, whisk the eggs vigorously until they become frothy and light in color. This extra air incorporation helps create the signature fluffy texture.
Step 4: Gradually stir in both the Monterey Jack and cheddar cheeses, distributing them evenly throughout the egg mixture to ensure consistent cheese distribution in every bite.
Adding Structure
Step 5: In a separate bowl, sift together the flour, baking powder, and salt to eliminate lumps and ensure even distribution. Subsequently, fold this dry mixture gently into the egg and cheese combination using a spatula rather than aggressive stirring.
Final Assembly
Step 6: Slowly pour in the melted butter and milk, stirring continuously until the mixture becomes completely smooth and well-incorporated without any streaks or lumps.
Step 7: Finally, fold in the drained green chiles with gentle motions, being careful not to break up the chile pieces while ensuring even distribution throughout the batter.
Baking Process
Step 8: Pour the completed mixture into your prepared casserole dish, spreading it evenly with a spatula to ensure uniform thickness across the entire surface.
Step 9: Bake for 35-45 minutes, checking for doneness by looking for a golden-brown surface and testing the center with a knife, which should come out clean when the squares are properly set.
Step 10: Allow the finished squares to cool for 10-15 minutes before cutting, as this resting period helps them firm up and makes cleaner cuts possible.
Creative Serving and Presentation Ideas
These adaptable squares lend themselves to numerous presentation styles depending on your occasion. For casual gatherings, cut them into generous 3-inch squares and serve on colorful southwestern-themed plates with dollops of sour cream and fresh cilantro.
During more formal events, slice them into elegant 2-inch squares and arrange on serving platters garnished with fresh herbs and colorful bell pepper strips. They photograph beautifully for social media when presented on rustic wooden boards with small bowls of salsa and guacamole nearby.
For brunch settings, serve warm squares alongside fresh fruit salads and crispy breakfast potatoes, creating a complete southwestern-inspired morning meal that satisfies both vegetarians and meat-eaters alike.
Delicious Recipe Variations
Heat Level Adjustments
While the recipe uses mild green chiles, you can easily customize the spice level to suit different preferences. Substitute jalapeños for extra heat, or try poblano peppers for a deeper, more complex flavor with moderate warmth.
Cheese Combinations
Experiment with different cheese blends to create unique flavor profiles. Try pepper jack and sharp cheddar for extra spice, or combine Swiss and Gruyère for a more sophisticated European twist on this southwestern classic.
Vegetable Additions
Consider incorporating other vegetables for added nutrition and flavor complexity. Diced bell peppers, corn kernels, or chopped scallions work wonderfully without compromising the basic structure or cooking time.
Make-Ahead and Storage Strategies
These cheese squares are excellent candidates for advance preparation, making them perfect for busy entertaining schedules. Prepare the entire dish up to the baking stage, then cover and refrigerate overnight before baking the next day.
Alternatively, bake them completely, then cool and refrigerate for up to three days. Reheat individual portions in the microwave for 30-45 seconds, or warm the entire dish in a 300°F oven for 15-20 minutes until heated through.
For longer storage, wrap cooled squares individually in plastic wrap and freeze for up to three months. Thaw overnight in the refrigerator before reheating using your preferred method.
Professional Tips and Techniques
Achieving the perfect texture requires attention to several crucial details. First, ensure your eggs are at room temperature before whisking, as this helps them incorporate more air and blend more easily with other ingredients.
Drain the green chiles thoroughly to prevent excess moisture from making the squares soggy. Pat them dry with paper towels if they seem particularly wet after draining from the cans.
Don’t overbake the squares, as this can result in a tough, rubbery texture rather than the desired tender custard-like consistency. The center should be just set but still slightly jiggly when you remove them from the oven.
Frequently Asked Questions
Q: Can I use fresh green chiles instead of canned? A: Absolutely! Roast, peel, and dice about 4-6 fresh Hatch or Anaheim chiles. Fresh chiles often provide better flavor, though they require more preparation time.
Q: Why do my squares turn out rubbery? A: This usually indicates overbaking or using eggs that were too cold. Bake just until set, and ensure eggs are at room temperature before beginning the recipe.
Q: Can I make these dairy-free? A: While challenging, you can substitute dairy-free cheese and plant-based milk, though the texture and flavor will differ significantly from the traditional version.
Q: How do I know when they’re properly done? A: Look for a golden-brown surface and test the center with a knife or toothpick. It should come out clean or with just a few moist crumbs attached.
Q: Can I cut these into different shapes? A: Certainly! Use cookie cutters for fun shapes, or cut into triangles for elegant presentation. Just remember that smaller pieces will cook slightly faster.
Q: What’s the best way to reheat leftovers? A: For best results, reheat in a 300°F oven for 10-15 minutes, or microwave individual pieces for 30-45 seconds. Avoid high heat, which can make them tough.
Q: Can I add meat to this recipe? A: Yes! Cooked bacon bits, diced ham, or crumbled chorizo work wonderfully. Add about ½ cup of cooked meat along with the green chiles.
Recipe Summary:
- Prep Time: 15 minutes
- Cook Time: 40 minutes
- Total Time: 55 minutes
- Yield: Approximately 12 squares
- Difficulty: Intermediate
- Dietary: Vegetarian
Nutrition per serving: 250 calories, 18g fat, 14g carbohydrates, 10g protein


