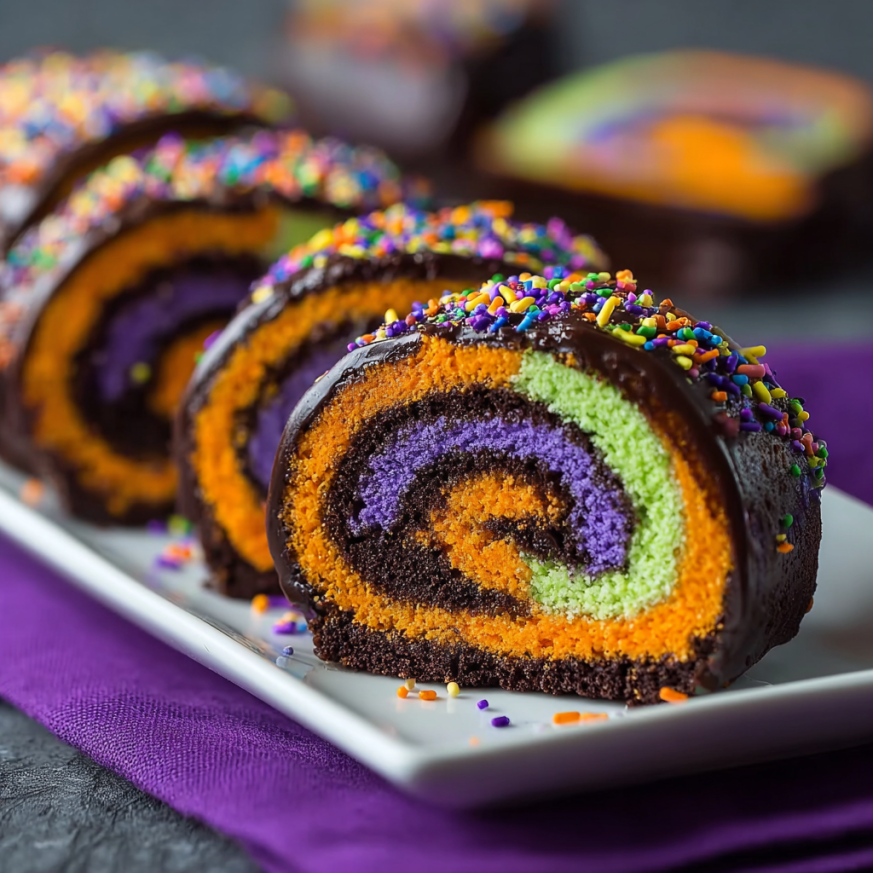
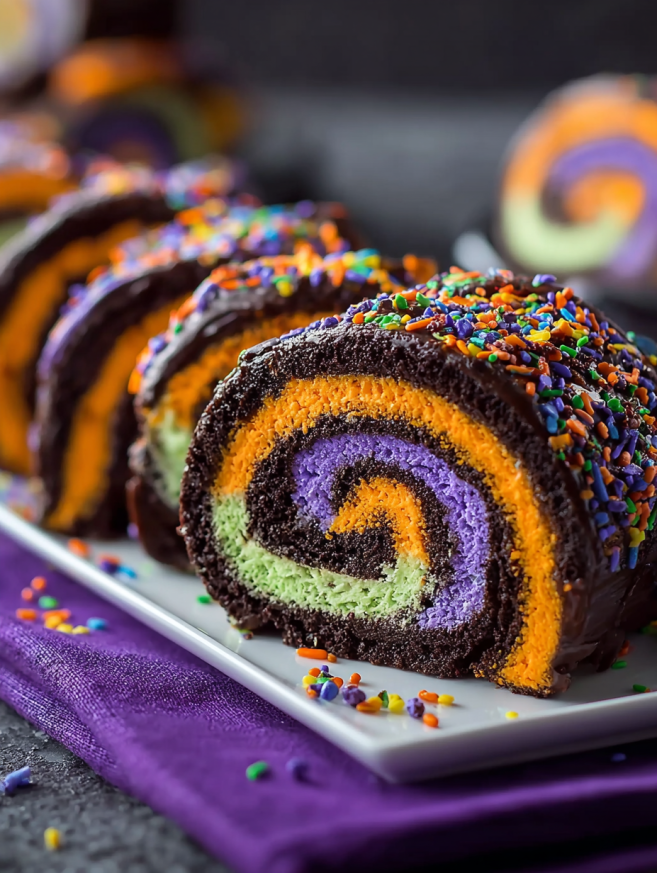
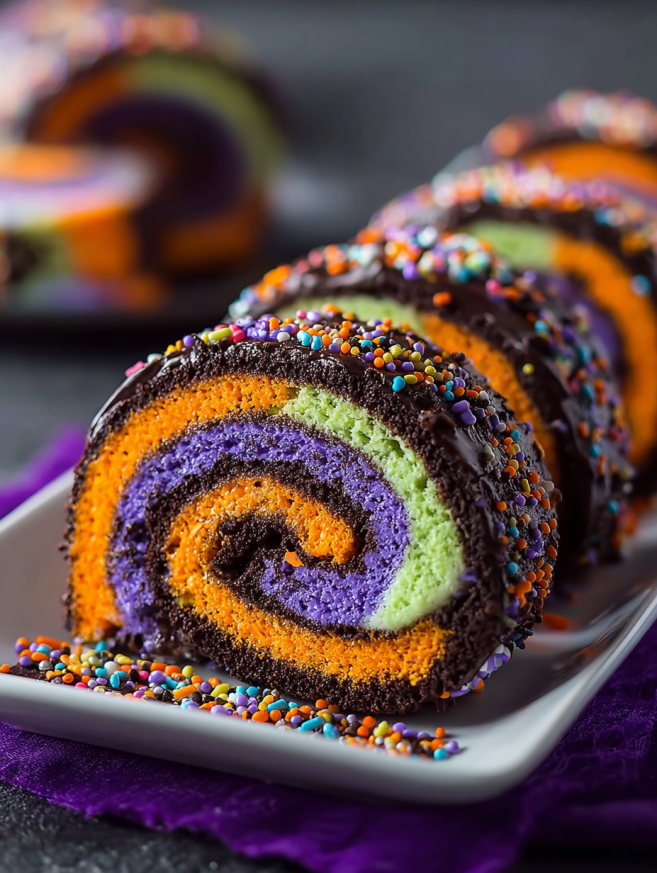
Every October, I find myself scrambling for the perfect Halloween treat that looks impressive but doesn’t require hours in the kitchen. That’s exactly how this Halloween Oreo Roll was born! After one particularly hectic week when I needed dessert for my daughter’s class party, I threw together this no-bake wonder—and it became an instant legend among the neighborhood kids.
The beauty of this dessert lies in its simplicity. You’re essentially creating a gorgeous spiral pinwheel using everyone’s favorite Halloween cookies, cream cheese, and colorful frosting. When you slice into it, those orange and black swirls look absolutely spectacular, yet the whole thing comes together in about 15 minutes of active work. It’s the kind of recipe that makes you look like a baking superstar without breaking a sweat.
Why You’ll Love This Recipe
Zero baking required. On those busy October days when your oven is already occupied with dinner (or you simply don’t want to turn it on), this no-bake dessert saves the day. There’s no waiting for anything to bake or worrying about oven temperatures.
Kid-friendly and fun to make. Little hands love crushing cookies and helping roll the dough. It’s messy, it’s tactile, and it creates memories along with a delicious treat. Plus, kids feel incredibly proud when they see those beautiful spiral slices.
Impressive presentation with minimal effort. When you bring this to a Halloween party, people will assume you spent hours creating it. Meanwhile, you’ll know the truth—it took less time than running to the bakery!
Make-ahead perfection. Prepare this dessert days in advance and simply slice when you’re ready to serve. In fact, it actually benefits from some chill time in the refrigerator, making the flavors meld beautifully.
Customizable to your taste. Whether you prefer classic orange-filled Oreos or want to experiment with different frosting colors, this recipe adapts easily to your creative vision.
Ingredients You’ll Need
For the Base Roll
- 36 Halloween Oreos – The orange crème variety works best for that classic Halloween look
- 6 oz cream cheese, softened – Full-fat is essential here; don’t skimp with reduced-fat versions
- ½ tsp vanilla extract – Enhances the sweetness and adds depth
For the Filling & Decoration
- ½ cup Halloween-colored frosting – Purple, green, or orange creates that spooky spiral effect
- Optional toppings: Halloween sprinkles, candy eyeballs, melted chocolate drizzle, or orange and black sanding sugar
Step-by-Step Instructions
Crush the Cookies Into Fine Crumbs
Begin by placing all 36 Oreos—cream filling and all—into your food processor. Pulse the cookies until they transform into fine crumbs that resemble dark sand or coal dust. This texture is crucial for creating a dough that holds together properly.
Don’t have a food processor? No problem! Simply seal the cookies inside a sturdy plastic bag, then use a rolling pin to crush them. This method takes a bit more elbow grease, but it works beautifully. Just make sure those crumbs are nice and fine with no large chunks remaining.
Create Your Cookie Dough
Transfer your cookie crumbs to a large mixing bowl. Add the softened cream cheese and vanilla extract, then stir everything together with a spoon. At first, the mixture will look dry and crumbly, similar to wet sand. However, as you continue mixing, it will start coming together.
Once the ingredients are roughly combined, use clean hands to knead the mixture briefly. The warmth from your hands helps soften the cream cheese, allowing everything to bind together like Play-Doh. Stop kneading as soon as the dough holds its shape—overworking it can make the final product too dense.
Shape and Fill Your Roll
Place your cookie dough between two large sheets of parchment paper. Using a rolling pin, gently roll the dough into a rectangle measuring approximately 10×14 inches and about ¼-inch thick. The parchment paper prevents sticking and makes the rolling process much easier.
Carefully peel away the top sheet of parchment paper. Spread your Halloween-colored frosting evenly across the dough’s surface, leaving about a 1-inch border along the edges. This border prevents the filling from squeezing out when you roll it up. Use an offset spatula or the back of a spoon for smooth, even coverage.
Roll It Into a Log
Here comes the fun part! Starting from one of the short ends, use the bottom parchment paper to help lift and roll the dough jelly-roll style. Tuck the edge under as you go, working slowly and steadily. Don’t worry if you see a few cracks appearing—they actually add to the rustic, spooky charm of this dessert.
Continue rolling until you’ve created a complete log. Gently press the final edge to seal it shut. If any filling oozes out, simply wipe it away with a paper towel.
Chill for Perfect Slicing
Wrap your Oreo roll tightly in the parchment paper, then cover it with aluminum foil for extra protection. Place it in the refrigerator for at least 1 hour to firm up. This chilling time is essential—it helps the roll hold its shape when slicing and allows the flavors to meld together.
If you’re short on time, pop it in the freezer for 20 minutes instead. However, the refrigerator method produces slightly better texture and easier slicing.
Slice and Decorate
Once your roll is properly chilled, unwrap it and place it seam-side down on your serving platter. Using a sharp knife that’s been warmed under hot water (then quickly dried), slice the roll into 1-inch rounds. The warm knife glides through the dough cleanly, creating those beautiful spiral pinwheels.
Wipe your knife clean between each cut for the most professional-looking slices. Arrange the rounds on your platter, then get creative with decorations! Add Halloween sprinkles, press candy eyeballs into the frosting, or drizzle melted chocolate over the top for extra flair.
Serving Suggestions
Halloween Party Platter: Arrange the slices on a black or orange serving tray surrounded by candy corn, gummy worms, and chocolate spiders for a complete spooky dessert display.
Individual Treat Bags: Wrap each slice in cellophane tied with orange and black ribbon for perfect party favors or trick-or-treat alternatives.
Dessert Board Addition: Include these spirals on a larger Halloween dessert board alongside brownies, cookies, and candies for variety.
After-School Surprise: Pack a slice in lunch boxes or serve with cold milk as an after-school treat that kids will absolutely love.
Coffee Shop Style: Serve alongside hot apple cider or pumpkin spice lattes for an adult-friendly Halloween gathering.
Recipe Variations
Double Chocolate Version
Instead of orange-filled Halloween Oreos, use regular chocolate Oreos and fill with chocolate frosting. Add mini chocolate chips to the frosting for extra decadence. This variation appeals to serious chocolate lovers.
Pumpkin Spice Twist
Mix ½ teaspoon of pumpkin pie spice into the cream cheese mixture. Furthermore, use cinnamon cream cheese frosting as the filling for a cozy autumn flavor profile that goes beyond just Halloween.
Peanut Butter Lover’s Roll
Swap the vanilla extract for ½ teaspoon of peanut butter extract and use peanut butter frosting as the filling. Additionally, drizzle melted peanut butter over the finished slices for an extra indulgent touch.
Monster Eye Surprise
Press large candy eyeballs into each slice after cutting, positioning them to look like monster eyes peeking out. This creates an extra spooky presentation that kids find hilarious.
Rainbow Swirl
Use multiple frosting colors striped across the dough before rolling. When sliced, you’ll see a rainbow spiral effect that’s perfect for any celebration beyond Halloween.
Make-Ahead Tips
This Halloween Oreo Roll is a meal prep dream! The assembled, unsliced roll stays fresh in the refrigerator for up to 3 days when tightly wrapped. In fact, the flavors actually improve after a day or two of sitting, as the cream cheese and cookies meld together beautifully.
For longer storage, wrap the unsliced roll in plastic wrap, then place it in a freezer-safe container or bag. It will keep frozen for up to 2 weeks. When you’re ready to serve, transfer it to the refrigerator and let it thaw for about 2 hours before slicing.
If you’ve already sliced your roll, store the individual rounds in an airtight container with parchment paper between layers to prevent sticking. However, I recommend keeping the roll whole until serving time for the freshest texture and easiest storage.
Notes
Embrace the cracks! If your dough cracks while rolling, don’t panic. Once chilled, those cracks become barely noticeable and actually add a rustic, “haunted” charm to your dessert. You can also smooth over any major cracks with a bit of extra frosting.
Cream cheese consistency matters. Make sure your cream cheese is truly softened to room temperature before mixing. Cold cream cheese won’t blend properly with the cookie crumbs, resulting in a lumpy, difficult-to-roll dough.
Frosting thickness is key. If your filling is too thin or runny, it will ooze out during rolling and slicing. Store-bought frosting typically has the perfect consistency, but if you’re making homemade frosting, ensure it’s thick enough to hold its shape.
Temperature control helps. If your kitchen is very warm, the dough may become too soft to handle. Work quickly, and don’t hesitate to pop the dough back in the fridge for 10 minutes if it starts feeling too sticky or warm.
Knife technique. Warming your knife under hot water makes slicing significantly easier. The heat helps the knife glide through the chilled cream cheese without dragging or tearing the delicate dough.
Frequently Asked Questions
Can I use regular Oreos instead of Halloween ones?
Absolutely! Regular Oreos work perfectly well in this recipe. You’ll still get beautiful black and white spirals, though they won’t have that festive orange color. Consider using colored frosting to maintain the Halloween theme.
Why is my dough too crumbly to roll?
This usually means your cream cheese wasn’t soft enough or you need slightly more of it. Try kneading the dough a bit longer to warm it with your hands. If it’s still too dry, add an extra tablespoon of softened cream cheese and knead again.
Can I make this dairy-free?
Yes! Use dairy-free Oreos (the original Oreos are actually vegan) and substitute the cream cheese with a dairy-free cream cheese alternative. Make sure to also use dairy-free frosting for the filling.
How do I prevent the filling from squeezing out?
First, don’t overfill—½ cup is plenty. Second, leave that 1-inch border around the edges when spreading. Finally, roll slowly and gently, without pressing too hard. A well-chilled roll also slices more cleanly with less oozing.
Can kids really help make this?
Definitely! Children love crushing the cookies (especially in the bag method), kneading the dough, and decorating the finished slices. Just supervise the rolling step, as it requires a gentle touch. It’s a fantastic recipe for building confidence in young bakers.
What if I don’t have parchment paper?
You can use wax paper as a substitute for rolling. Alternatively, lightly flour your work surface and rolling pin, though this may slightly alter the color of your finished product.
How many servings does this make?
One roll typically yields about 10-12 slices, depending on how thick you cut them. Each 1-inch slice is a satisfying portion that’s sweet without being overwhelming.
Prep Time: 15 minutes
Chill Time: 1 hour
Total Time: 1 hour 15 minutes
Course: Dessert
Cuisine: American
Servings: 10-12 slices
Keywords: Halloween dessert, no-bake dessert, Oreo recipe, Halloween treats, kid-friendly recipe, party dessert
Nutrition (per slice):
- Calories: 160 kcal
- Sugar: 15g
- Fat: 8g
- Carbohydrates: 20g
- Protein: 2g