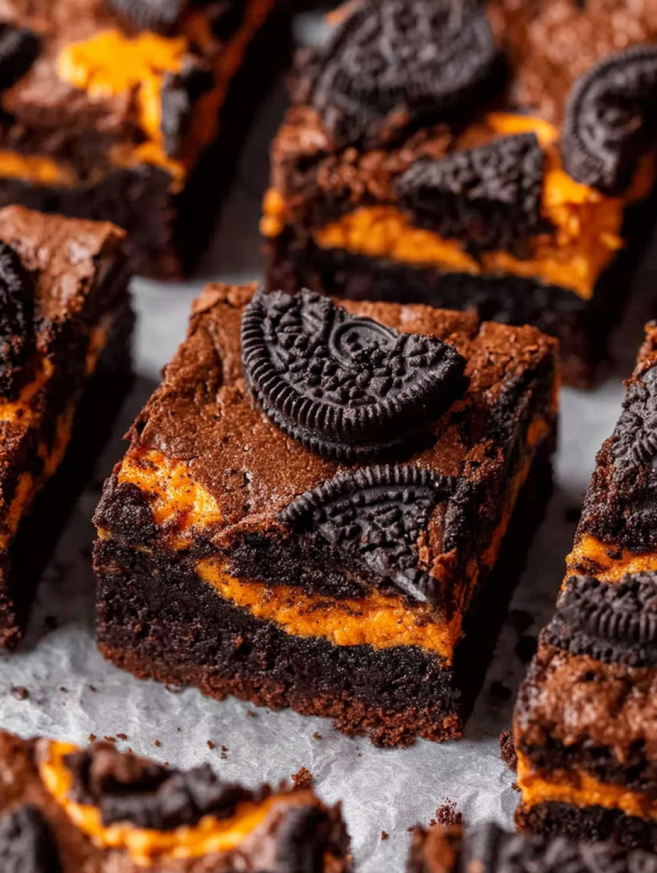
Last Halloween, I made a batch of brownies that looked ordinary on the outside but held a delicious secret inside. When I sliced into them, revealing those perfectly embedded Oreo cookies, my kids gasped with delight. That moment of surprise and joy has made these Halloween Oreo stuffed brownies a non-negotiable part of our October tradition. They’re the kind of treat that looks impressive but comes together surprisingly quickly.
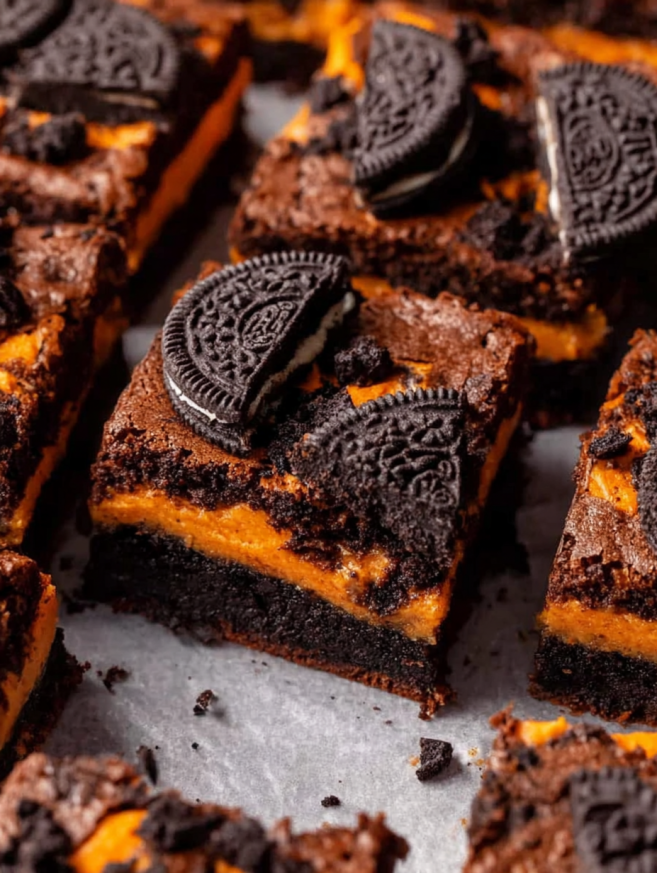
What sets these brownies apart is their incredibly fudgy texture combined with that hidden layer of Oreo cookies running through the center. Every single slice guarantees you’ll hit those chocolate sandwich cookies, creating a perfect balance of dense, rich brownie and crunchy cookie in every bite. The orange-filled Halloween Oreos make them festive, but honestly, any variety of Oreos works beautifully year-round.
Why You’ll Love This Recipe
Guaranteed Oreos in every slice. Unlike brownies where you randomly fold in cookie pieces, this method ensures every person gets that satisfying Oreo layer. No one feels shortchanged, and every slice looks Instagram-worthy when cut.
Ultra-fudgy, not cakey. The combination of melted butter, oil, and minimal flour creates brownies that are dense, moist, and intensely chocolatey. These are for serious chocolate lovers who want that rich, almost truffle-like texture.
Simple pantry ingredients. You don’t need specialty chocolate, fancy cocoa, or unusual ingredients. Everything in this recipe is probably already in your kitchen, making it perfect for last-minute baking.
Kid-friendly and party perfect. Children absolutely love the surprise Oreo layer, making these ideal for Halloween parties, bake sales, or after-school treats. They’re also substantial enough to satisfy adults who appreciate a seriously indulgent dessert.
Easier than you’d think. Despite looking like something from a fancy bakery, these brownies require just one bowl and about 15 minutes of hands-on work. The oven does all the heavy lifting while you move on to other tasks.
Ingredients You’ll Need
For the Fudgy Brownie Batter
- ⅔ cup butter – Unsalted works best for controlling saltiness
- ¼ cup vegetable oil – Adds moisture and creates that fudgy texture
- 1 cup granulated sugar – Sweetens and helps create the crackly top
- ⅓ cup brown sugar – Adds depth and chewiness
- ⅔ cup cocoa powder – Use quality cocoa for the best chocolate flavor
- 2 eggs, cold – Cold eggs help create that shiny brownie top
- 1 tsp vanilla extract – Enhances the chocolate notes
- ½ tsp salt – Balances sweetness and intensifies chocolate
- ½ cup all-purpose flour – Minimal flour keeps them fudgy
For the Oreo Layer
- 15 Oreos – Halloween orange-filled, classic, or any variety you love
- 5 additional Oreos for topping – Crushed for decoration
Step-by-Step Instructions
Prepare Your Baking Pan
Start by preheating your oven to 350°F (175°C). This gives it plenty of time to reach the proper temperature while you prepare the batter. Line an 8×8-inch baking pan with parchment paper, allowing some overhang on two sides. This creates handles that make removing the brownies effortless later.
The parchment paper is crucial—it prevents sticking and allows you to lift out the entire block of brownies for clean, professional-looking cuts.
Create the Chocolate Base
In a large microwave-safe bowl, combine the butter, vegetable oil, granulated sugar, and brown sugar. Microwave in 30-second intervals, stirring thoroughly between each burst, until everything is completely melted and combined.
Once melted, microwave the mixture for an additional full minute. Then stir vigorously—and I mean really stir!—for about 30 seconds. This extra heating and stirring helps dissolve the sugar crystals completely, which contributes to that gorgeous shiny, crackly top that makes brownies so appealing. Using a hand mixer or stand mixer at this stage works even better than whisking by hand.
Add Eggs and Vanilla
Allow the hot mixture to cool for just 2-3 minutes so it doesn’t scramble the eggs. Then add the cold eggs one at a time, whisking thoroughly after each addition. The batter should become thick, glossy, and start to pull away from the sides of the bowl when stirred. This “pulling” quality indicates proper emulsification.
Stir in the vanilla extract until evenly distributed. The mixture should look smooth and shiny at this point, almost like melted chocolate ganache.
Incorporate Dry Ingredients
Add the all-purpose flour, cocoa powder, and salt directly to the wet mixture. Using a rubber spatula or wooden spoon, fold gently just until you no longer see streaks of flour. Be careful not to overmix—stop as soon as the ingredients are combined.
Overmixing develops gluten, which creates cakey rather than fudgy brownies. Those last few flour streaks will incorporate as you transfer the batter to the pan, so don’t worry about achieving absolute uniformity.
Layer the Batter and Oreos
Pour half of your brownie batter into the prepared pan. Use an offset spatula or the back of a spoon to spread it into an even layer that covers the entire bottom. Don’t worry about making it perfectly smooth—close enough works fine.
Arrange your 15 Oreos in the center of the batter in a single layer. You can place them in neat rows (3 rows of 5 cookies works perfectly in an 8×8 pan) or arrange them however they fit best. The important thing is creating one complete layer so every slice will hit multiple cookies.
Carefully pour the remaining brownie batter over the Oreo layer. Spread it gently to cover all the cookies, working from the center outward to avoid shifting the Oreos around too much. Some cookies might peek through slightly—that’s totally fine and actually looks charming.
Add Finishing Touches and Bake
Take your 5 extra Oreos and crush them into various-sized pieces—some fine crumbs, some chunky bits. Sprinkle these crushed cookies evenly over the top of the batter. They’ll bake into the surface, creating an attractive textured appearance that hints at the surprise inside.
Transfer the pan to your preheated oven and bake for 30 minutes. The brownies are done when the edges look set and the center still has a slight jiggle when you gently shake the pan. A toothpick inserted into the brownie portion (not the Oreo layer) should come out with a few moist crumbs but no wet batter.
Remember that brownies continue cooking from residual heat even after leaving the oven, so slightly underbaking is better than overbaking.
Cool Completely Before Cutting
This step requires patience but it’s absolutely essential: allow the brownies to cool completely on a wire rack. This takes at least 2 hours at room temperature, or you can speed it up by refrigerating them for about 1 hour.
Cutting warm brownies results in messy, crumbly pieces that fall apart. However, fully cooled brownies slice cleanly into perfect squares with those beautiful crinkly tops intact. Use the parchment paper overhang to lift the entire block onto a cutting board, then use a sharp knife to cut clean slices.
For the absolute cleanest cuts, wipe your knife with a damp cloth between each slice. This removes chocolate buildup that can drag and tear the brownies.
Serving Suggestions
Classic Presentation: Cut into 16 squares and serve on a platter dusted with powdered sugar. The white powder creates a snowy contrast against the dark chocolate that looks festive and elegant.
À la Mode: Warm a brownie square in the microwave for 10-15 seconds and top with a scoop of vanilla ice cream. The temperature contrast between warm brownie and cold ice cream is absolutely divine.
Brownie Sundae Bar: Set out brownies alongside various ice cream flavors, hot fudge, caramel sauce, whipped cream, and sprinkles. Let guests build their own decadent sundaes with the brownies as the base.
Halloween Party Platter: Arrange the brownies on an orange or black serving plate surrounded by candy corn, chocolate spiders, and gummy worms for a spooky presentation.
Gift Boxes: Wrap individual brownies in cellophane tied with orange and black ribbon for perfect Halloween party favors or thoughtful homemade gifts.
Recipe Variations
Double Stuffed Version
Use Double Stuf Oreos for an even more indulgent cookie layer. The extra cream filling adds richness without changing the baking time or method.
Peanut Butter Twist
Swirl ½ cup of creamy peanut butter into the top layer of brownie batter before baking. Use a knife to create decorative swirls for a peanut butter cup-inspired variation.
Mint Chocolate Delight
Use mint-flavored Oreos and add ½ teaspoon of peppermint extract to the batter. Top with crushed candy canes or Andes mints for a refreshing twist on the classic.
Salted Caramel Addition
Drizzle caramel sauce over the Oreo layer before adding the top batter layer. Finish with a sprinkle of flaky sea salt on top before baking for sweet-and-salty perfection.
Triple Chocolate Overload
Mix ½ cup of chocolate chips into the batter and use chocolate-filled Oreos for the cookie layer. Drizzle melted chocolate over the cooled brownies for maximum chocolate intensity.
Make-Ahead Tips
These brownies are actually better the day after baking, making them perfect for advance preparation. Once completely cooled, store them in an airtight container at room temperature for up to 4 days. The flavors deepen and the texture becomes even more fudgy as they sit.
For longer storage, wrap individual brownies tightly in plastic wrap, then place them in a freezer-safe container or bag. They’ll keep frozen for up to 3 months. Thaw at room temperature for about an hour, or microwave for 15-20 seconds for a warm, fresh-baked taste.
You can also freeze the entire uncut block wrapped tightly in plastic wrap and aluminum foil. This protects against freezer burn and makes thawing easier when you want to serve the whole batch at once.
If making these for a party or event, bake them 1-2 days ahead and store at room temperature. Cut them just a few hours before serving to maintain those sharp, clean edges and beautiful presentation.
Notes
Cold eggs are important. Room temperature eggs are usually preferred in baking, but cold eggs in this recipe help create that signature shiny, crackly brownie top. Don’t skip this detail!
Don’t overbake. Fudgy brownies should look slightly underdone when you remove them from the oven. They’ll continue setting as they cool. Overbaking creates dry, cakey brownies instead of moist, fudgy ones.
Quality cocoa matters. While you don’t need expensive Dutch-process cocoa, avoid the absolute cheapest brands. Mid-range cocoa powder provides much better chocolate flavor without breaking the bank.
Pan size is crucial. Using a larger pan will result in thinner brownies that bake faster and may turn out dry. An 8×8-inch pan is ideal for this recipe’s quantities.
The vigorous stirring isn’t optional. That extra minute of heating followed by aggressive stirring really does impact the final texture. It dissolves sugar crystals and creates the right consistency for optimal results.
Patience with cooling pays off. I know it’s tempting to cut into warm brownies, but waiting ensures perfect slices. If you absolutely can’t wait, refrigerating speeds up the process significantly.
Frequently Asked Questions
Can I use a different size pan?
Yes, but you’ll need to adjust baking time. A 9×9-inch pan will yield thinner brownies that bake in about 25 minutes. A 9×13-inch pan creates very thin brownies that only need 20-22 minutes. Always check for doneness rather than relying solely on time.
Why do my brownies turn out cakey instead of fudgy?
This usually indicates overbaking or using too much flour. Make sure you’re measuring flour correctly (spoon and level rather than scooping). Additionally, remove brownies from the oven when they still look slightly underdone in the center.
Can I make these gluten-free?
Yes! Substitute a 1-to-1 gluten-free flour blend for the all-purpose flour. The small amount of flour in this recipe makes it particularly successful for gluten-free baking. The texture may be very slightly different but still delicious.
What if I don’t have vegetable oil?
You can replace the vegetable oil with melted coconut oil, canola oil, or even additional melted butter. Each option works well, though butter will create a slightly richer flavor.
Can I use egg substitutes?
Flax eggs (1 tablespoon ground flaxseed mixed with 3 tablespoons water per egg, left to gel for 5 minutes) work reasonably well here. The texture will be slightly different and you won’t get the same shiny top, but they’ll still taste great.
How do I know when they’re done?
The edges should look set and slightly pull away from the pan. The center should have a slight jiggle when gently shaken. A toothpick inserted into the brownie part (avoiding the Oreos) should come out with moist crumbs, not wet batter.
Can I add other mix-ins?
Absolutely! While the Oreo layer is the star, you can fold ½ cup of chocolate chips, chopped nuts, or toffee bits into the batter for additional texture and flavor.
Prep Time: 15 minutes
Bake Time: 30 minutes
Cooling Time: 2 hours
Total Time: 2 hours 45 minutes
Course: Dessert
Cuisine: American
Servings: 16 brownies
Keywords: Oreo brownies, stuffed brownies, Halloween brownies, fudgy brownies, chocolate brownies
Nutrition (per brownie):
- Calories: 245 kcal
- Carbohydrates: 32g
- Protein: 3g
- Fat: 13g
- Saturated Fat: 6g
- Cholesterol: 40mg
- Sodium: 140mg
- Potassium: 95mg
- Fiber: 2g
- Sugar: 23g
- Vitamin A: 250 IU
- Calcium: 25mg
- Iron: 2mg