Total Time: 1 hour 12 minutes | Yield: 40 cookies | Diet: Vegetarian
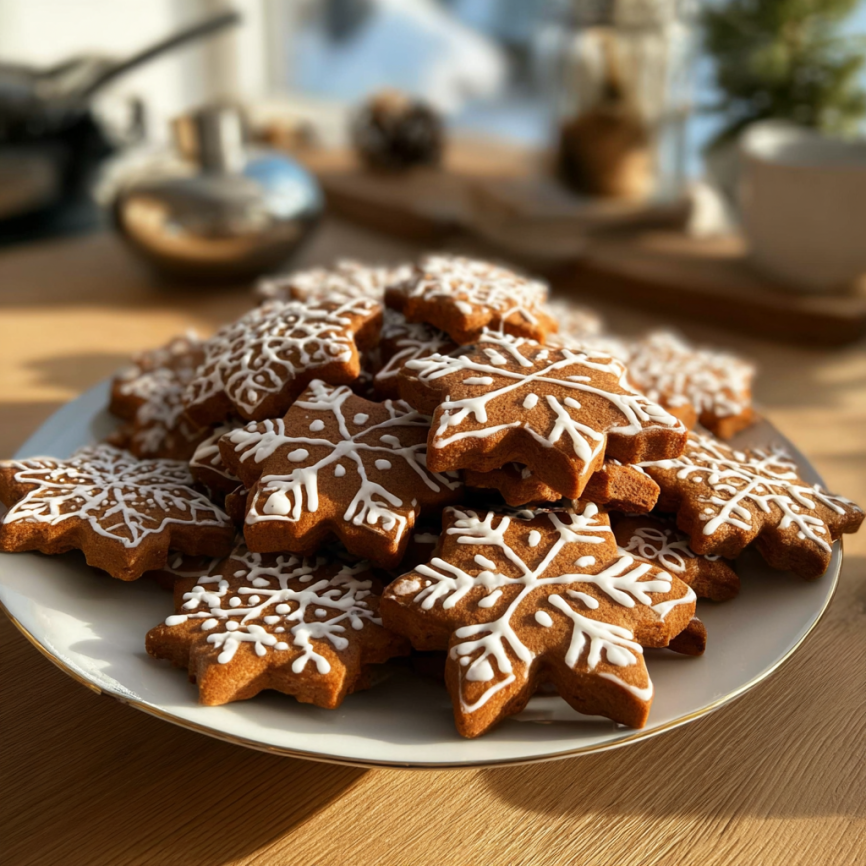
The first time I smelled gingerbread baking in my grandmother’s kitchen, I was seven years old and completely mesmerized by the warm, spicy aroma that seemed to wrap around me like a cozy blanket. Babcia would stand at her worn wooden counter, rolling out golden dough with practiced hands, while I watched in wonder as simple ingredients transformed into the most magical cookies I’d ever tasted. Years later, I still make these same Polish-style gingerbread cookies every December, and they never fail to transport me back to that enchanted kitchen.
These aren’t your typical crispy gingerbread cookies – they’re soft, chewy, and deeply spiced with a complex flavor that develops beautifully over time. The secret lies in the generous amount of honey, which creates moisture and adds a floral sweetness that perfectly balances the warming spices. What makes this recipe truly special is how it brings families together, turning an ordinary afternoon into a cherished memory-making session filled with laughter, flour-dusted counters, and the irresistible scent of Christmas magic.
5 Reasons to Love These Gingerbread Cookies
1. Perfect Texture Balance
Unlike many gingerbread recipes that produce either tough or overly soft cookies, this Polish version achieves the ideal balance between tender and chewy. The honey creates moisture that keeps the cookies soft days after baking, while the proper flour ratio ensures they hold their shape during cutting and baking.
2. Deep, Complex Spice Profile
Traditional gingerbread spice blend creates layers of flavor that unfold with each bite. The warmth of cinnamon, the kick of ginger, and the subtle sweetness of cloves work together harmoniously. Additionally, the honey enhances these spices naturally, creating a more sophisticated flavor than sugar alone could achieve.
3. Family-Friendly Activity
Cookie cutting and decorating becomes a beloved family tradition that creates lasting memories. Children love using various shaped cutters, while adults appreciate the meditative quality of rolling dough and the satisfaction of creating something beautiful with their hands.
4. Excellent for Decorating
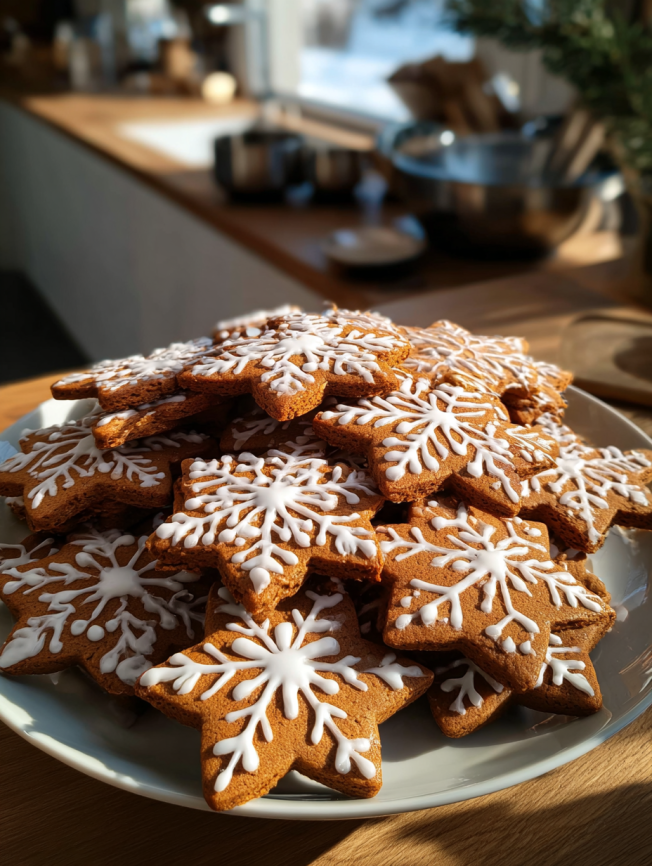
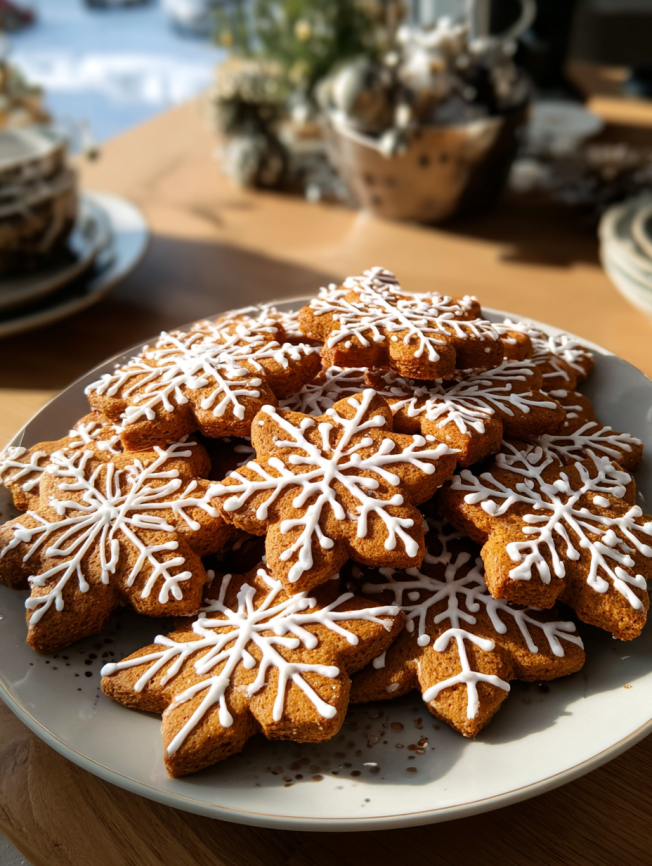
The smooth, even surface of these cookies provides the perfect canvas for royal icing, simple glazes, or creative decorations. Furthermore, they maintain their shape exceptionally well during baking, ensuring your carefully cut stars and hearts emerge from the oven looking exactly as intended.
5. Long-Lasting Freshness
These cookies actually improve with age, developing deeper flavors over the first few days after baking. Stored properly, they maintain their soft texture for up to two weeks, making them perfect for holiday gift-giving or preparing ahead for celebrations.
Ingredients
Essential Components
- 500g wheat flour (all-purpose works perfectly)
- 200g honey (preferably wildflower or clover honey)
- 100g granulated sugar
- 100g unsalted butter
- 2 large eggs, room temperature
- 2 tablespoons gingerbread spice blend
- 1 teaspoon baking soda
- A pinch of salt
Gingerbread Spice Blend (if making your own)
- 2 teaspoons ground ginger
- 2 teaspoons ground cinnamon
- 1/2 teaspoon ground cloves
- 1/2 teaspoon ground nutmeg
- 1/4 teaspoon ground allspice
Decorating Supplies
- Royal icing ingredients (powdered sugar, egg whites, lemon juice)
- Food coloring for tinting icing
- Sprinkles, mini chocolate chips, or candies
- Edible glitter for special occasions
Step-by-Step Instructions
Magical Step 1: Create the Dry Foundation
- Combine all dry ingredients in a large mixing bowl, whisking together flour, gingerbread spice, baking soda, and salt. This preliminary mixing ensures even spice distribution throughout your dough, preventing any cookies from being under-seasoned or overpowering.
Magical Step 2: Melt the Golden Trio
- Melt butter with honey and sugar in a medium saucepan over low heat, stirring constantly until the mixture becomes smooth and fragrant. The gentle heating process allows the flavors to meld beautifully while preventing the honey from burning or crystallizing.
- Allow the mixture to cool slightly for about 5 minutes before proceeding. This cooling period prevents the hot mixture from cooking the eggs when combined.
Magical Step 3: Unite Wet and Dry Elements
- Add eggs to the honey mixture one at a time, whisking vigorously after each addition until fully incorporated. The eggs should blend seamlessly into the mixture without creating lumps or cooking from residual heat.
- Pour wet ingredients into dry ingredients gradually, mixing with a wooden spoon initially, then transitioning to hand kneading as the dough comes together. The dough should feel slightly sticky but manageable.
Magical Step 4: The Patience of Chilling
- Wrap the dough in plastic wrap and refrigerate for exactly 1 hour. This chilling period is crucial for developing flavors and making the dough easier to roll. Additionally, it prevents the cookies from spreading too much during baking.
Magical Step 5: Shape and Bake
- Roll out the chilled dough on a lightly floured surface to 5mm thickness, working in sections to maintain the proper temperature. Use gentle, even pressure to achieve consistent thickness across the entire surface.
- Cut into desired shapes using cookie cutters, placing them on parchment-lined baking sheets with 2cm spacing between each cookie.
- Bake at 180°C (350°F) for 10-12 minutes until the edges are lightly golden but centers still appear slightly soft. They will continue cooking on the hot pan after removal.
- Cool completely on the baking sheet for 5 minutes before transferring to wire racks. This prevents breaking while ensuring proper texture development.
Serving Suggestions
Traditional Presentation
These cookies shine when arranged on festive plates or tiered stands, showcasing their beautiful shapes and decorations. For holiday gatherings, create a cookie decorating station where guests can personalize their treats with various icings and toppings.
Creative Serving Ideas
Transform these cookies into edible gifts by packaging them in clear cellophane bags tied with ribbon. Create cookie sandwiches by spreading cream cheese frosting between two cookies, or crumble them over ice cream for a spiced dessert topping.
Recipe Variations
Flavor Adaptations
Chocolate Gingerbread: Add 50g of cocoa powder to the dry ingredients and reduce flour by the same amount for rich, chocolatey cookies with warm spice undertones.
Citrus Gingerbread: Incorporate the zest of one orange and one lemon into the dough for a bright, festive twist that pairs beautifully with the traditional spices.
Nutty Gingerbread: Fold in 100g of finely chopped walnuts or pecans during the final mixing stage for added texture and richness.
Texture Modifications
Extra Soft Version: Replace 50g of flour with cornstarch for an incredibly tender texture that melts in your mouth.
Crispier Cookies: Roll the dough slightly thinner (3mm) and bake for an additional 2-3 minutes for cookies with more snap and longer shelf life.
Dietary Adaptations
Vegan Version: Replace butter with vegan margarine and eggs with flax eggs (2 tablespoons ground flaxseed mixed with 6 tablespoons water).
Gluten-Free Alternative: Substitute with a 1:1 gluten-free flour blend, adding an extra 1/4 teaspoon xanthan gum if not included in the blend.
Make-Ahead Tips
Dough Preparation
The cookie dough can be made up to three days ahead and stored in the refrigerator, wrapped tightly in plastic wrap. For longer storage, freeze the dough for up to three months, thawing overnight in the refrigerator before rolling.
Baking Schedule
Bake cookies up to one week before serving, storing them in airtight containers at room temperature. Layer between parchment paper to prevent sticking, and avoid refrigerating baked cookies as this can make them soggy.
Decoration Timeline
If decorating with royal icing, complete the base cookies first and allow them to cool completely. Apply decorations 1-2 days before serving to allow icing to set properly while maintaining the cookies’ texture.
Notes
Honey Selection Impact
The type of honey you choose significantly affects the final flavor profile. Wildflower honey provides complexity, while clover honey offers mild sweetness. Darker honeys like buckwheat create more robust, molasses-like flavors that some prefer for gingerbread.
Dough Consistency Guidelines
Perfect gingerbread dough should feel slightly sticky when first mixed but become more manageable after chilling. If your dough seems too dry, add water one teaspoon at a time. Conversely, if it’s too sticky to roll, incorporate small amounts of flour gradually.
Baking Success Tips
Parchment paper is essential for preventing sticking and ensuring even browning. Additionally, rotating your baking sheets halfway through baking promotes uniform color and texture across all cookies.
Frequently Asked Questions
Q: Can I make the dough ahead and freeze it? A: Absolutely! Wrap the dough tightly in plastic wrap, then place in a freezer bag. It keeps for up to 3 months. Thaw overnight in the refrigerator and let it come to room temperature before rolling.
Q: Why are my cookies spreading too much during baking? A: This usually indicates the dough wasn’t chilled long enough or your kitchen is too warm. Ensure the dough is properly chilled, and consider refrigerating cut cookies for 15 minutes before baking if your kitchen is very warm.
Q: Can I substitute the honey with something else? A: While honey provides unique flavor and texture, you can substitute with maple syrup or golden syrup. However, the cookies will have a slightly different taste and may be less moist.
Q: How do I prevent my cookies from becoming too hard? A: Don’t overbake them – they should still look slightly soft in the center when you remove them from the oven. Also, store them with a slice of bread in the container to maintain moisture.
Q: What’s the best way to get clean cuts with cookie cutters? A: Dip your cookie cutters in flour between cuts to prevent sticking. Additionally, use a straight up-and-down motion rather than twisting, which can seal the edges and prevent proper rising.
Q: Can I double this recipe? A: Yes, but mix in two separate bowls rather than trying to double everything in one bowl. Large batches can be difficult to mix evenly, potentially resulting in inconsistent cookies.
Prep Time: 1 hour | Cook Time: 12 minutes | Category: Dessert | Method: Baking | Cuisine: Polish
Nutrition (per cookie):
- Serving Size: 1 cookie
- Calories: 100
- Sugar: 8g
- Sodium: 50mg
- Fat: 4g
- Saturated Fat: 2g
- Unsaturated Fat: 2g
- Trans Fat: 0g
- Carbohydrates: 15g
- Fiber: 1g
- Protein: 2g
- Cholesterol: 15mg