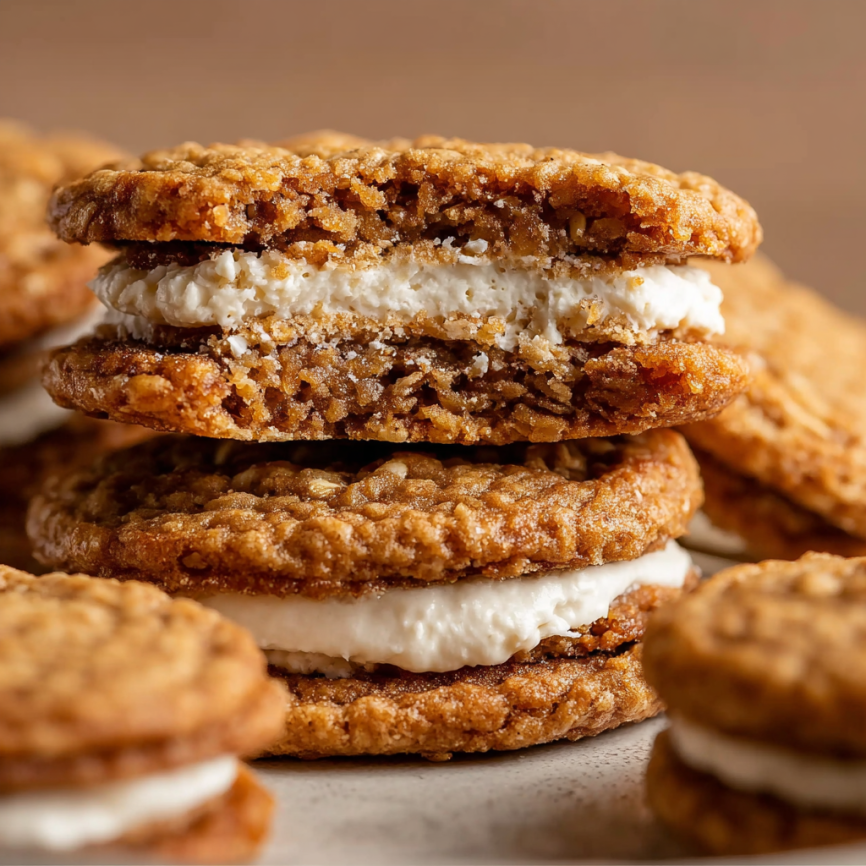
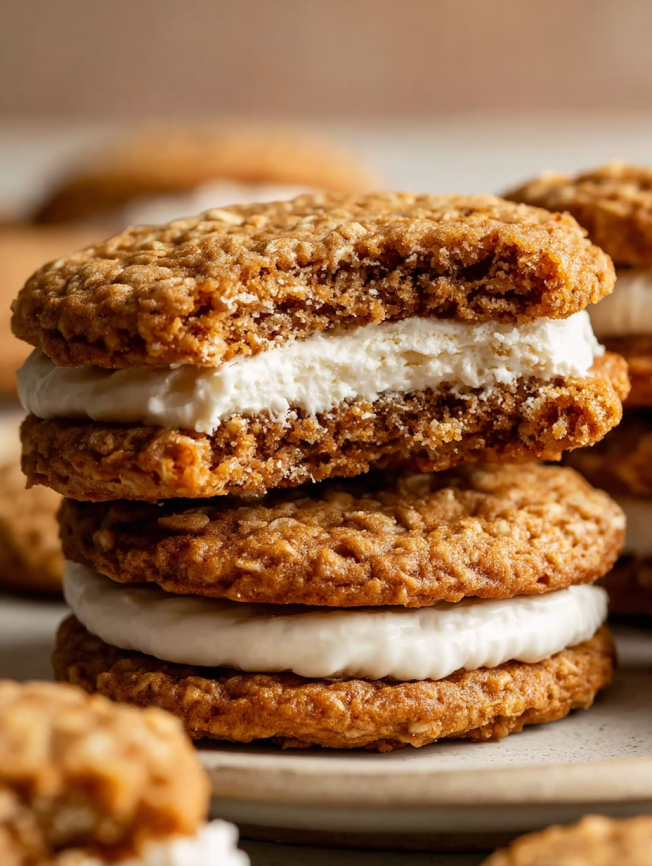
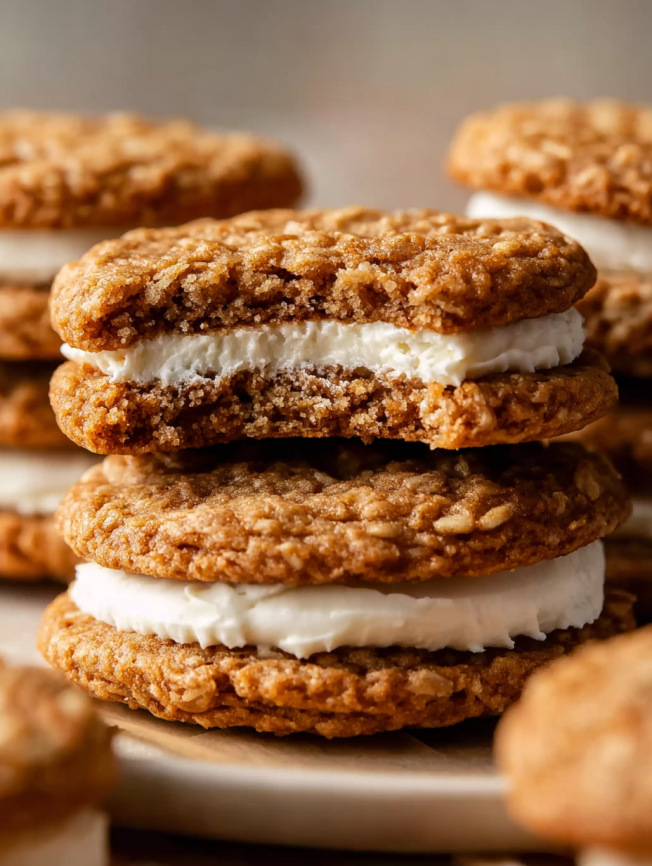
Growing up, finding an oatmeal cream pie in my lunchbox was like discovering buried treasure. Those soft, pillowy cookies sandwiching sweet vanilla cream represented pure childhood bliss. Now, as an adult with access to real butter, quality vanilla, and fresh spices, I’ve recreated this beloved treat with a homemade twist that surpasses any store-bought version. These cookies capture all the nostalgic comfort of the original while delivering superior flavor and texture that will transport you straight back to your school cafeteria days—but in the very best way possible.
Prep Time: 30 minutes | Cook Time: 10 minutes | Total Time: 1 hour, 30 minutes | Yield: 15 cookie sandwiches
Why These Homemade Versions Win Every Time
Superior Ingredients Make All the Difference
Unlike mass-produced versions filled with preservatives and artificial flavors, these oatmeal cream pies showcase real butter, pure vanilla extract, and warm spices. The difference is immediately apparent in both taste and texture—these cookies are tender, flavorful, and satisfying in a way that processed alternatives simply cannot match.
No-Chill Convenience
Many cookie recipes require chilling time that can derail spontaneous baking plans. However, this dough comes together quickly and bakes immediately, making it perfect for last-minute treats or when you’re craving something homemade without the wait.
Perfectly Balanced Sweetness
The combination of brown sugar, granulated sugar, and a touch of molasses creates complex sweetness that complements the hearty oats. Meanwhile, the cream filling provides just enough sweetness without being overwhelming—a common issue with commercial versions.
Ideal Make-Ahead Treat
These cookies actually improve over time as the filling softens the cookies slightly, creating the perfect chewy texture. This makes them excellent for meal prep, packed lunches, or preparing ahead for gatherings.
Essential Ingredients
For the Oatmeal Cookies
- 1¼ cups (20 Tbsp; 282g) unsalted butter, softened to room temperature
- 1 cup (200g) packed dark brown sugar
- ½ cup (100g) granulated sugar
- 1 large egg, at room temperature
- 2 teaspoons pure vanilla extract
- 1 tablespoon (15ml) unsulphured or dark molasses (avoid blackstrap)
- 1⅔ cups (209g) all-purpose flour, spooned and leveled
- 1 teaspoon baking soda
- ½ teaspoon salt
- ¾ teaspoon ground cinnamon
- ¼ teaspoon ground cloves
- 3 cups (255g) quick oats (not whole oats)
For the Cream Filling
- ¾ cup (12 Tbsp; 170g) unsalted butter, softened to room temperature
- 3 cups (360g) confectioners’ sugar
- 3 tablespoons (45ml) heavy cream, at room temperature
- 1½ teaspoons pure vanilla extract
- Salt, to taste
Step-by-Step Instructions
Preparing Your Workspace
Preheat your oven to 375°F (191°C) and line your baking sheets with parchment paper or silicone baking mats. This preparation ensures even baking and easy cookie removal.
Creating the Cookie Base
Using a large bowl and either a hand mixer or stand mixer fitted with paddle attachment, beat together the softened butter, brown sugar, and granulated sugar on medium-high speed. Continue mixing for about 3 minutes until the mixture becomes light and creamy, scraping down the bowl sides as needed for even incorporation.
Add the room-temperature egg, vanilla extract, and molasses to the creamed mixture. Beat on high speed for approximately 1 minute until everything is well combined. Don’t forget to scrape down the sides and bottom of the bowl to ensure uniform mixing.
Combining Dry Ingredients
In a separate medium bowl, whisk together the flour, baking soda, salt, cinnamon, cloves, and quick oats until evenly distributed. This step prevents pockets of spices or leavening agents in your finished cookies.
Bringing the Dough Together
With your mixer running on low speed, gradually add the dry ingredient mixture to the wet ingredients. The resulting dough will be quite thick and notably sticky—this is exactly what you want for soft, chewy cookies. You may need to finish mixing by hand once the mixer becomes difficult to use.
Shaping and Baking
Scoop the dough using about 2 heaping tablespoons per cookie (approximately 45g if using a scale). Space these portions 3 inches apart on your prepared baking sheets, fitting about 6 cookies per sheet to allow for spreading.
Bake for 10-13 minutes, watching for very light golden edges while the centers remain soft and underbaked-looking. This ensures the perfect chewy texture once cooled.
Allow cookies to rest on the baking sheet for 10 minutes before transferring to cooling racks. This resting period prevents breakage while the cookies are still fragile from the heat.
Crafting the Cream Filling
While your cookies cool completely, prepare the filling using a large bowl and your mixer. Beat the softened butter on high speed for about 1 minute until it becomes light and creamy.
Add the confectioners’ sugar and beat on medium speed for 1-2 minutes to incorporate without creating sugar clouds. Pour in the heavy cream and vanilla extract, then beat on high speed for 2-3 minutes until the filling becomes fluffy and smooth.
Taste your filling and add a pinch or two of salt if it seems too sweet. Should the consistency be too thick, add another tablespoon of room-temperature heavy cream and beat until smooth.
Final Assembly
Spread approximately 1.5 tablespoons of cream filling on the flat (bottom) side of half your cooled cookies. Top with the remaining cookies, placing them right-side up to create perfect sandwich cookies.
Serving Suggestions
Presentation Ideas
Arrange these cream pies on a vintage cake stand for a nostalgic display, or wrap individually in cellophane for portable treats. The rustic, homemade appearance adds charm to any dessert table.
Perfect Pairings
These cookies pair beautifully with cold milk, hot coffee, or afternoon tea. For special occasions, consider serving alongside vanilla ice cream for an indulgent dessert experience.
Creative Variations
Chocolate Oatmeal Version
Replace ¼ cup of flour with unsweetened cocoa powder for chocolate oatmeal cookies that taste like childhood breakfast cereal in cookie form.
Maple Cream Filling
Substitute 2 tablespoons of the heavy cream with pure maple syrup for a filling that tastes like autumn mornings.
Spiced Holiday Edition
Double the cinnamon and add ¼ teaspoon each of nutmeg and ginger for cookies that capture the essence of holiday spice blends.
Make-Ahead Tips
Dough Storage
Cookie dough can be prepared and refrigerated for up to 3 days when tightly covered. Note that cookies won’t spread as much after chilling since the oats absorb moisture, but the flavor develops beautifully.
Freezing Options
Both unbaked dough balls and baked (unfilled) cookies freeze excellently for up to 3 months. Frozen dough balls can bake directly from the freezer with just an extra minute or two added to the baking time.
Assembly Strategy
For best results, assemble the cream pies within a day of serving. However, the filling can be prepared up to a week ahead and stored in the refrigerator until needed.
Important Notes
Oat Selection Matters
Quick oats are essential for proper texture and moisture absorption. If you only have old-fashioned oats, pulse them about 10 times in a food processor before using to achieve the correct consistency.
Molasses Guidelines
Use unsulphured or dark molasses rather than blackstrap, which can be overwhelmingly bitter. The molasses adds depth and helps create the characteristic chewy texture.
Storage Considerations
Store finished cream pies covered at room temperature for up to 2 days, or refrigerate for up to 5 days. The cookies actually improve after a day as the filling softens them slightly.
Frequently Asked Questions
Can I use light brown sugar instead of dark?
Absolutely! Light brown sugar works perfectly with no other changes needed. Dark brown sugar simply provides a slightly deeper molasses flavor.
Why are my cookies spreading too much?
Ensure your butter is properly softened (not melted) and that you’re using the correct type of oats. Over-mixing can also cause excessive spreading.
How do I know when the cookies are done?
Look for very lightly golden edges while the centers still appear soft and slightly underbaked. They’ll continue cooking on the hot pan after removal from the oven.
Can I make these gluten-free?
While I haven’t tested this variation, a 1:1 gluten-free flour blend should work as a substitute. The texture may be slightly different but should still be delicious.
What’s the best way to store leftover filling?
Unused cream filling keeps well in the refrigerator for up to a week. Let it come to room temperature and give it a quick whip before using.
Why is my filling too thick or thin?
Filling consistency depends on room temperature ingredients and proper butter creaming. If too thick, add cream one tablespoon at a time. If too thin, add more confectioners’ sugar gradually.
Can I double this recipe?
Yes, this recipe doubles beautifully for larger batches. Just ensure you have adequate oven space and cooling racks to handle the increased quantity.


