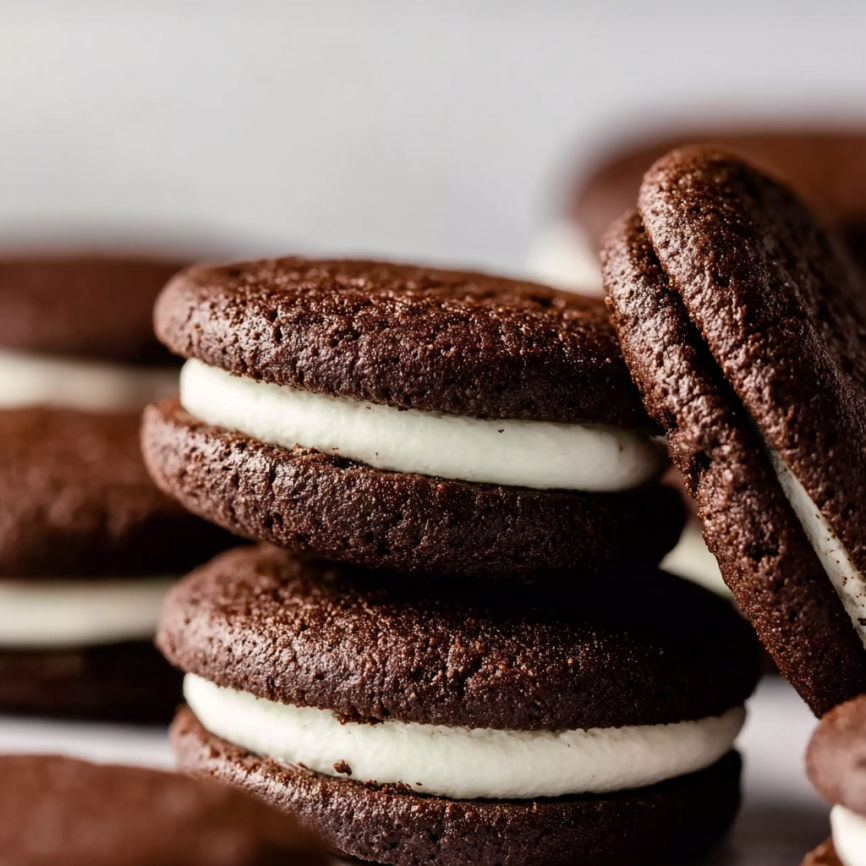
Standing in my kitchen at 2 AM, covered in cocoa powder and utterly determined to recreate childhood’s most iconic cookie, I experienced what can only be described as a baking epiphany. After countless attempts to perfect the balance between rich chocolate cookies and creamy filling, I discovered that homemade Oreos aren’t just possible – they’re infinitely better than their store-bought counterparts. The moment I bit into that first perfectly assembled sandwich cookie, with its tender-crisp texture and luxurious cream center, I knew I’d never look at packaged cookies the same way again.
This recipe represents years of refinement, resulting in sandwich cookies that capture the essence of the beloved original while offering superior flavor and texture. Unlike mass-produced versions, these homemade treats feature real vanilla, premium cocoa, and a filling you can actually pronounce every ingredient in.
Why These Homemade Oreos Will Transform Your Cookie Game
Creating Oreos from scratch provides complete control over ingredients, sweetness levels, and texture preferences. Furthermore, the satisfaction of assembling these iconic sandwich cookies in your own kitchen creates memories that store-bought packages simply cannot match.
Superior Ingredient Quality Real butter replaces hydrogenated oils, while pure vanilla extract and premium Dutch-process cocoa deliver flavor depth impossible to achieve with artificial alternatives. Additionally, you control the sugar content, allowing customization for different taste preferences.
Texture Perfection Homemade versions achieve the ideal balance between crispy exterior and tender interior that commercial cookies often lack. Moreover, the cream filling strikes the perfect consistency – thick enough to stay put yet smooth enough to bite through cleanly.
Customization Freedom Experiment with different flavors, from mint cream to orange filling, creating unique variations impossible to find in stores. Besides flavor modifications, you can adjust cookie thickness, filling quantity, and even create seasonal themed versions.
Essential Ingredients for Cookie Excellence
Chocolate Cookie Base
- 1¼ cups (156g) all-purpose flour, spooned and leveled
- ½ cup (41g) unsweetened Dutch-process cocoa powder
- 1 teaspoon baking soda
- ⅛ teaspoon salt
- ½ cup (113g) unsalted butter, softened to room temperature
- ¾ cup (150g) granulated sugar
- ¼ cup (50g) packed light brown sugar
- 1 large egg, at room temperature
- 1 teaspoon pure vanilla extract
Classic Cream Filling
- ¼ cup (56g) unsalted butter, softened to room temperature
- ¼ cup (48g) vegetable shortening, room temperature
- 1¾ cups (210g) confectioners’ sugar
- 1 teaspoon pure vanilla extract
Cocoa Powder Selection: Dutch-process cocoa provides the darkest color and most authentic Oreo flavor. Natural cocoa creates puffier, lighter-colored cookies that, while delicious, don’t replicate the classic appearance.
Step-by-Step Cookie Creation
Preparing the Cookie Dough
Begin by whisking flour, cocoa powder, baking soda, and salt in a large bowl, ensuring even distribution of leavening agents. In a separate bowl, cream butter with both sugars using an electric mixer until light and fluffy, approximately 3 minutes of beating on medium-high speed.
Add the egg and vanilla extract to the butter mixture, beating until fully incorporated. Gradually combine the dry ingredients with the wet mixture, mixing on low speed until a thick, cohesive dough forms. Avoid overmixing, which can result in tough cookies.
Shaping and Chilling
Line baking sheets with parchment paper or silicone mats for easy cookie removal. Using a small cookie scoop or measuring spoon, portion dough into 2-teaspoon balls (approximately 13-15g each). This sizing ensures uniform cookies that bake evenly.
Critical Flattening Technique Place dough balls on prepared baking sheets, then flatten each using the bottom of a measuring cup or drinking glass until they reach approximately 1.5 inches in diameter. Consistency matters more than perfection – slight variations add homemade charm.
Refrigerate the shaped cookies for exactly 10 minutes. This brief chilling prevents excessive spreading while maintaining the desired texture. Meanwhile, preheat your oven to 350°F (177°C).
Baking to Perfection
Space chilled cookies 3 inches apart on baking sheets, accommodating their expansion during baking. Bake for 8-10 minutes, watching for set edges and slightly cracked tops – the cookies will appear underdone but continue cooking on the hot pan.
Allow cookies to cool on baking sheets for 5 minutes before transferring to wire racks. This resting period prevents breakage while ensuring proper texture development.
Creating the Signature Cream Filling
Achieving Optimal Consistency
Beat softened butter and shortening together until completely smooth and creamy, approximately 2 minutes on high speed. The combination of butter and shortening creates filling that’s both flavorful and structurally sound, closely mimicking commercial versions.
Gradually add confectioners’ sugar and vanilla extract, beginning on low speed to prevent sugar clouds, then increasing to high speed for 1-2 minutes until the mixture becomes thick and pipeable.
Assembly Strategies
Spread or pipe filling onto the flat bottom of half your cookies. Using a piping bag with a #12 tip creates professional-looking results, though simple spreading with a knife works perfectly well. Top with remaining cookies, pressing gently to create secure sandwiches without squishing out the filling.
Creative Serving and Presentation Ideas
Elegant Displays
Arrange assembled cookies on tiered stands for special occasions, or package individually in clear bags tied with ribbons for gift-giving. The classic black and white appearance makes these cookies suitable for both casual gatherings and formal events.
Flavor Pairings
Serve alongside cold milk, coffee, or hot chocolate for traditional enjoyment. However, these cookies also complement wine pairings – try them with port or dessert wines for sophisticated after-dinner treats.
Creative Applications
Crush homemade Oreos for pie crusts, ice cream mix-ins, or cheesecake toppings. Their superior flavor elevates any recipe calling for cookie crumbs beyond what commercial versions can achieve.
Exciting Flavor Variations
Mint Chocolate Delight
Transform the classic filling by adding ¼ teaspoon peppermint extract and 2 drops of green food coloring to create refreshing mint cream cookies perfect for holidays or summer entertaining.
Seasonal Specialties
Orange extract and orange zest create autumn-themed cookies, while almond extract produces sophisticated adult flavors. Consider adding espresso powder to the cookie dough for mocha variations.
Decorative Options
Dip assembled cookies in melted chocolate, roll edges in sprinkles, or drizzle with contrasting chocolate for bakery-worthy presentations that impress guests and family alike.
Make-Ahead and Storage Solutions
Component Preparation
Cream filling can be prepared 2-3 days in advance when stored covered in the refrigerator. Bring to room temperature before assembly for optimal spreading consistency. This advance preparation streamlines cookie assembly during busy periods.
Proper Storage Methods
Store assembled cookies in airtight containers at room temperature for up to one week, maintaining optimal texture and flavor. Layer cookies between parchment paper to prevent sticking and preserve appearance.
Freezing Guidelines
Completed sandwich cookies freeze excellently for up to 3 months when properly wrapped. Thaw overnight in the refrigerator, then bring to room temperature before serving. However, avoid freezing cookie dough, as it doesn’t flatten properly after thawing.
Essential Technical Notes
Butter and Shortening Combination
The filling’s half-butter, half-shortening composition creates authentic texture and stability while providing rich flavor. Substituting all butter produces softer filling that may not hold its shape as well, though it remains delicious.
Temperature Considerations
Room temperature ingredients cream together more effectively, creating smoother textures in both dough and filling. Plan ahead to remove butter and eggs from refrigeration 1-2 hours before baking.
Dutch-Process Cocoa Benefits
This specially treated cocoa provides deeper color and more neutral pH, resulting in cookies that taste and look more like commercial Oreos. Natural cocoa produces lighter, puffier cookies with different flavor profiles.
Frequently Asked Questions
Can I make these cookies without vegetable shortening in the filling? Yes, you can substitute with additional butter (use 8 tablespoons total), but the texture will be softer and less stable than the traditional combination. The filling may also taste richer and less like store-bought versions.
Why do my cookies spread too much during baking? Excessive spreading usually results from warm dough or insufficient chilling time. Ensure your dough balls are properly chilled for 10 minutes, and verify your oven temperature with a thermometer, as too-low temperatures can cause spreading.
How can I make my cookies darker like store-bought Oreos? Use Dutch-process cocoa powder, which creates darker color than natural cocoa. Some bakers add a small amount of black cocoa powder for even deeper color, though this specialty ingredient isn’t necessary for delicious results.
Can I double this recipe for larger batches? Absolutely! This recipe doubles successfully, though you may need to bake in multiple batches depending on your oven capacity. Keep unbaked dough balls refrigerated while previous batches bake to maintain proper consistency.
What’s the best way to achieve uniform cookie sizes? Use a small cookie scoop or measuring spoon to portion dough consistently. Weighing portions (13-15g each) provides the most accurate results, though measuring by volume works well for home bakers.
How do I prevent my cream filling from being too sweet? Add a pinch of salt to the filling mixture to balance sweetness, or reduce confectioners’ sugar slightly. The butter-shortening combination already helps temper sweetness compared to all-butter fillings.


