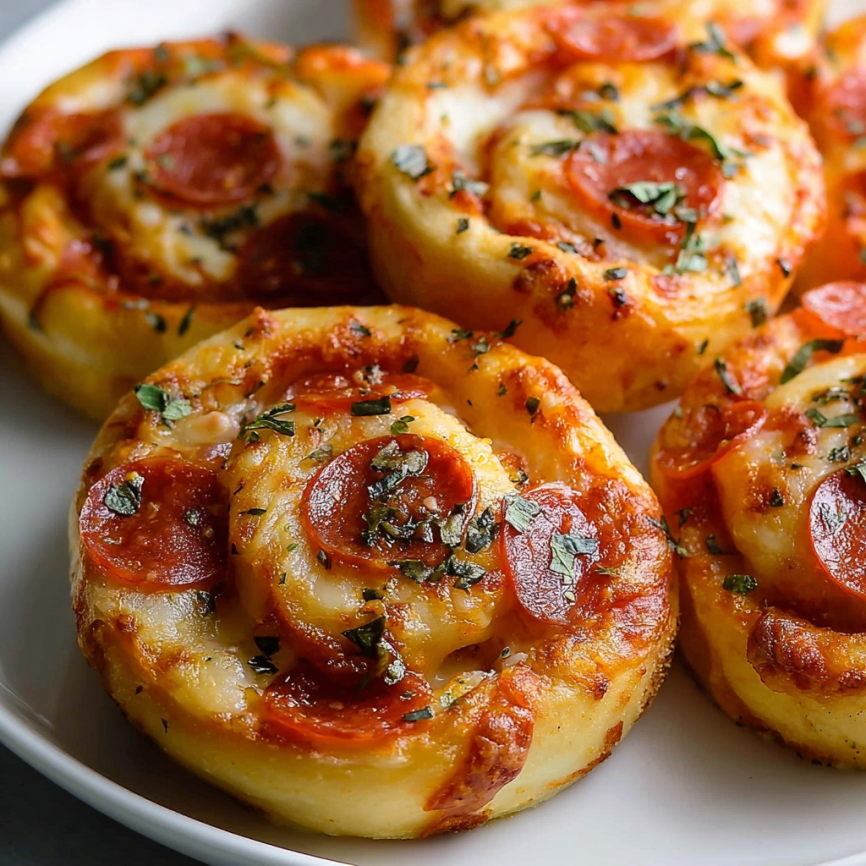
Nothing quite compares to the aroma of freshly baked pizza rolls wafting through the kitchen—it’s pure comfort food magic that instantly brings back memories of cozy family gatherings and weekend treats. These homemade pepperoni pizza rolls represent everything I love about cooking from scratch: the satisfaction of creating something spectacular with simple ingredients, the joy of sharing warm, delicious food with loved ones, and that unbeatable taste that only comes from homemade goodness. Unlike their frozen counterparts, these rolls feature a tender, pillowy interior wrapped around perfectly seasoned filling, finished with an optional cornmeal crust that adds delightful texture and rustic charm.
Why These Pizza Rolls Will Transform Your Kitchen Experience
Authentic Homemade Quality
Creating these rolls from scratch allows you to control every ingredient, ensuring superior flavor and texture that surpasses any store-bought version. Furthermore, the homemade pizza dough provides a tender, slightly chewy base that complements the savory filling perfectly.
Perfect for Batch Cooking
With this recipe yielding 24 generous rolls, you’ll have plenty for immediate enjoyment plus extras for freezing. Additionally, the make-ahead friendly nature means you can prepare them during leisurely weekend cooking sessions for quick weeknight meals later.
Impressive Yet Achievable
While these rolls require some time investment, the intermediate-level techniques are well within reach of most home cooks. Moreover, the spectacular results make them perfect for entertaining guests or treating your family to something truly special.
Customization Paradise
The basic recipe serves as an excellent foundation for countless variations, allowing you to adapt flavors based on dietary preferences or available ingredients. Consequently, you’ll never get bored with this versatile recipe.
Essential Ingredients and Quality Selection
Dough Foundation
- 1 recipe homemade pizza dough – The heart of these rolls, providing structure and flavor base
- 2 teaspoons olive oil – Creates moisture and prevents sticking during assembly
Flavorful Filling Components
- 2/3 cup pizza sauce – Choose a well-balanced sauce or make your own for exceptional taste
- Italian seasoning or ground basil – Adds aromatic herbs that enhance the pizza experience
- Garlic powder – Provides savory depth that complements the other flavors
- 1 cup shredded mozzarella cheese – The star ingredient that creates those irresistible cheese pulls
- 60-65 pepperoni slices – High-quality pepperoni ensures rich, satisfying flavor
Optional Enhancement Ingredients
- 1/2 cup yellow cornmeal – Creates a delightfully crispy bottom crust with rustic appeal
- Extra mozzarella cheese – For those who can never have too much cheese
- Fresh basil – Adds bright, aromatic finishing touch
Ingredient Selection Tips
When choosing your pizza sauce, look for varieties with balanced acidity and rich tomato flavor. Fresh mozzarella can be substituted for pre-shredded, though it may release more moisture during baking. For the pepperoni, select high-quality options that won’t become overly greasy when heated.
Comprehensive Step-by-Step Instructions
Dough Preparation Phase
Begin with your prepared pizza dough, allowing it to complete its initial rise according to your recipe. Once ready, gently punch down the dough to release accumulated air bubbles, which ensures even texture in the finished rolls.
Rolling and Shaping Process
Divide the dough into two equal portions using a sharp knife or bench scraper. Working on a lightly floured surface, carefully roll each piece into a 10×12 inch rectangle, maintaining even thickness throughout for uniform cooking.
Oil and Texture Treatment
Brush each rectangle with one teaspoon of olive oil, distributing it evenly across the surface. Next, use your fingertips to create small dents throughout the dough, which prevents excessive bubbling during baking and helps the toppings adhere better.
Sauce and Seasoning Application
Spread one-third cup of pizza sauce evenly across each rectangle, leaving a small border around the edges for sealing. Sprinkle Italian seasoning and garlic powder to taste, ensuring even distribution for consistent flavor in every bite.
Cheese and Pepperoni Assembly
Distribute half a cup of mozzarella cheese over each sauced rectangle, followed by the pepperoni slices arranged in an even layer. Avoid overcrowding, as this can make rolling difficult and cause filling to leak during baking.
Rolling Technique
Starting from one long edge, carefully roll each rectangle into a tight log, keeping the filling secure inside. The key is maintaining consistent pressure while rolling to prevent air pockets that could cause uneven cooking.
Chilling for Success
Place the completed logs seam-side down on a baking sheet and refrigerate uncovered for at least 20 minutes. This crucial step firms up the dough, making slicing much easier and preventing the rolls from falling apart.
Final Preparation and Baking
Preheat your oven to 400°F (204°C) while the logs chill. Using a sharp knife, slice each log into 12 pieces approximately one inch thick. For added texture, dip the bottom of each roll in cornmeal before placing on lined baking sheets.
Baking to Perfection
Arrange the rolls on your prepared baking sheets, leaving adequate space between each one for proper air circulation. If desired, sprinkle additional cheese on top before baking for 15-20 minutes, until the rolls are lightly golden brown and the cheese is melted and bubbly.
Creative Serving and Presentation Ideas
Family-Style Comfort
Serve these warm rolls immediately from the oven, arranging them on a large platter with small bowls of extra pizza sauce for dipping. The contrast between the soft interior and slightly crispy exterior creates an incredibly satisfying eating experience.
Elegant Entertaining Option
For dinner parties, present the rolls on individual small plates with a drizzle of high-quality olive oil and fresh basil garnish. This elevated presentation transforms humble pizza rolls into sophisticated appetizers.
Casual Game Day Spread
Arrange the rolls in baskets lined with colorful kitchen towels, keeping them warm while maintaining their appealing texture. Provide various dipping sauces like marinara, ranch, or garlic aioli for variety.
Lunch Box Excellence
These rolls travel beautifully when cooled completely and wrapped individually. They’re equally delicious at room temperature, making them perfect for school or work lunches.
Exciting Recipe Variations and Adaptations
Breakfast Pizza Roll Transformation
Create morning-friendly versions by replacing traditional toppings with scrambled eggs, breakfast sausage, and cheddar cheese. Use a light cream cheese spread instead of pizza sauce for a breakfast-appropriate base.
Vegetarian Garden Medley
Develop a healthier alternative using sautéed vegetables like bell peppers, mushrooms, and spinach combined with ricotta and mozzarella cheese. This combination provides excellent nutritional value while maintaining incredible taste.
Meat Lover’s Extravaganza
Satisfy hearty appetites by combining pepperoni with cooked Italian sausage and diced ham. Use a blend of mozzarella and cheddar cheese for extra richness and complexity.
Mediterranean Inspired Creation
Experiment with sun-dried tomatoes, artichoke hearts, feta cheese, and fresh herbs for a sophisticated flavor profile. Replace traditional pizza sauce with a light pesto base for authentic Mediterranean taste.
Spicy Jalapeño Heat
Add excitement with sliced jalapeños, spicy sausage, and pepper jack cheese. Include a dash of hot sauce in the pizza sauce for those who enjoy bold, fiery flavors.
Make-Ahead Strategies and Storage Solutions
Advance Preparation Options
These rolls can be prepared through the rolling stage and refrigerated for up to 24 hours before slicing and baking. Cover the logs tightly with plastic wrap to prevent drying out while maintaining dough quality.
Freezer-Friendly Approach
For longest storage, slice the rolls and freeze them on baking sheets before transferring to freezer bags. When ready to enjoy, bake directly from frozen, adding an additional 5-8 minutes to the cooking time.
Cooked Roll Storage
Fully baked rolls keep well in the refrigerator for up to four days when stored in airtight containers. They also freeze beautifully for up to three months, making them perfect for meal prep strategies.
Reheating Excellence
Restore the perfect texture by reheating refrigerated rolls in a 350°F oven for 8-10 minutes. For frozen cooked rolls, thaw overnight in the refrigerator before reheating for best results.
Professional Tips for Outstanding Results
Dough Handling Mastery
Work with room temperature dough for easier rolling and shaping. If the dough springs back during rolling, allow it to rest for 10-15 minutes before continuing, which relaxes the gluten for better workability.
Moisture Control Techniques
Pat pepperoni slices dry before assembly to prevent excess grease from making the dough soggy. Similarly, if using fresh mozzarella, drain it thoroughly and consider pressing between paper towels.
Slicing Success Strategies
Use a sharp, clean knife and wipe it between cuts to maintain clean edges. Gentle sawing motions work better than pressing straight down, which can compress and distort the rolls.
Baking Pan Alternatives
These rolls work beautifully in muffin pans for individual servings, or in 9×13-inch baking dishes for family-style presentation. Adjust spacing and cooking times accordingly for different pan sizes.
Essential Kitchen Equipment and Tools
Must-Have Equipment
- Stand mixer with dough hook – Essential for creating smooth, elastic pizza dough
- Heavy-duty rolling pin – Ensures even dough thickness for uniform cooking
- Quality pastry brush – Applies oil evenly without tearing delicate dough
- Multiple baking sheets – Accommodates the full batch without overcrowding
- Sharp chef’s knife – Critical for clean, precise slicing
Helpful Additions
Silicone baking mats provide excellent non-stick properties and even heat distribution. A bench scraper helps with dough portioning and workspace cleanup, while a pizza wheel can assist with dough cutting tasks.
Dietary Information and Allergen Awareness
Common Allergens Present
These rolls contain dairy from the mozzarella cheese and gluten from the pizza dough, making them unsuitable for those with corresponding allergies or sensitivities. Always check individual ingredient labels for additional allergen information.
Modification Possibilities
Dairy-free cheese alternatives work well for those avoiding milk products, though melting characteristics may vary. Gluten-free pizza dough creates excellent results for those following gluten-free diets, though texture differences should be expected.
Nutritional Considerations
Each roll provides balanced macronutrients with carbohydrates from the dough, protein from cheese and pepperoni, and moderate fat content. The exact nutritional profile varies based on specific ingredient brands and preparation methods used.
Advanced Techniques and Troubleshooting
Achieving Perfect Texture
The cornmeal bottom treatment adds delightful crunch and helps prevent sticking. However, it’s entirely optional—plain rolls are equally delicious and slightly softer on the bottom.
Temperature and Timing Precision
Internal temperature should reach 165°F for food safety, especially when using meat toppings. The exterior should be golden brown with no pale or doughy areas remaining.
Preventing Common Issues
If rolls open during baking, they may have been under-sealed or overfilled. Ensure tight rolling and moderate filling amounts for best results. Proper chilling also helps maintain shape during slicing and baking.
Frequently Asked Questions
Can I use store-bought pizza dough instead of homemade?
Absolutely! High-quality store-bought pizza dough works excellently and saves considerable time. Allow it to come to room temperature before rolling for easier handling and better results.
How do I prevent the filling from leaking during baking?
The key is proper sealing technique and not overfilling. Roll tightly, ensure the seam is on the bottom, and chill adequately before slicing. Moderate filling amounts also help prevent leakage.
What’s the best way to reheat leftover pizza rolls?
For optimal texture, reheat in a 350°F oven for 8-10 minutes rather than microwaving. This restores the crispy exterior while heating the interior thoroughly and evenly.
Can I make these without pepperoni for vegetarians?
Certainly! These rolls are delicious with just cheese and sauce, or you can substitute with vegetables like bell peppers, mushrooms, or plant-based pepperoni alternatives.
Why do I need to refrigerate the logs before slicing?
Chilling firms up the dough and filling, making slicing much easier and preventing the rolls from falling apart. This step is crucial for maintaining attractive, uniform shapes.
How do I know when the rolls are perfectly done?
Look for golden-brown exteriors with no pale spots, and ensure the cheese is melted and bubbly. The rolls should feel firm to the touch and spring back slightly when pressed gently.
Can I prepare these in different sizes?
Yes! You can make smaller appetizer-sized rolls by cutting thinner slices, or larger meal-sized portions with thicker cuts. Adjust baking time accordingly—smaller rolls cook faster while larger ones need additional time.
What causes my pizza rolls to become soggy?
Soggy rolls typically result from too much sauce, wet toppings, or insufficient baking time. Use moderate sauce amounts, pat ingredients dry, and ensure complete cooking for best texture.


