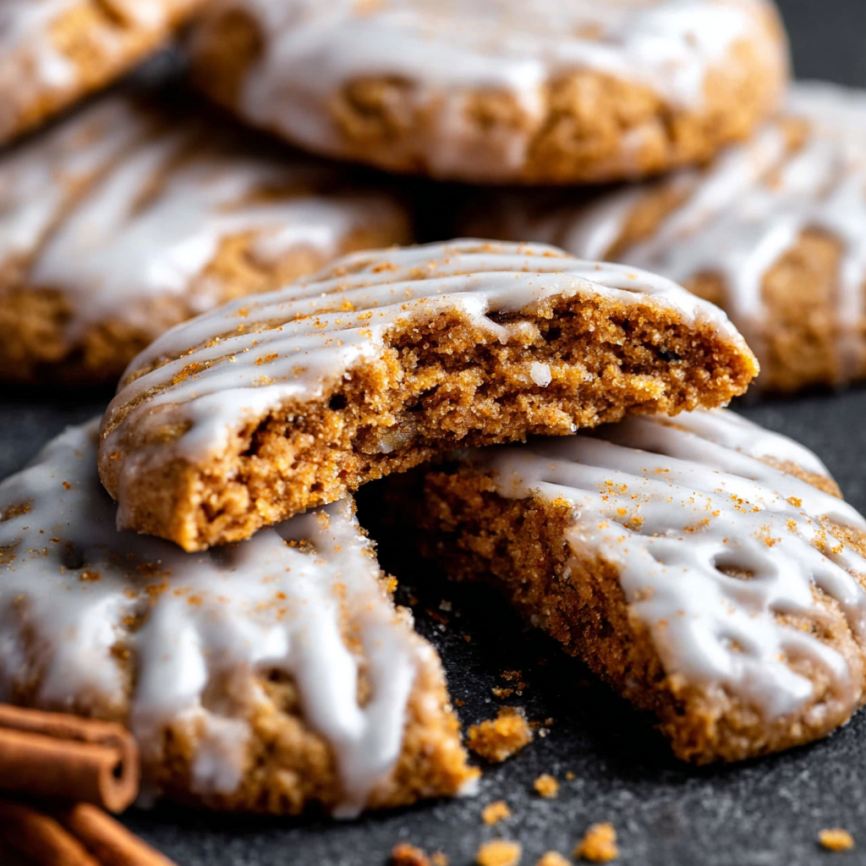
There’s something magical about the aroma of gingerbread spices filling your kitchen – it instantly transports me back to childhood memories of holiday baking sessions with my grandmother. These Iced Gingerbread Oatmeal Cookies capture all that nostalgic warmth while adding the hearty, satisfying texture that only oats can provide. What began as an experiment to combine two of my favorite cookie types has evolved into one of our family’s most requested treats.
The first batch I ever made was intended for a holiday cookie exchange, but I found myself hiding half the cookies before the event because they were simply too good to give away. The combination of chewy oats, warming spices, and that perfectly sweet icing creates a cookie that’s both sophisticated enough for adult palates and appealing enough to disappear from children’s plates in record time.
These cookies strike the perfect balance between festive and everyday – fancy enough for special occasions, yet simple enough for casual afternoon snacking. Moreover, the icing sets beautifully, making them ideal for gifting, shipping, or storing without creating a sticky mess.
Why These Cookies Will Become Your New Signature Recipe
Complex Flavors Made Simple
The beauty of these cookies lies in how effortlessly they combine the warm, spicy notes of traditional gingerbread with the wholesome heartiness of oatmeal. The molasses provides deep, rich sweetness while the blend of ginger, cinnamon, nutmeg, and cloves creates layers of warming spice that develop beautifully during baking.
Additionally, the unique technique of pulsing oats in a food processor creates varied textures within each cookie – some pieces provide satisfying chewiness while others break down to add substance and nutty flavor to the dough itself.
Perfect for Every Occasion
These versatile cookies adapt seamlessly to different settings and seasons. During holidays, they evoke all the cozy feelings of gingerbread houses and spiced cider. Throughout the rest of the year, they serve as comforting afternoon treats that pair perfectly with coffee or tea.
Furthermore, the beautiful icing makes them presentation-ready without requiring advanced decorating skills. The simple dip-and-set technique creates professional-looking results that impress guests while remaining accessible to bakers of all skill levels.
Make-Ahead Friendly for Busy Schedules
Busy lifestyles shouldn’t prevent you from enjoying homemade cookies. This recipe accommodates hectic schedules beautifully – the dough can be prepared days in advance, while baked cookies freeze perfectly for up to three months. The result is fresh, homemade cookies whenever you need them, with minimal last-minute effort.
Essential Ingredients for Cookie Success
The Oat Foundation
- 2 cups (170g) old-fashioned whole rolled oats – The star ingredient that provides texture and heartiness
- 1⅔ cups (210g) all-purpose flour, spooned and leveled – Creates structure and tender crumb
The Spice Symphony
- 2 teaspoons ground ginger – Provides the signature warming heat
- 1½ teaspoons ground cinnamon – Adds sweet warmth and familiar comfort
- ½ teaspoon ground nutmeg – Contributes subtle complexity and depth
- ¼ teaspoon ground cloves – Delivers intense, aromatic spice notes
Essential Building Blocks
- 1 teaspoon baking soda and ½ teaspoon salt – Create proper rise and enhance flavors
- ¾ cup unsalted butter, softened – Provides richness and tender texture
- 1 cup packed brown sugar and ¼ cup granulated sugar – The sweet foundation with molasses notes
- 1 large egg and ¼ cup molasses – Bind ingredients and add distinctive gingerbread flavor
The Perfect Icing Components
- 1½ cups sifted confectioners’ sugar – Creates smooth, sweet coating
- ¼ teaspoon pure vanilla extract – Adds aromatic sweetness
- 1.5-2 tablespoons milk – Achieves perfect consistency
- Pinches of cinnamon and ginger – Echo the cookie’s spice profile
Detailed Step-by-Step Instructions
Creating the Perfect Oat Texture
Begin by pulsing the old-fashioned oats in your food processor 10-12 times until you achieve a varied texture combining chopped oat pieces with some oat flour. This crucial step creates the unique texture that sets these cookies apart from standard oatmeal varieties.
The goal is diversity – some larger pieces for chewiness, some medium pieces for texture, and some fine particles that integrate seamlessly into the dough. If you don’t have a food processor, a blender works, or you can roughly chop the oats with a knife on a cutting board.
Building the Flavor Base
In a medium bowl, whisk together the pulsed oats, flour, baking soda, salt, and all the warming spices. Take your time with this step to ensure even distribution – proper spice integration prevents pockets of intense flavor or bland bites.
Set this dry mixture aside while you prepare the wet ingredients, allowing the spices to mingle and develop their aromatic potential.
Creaming for Perfect Texture
Using either a hand mixer or stand mixer fitted with the paddle attachment, cream the softened butter with both brown and granulated sugars on medium-high speed for about two minutes. The mixture should become light and fluffy, with the sugars fully incorporated into the butter.
Add the egg and molasses, then beat on high speed for one minute until completely combined. Scrape down the bowl sides and bottom as needed to ensure uniform mixing – this step is crucial for consistent cookie texture.
Bringing It All Together
Add the dry ingredients to the creamed mixture and mix on low speed until just combined. The dough will be quite thick and slightly sticky, which is exactly what you want for chewy, substantial cookies.
Resist the temptation to overmix, as this can lead to tough cookies. Stop as soon as you no longer see dry flour streaks.
The Chilling Phase
Cover the dough and refrigerate for 30-45 minutes, though it can chill for up to four days. This chilling period serves multiple purposes: it firms up the butter for better shape retention, allows the oats to hydrate slightly, and gives the spices time to permeate throughout the dough.
If chilling for more than a few hours, let the dough sit at room temperature for 30 minutes before scooping, as it becomes quite hard when thoroughly chilled.
Baking to Perfection
Preheat your oven to 350°F and line baking sheets with parchment paper or silicone mats. Scoop approximately 1.5 tablespoons of dough per cookie, spacing them 3 inches apart to allow for spreading.
Bake for 12-13 minutes, watching for light browning on the edges while the centers remain soft. The cookies will look slightly underbaked – this ensures they stay chewy rather than becoming crispy.
Allow cookies to cool on the baking sheet for five minutes before transferring to wire racks. This brief cooling period lets them set up properly while still warm.
Creating the Perfect Icing
Achieving the Right Consistency
The icing technique makes these cookies special – it should be thick enough to coat nicely but fluid enough for easy dipping. Start by combining the sifted confectioners’ sugar, vanilla extract, and just one tablespoon of milk in a medium bowl.
Whisk with a fork, knowing it won’t fully combine at first due to insufficient liquid. Gradually add only enough additional milk to create a very thick icing that coats the back of a spoon heavily.
Flavoring and Application
Whisk in tiny pinches of ground cinnamon and ginger to echo the cookie’s spice profile. Taste and adjust as desired – the icing should complement, not overpower, the cookies’ complex flavors.
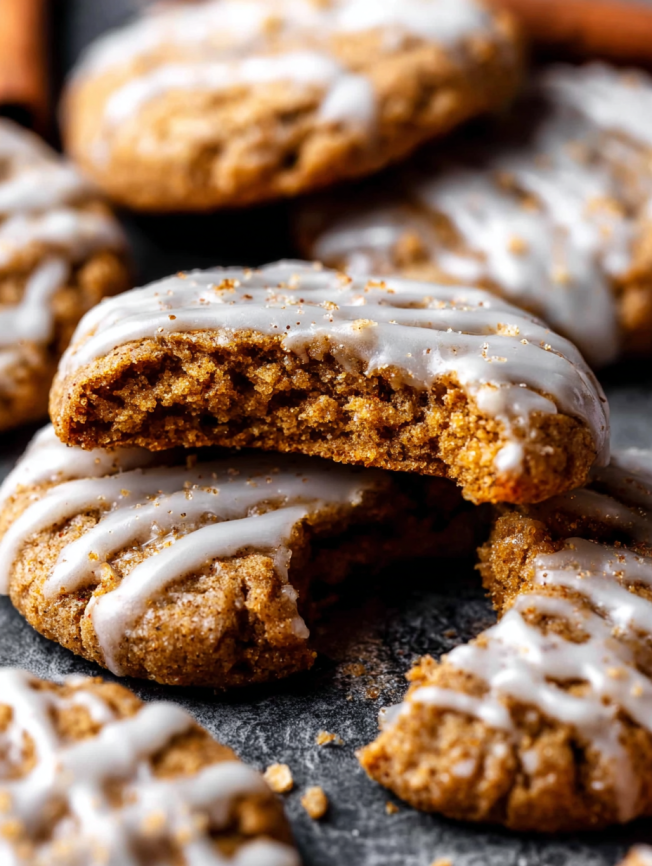
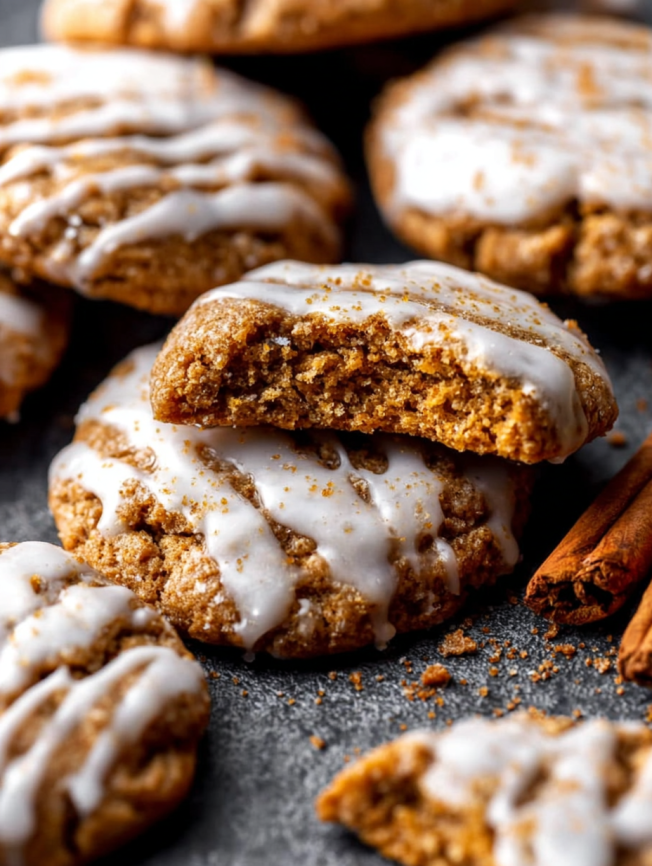
Lightly dip the tops of completely cooled cookies into the icing, allowing excess to drip back into the bowl. The icing will set within a few hours, creating a beautiful finish that’s perfect for stacking, transporting, or gifting.
Serving Suggestions and Presentation
Perfect Pairings
These spiced cookies pair beautifully with warm beverages that complement their complex flavor profile. Hot coffee brings out the molasses notes, while spiced chai or black tea enhances the warming spices. During cooler months, they’re exceptional alongside hot chocolate or mulled cider.
For elegant entertaining, arrange them on tiered serving plates alongside other holiday treats, or present them as part of a dessert board with nuts, dried fruits, and artisanal chocolates.
Gift-Worthy Presentation
The set icing makes these cookies ideal for gifting. Layer them in decorative tins with parchment paper, or package them in clear cellophane bags tied with festive ribbons. The professional appearance created by the smooth icing makes them look like bakery-quality treats.
Consider dusting the set icing with additional ground cinnamon for extra visual appeal and a hint of added spice that delights the senses before the first bite.
Recipe Variations and Customizations
Spice Adjustments
The spice blend can be customized to suit different preferences or dietary needs. For those who enjoy more heat, increase the ginger slightly or add a pinch of cayenne pepper. Conversely, those preferring milder flavors can reduce the cloves or omit them entirely while increasing the cinnamon.
Consider seasonal variations too – a touch of cardamom creates a more sophisticated profile, while allspice can substitute for the nutmeg for a slightly different flavor dimension.
Icing Variations
Transform the basic icing by experimenting with different extracts or additions. Almond extract creates a more complex sweetness, while a hint of orange zest adds bright, citrusy notes that complement the warming spices beautifully.
For chocolate lovers, add a tablespoon of cocoa powder to the icing for a rich, complementary coating that creates an entirely different cookie experience.
Add-In Options
While these cookies are perfect as written, small additions can create interesting variations. Mini chocolate chips, chopped crystallized ginger, or toasted chopped pecans all integrate well without overwhelming the base flavors.
Keep additions to no more than ½ cup total to maintain the cookies’ signature texture and flavor balance.
Make-Ahead and Storage Strategies
Dough Preparation
The cookie dough is remarkably make-ahead friendly, lasting up to four days in the refrigerator when properly covered. For longer storage, portion the dough into individual cookie sizes and freeze on baking sheets before transferring to freezer bags.
Frozen dough balls bake directly from the freezer with just one additional minute of baking time, making it possible to have fresh cookies ready in under 15 minutes whenever cravings strike.
Finished Cookie Storage
Properly stored cookies maintain their quality for up to three days at room temperature or ten days refrigerated. The key is ensuring they’re completely cool before storing and keeping them in airtight containers to prevent moisture loss.
Iced cookies can be stacked once the icing sets completely, making them perfect for large-batch baking and storage.
Expert Tips for Perfect Results
Oat Processing Secrets
The food processor technique for the oats is crucial – don’t skip this step even if you’re tempted to use quick oats instead. The varied texture created by pulsing whole oats provides the perfect balance of chewiness and integration that makes these cookies special.
If using quick oats, pulse them less to avoid creating too much oat flour, which can make the cookies dense rather than chewy.
Molasses Selection
Choose unsulphured or dark molasses rather than blackstrap for the best flavor balance. Blackstrap molasses can be overpoweringly bitter and will throw off the cookie’s carefully balanced sweetness.
Room temperature molasses mixes more easily into the dough, so take it out of the pantry when you begin your prep work.
Icing Success Secrets
Sifting the confectioners’ sugar before measuring eliminates lumps that can create an uneven icing texture. This extra step ensures smooth, professional-looking results that enhance rather than detract from the cookies’ appearance.
The icing’s thickness is crucial – too thin and it won’t coat properly, too thick and it becomes difficult to work with. Aim for the consistency of thick honey for best results.
Frequently Asked Questions
Can I make these cookies without a food processor?
Yes! While a food processor creates the ideal oat texture, you can use a blender or roughly chop the oats with a knife on a cutting board. The key is creating varied particle sizes rather than uniform pieces for the best texture contrast.
How do I know when the cookies are done baking?
Look for light browning around the edges while the centers still appear soft and slightly underbaked. The cookies will continue cooking on the hot pan after removal from the oven, so slightly underbaking ensures they stay chewy rather than becoming crispy.
Can I make the icing ahead of time?
The icing is best made fresh since it begins to set within hours of mixing. However, you can prepare it up to a day ahead if stored covered in the refrigerator. Stir gently before using and thin with a few drops of milk if needed.
What’s the best way to achieve consistent cookie sizes?
Use a cookie scoop or measuring spoon to portion the dough – approximately 1.5 tablespoons per cookie. This ensures even baking and professional-looking results. Consistent sizing also helps with gift presentation and storage.
Can I double this recipe for larger batches?
Absolutely! This recipe doubles beautifully. Just ensure your mixing bowl is large enough to accommodate the increased volume, and you may need to mix the doubled batch in two stages to ensure proper incorporation.
How should I store cookies for gifting or shipping?
Once the icing sets completely (about 2-4 hours), the cookies can be stacked with parchment paper between layers. For shipping, use sturdy containers with minimal air space and pack carefully to prevent movement during transport.
Recipe Summary:
- Prep Time: 45 minutes
- Cook Time: 13 minutes per batch
- Total Time: 1 hour 30 minutes
- Yield: 30 cookies
- Difficulty: Intermediate
- Method: Drop Cookies with Icing
Storage Information:
- Room Temperature: 3 days
- Refrigerated: 10 days
- Frozen: 3 months
- Unbaked Dough: 4 days refrigerated, 3 months frozen


