Last spring, when life felt particularly heavy, I found myself craving something that could lift both my spirits and my kitchen. That’s when I rediscovered the magic of lemon pound cake—a dessert that somehow manages to be both comfortingly rich and refreshingly bright at the same time. The first bite transported me to sunny afternoons and simpler moments, reminding me why certain recipes become treasured family traditions.
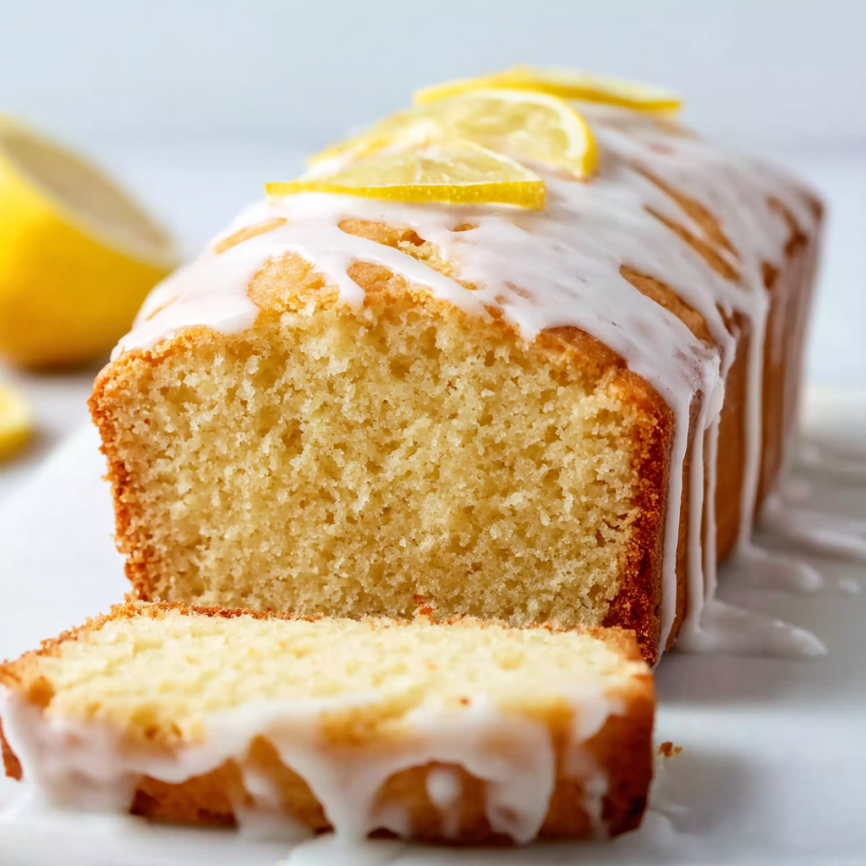
This isn’t just any lemon cake; it’s a true pound cake with that characteristic dense, buttery crumb that makes each slice satisfying in a way lighter cakes simply can’t match. However, the addition of fresh lemon juice, zest, and tangy sour cream transforms the traditional heaviness into something vibrant and irresistible. Topped with a silky lemon icing that sets beautifully, this cake proves that sometimes the most elegant desserts are also the most approachable.
Why This Lemon Pound Cake Will Become Your Signature Dessert
Perfect Texture Balance
Unlike lighter lemon cakes that can feel insubstantial, this pound cake delivers that signature dense, moist crumb that satisfies with every bite. The sour cream adds tenderness while maintaining the rich, buttery foundation that makes pound cake so beloved.
Bright Citrus Character
Fresh lemon juice and zest infuse every layer with authentic citrus flavor that never tastes artificial or overwhelming. The brightness cuts through the richness beautifully, creating a dessert that feels both indulgent and refreshing.
Foolproof Success
This recipe uses straightforward techniques that deliver consistent results every time. Even novice bakers can achieve the perfect pound cake texture using standard mixing methods and readily available ingredients.
Impressive Simplicity
The elegant white icing creates a stunning presentation that looks far more complicated than it actually is. This cake proves that sometimes the most beautiful desserts are also the most uncomplicated to create.
Essential Ingredients for Lemon Perfection
Cake Foundation
- 1½ cups (188g) all-purpose flour (spooned and leveled for accuracy)
- 1½ teaspoons baking powder (ensures proper rise without compromising density)
- ½ teaspoon salt (enhances all flavors)
Rich Base Components
- 1 cup (16 Tbsp; 226g) unsalted butter (softened to room temperature)
- 1 cup (200g) granulated sugar (creates perfect sweetness balance)
- 3 large eggs (at room temperature for better incorporation)
- ¼ cup (60g) sour cream (at room temperature for smooth mixing)
Bright Citrus Elements
- 1 teaspoon lemon zest (use only the yellow part for best flavor)
- 3 tablespoons (45ml) freshly squeezed lemon juice (approximately one lemon)
- 1 teaspoon pure vanilla extract (complements the lemon beautifully)
Silky Lemon Icing
- 1 cup (120g) confectioners’ sugar (sifted for smoothness)
- 1½ tablespoons (22ml) lemon juice (freshly squeezed preferred)
- 1 tablespoon (15ml) heavy cream or milk (heavy cream creates thicker consistency)
Step-by-Step Baking Instructions
Preparation Setup
Position your oven rack in the lower-third position and preheat to 350°F (177°C). Generously grease an 8×4-inch loaf pan with nonstick spray, ensuring complete coverage to prevent sticking. Alternatively, a 9×5-inch pan works well for a shorter, wider loaf.
Creating the Dry Foundation
In a large bowl, whisk together flour, baking powder, and salt until evenly distributed. This preliminary mixing ensures even leavening throughout the finished cake. Set this mixture aside while you prepare the wet ingredients.
Building the Creamy Base
Using a handheld or stand mixer with paddle attachment, beat the softened butter on high speed until smooth and creamy—about one minute of beating should achieve the right consistency. Add granulated sugar and continue beating on high speed for two full minutes until the mixture becomes light and fluffy.
Scrape down the bowl sides and bottom as needed to ensure even mixing. With the mixer running on low speed, add eggs one at a time, allowing each to incorporate completely before adding the next.
Incorporating Flavor Elements
Once the final egg is fully mixed, stop the mixer and add sour cream, lemon juice, lemon zest, and vanilla extract all at once. Beat on medium speed until just combined, scraping the bowl as needed.
Don’t worry if the mixture appears slightly curdled at this stage—this is completely normal when combining ingredients of different textures and temperatures. The batter will smooth out beautifully once you add the dry ingredients.
Final Assembly
With the mixer on low speed, gradually add the flour mixture, beating just until combined. The batter should be very thick and smooth. If you notice any large lumps, gently whisk them out by hand, but avoid overmixing, which can create a tough texture.
Baking to Perfection
Spoon the thick batter into your prepared loaf pan, spreading it evenly to the corners. Bake for 55-65 minutes for an 8×4-inch pan, or 45-60 minutes for a 9×5-inch pan.
Halfway through baking, tent the cake with aluminum foil to prevent over-browning of the top. Pound cakes require longer baking times due to their dense nature, so don’t be alarmed if your cake needs the full time or even slightly longer.
Test for doneness by inserting a toothpick into the center—it should come out mostly clean with just a few moist crumbs clinging to it.
Proper Cooling Technique
Remove the finished cake from the oven and place the pan on a wire cooling rack. Allow the cake to cool in the pan for exactly one hour—this prevents breaking while ensuring easy removal.
After one hour, carefully turn the slightly warm cake out onto the cooling rack or directly onto your serving plate. You can apply the icing while the cake is still warm for a more rustic look, or wait for complete cooling for neater slices.
Creative Serving Suggestions
Classic Elegance
Serve thick slices of this pound cake alongside fresh berries and a dollop of lightly sweetened whipped cream. The combination of rich cake, tart berries, and creamy accompaniment creates a perfect balance of flavors and textures.
Tea Time Perfection
Cut into thinner slices for elegant afternoon tea service. The dense texture holds up beautifully to delicate handling, while the bright lemon flavor pairs wonderfully with Earl Grey or chamomile tea.
Warm Weather Delight
During summer months, serve chilled slices with a scoop of vanilla bean ice cream or lemon sorbet. The temperature contrast enhances both the cake’s richness and the ice cream’s creaminess.
Delicious Recipe Variations
Blueberry Lemon Enhancement
Fold one cup of fresh blueberries into the finished batter before baking. The berries add bursts of sweetness and beautiful color throughout each slice. Fresh berries work best, as frozen ones can turn the batter an unappetizing grayish-blue color.
Bundt Cake Transformation
Double the recipe (using ¾ cup sour cream instead of ½ cup for extra moisture) and bake in a generously greased 10-12 cup Bundt pan. Follow the baking guidelines from traditional pound cake recipes, adjusting time as needed for the larger size.
Glaze Alternatives
Instead of the traditional icing, try a simple lemon glaze made with powdered sugar and lemon juice, or dust the finished cake with confectioners’ sugar for a more rustic presentation.
Flavor Variations
Substitute lime juice and zest for lemon to create a lime pound cake, or add almond extract along with the lemon for a more complex flavor profile.
Smart Make-Ahead Strategies
Freezing Guidelines
This pound cake freezes exceptionally well for up to three months. Bake and cool the cake completely, then wrap it first in plastic wrap and then in aluminum foil for maximum protection against freezer burn.
For best results, freeze the cake without icing and add the lemon glaze just before serving. Thaw overnight in the refrigerator, then bring to room temperature before glazing and serving.
Storage Solutions
At room temperature, covered cake stays fresh for up to three days. Refrigerated storage extends freshness to one week, though the texture is best when served at room temperature.
Advance Preparation
The dense nature of pound cake actually improves with time, as flavors have opportunity to meld and develop. Consider making this cake one day ahead for optimal flavor development.
Professional Baking Tips
Temperature Considerations
Room temperature ingredients are crucial for proper mixing and texture development. Take eggs, butter, and sour cream out of the refrigerator about one hour before baking to ensure they reach the ideal temperature.
Measuring Accuracy
Properly measuring flour makes a significant difference in pound cake texture. Always spoon flour into measuring cups and level with a knife rather than scooping directly from the container, which can pack too much flour into the cup.
Pan Selection Impact
The 8×4-inch pan creates a taller, more traditional pound cake shape, while the 9×5-inch pan produces a shorter, wider loaf. Both work perfectly, but adjust baking times accordingly.
Icing Consistency
Heavy cream creates a thicker, more luxurious icing that sets beautifully on the cake surface. Milk produces a thinner consistency that soaks into the cake more readily—both are delicious but create different visual and textural effects.
Frequently Asked Questions
Q: Can I substitute Greek yogurt for sour cream? A: Yes, plain Greek yogurt works well as a substitute and provides similar tang and moisture. Use the same amount as called for in the recipe, and ensure it’s at room temperature for best mixing results.
Q: Why did my pound cake turn out dry? A: Dry pound cake usually results from overbaking or overmixing the batter. Use a timer and test for doneness with a toothpick, and mix the batter just until ingredients are combined to avoid developing too much gluten.
Q: How do I prevent the icing from sliding off the cake? A: Allow the cake to cool slightly before applying icing—it should be warm but not hot. The residual warmth helps the icing set properly while preventing it from melting and sliding off completely.
Q: Can I make this cake without a stand mixer? A: Absolutely! A handheld mixer works perfectly for this recipe. Just be sure to cream the butter and sugar thoroughly for the proper texture, which may take slightly longer than with a stand mixer.
Q: What’s the best way to zest lemons? A: Use a microplane grater or fine zester, taking only the bright yellow outer layer of the peel. Avoid the white pith underneath, which can add bitter flavors to your cake.
Q: How do I know when my pound cake is properly done? A: The cake should spring back lightly when touched in the center, and a toothpick inserted in the middle should come out with just a few moist crumbs. The top should be golden brown and set.
Q: Can I double this recipe for a larger crowd? A: Yes, this recipe doubles beautifully. Use two loaf pans or convert to a Bundt cake format using the guidelines provided in the notes section for best results.
Prep Time: 15 minutes | Cook Time: 55 minutes | Total Time: 3 hours, 15 minutes | Serves: 8-10


