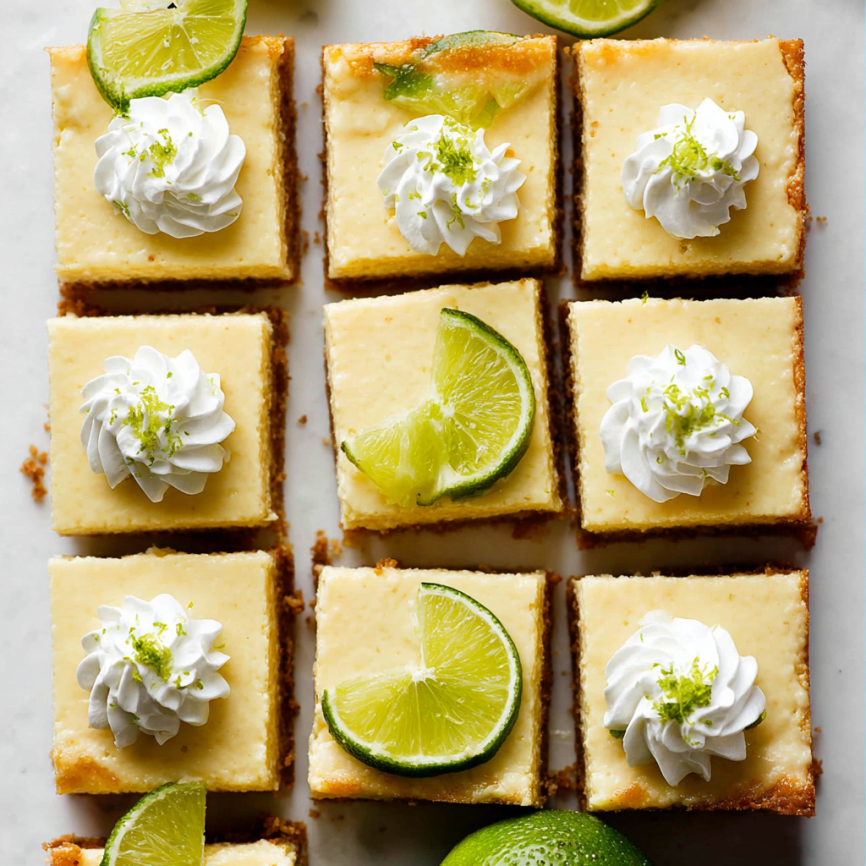
Growing up in Florida, key lime pie was more than just a dessert – it was a celebration of our citrus heritage and a testament to the magic that happens when simple ingredients come together perfectly. However, serving traditional pie at casual gatherings always felt a bit formal and messy. That’s when I discovered these incredible Key Lime Pie Bars, which capture all the creamy, tangy bliss of the classic dessert in a perfectly portable, party-friendly format. The first time I brought these to a beach picnic, they disappeared faster than the sunset, and I knew I had found my go-to summer treat.
Why These Bars Will Become Your New Obsession
Effortless Elegance in Handheld Form
These bars deliver all the sophisticated flavors of traditional key lime pie without any of the fuss. While classic pie requires careful slicing and serving utensils, these bars can be eaten by hand, making them perfect for outdoor gatherings, potluck dinners, or casual entertaining. Moreover, their uniform squares create an instantly professional presentation that looks like you spent hours perfecting each piece.
Simple Ingredients, Extraordinary Results
With just seven basic ingredients, this recipe proves that exceptional desserts don’t require complicated techniques or exotic components. The beauty lies in the harmony between the buttery graham cracker crust, creamy filling, and bright citrus notes that transport you straight to the tropics with every bite.
Make-Ahead Convenience
Unlike many desserts that require last-minute preparation, these bars actually improve with chilling time. You can prepare them completely the day before your event, allowing the flavors to meld while the texture achieves perfect firmness. Additionally, they freeze beautifully for up to three months, making them an excellent option for planned entertaining or unexpected guests.
Essential Ingredients and Quality Guidelines
For the Graham Cracker Crust
Foundation Components:
- 12 full-sheet graham crackers (yielding 1½ cups or 180g crumbs)
- 6 tablespoons (85g) unsalted butter, melted
- ¼ cup (50g) granulated sugar
For the Key Lime Filling
Creamy Citrus Elements:
- 4 ounces (113g) full-fat brick cream cheese, softened to room temperature
- 4 large egg yolks
- 14-ounce (397g) can sweetened condensed milk
- ½ cup (120ml) key lime juice
- 2 teaspoons lime zest (from about 1 regular lime or 2 key limes)
Optional Garnishes
Finishing Touches:
- Fresh whipped cream
- Thin lime slices
- Extra lime zest for sprinkling
Shopping and Preparation Tips
Key Lime Juice Selection: While fresh key limes provide the most authentic flavor, they can be difficult to find and expensive. High-quality bottled key lime juice (like Nellie & Joe’s) delivers excellent results and consistent flavor year-round.
Cream Cheese Preparation: Remove cream cheese from refrigeration 1-2 hours before baking to ensure proper softening. Properly softened cream cheese should yield easily to gentle pressure without being warm or oily.
Graham Cracker Quality: Choose honey graham crackers for the best flavor foundation. Avoid overly sweet or artificial-tasting varieties that might compete with the delicate lime filling.
Step-by-Step Instructions
Setting Up for Success
Step 1: Prepare Your Equipment Preheat your oven to 350°F (177°C) and position the rack in the center. Line a 9-inch square baking pan with parchment paper, leaving generous overhang on opposite sides for easy bar removal later.
Step 2: Create Perfect Graham Cracker Crumbs Process full graham crackers in a food processor until they form fine, uniform crumbs. Alternatively, place crackers in a sealed zip-top bag and crush with a rolling pin until no large pieces remain. The goal is consistent, fine crumbs that will press together smoothly.
Building the Foundation
Step 3: Mix the Crust Components Combine graham cracker crumbs and granulated sugar in a medium bowl, stirring until evenly distributed. Pour in melted butter and mix thoroughly until the mixture resembles wet sand and holds together when pressed. Break up any large clumps for uniform texture.
Step 4: Create the Base Layer Transfer the crumb mixture to your prepared pan and press firmly into an even layer using the bottom of a measuring cup or your hands. Pay special attention to the corners and edges to ensure uniform thickness throughout.
Step 5: Pre-bake the Foundation Bake the crust for exactly 10 minutes until it appears set and lightly golden. Remove from oven and allow to cool slightly while you prepare the filling – the residual warmth will help the filling adhere properly.
Crafting the Lime Filling
Step 6: Master the Cream Cheese Base Using an electric mixer fitted with a paddle attachment, beat the softened cream cheese on medium-high speed for about 1 minute until completely smooth and fluffy. Scrape down bowl sides as needed to ensure even mixing.
Step 7: Incorporate the Egg Yolks Add egg yolks one at a time, beating on medium speed until each is fully incorporated before adding the next. This gradual addition prevents the mixture from curdling and ensures silky texture.
Step 8: Complete the Filling Beat in sweetened condensed milk, key lime juice, and lime zest on medium speed until just combined. Finish with a final hand whisk to ensure no cream cheese lumps remain at the bottom of the bowl.
Assembly and Baking
Step 9: Combine Base and Filling Pour the lime filling evenly over the warm crust, using a spatula to spread it gently to all corners. The warm crust helps create a seamless bond between layers.
Step 10: Bake to Perfection Bake for 18-20 minutes until the edges appear set and the center has only a slight jiggle when gently shaken. The surface should look mostly matte rather than shiny and wet.
Cooling and Setting
Step 11: Gradual Cooling Process Remove from oven and cool at room temperature on a wire rack for 30 minutes. This gradual cooling prevents sudden temperature changes that could cause cracking or texture issues.
Step 12: Complete Chilling Transfer to the refrigerator and chill for at least 2-3 hours, preferably overnight. This extended chilling time is crucial for achieving the perfect sliceable consistency and allowing flavors to develop fully.
Creative Serving and Presentation Ideas
Professional Cutting Techniques
Use the parchment paper overhang to lift the entire bar sheet from the pan before cutting. Clean, sharp knife dipped in warm water between cuts ensures neat squares without dragging the filling. For extra precision, mark cutting lines lightly with a knife tip before making full cuts.
Elegant Garnish Options
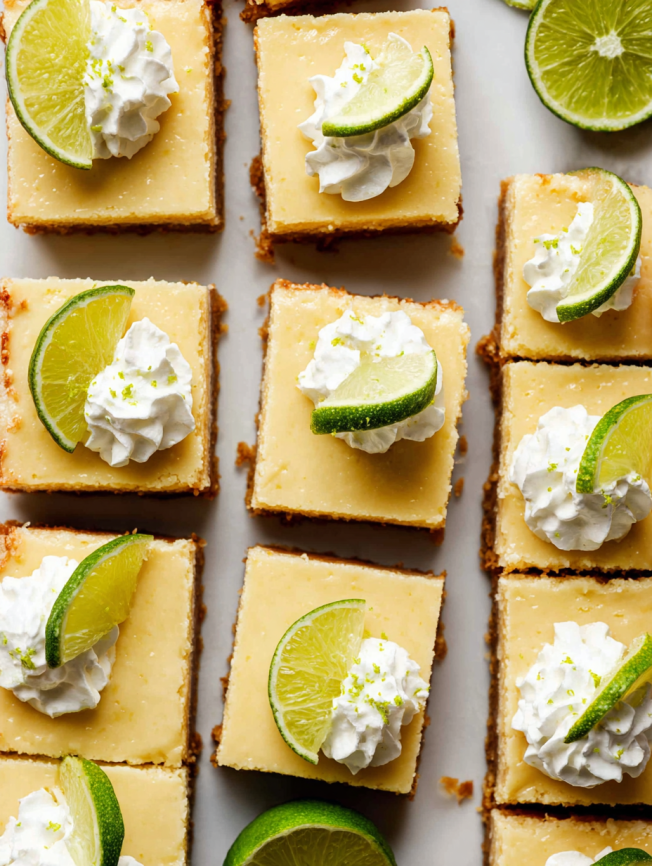
Piped Whipped Cream: Use a star tip to pipe decorative rosettes of freshly whipped cream on each bar just before serving.
Lime Wheel Accents: Cut thin lime wheels and place a small wedge on each bar for color and fresh citrus aroma.
Zest Finishing: Grate fresh lime zest over the bars just before serving for an extra burst of citrus fragrance and visual appeal.
Exciting Recipe Variations
Crust Alternatives
Gingersnap Foundation: Replace graham crackers with 2 cups (240g) finely crushed gingersnap cookies mixed with 3 tablespoons melted salted butter for a spicier, more complex base flavor.
Vanilla Wafer Option: Use crushed vanilla wafers for a lighter, more delicate crust that allows the lime filling to truly shine.
Coconut Enhancement: Add 2 tablespoons of sweetened shredded coconut to the graham cracker mixture for tropical flair.
Filling Modifications
Regular Lime Version: Substitute regular lime juice and zest if key limes are unavailable – the flavor will be slightly more tart but equally delicious.
Lemon Variation: Transform these into lemon bars by using fresh lemon juice and zest instead of lime for a classic citrus alternative.
Mixed Citrus Blend: Combine equal parts key lime and lemon juice for a complex, layered citrus flavor profile.
Make-Ahead Strategies and Storage Solutions
Advanced Preparation Timeline
Two Days Before: Prepare bars completely and store covered in refrigerator. The flavors actually improve with extended chilling time.
Freezing for Later: Wrap individual bars in plastic wrap, then place in freezer bags for up to 3 months. Thaw overnight in refrigerator before serving.
Storage Guidelines
Short-term Storage: Keep bars in airtight container in refrigerator for up to 5 days. Layer between parchment paper to prevent sticking.
Serving Temperature: Serve chilled for best texture and flavor. Bars can sit at room temperature for up to 2 hours before requiring refrigeration.
Professional Tips for Perfect Results
Avoiding Common Pitfalls
Preventing Soggy Crust: Ensure the crust is properly pre-baked and still warm when adding filling. This creates a barrier that prevents moisture absorption.
Achieving Smooth Filling: Room temperature cream cheese is essential for lump-free texture. If lumps persist, strain the mixture through a fine-mesh sieve before baking.
Perfect Consistency: Don’t overbake – the center should still have a slight jiggle when removed from the oven. Residual heat will complete the setting process.
International Adaptations
Non-US Ingredient Substitutions
Graham Cracker Alternatives: Use 200g ground digestive biscuit crumbs (about 13-14 biscuits) with the same amount of butter and slightly more sugar (⅓ cup or 67g) for similar results.
Cream Cheese Variations: International spreadable cream cheese in tubs tends to be thicker and more solid, which actually works well for this recipe without modification.
Important Notes for Success
Equipment Essentials
A 9-inch square pan produces the ideal thickness for these bars. While you can double the recipe for a 9×13-inch pan, the smaller batch typically yields better texture and more manageable serving sizes.
Timing Considerations
Plan to start these bars at least 4 hours before serving to allow adequate cooling and chilling time. The extended preparation time is essential for achieving the proper texture and flavor development.
Leftover Management
Save leftover egg whites for meringues, angel food cake, or pavlova – they freeze beautifully for up to 6 months when stored in labeled containers.

Frequently Asked Questions
Can I use regular lime juice instead of key lime juice? Absolutely! Regular lime juice works perfectly and is much more accessible. The flavor will be slightly more tart, but equally delicious and refreshing.
Why is my filling grainy or lumpy? This usually indicates the cream cheese wasn’t properly softened or was overmixed. Ensure cream cheese reaches room temperature before beginning, and mix just until smooth.
How do I know when the bars are properly baked? The edges should appear set and slightly golden, while the center should have just a slight jiggle when gently shaken. Overbaking creates a rubbery texture.
Can I make these in a different sized pan? The recipe is optimized for a 9-inch square pan. For larger batches, double all ingredients and use a 9×13-inch pan, increasing baking time to about 35 minutes.
What if my bars are too soft to cut cleanly? Ensure they’ve chilled for at least 2-3 hours, preferably overnight. If still soft, freeze for 30 minutes before cutting for the cleanest edges.
Can I make the crust ahead of time? Yes! Pre-bake the crust up to 2 days in advance and store covered at room temperature. Add the filling and complete baking when ready.
How do I prevent the bars from sticking to the pan? Proper parchment paper lining with overhang is crucial. Alternatively, lightly grease the pan before adding parchment for extra insurance.
Can I reduce the sweetness? The sweetened condensed milk provides both sweetness and structure, so reducing it isn’t recommended. However, increasing the lime juice slightly can help balance sweetness with more tartness.
Prep Time: 15 minutes | Bake Time: 30 minutes | Chill Time: 3 hours | Total Time: 3 hours 45 minutes
Yield: 16 bars | Difficulty: Easy | Method: Baked | Cuisine: American
Nutrition Information (per bar):
- Calories: 195 | Fat: 8g | Carbohydrates: 28g | Protein: 4g
- Sugar: 24g | Fiber: 1g | Sodium: 125mg | Cholesterol: 65mg


