Every winter, there’s that magical moment when you wrap your hands around a steaming mug of hot cocoa, topped with pillowy marshmallows that slowly melt into creamy perfection. These cookies capture that exact feeling – the rich chocolate warmth, the sweet marshmallow surprise, and that cozy comfort that makes cold days bearable. When I first developed this recipe, I wanted to create something that would bring the same joy as that first sip of perfect hot chocolate.
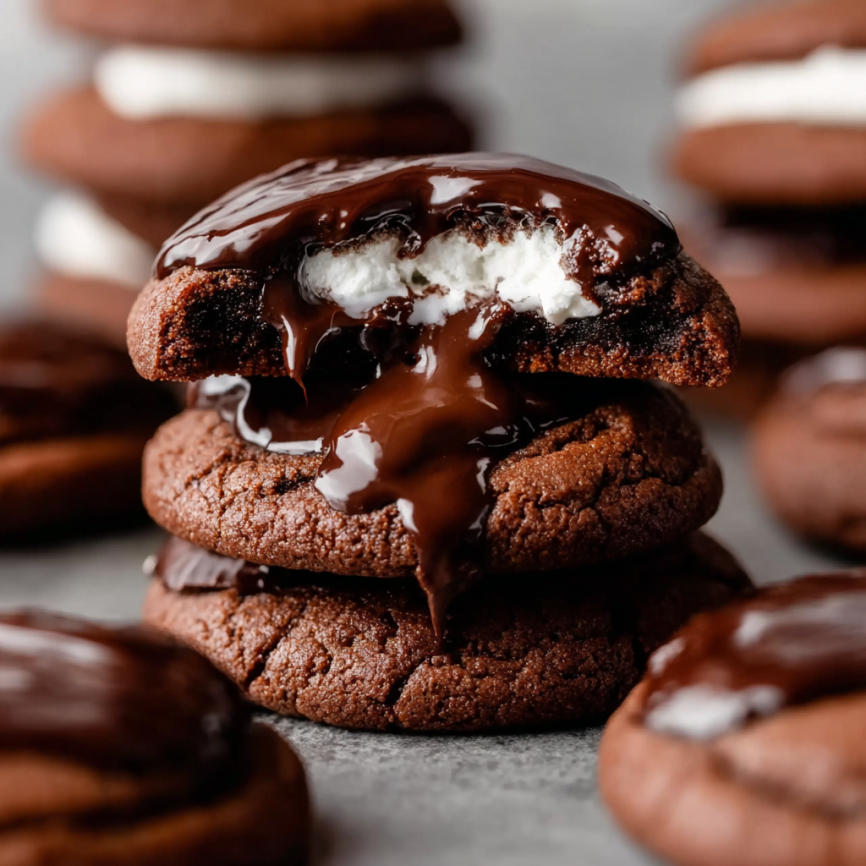
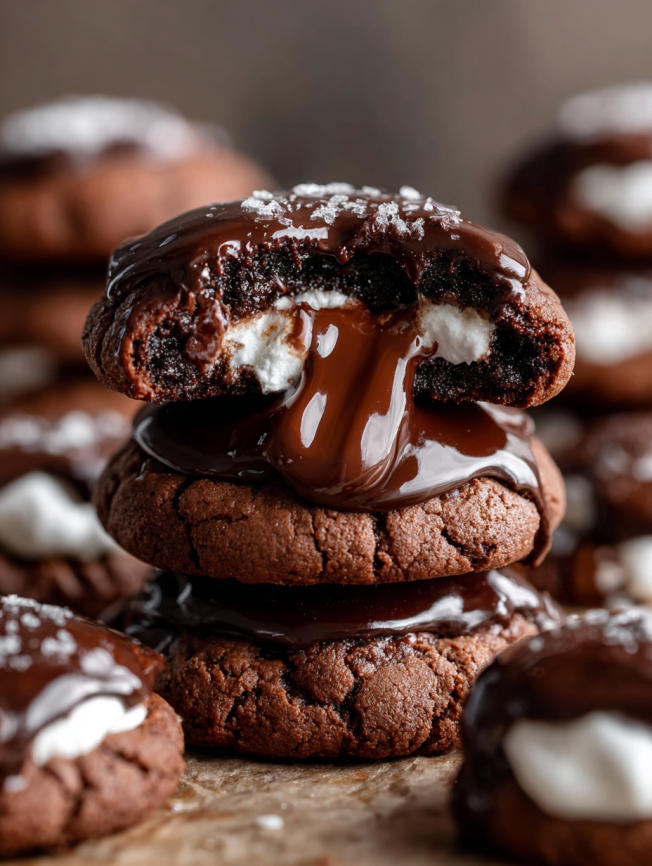
The genius of these cookies lies in their surprising construction. What looks like a simple chocolate cookie reveals a hidden marshmallow center that becomes beautifully caramelized during baking. Then, a glossy chocolate coating seals in all that goodness, creating a treat that’s part cookie, part candy, and completely irresistible. Each bite delivers layers of texture and flavor that transport you straight to that cozy fireside moment.
Why These Cookies Will Become Your New Winter Obsession
Unique Interactive Experience
The surprise marshmallow center creates an element of discovery with each bite. Unlike traditional cookies, these offer multiple textures – from the tender chocolate base to the gooey marshmallow center, all crowned with smooth melted chocolate.
Perfect Balance of Flavors
The combination of natural cocoa powder and hot cocoa mix creates a complex chocolate profile that’s both rich and comforting. Meanwhile, the marshmallow adds just the right amount of sweetness without overwhelming the chocolate intensity.
Show-Stopping Presentation
These cookies look incredibly impressive with their glossy chocolate tops and hint of marshmallow peeking through. They’re conversation starters at parties and make stunning gifts that show real thoughtfulness and effort.
Customizable Intensity
The dual chocolate approach allows you to control the depth of flavor. You can adjust the hot cocoa mix for a milder taste or increase the cocoa powder for more intense chocolate lovers.
Essential Ingredients
For the Cookie Base
- ¾ cup unsalted butter (softened to room temperature)
- ½ cup granulated sugar (creates tender texture)
- ½ cup packed brown sugar (adds moisture and depth)
- 1 large egg (binding and richness)
- 1 teaspoon pure vanilla extract (enhances chocolate flavor)
- 1¼ cups all-purpose flour (spooned and leveled)
- ¼ cup natural cocoa powder (unsweetened, for deep chocolate taste)
- ¼ cup dry hot cocoa mix (about one standard packet)
- ½ teaspoon baking soda (proper rise and texture)
- ½ teaspoon salt (balances sweetness)
- 2 tablespoons milk (creates proper dough consistency)
For the Surprise Element
- 10-11 large marshmallows (cut in half horizontally)
For the Chocolate Coating
- 8 ounces baking chocolate (semi-sweet, bittersweet, or milk chocolate)
Step-by-Step Instructions
Creating the Perfect Base
Begin by beating softened butter with both granulated and brown sugars using either a handheld or stand mixer with paddle attachment. Beat on medium-high speed for 2-3 minutes until the mixture becomes fluffy and noticeably lighter in color. This creaming process is crucial for achieving the proper cookie texture.
Add the egg and vanilla extract, then beat on high speed until completely incorporated. Scrape down the bowl sides and bottom as needed to ensure even mixing throughout the process.
Incorporating Dry Ingredients
In a separate bowl, whisk together flour, natural cocoa powder, hot cocoa mix, baking soda, and salt until well combined. The hot cocoa mix adds a unique flavor dimension that distinguishes these cookies from ordinary chocolate cookies.
Add this dry mixture to the creamed butter mixture, beating on low speed until just combined. The dough will be quite thick at this stage, which is exactly what you want for proper structure.
Achieving Perfect Consistency
Finally, beat in the milk, which will make the dough thick and slightly sticky – the ideal consistency for these cookies. Don’t be tempted to add more liquid; this stickiness is what creates the tender final texture.
Essential Chilling Period
Cover the dough tightly and refrigerate for at least 2 hours, though up to 3 days is perfectly acceptable. This chilling step is absolutely imperative for handling the sticky dough and preventing excessive spreading during baking.

Preparation for Baking
Preheat your oven to 350°F and line large baking sheets with parchment paper or silicone baking mats. Meanwhile, cut your marshmallows in half horizontally using kitchen shears – this creates the perfect size for cookie topping.
Shaping and Initial Baking
Remove the chilled dough from the refrigerator and scoop heaping tablespoons (about 25-26 grams each) into balls. Arrange them 2-3 inches apart on prepared baking sheets, allowing room for spreading.
Bake the cookies for exactly 10 minutes – no longer. They should look slightly underdone at this point, which is perfect for the next step.
The Marshmallow Magic
Remove cookies from the oven and immediately press a marshmallow half into the top of each cookie, cut-side down. The marshmallows should nestle into the warm cookie surface easily.
Return the cookies to the oven for exactly 2 more minutes. Upon removal, use the back of a spoon to gently press down on each marshmallow, flattening it slightly and helping it adhere to the cookie surface.
Cooling Process
Allow cookies to cool on the baking sheet for 10 minutes before transferring to a wire rack. This initial cooling period helps the marshmallows set properly and prevents them from sliding off during transfer.
Creating the Chocolate Crown
Once cookies are completely cool, melt your baking chocolate using either a double boiler or microwave method. For microwave melting, use 20-second increments, stirring between each interval until smooth and completely melted.
Spoon the melted chocolate generously over each marshmallow-topped cookie, allowing it to cascade down the sides slightly. The chocolate will set at room temperature within 30-60 minutes, creating a beautiful glossy finish.
Serving Suggestions
Perfect Pairings
These rich cookies pair beautifully with cold milk, creating that classic cookies-and-milk combination. For adults, they’re exceptional alongside coffee or even a glass of dessert wine for special occasions.
Seasonal Presentation
During winter months, arrange these cookies on rustic wooden boards with mugs of actual hot cocoa for a themed dessert spread. They also look stunning on holiday cookie platters alongside other festive treats.
Gift-Giving Ideas
Package these cookies in clear boxes or tins with festive ribbons for impressive homemade gifts. Their professional appearance makes them perfect for teacher gifts, neighbor treats, or holiday exchanges.
Creative Variations
Flavor Modifications
Experiment with different hot cocoa mix flavors – peppermint, salted caramel, or even white chocolate varieties can create interesting twists on the classic recipe. Each variation brings its own unique character to the final cookie.
Marshmallow Alternatives
Try using flavored marshmallows like strawberry or vanilla for subtle flavor variations. Mini marshmallows can also work, though you’ll need to use several per cookie to achieve the same effect.
Chocolate Coating Options
While semi-sweet chocolate is traditional, milk chocolate creates a sweeter finish, while dark chocolate provides more sophisticated depth. White chocolate coating creates a striking visual contrast and milder flavor profile.
Make-Ahead Tips
Dough Storage
The cookie dough actually improves with extended chilling, developing deeper flavors over time. Store covered dough in the refrigerator for up to 3 days, or freeze shaped dough balls for up to 3 months.
Baking Schedule
These cookies are perfect for advance preparation since they need complete cooling before chocolate application. Bake the cookies and add marshmallows one day, then apply chocolate coating the next day for stress-free entertaining.
Storage Solutions
Once the chocolate has completely set, these cookies store beautifully in airtight containers for up to one week. Layer them carefully to prevent the chocolate coating from scratching or breaking.
Important Notes
Cocoa Powder Selection
This recipe specifically calls for natural cocoa powder rather than Dutch-processed. Natural cocoa powder provides the proper acidity balance needed for the baking soda to work effectively, ensuring proper rise and texture.
Hot Cocoa Mix Guidelines
Use dry hot cocoa mix powder, not liquid hot chocolate. Avoid mixes that contain mini marshmallows, as these can interfere with the cookie texture. One standard packet equals approximately ¼ cup of mix.
Chocolate Quality Matters
Invest in quality baking chocolate bars rather than chocolate chips for the coating. Baking chocolate melts to the proper consistency, while chocolate chips contain stabilizers that prevent smooth melting and proper setting.
Timing Is Everything
The two-stage baking process is crucial for success. The initial baking sets the cookie structure, while the brief second baking caramelizes the marshmallow surface without burning it.
Frequently Asked Questions
Q: Can I skip the hot cocoa mix and use only cocoa powder? A: Yes! If you don’t have hot cocoa mix, simply increase the natural cocoa powder to ½ cup total. The flavor will be more intensely chocolate and less sweet, which some people prefer.
Q: Why do my marshmallows slide off during baking? A: Make sure to press the marshmallows into the warm cookies immediately after the first baking stage. The cookies should still be soft enough for the marshmallows to nestle in securely.
Q: Can I use chocolate chips instead of baking chocolate for the coating? A: Unfortunately, chocolate chips contain stabilizers that prevent them from melting smoothly. Stick with baking chocolate bars for the best coating results and professional appearance.
Q: How do I know when the cookies are done after adding marshmallows? A: After the second 2-minute baking period, the marshmallows should be lightly golden and slightly puffed. They’ll continue to set as they cool, so don’t overbake.
Q: Can I make these cookies larger or smaller? A: You can adjust the size, but you’ll need to modify baking times accordingly. Smaller cookies may need only 8 minutes for the first bake, while larger ones might need 12-13 minutes.
Q: What’s the best way to cut marshmallows cleanly? A: Use kitchen shears rather than a knife for the cleanest cuts. Lightly spray the shears with cooking spray if the marshmallows start sticking to the blades.
Q: Why is chilling the dough so important? A: The dough is quite sticky due to the chocolate content and needs chilling to firm up for proper handling. Unchilled dough will spread too much during baking and won’t hold the marshmallow properly.
Q: Can I freeze these cookies after they’re completely finished? A: Yes, but keep in mind that the chocolate coating may develop a slightly streaky appearance or condensation after thawing. They’re still perfectly delicious, just less visually pristine.
Prep Time: 2 hours 40 minutes (includes chilling) | Cook Time: 12 minutes | Total Time: 3 hours | Yield: 20-22 cookies


