Standing in a Parisian patisserie five years ago, I watched in awe as the baker effortlessly piped perfect cream puffs that would later transform into towering croquembouche. That moment sparked my obsession with choux pastry—this magical dough that seems impossible until you understand its simple science. After countless batches and a few spectacular failures, I discovered that choux pastry isn’t intimidating at all; it’s actually one of the most forgiving and versatile foundations in all of baking.
Why Choux Pastry Deserves a Place in Your Repertoire
Incredible Versatility
This single dough transforms into cream puffs, éclairs, profiteroles, churros, and even savory gougères. Moreover, the neutral flavor profile means it pairs beautifully with both sweet and savory fillings, making it suitable for appetizers, desserts, and everything in between.
Surprisingly Simple Technique
Despite its sophisticated French reputation, choux pastry requires only basic pantry ingredients and straightforward techniques. Furthermore, the entire process takes just 10 minutes of active preparation time, with most of the work happening in the oven.
Make-Ahead Convenience
Unlike many pastry doughs that lose quality over time, choux pastry actually improves with refrigeration and freezes beautifully. Additionally, unfilled shells can be stored for days, allowing you to prepare components in advance for stress-free entertaining.
Impressive Results Every Time
Few things in baking deliver such dramatic visual impact with so little effort. Consequently, mastering this technique instantly elevates your dessert game and creates memorable moments for family and guests.
Essential Ingredients for Perfect Choux
The Liquid Foundation
- 1/2 cup unsalted butter, cut into pieces for even melting
- 1/2 cup water combined with 1/2 cup 2% or whole milk for optimal texture
- 1/4 teaspoon salt to enhance flavors
- 2 teaspoons granulated sugar for subtle sweetness and browning
The Structure Elements
- 1 cup all-purpose flour (spooned and leveled for accuracy)
- 4 large eggs, beaten for easy incorporation
- Egg wash: 1 egg beaten with 1 tablespoon milk for golden finish
Step-by-Step Mastery Guide
Creating the Base Mixture
Begin by combining butter, water, milk, salt, and granulated sugar in a medium saucepan over medium heat. Stir continuously until the butter melts completely, then bring the mixture to a gentle simmer—avoid vigorous boiling, which can cause the liquid to evaporate too quickly.
Once simmering, reduce heat to low and add all the flour at once. This sudden addition might seem alarming, but it’s crucial for proper texture development. Stir vigorously until the flour incorporates completely and the mixture forms a thick dough that pulls away from the pan sides.
The Critical Cooking Phase
Mash this dough ball against the pan bottom and sides for exactly one minute, which gently cooks the flour and removes its raw taste. This step also helps achieve the proper consistency for egg incorporation later.
Remove from heat and transfer to a stand mixer bowl fitted with paddle attachment, or use a large mixing bowl if using a handheld mixer. Allow the mixture to cool for several minutes—adding eggs to mixture that’s too hot will scramble them.
Achieving Perfect Consistency
With the mixer running on low speed, slowly add the beaten eggs in 3-4 separate additions, mixing for 30 seconds between each. Initially, the mixture will look curdled and broken, but patience is key—it will gradually come together into smooth, glossy perfection.
Pour the final egg addition very slowly, watching for the ideal texture: shiny, thick, smooth, and pipeable. You may not need all the beaten eggs, so reserve any leftover for your egg wash mixture.
Storage and Preparation Options
Your completed choux pastry dough can be used immediately or refrigerated for up to three days. There’s no need to bring refrigerated dough to room temperature before use—in fact, the slightly firmer texture often pipes more easily.
For maximum convenience, transfer dough directly to a piping bag and refrigerate, then pipe and bake straight from cold storage when ready.
Baking Perfect Cream Puffs and Profiteroles
Oven Preparation
Preheat your oven to 400°F (204°C) and line two baking sheets with parchment paper. Lightly brush the parchment with water—this creates essential humidity that helps pastries puff properly without drying out or burning.
Professional Piping Technique
Transfer choux pastry to a piping bag fitted with a Wilton 1A tip, or use a zip-top bag with the corner cut off for simpler application. Pipe 2-inch mounds approximately 3 inches apart, allowing room for expansion during baking.
Using a water-moistened finger, gently smooth down any peaks that might burn during baking. Brush each mound lightly with egg wash for beautiful golden color and professional appearance.
The Critical Baking Process
Bake for 20 minutes at 400°F, then reduce temperature to 350°F (177°C) without opening the oven door. Continue baking for 10-15 minutes until the pastries achieve deep golden brown color.
Never open the oven during baking—cool air will cause the delicate steam structure to collapse, resulting in flat, dense pastries instead of light, airy puffs.
Creative Filling and Serving Ideas
Classic Sweet Applications
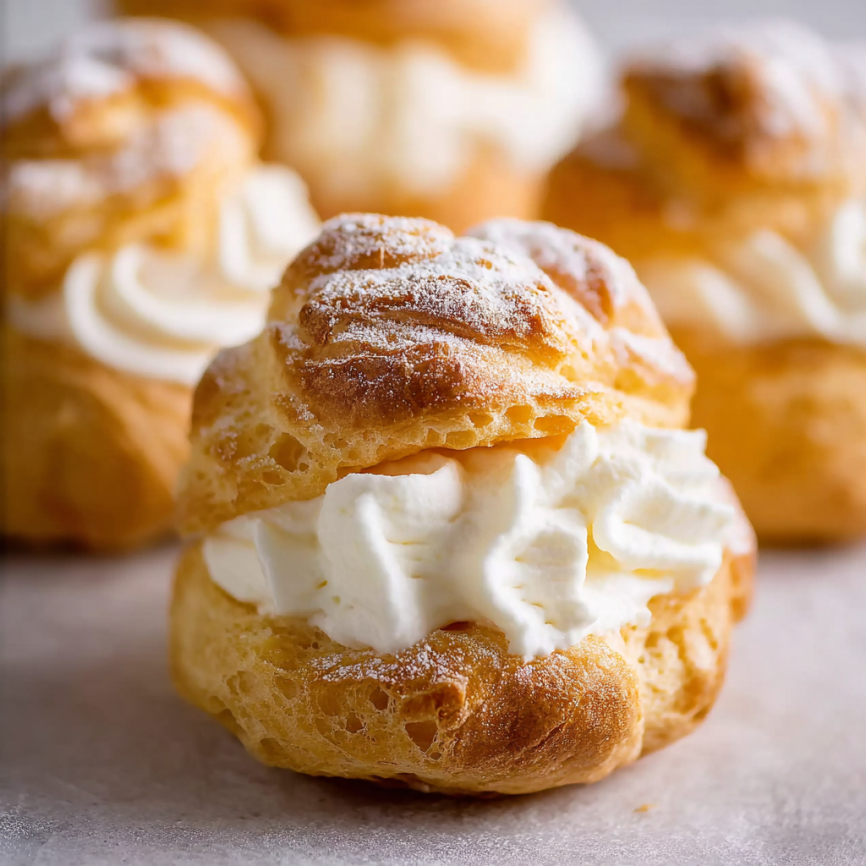
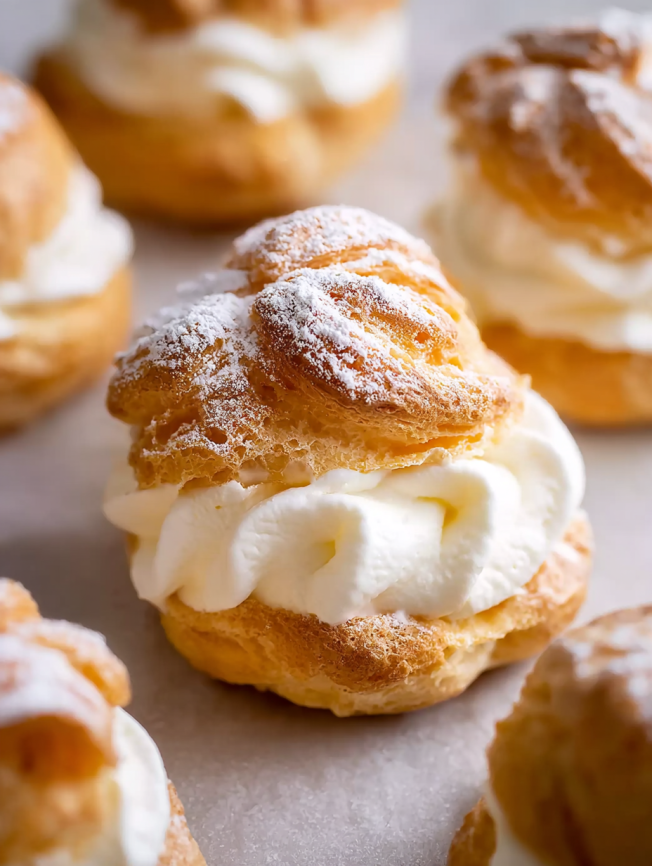
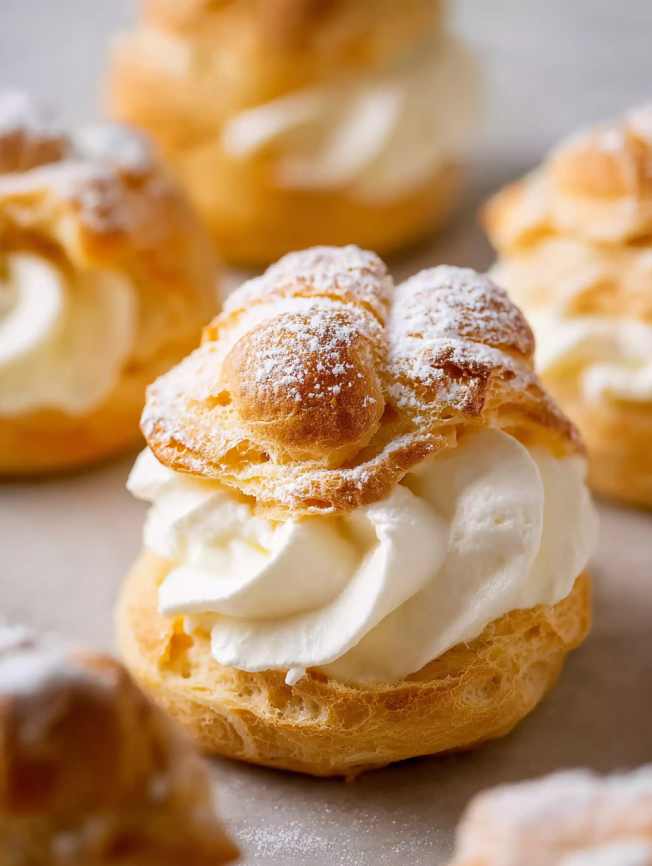
Traditional cream puffs filled with vanilla-flavored whipped cream (Crème Chantilly) and dusted with confectioners’ sugar never go out of style. Alternatively, fill with rich pastry cream, tangy lemon curd, or seasonal fruit preserves for variety.
Profiteroles showcase the pastry’s versatility beautifully—fill cooled shells with premium ice cream, freeze until firm, then drizzle with warm chocolate ganache for an elegant dinner party finale.
Savory Possibilities
Transform choux pastry into sophisticated appetizers by adding grated cheese to the dough for gougères, or fill neutral shells with chicken salad, egg salad, or herbed cream cheese mixtures for elegant brunch offerings.
Holiday and Special Occasion Variations
During autumn, fill with pumpkin mousse and top with cinnamon sugar. Winter holidays call for eggnog-flavored fillings, while spring celebrations shine with fresh berry compotes and light mascarpone creams.
Advanced Shaping Techniques
Éclair Excellence
For classic éclairs, pipe 4-inch logs instead of round mounds, maintaining consistent width for professional appearance. Fill with pastry cream and top with chocolate glaze or fondant for traditional French elegance.
Croquembouche Construction
Advanced bakers can use individual cream puffs as building blocks for the impressive croquembouche tower, bound together with caramel and decorated with spun sugar for special celebrations.
Churros and Beyond
Pipe choux pastry directly into hot oil for instant churros, or shape into rings before baking for French cruller-style donuts that are lighter than their yeast-based counterparts.
Make-Ahead Strategies for Success
Advance Preparation Timeline
Prepare choux pastry dough up to three days before needed, storing it covered in the refrigerator. For longer storage, freeze the completed dough for up to three months, thawing in the refrigerator before use.
Baked unfilled shells keep beautifully at room temperature for one day, refrigerated for five days, or frozen for up to three months. This flexibility allows you to prepare components during less busy periods.
Assembly Timing
Fill pastries as close to serving time as possible to maintain optimal texture. However, cream puff shells can be filled up to several hours in advance if using stable fillings like pastry cream or whipped cream stabilized with gelatin.
Profiteroles with ice cream filling actually benefit from advance preparation—the freezing time allows flavors to meld while maintaining the contrast between cold filling and room-temperature shell.
Professional Tips for Consistent Results
Temperature Control Matters
Room temperature eggs incorporate more easily than cold ones, while slightly cooled (but not cold) dough accepts eggs better than mixture that’s too hot. These temperature considerations significantly impact final texture.
Humidity Considerations
Brushing parchment with water creates essential steam for proper puffing, while avoiding oven door opening maintains the humid environment necessary for maximum rise and crispy exterior development.
Troubleshooting Common Issues
If pastries don’t puff adequately, check oven temperature accuracy and ensure you didn’t open the door during baking. Flat results often indicate insufficient cooking of the flour mixture or eggs added too quickly.
Essential Equipment for Success
Basic Tools Required
A heavy-bottomed saucepan ensures even heating without scorching, while a sturdy wooden spoon handles the thick dough mixing effectively. An electric mixer simplifies egg incorporation, though hand mixing is possible with extra effort.
Piping Perfection
Professional piping tips like Wilton 1A create consistent shapes, while quality piping bags prevent blowouts during use. Reusable silicone bags offer better control than disposable options for frequent bakers.
Baking Setup
Heavy-duty baking sheets prevent warping and ensure even heat distribution, while parchment paper provides non-stick surface and easy cleanup. A reliable oven thermometer helps maintain accurate temperatures throughout the baking process.
Storage and Preservation Guidelines
Short-Term Storage
Filled pastries stay fresh in the refrigerator for up to three days when properly covered. Unfilled shells maintain crispness at room temperature for 24 hours in airtight containers.
Long-Term Preservation
Freeze unfilled shells in single layers, then transfer to freezer bags once solid. Frozen shells thaw quickly at room temperature and regain their crispy texture when briefly warmed in a low oven.
Completed dough freezes beautifully in portions, allowing you to bake fresh pastries whenever inspiration strikes without starting from scratch.
Frequently Asked Questions
Q: Why didn’t my choux pastry puff up properly? A: Common causes include opening the oven door during baking, insufficient cooking of the flour mixture, or incorrect oven temperature. Ensure your oven runs accurately and resist the temptation to peek during the crucial puffing phase.
Q: Can I make choux pastry without a mixer? A: Yes, though it requires more effort. Allow the cooked flour mixture to cool slightly more than usual, then beat in eggs vigorously by hand, adding them gradually until the mixture becomes smooth and pipeable.
Q: How do I know when I’ve added enough eggs? A: The finished dough should be smooth, glossy, and fall slowly from a spoon in a thick ribbon. If it’s too stiff, add more beaten egg gradually until you achieve the proper consistency.
Q: Can I flavor the choux pastry dough itself? A: Absolutely! Add vanilla extract, citrus zest, or herbs to the liquid mixture, or incorporate grated cheese for savory applications. Keep additions moderate to avoid affecting the pastry’s structure.
Q: What’s the best way to fill cream puffs? A: Either split them horizontally and spoon in filling, or poke a small hole in the bottom and pipe filling directly inside. The second method maintains a neater exterior appearance.
Q: Why do my pastries collapse after baking? A: This usually indicates underbaking. The pastries should be deeply golden brown and feel light when properly done. If they seem heavy or pale, return them to the oven for additional baking time.


