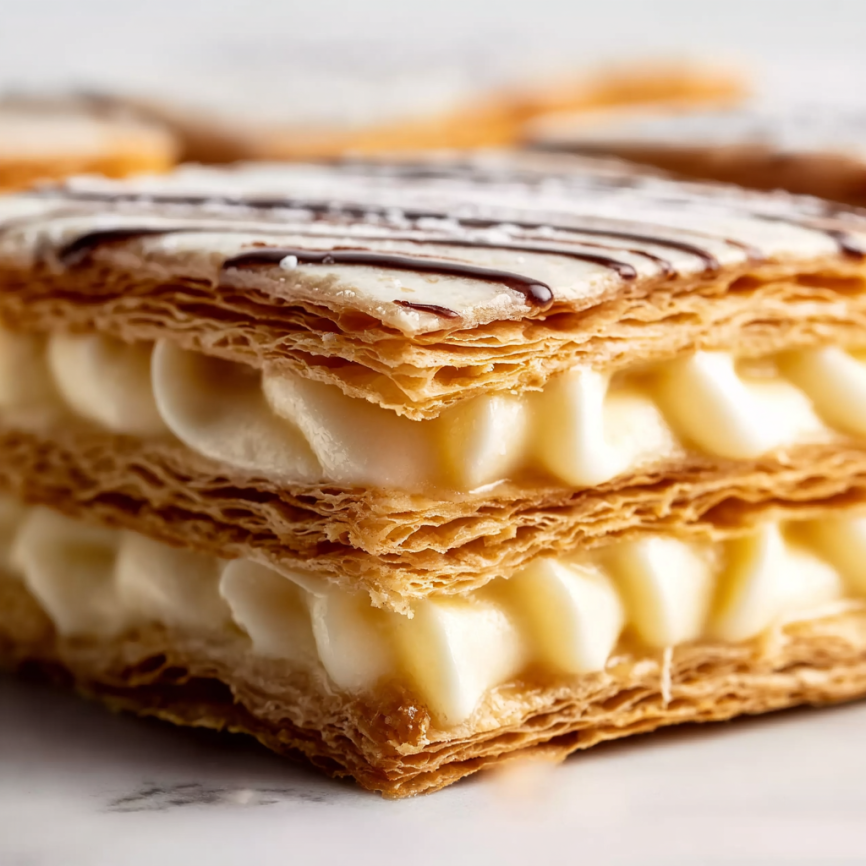
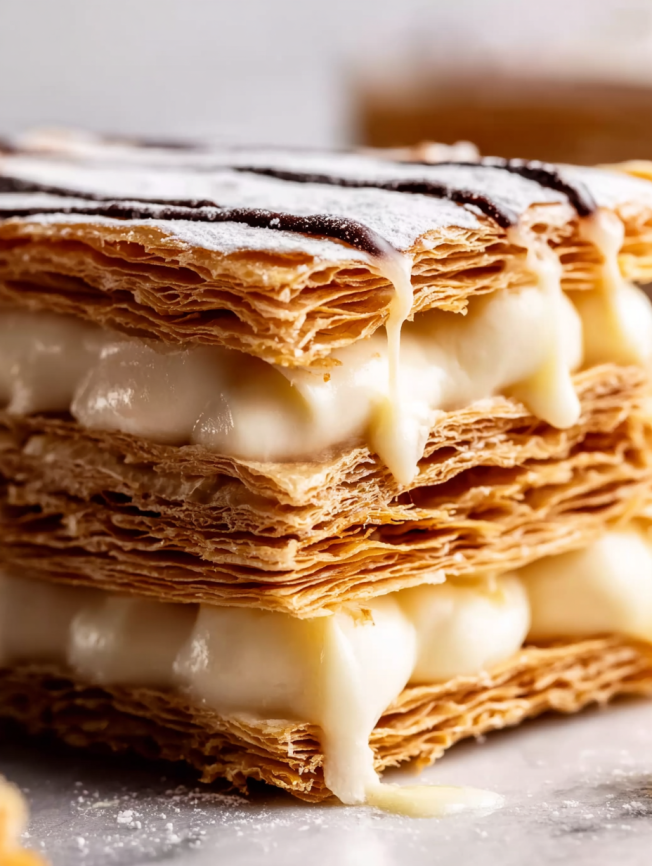
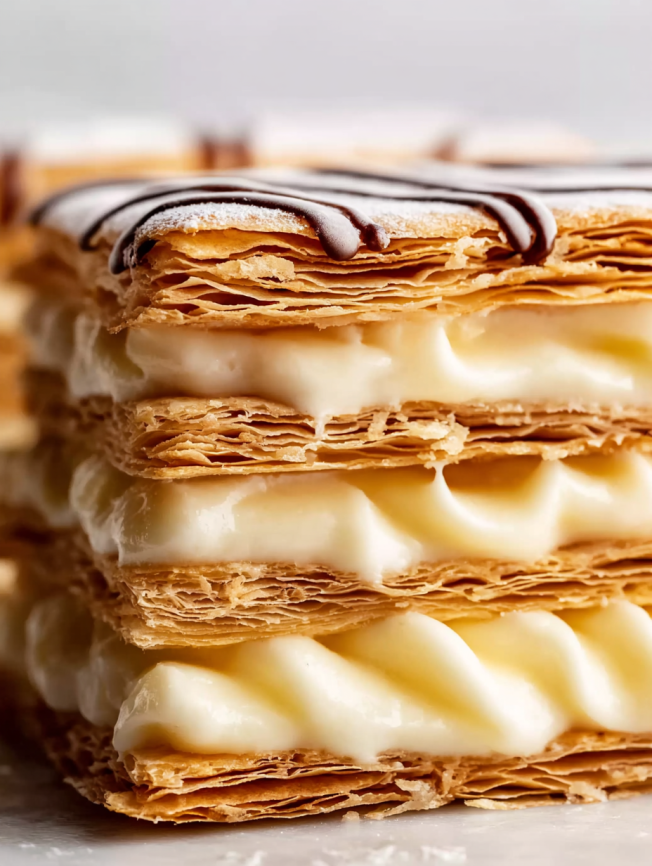
When I first attempted mille-feuille in my kitchen, I’ll admit I was intimidated by its reputation as one of the most technically challenging French pastries. The name literally means “thousand leaves,” referring to the countless flaky layers that should shatter delicately at first bite, revealing clouds of silky pastry cream within. After many attempts and refinements, I’ve learned that while this dessert demands patience and precision, the results are absolutely worth every careful step.
There’s something deeply satisfying about mastering a technique that professional pastry chefs spend years perfecting. Each element—the crisp puff pastry, the luxurious vanilla pastry cream, and the elegant marbled icing—must come together in perfect harmony. This recipe breaks down what seems impossible into manageable steps, ensuring your homemade mille-feuille rivals those found in the finest French patisseries.
Why This Recipe Will Transform Your Baking Skills
A True Pastry Masterpiece
Few desserts showcase technical skill like mille-feuille. Successfully creating this classic demonstrates mastery of multiple pastry techniques, from tempering eggs for custard to achieving perfectly laminated puff pastry layers.
Impressive Presentation Impact
The elegant appearance of mille-feuille never fails to captivate guests. The distinctive marbled icing pattern and towering layers create an undeniably sophisticated dessert that elevates any special occasion into a memorable celebration.
Make-Ahead Convenience
Despite its complex appearance, many components can be prepared days in advance. This flexibility allows you to create restaurant-quality desserts without overwhelming your schedule on the day of serving.
Customizable Foundation
Once you master the basic technique, countless variations become possible. Different fillings, flavor combinations, and decorative patterns let you personalize this classic to suit any preference or seasonal inspiration.
Essential Components for Success
Puff Pastry Foundation
- 1 lb. homemade rough puff pastry or 2 sheets store-bought frozen puff pastry (thawed)
- All-purpose flour as needed for rolling
Luxurious Pastry Cream Filling
- 4 large egg yolks (cold or room temperature)
- 3 tablespoons (23g) cornstarch (for perfect thickening)
- 2 cups (480ml) whole milk (never use low-fat varieties)
- ½ cup (100g) granulated sugar
- 1 tablespoon (14g) unsalted butter (softened to room temperature)
- 1 teaspoon pure vanilla extract
- Seeds from ½ vanilla bean (or additional ½ teaspoon vanilla extract)
- Small pinch salt (enhances all flavors)
- ½ cup (120ml) heavy cream or heavy whipping cream (cold)
Elegant Topping Elements
- 1 cup (120g) confectioners’ sugar (sifted for smoothness)
- 1½ tablespoons milk (dairy or non-dairy)
- ½ teaspoon pure vanilla extract
- 2 ounces (57g) semi-sweet chocolate (coarsely chopped)
Detailed Step-by-Step Instructions
Pastry Preparation Phase
Begin by preparing your puff pastry according to recipe directions, completing it through the second refrigeration if making homemade. Store-bought pastry should be thawed according to package instructions. Keep the dough refrigerated until you’re ready to roll and bake.
Creating the Pastry Cream Base
In a large heatproof bowl with a pour spout, whisk egg yolks and cornstarch together thoroughly. Initially, this mixture may appear dry and difficult to combine, but continue whisking until it becomes thick and smooth. If needed, add a few drops of milk to help bring the mixture together.
Meanwhile, combine milk and sugar in a medium saucepan over medium heat. Whisk constantly until the sugar dissolves completely, then bring the mixture to a gentle simmer. Remove from heat immediately once simmering begins.
The Critical Tempering Process
Pour the warm milk mixture into the egg yolk mixture in a slow, steady stream while whisking continuously. This gradual temperature adjustment prevents the eggs from scrambling. Keep those egg yolks moving throughout this entire process.
Strain the mixture through a fine-mesh sieve back into the saucepan to remove any potential lumps that may have formed during tempering.
Cooking the Custard
Return the saucepan to medium heat and whisk constantly as the mixture heats. Initially, you’ll notice frothy bubbles on the surface, followed by rapid thickening as large bubbles begin bursting. This transformation typically takes 1-2 minutes, so stay alert and use caution as the mixture can splatter.
Allow the bubbles to burst for about 20 seconds until the mixture reaches a custard-like consistency. For accuracy, use an instant-read thermometer—the custard is perfect when it reaches 185-190°F (85-88°C).
Remove from heat and whisk in butter, vanilla extract, vanilla bean seeds, and salt until fully incorporated. Allow the custard to cool for 10 minutes before transferring to a bowl.
Proper Cooling and Storage
Transfer the pastry cream to a heatproof bowl and place plastic wrap or parchment paper directly on the surface to prevent skin formation. Refrigerate for at least 3 hours, though it can be stored for up to 24 hours. This yields approximately 2-2.5 cups of rich, silky pastry cream.
Baking the Puff Pastry
Preheat your oven to 400°F (204°C) and line a 12×17-inch baking sheet with parchment paper. Have a second baking sheet and additional parchment ready.
On a well-floured surface using a floured rolling pin, roll the pastry dough into an 11×16-inch rectangle. For store-bought sheets, overlap them slightly in the center and roll them together into the same dimensions.
Transfer the dough to your lined baking sheet and dock the entire surface with a fork to allow steam to escape during baking. Place another piece of parchment on top, then set the second baking sheet filled with pie weights on top of the pastry.
Achieving Perfect Texture
Bake for 20 minutes with the weights in place, then carefully remove the top baking sheet and parchment. Return the uncovered pastry to the oven for 7-9 additional minutes until golden brown throughout.
Cool the pastry on the pan for 20 minutes, then transfer to a cooling rack for complete cooling. This two-stage cooling prevents condensation from making the pastry soggy.
Finishing the Cream Filling
Using a handheld or stand mixer with whisk attachment, whip the cold heavy cream to medium peaks—about 3 minutes on medium-high speed. Add the chilled pastry cream and beat on low speed just until combined and smooth. Avoid over-mixing, which can cause the cream to break.
Cover and refrigerate for at least 1 hour, up to 4 hours before assembly.
Creative Serving Suggestions
Traditional French Presentation
Serve mille-feuille on individual dessert plates with a light dusting of powdered sugar around the plate’s edge. The contrast of the white plate against the golden pastry and cream creates an elegant, classic presentation.
Modern Plating Techniques
For contemporary presentations, accompany each portion with fresh berry coulis drizzled artistically around the plate. A small quenelle of vanilla bean ice cream provides temperature contrast and additional luxury.
Seasonal Accompaniments
During summer, serve alongside fresh strawberries or raspberries. Winter presentations benefit from warm berry compote or a light drizzle of caramel sauce for added richness and warmth.
Delicious Recipe Variations
Alternative Filling Options
Transform your mille-feuille with different fillings like peanut butter mousse, lightly sweetened whipped cream, or rich chocolate mousse. Each variation creates a completely different flavor profile while maintaining the classic structural elegance.
Fruit-Enhanced Versions
Layer thinly sliced strawberries or fresh raspberries between the cream layers, or add dollops of high-quality jam for bursts of concentrated fruit flavor throughout each bite.
Flavor Infusions
Infuse the pastry cream with different extracts like almond or rum, or fold in finely chopped toasted nuts for added texture and complementary flavors.
Creative Topping Alternatives
Instead of the traditional marbled icing, try a simple dusting of confectioners’ sugar, plain vanilla icing, or even royal icing for a more formal presentation.
Strategic Make-Ahead Planning
Component Preparation Timeline
The beauty of mille-feuille lies in its component-based construction. Puff pastry dough can be prepared 1-2 days ahead, while pastry cream keeps perfectly for 24 hours in the refrigerator.
Assembly Timing
Baked pastry sheets remain crisp when covered at room temperature for up to one day. This allows you to complete the most time-consuming elements well before your final assembly.
Storage and Serving
Once assembled, mille-feuille benefits from 30 minutes of refrigeration to set the layers, though it can be held for up to 8 hours. The pastry will gradually soften, so serve within this timeframe for optimal texture contrast.
Freezing Guidelines
Fully assembled pastries can be wrapped individually and frozen for up to 3 months, though some textural quality will be lost upon thawing. For best results, freeze components separately and assemble after thawing.
Professional Tips and Techniques
Puff Pastry Perfection
When working with homemade puff pastry, be generous with bench flour to prevent sticking. The key to achieving maximum layers is maintaining proper temperature throughout the rolling and folding process.
Pastry Cream Consistency
The perfect pastry cream should coat a spoon but still flow smoothly. If it becomes too thick during cooking, whisk in a tablespoon of milk while still warm to achieve the ideal consistency.
Assembly Precision
When cutting the baked pastry, use a large, very sharp knife and clean it between cuts. This prevents dragging and ensures clean, professional-looking edges that showcase the beautiful layers.
Chocolate Work Tips
Use high-quality baking chocolate bars rather than chips for the marbled decoration. Chips contain stabilizers that prevent proper melting and smooth flowing consistency needed for decorative work.
Frequently Asked Questions
Q: Can I use store-bought pastry cream instead of making my own? A: While homemade pastry cream provides superior flavor and texture, high-quality store-bought versions can work in a pinch. However, you’ll still need to whip cream and fold it in for the proper light consistency.
Q: Why did my puff pastry not rise properly? A: This usually occurs when the butter temperature wasn’t correct during lamination, or the dough became too warm during rolling. Keep everything properly chilled and work quickly to maintain distinct butter layers.
Q: How do I prevent the pastry cream from breaking when adding whipped cream? A: Ensure both components are at similar cool temperatures and fold together gently on low speed. Over-mixing or temperature differences can cause the cream to separate.
Q: Can I make mille-feuille without the decorative icing? A: Absolutely! Many variations simply dust the top with powdered sugar or leave it plain. The icing is primarily decorative, though it does add a pleasant sweetness contrast.
Q: What’s the best way to cut mille-feuille for serving? A: Use a sharp serrated knife in a gentle sawing motion rather than pressing straight down. This prevents the layers from compressing and maintains the beautiful structure.
Q: How far in advance can I assemble the pastries? A: For optimal texture, assemble no more than 8 hours before serving. The pastry will gradually absorb moisture from the cream, softening the desirable crisp texture.
Q: Why is my pastry cream lumpy despite following the recipe? A: Lumps typically form when eggs get too hot during tempering or when the mixture isn’t whisked constantly while cooking. Always strain the mixture if lumps appear, and maintain constant motion during heating.
Prep Time: 1 hour, 45 minutes | Cook Time: 35 minutes | Total Time: 5 hours (includes chilling) | Yield: 5 three-layer squares (shareable portions)


