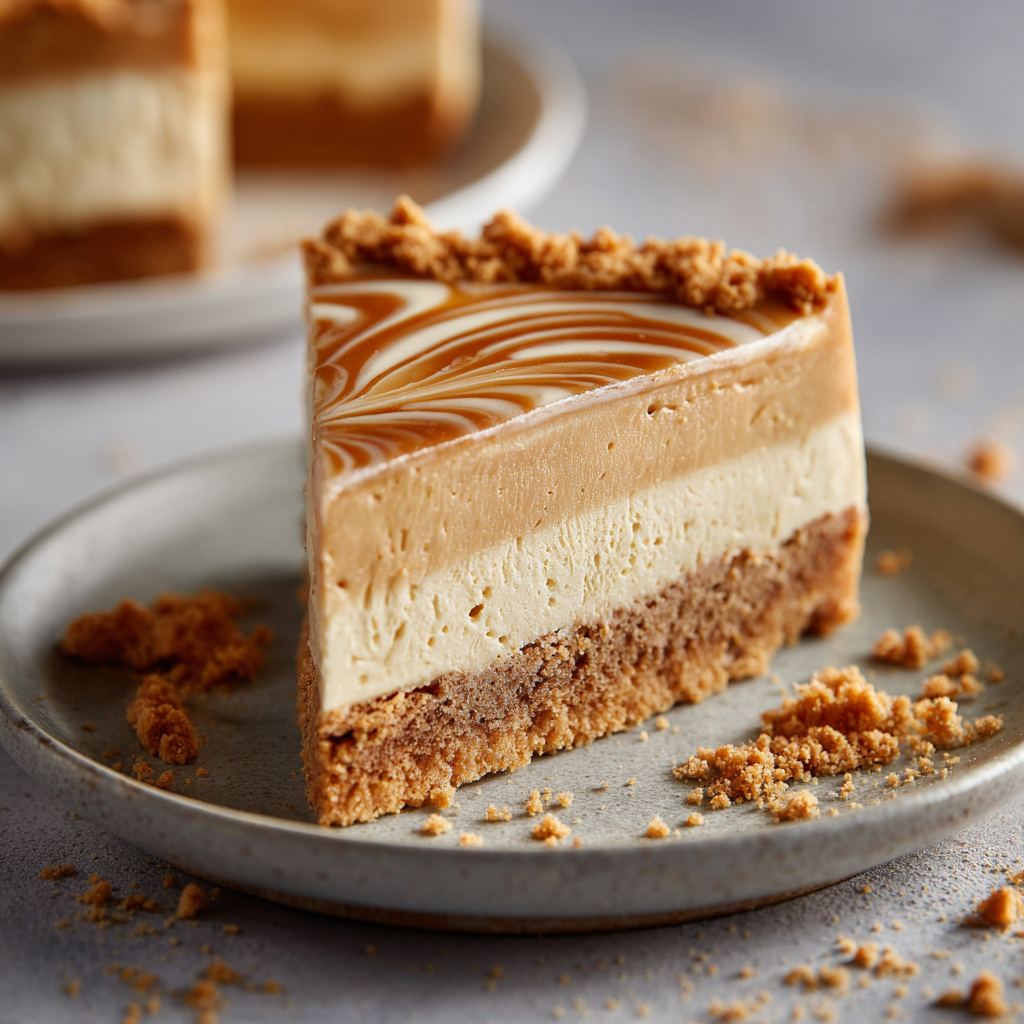
If you’re craving a luscious, creamy dessert that comes together without turning on the oven, this No Bake Biscoff Cheesecake is your perfect match. With the irresistible caramelized crunch of Biscoff cookies and the smooth softness of cream cheese, it offers an indulgent treat that’s both simple and satisfying.
This cheesecake is fantastic for busy days or warm weather when you want something impressive yet effortless. It sets beautifully in the fridge, letting the flavors meld into a dreamy, velvety finish that’s perfect for sharing or savoring solo.
- No baking required, making it ideal for quick preparation and less kitchen heat.
- The distinctive spiced caramel flavor of Biscoff cookies pairs deliciously with creamy cheese filling.
- Easy to customize with toppings or garnish to fit your personal style and occasion.
Ingredients
- Biscoff cookies: Crunchy spiced caramel biscuits, crushed finely to create a flavorful base for the crust.
- Melted butter: Helps bind the crushed cookies into a firm, buttery crust with a rich texture.
- Cream cheese: Softened to a smooth consistency, providing the primary creamy body for the cheesecake filling.
- Sugar: Granulated sugar to sweeten and balance the tanginess of the cream cheese.
- Whipping cream: Cold and whipped to soft peaks, folded in to make the filling light and airy.
- Biscoff spread: Adds that signature smooth, caramelized flavor directly into the filling for richness.
- Vanilla extract: Enhances all the flavors, adding a delicate aromatic sweetness to the mixture.
- Extra Biscoff spread: Warmed slightly for drizzling on top, offering a glossy, indulgent finish.
- Crushed Biscoff cookies: Sprinkled over the top to add texture and visual appeal as garnish.
Instructions
- Make the crust
-
Start by crushing the Biscoff cookies into fine crumbs to ensure the crust binds well. Combine these crumbs with melted butter, mixing thoroughly so the butter coats every crumb. Press this mixture firmly into the base of your pan to form an even crust. Chilling the crust for about 20 minutes helps it set firmly before you add the filling, creating a sturdy base that will hold the cheesecake perfectly.
- Beat the cream cheese
-
In a large bowl, beat together the softened cream cheese and sugar until the mixture is smooth and creamy. This step is essential to eliminate any lumps and to incorporate air, yielding a soft and fluffy filling. The sugar sweetens the cream cheese base while helping to create a velvety texture.
- Add Biscoff spread
-
Stir the Biscoff spread into the cream cheese mixture thoroughly. This infuses the filling with the signature warm caramel-spiced flavor of Biscoff, making your cheesecake irresistibly aromatic and delicious. Mixing well ensures that every bite has a consistent taste of the spread’s rich goodness.
- Whip the cream
-
Whip the cold whipping cream until soft peaks form; this means the cream holds its shape but is still smooth and light. Gently folding this whipped cream into the Biscoff-cream cheese mixture adds airiness and lightness to the dense filling. Be careful to fold gently so you retain the volume and achieve a perfectly fluffy consistency.
- Fill the pan
-
Pour the creamy filling evenly over the chilled crust. Use a spatula to spread it smoothly and make sure it reaches all corners. A level surface helps the cheesecake set uniformly and looks beautiful when sliced.
- Chill the cheesecake
-
Refrigerate the cheesecake for at least six hours, or overnight if possible. This chilling period is crucial as it allows the filling to firm up completely, making slicing neat and flavors to meld beautifully for a rich, cohesive taste experience.
- Add topping
-
Warm the extra Biscoff spread slightly to make it easy to drizzle over the top of your chilled cheesecake. Spread it decoratively, then sprinkle crushed Biscoff cookies on top for an eye-catching presentation and crunchy texture contrast. These final touches elevate both flavor and appearance.
- Always use cold whipping cream for perfect soft peaks when whipped.
- Chilling the crust before adding filling prevents sogginess and helps maintain a crisp base.
- Do not shorten the chilling time; proper setting is key to slicing clean pieces.
- Using a springform pan simplifies removal and cutting of the cheesecake.
Storage Tips
Store your cheesecake covered in the refrigerator for up to 3 days to maintain freshness and texture. For longer storage, you can freeze it wrapped tightly for up to 1 month; thaw in the fridge overnight before serving.
Serving Suggestions
Serve chilled slices with a drizzle of warm chocolate or caramel sauce for added indulgence. Fresh berries or a dusting of powdered sugar also complement the rich Biscoff flavor beautifully.
- Sift powdered sugar with cream cheese for an extra smooth filling texture.
- Gently fold whipped cream with a spatula to avoid deflating the mixture.
- Press the crust firmly to prevent crumbling when slicing.
FAQs
- Can I use a different type of cookie for the crust?
-
Yes, any spiced or plain biscuit like graham crackers or digestive biscuits can work well with similar results.
- How do I know when the whipped cream is ready?
-
The whipped cream should hold soft peaks, meaning it sticks up but the tip curls over when the whisk is lifted.
- Can I make this cheesecake vegan?
-
You can substitute dairy ingredients with vegan cream cheese, non-dairy whipped cream, and vegan butter, but results may vary slightly.
- Is it necessary to use a springform pan?
-
While not required, a springform pan makes removal and slicing much easier and reduces the risk of damaging the cheesecake.
- How long should I chill the cheesecake?
-
At least 6 hours is recommended for proper setting, though overnight chilling produces the best results.
- Can I prepare this cheesecake a day ahead?
-
Absolutely! Making it ahead allows flavors to develop and ensures it is perfectly set for serving.

No Bake Biscoff Cheesecake
Equipment
- 1 springform pan for easy cutting and setting
- 1 Mixing bowls multiple for preparation
- 1 spatula for spreading filling
- 1 mixer or whisk for whipping cream and mixing
Ingredients
- 1 ½ cups Biscoff cookies crushed
- 5 tablespoons melted butter
- 16 ounces cream cheese softened
- ⅓ cup granulated sugar
- 1 cup heavy whipping cream cold
- ½ cup Biscoff spread
- 1 teaspoon vanilla extract
- Extra Biscoff spread warmed for topping
- Crushed Biscoff cookies for garnish
Instructions
- Crush Biscoff cookies and mix with melted butter until combined.
- Press the cookie mixture firmly into the base of a springform pan. Chill in the refrigerator for 20 minutes.
- In a bowl, beat cream cheese and sugar together until smooth and creamy.
- Add Biscoff spread and vanilla extract to the cream cheese mixture and blend well.
- Whip the cold heavy cream until soft peaks form, then gently fold it into the cream cheese mixture.
- Pour the filling evenly over the chilled crust and smooth the surface with a spatula.
- Refrigerate the cheesecake for at least 6 hours to set properly.
- Warm extra Biscoff spread and drizzle it over the top. Garnish with crushed Biscoff cookies before serving.
Notes
- Use cold heavy cream for better whipping consistency.
- Chill crust before adding the filling for best texture.
- Allow sufficient chilling time to let cheesecake set fully.
- Use a springform pan to simplify removal and serving.