Prep Time: 15 minutes | Cook Time: 0 minutes | Total Time: 2 hours, 15 minutes | Yield: 12 squares
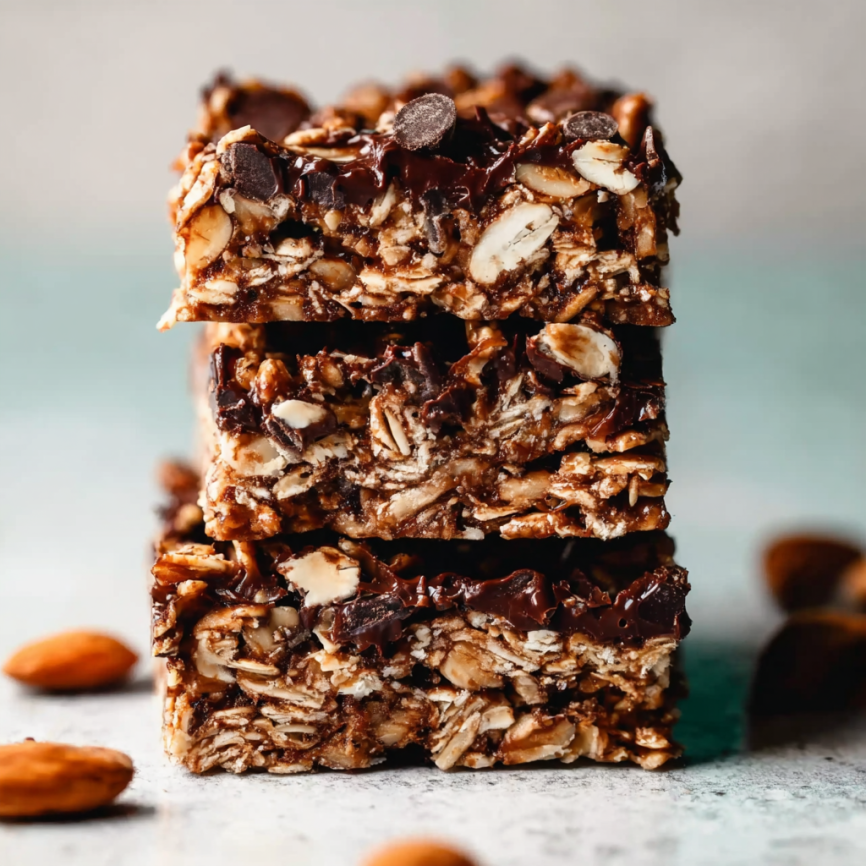
Description: Enjoy a delightful combination of chewy-crispy-crunchy textures and salty-sweet chocolate-peanut butter flavors in every bite of these easy no-bake oat bars.
When Life Calls for Something Sweet and Simple
There are moments when you crave something homemade and indulgent, but the thought of turning on the oven feels overwhelming. Perhaps it’s a sweltering summer day, or maybe you’re dealing with a broken oven, or you simply want to satisfy that chocolate craving without the usual baking commitment. These no-bake chocolate fudge oat bars were born from exactly those moments—when I needed something delicious, satisfying, and achievable in just minutes of active work.
What started as an experiment in my kitchen has become one of my most requested recipes. Friends constantly ask for the “recipe for those amazing bars you brought to the potluck,” and I love watching their faces when I tell them how simple they actually are. There’s something magical about creating a treat that tastes like you spent hours in the kitchen when reality tells a completely different story.
These bars represent everything I love about no-bake desserts: they’re forgiving, customizable, and deliver maximum satisfaction with minimal effort. Whether you’re a beginner baker looking for confidence-building success or an experienced cook seeking a quick treat solution, these bars will exceed your expectations every single time.
Why These Bars Will Revolutionize Your Sweet Tooth
The genius of these bars lies in their incredible texture combination that hits every craving simultaneously. Each bite delivers the chewy satisfaction of oats, the delightful crunch of crispy rice cereal, and the rich fudginess of the chocolate-peanut butter base. Meanwhile, your chosen add-ins provide additional layers of flavor and texture that make each square a unique experience.
Unlike many no-bake treats that can be overly sweet or one-dimensional, these bars achieve perfect balance through the natural nuttiness of oats, the slight bitterness of chocolate, and the creamy richness of peanut butter. The touch of maple syrup provides natural sweetness that complements rather than overwhelms the other flavors.
Perhaps most importantly, these bars actually improve with time. While they’re delicious immediately after setting, they develop deeper, more complex flavors after a day or two in the refrigerator. The ingredients meld together beautifully, creating a more cohesive and sophisticated taste that rivals any bakery treat.
The customization possibilities are virtually endless, making these bars perfect for dietary restrictions, personal preferences, or whatever ingredients you happen to have on hand. This adaptability means you’ll never get bored with the basic recipe—there’s always a new combination to explore.
Essential Ingredients and Their Roles
The Binding Base
- 1/3 cup (70g) coconut oil
- 1/2 cup (90g) semi-sweet chocolate chips
- 1/2 cup (125g) crunchy or creamy peanut butter
- 1/4 cup (60ml) pure maple syrup (or honey)
The Texture Foundation
- 1¼ cups (106g) old-fashioned whole rolled oats
- 3/4 cup (19g) crispy rice cereal
- 3/4 cup (about 100-120g) add-ins of your choice
- Optional: 1 tablespoon unsweetened shredded coconut for topping
Each ingredient serves a specific purpose in creating the perfect bar. Coconut oil provides structure while remaining pliable when chilled, while chocolate chips deliver rich flavor and additional binding power. Peanut butter contributes creaminess and protein, and maple syrup adds natural sweetness plus moisture that keeps the bars from becoming too dry.
Step-by-Step Instructions for Perfect Results
Setting Up for Success
Begin by lining a 9-inch square baking pan with parchment paper, ensuring you leave overhang on all sides. This simple step transforms the cutting and serving process from frustrating to effortless—you’ll be able to lift the entire batch out of the pan for clean, professional-looking cuts.
Creating the Chocolate Base
Place a medium saucepan over medium heat and combine the coconut oil and chocolate chips. Stir frequently as they melt together, watching carefully to prevent overheating. The mixture is ready when the chocolate chips have completely melted and the mixture appears smooth and glossy.
Remove the pan from heat immediately and stir in the peanut butter and maple syrup. The residual heat will warm these ingredients just enough to incorporate them smoothly without cooking them. This technique preserves the fresh flavor of both the peanut butter and maple syrup while creating a cohesive binding mixture.
Combining the Components
In a medium bowl, whisk together the oats, crispy rice cereal, and your chosen add-ins. This preliminary mixing ensures even distribution of ingredients before adding the chocolate mixture, preventing any pockets of unmixed components in your finished bars.
Pour the warm chocolate mixture over the dry ingredients and stir thoroughly until everything is well-coated and evenly distributed. The mixture should appear wet and cohesive, with no dry patches of oats or cereal visible.
Forming and Setting the Bars
Transfer the mixture to your prepared pan and use the back of a flat spatula to press it down firmly and evenly. This pressing step is crucial—insufficient compression will result in bars that crumble when cut. Apply consistent pressure across the entire surface, ensuring the mixture is compact and uniform in thickness.
If using coconut topping, sprinkle it evenly over the pressed surface and gently press it into the mixture to help it adhere. This creates an attractive finish and adds another layer of texture to the final product.
The Chilling Process
Refrigerate the bars uncovered for at least 2 hours to allow them to set completely. During this time, the coconut oil will solidify, creating the structure that holds everything together. For longer storage periods, cover lightly with plastic wrap or aluminum foil to prevent the bars from absorbing refrigerator odors.
Cutting and Storage Techniques
Once fully set, lift the entire batch from the pan using the parchment paper overhangs. This technique allows you to cut clean, even squares without struggling to remove individual pieces from the pan. Use a sharp knife, wiping it clean between cuts to maintain neat edges.
Store the cut bars covered in the refrigerator for up to two weeks. For optimal texture, allow them to come to room temperature for 5-10 minutes before serving—this slight warming enhances the flavors and creates the perfect eating consistency.
Creative Customization Ideas
Classic Combinations
The beauty of this recipe lies in its adaptability to your taste preferences and pantry contents. For a traditional trail mix experience, combine salted roasted peanuts with raisins—this provides the perfect salty-sweet balance with contrasting textures.
Chocolate lovers can double down on their favorite flavor by adding mini chocolate chips or chopped dark chocolate to the add-in mixture. Meanwhile, tropical enthusiasts might prefer a combination of dried pineapple, coconut flakes, and macadamia nuts.
Seasonal Variations
Transform these bars to match the seasons by adjusting your add-in combinations. Summer calls for dried strawberries and pistachios, while autumn suggests dried cranberries with chopped pecans. Winter holidays become more festive with dried cherries and almonds, and spring feels fresh with dried apricots and sunflower seeds.
Dietary Adaptations
For nut-free versions, substitute sunflower seed butter for the peanut butter and choose nut-free add-ins like dried fruit and seeds. Vegan versions work beautifully by ensuring your chocolate chips are dairy-free and using maple syrup instead of honey.
Those following gluten-free diets should verify that their oats and crispy rice cereal carry gluten-free certifications, as these ingredients can sometimes contain trace amounts of gluten from processing facilities.
Advanced Tips for Professional Results
Texture Optimization
The ratio of wet to dry ingredients is carefully calibrated to create the ideal texture, but minor adjustments can customize the final result. For chewier bars, add an extra tablespoon of maple syrup. For firmer bars that hold their shape better at room temperature, increase the coconut oil by one tablespoon.
If your mixture seems too wet after combining all ingredients, add additional oats one tablespoon at a time until you achieve the desired consistency. Conversely, if the mixture appears too dry to hold together, add maple syrup gradually in teaspoon increments.
Flavor Enhancement Techniques
Toast your oats in a dry skillet for 3-4 minutes before using them in the recipe. This simple step adds depth and nuttiness that elevates the entire bar. Similarly, lightly toasting nuts and seeds before adding them intensifies their flavors and improves their texture.
For chocolate enthusiasts, consider using a combination of semi-sweet and dark chocolate chips to create more complex flavor profiles. The slight bitterness of dark chocolate balances the sweetness beautifully while adding sophistication to the finished product.
Make-Ahead and Storage Strategies
Batch Preparation
These bars are perfect for meal prep and make-ahead entertaining. Double the recipe and use a 9×13-inch pan for larger batches, though you’ll need to increase the chilling time to 3-4 hours for proper setting.
Individual bars can be wrapped in plastic wrap or parchment paper for grab-and-go snacks. This packaging method makes them perfect for lunchboxes, hiking trips, or any situation where you need portable energy.
Freezer Storage
Layer cut bars between parchment paper sheets in a freezer-safe container for up to three months. Frozen bars can be eaten directly from the freezer for a fudge-like texture, or thawed in the refrigerator for the traditional consistency.
When freezing, label containers with the date and add-in combinations—this helps you keep track of different flavor variations and ensures you use them within the optimal timeframe.
Troubleshooting Common Issues
Texture Problems
If your bars turn out too soft to cut cleanly, they likely need more chilling time or contain too much liquid. Return them to the refrigerator for several additional hours, or place them in the freezer for 30 minutes for faster firming.
Conversely, overly hard bars usually result from too much coconut oil or over-chilling. Allow them to sit at room temperature for 10-15 minutes before serving, and consider reducing the coconut oil slightly in future batches.
Binding Issues
Bars that fall apart when cut typically weren’t pressed firmly enough during formation or contain insufficient binding mixture. Ensure you apply significant pressure when pressing the mixture into the pan, and verify that all dry ingredients are well-coated with the chocolate mixture.
If your bars consistently fall apart, try adding an extra tablespoon of peanut butter or maple syrup to increase the binding capacity of your mixture.
Nutritional Benefits and Considerations
These bars provide sustained energy through their combination of healthy fats, protein, and complex carbohydrates. Oats contribute fiber and help regulate blood sugar, while peanut butter provides protein and healthy monounsaturated fats.
The use of natural sweeteners like maple syrup offers trace minerals and a more complex flavor profile compared to refined sugars. Meanwhile, the customizable add-ins allow you to boost nutrition with ingredients like nuts, seeds, and dried fruits that provide additional vitamins, minerals, and antioxidants.
Frequently Asked Questions
Can I substitute the coconut oil with something else? Yes, you can use an equal amount of butter (melted and cooled slightly) or another neutral oil like vegetable oil. However, coconut oil provides the best texture and helps the bars hold their shape at room temperature.
How long do these bars need to chill before cutting? A minimum of 2 hours is essential for proper setting. However, overnight chilling produces the best texture and makes cutting much easier. In hot weather, consider chilling for 3-4 hours minimum.
Can I make these bars without peanut butter? Absolutely! Almond butter, cashew butter, or sunflower seed butter work equally well. Each alternative will create slightly different flavor profiles while maintaining the same basic texture and structure.
What happens if I don’t press the mixture firmly enough? Insufficient pressing is the most common cause of bars that crumble when cut. The mixture needs compression to bind properly. If you’ve already chilled bars that seem too loose, you can re-warm the mixture slightly, press it again, and re-chill.
Can I double this recipe? Yes, doubling works perfectly in a 9×13-inch pan. Keep all ingredient ratios the same and increase chilling time to 3-4 hours for proper setting throughout the thicker layer.
Are these bars suitable for people with diabetes? While they’re made with natural sweeteners and provide fiber and protein that help stabilize blood sugar, they should still be enjoyed in moderation. The maple syrup and chocolate still contribute significant sugar content.
How do I prevent the bars from sticking to the knife when cutting? Clean your knife with warm water between cuts, or lightly oil the blade. Alternatively, let the bars sit at room temperature for 5-10 minutes before cutting—slightly softer bars cut more cleanly.
Can I add fresh fruit to these bars? Fresh fruit contains too much moisture and will prevent proper setting. Stick to dried fruits, which provide concentrated flavor without compromising texture.


